12 tips for your first backpacking trip of the year
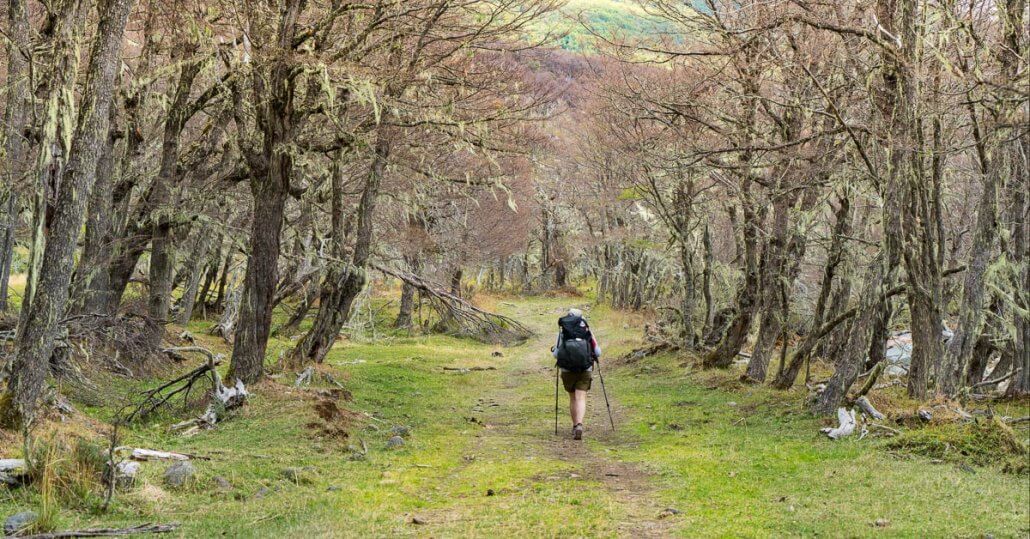
When you haven’t backpacked in months & months, getting your systems dialed back in can be overwhelming and challenging. Between gear, food and logistics, it’s easy to lose track of things. But with these 12 tips for your first backpacking trip of the year you’ll quickly find your stride and confidence. A successful first trip of the season awaits you!
Related content | tips for your first backpacking trip of the year
- 9 Pound Full Comfort Lightweight Backpacking Gear Checklist
- Best Backpacking Food | simple and nutritious
- Quick and Efficient Training for Backpacking and Hiking
- Benefits of Early Spring Backpacking
12 tips for your first backpacking trip of the year – make it easy – have fun!
Getting ready for a backpacking trip is not rocket science or brain surgery. Use the following tips to make it a lot easier to pack and get out on that first backpacking trip of the year. And this is supposed to be fun — even the pre-trip preparation!
1. Pack to a Gear List!
There are any number of good checklists for bringing the right gear. Print one out and use a pencil to check off each item. If you have a spare room (or even the living room) lay things out clearly in groups; sleeping gear (tent, sleeping bag, sleeping pad) in one area, clothing in another, cooking gear in another, etc. When it’s laid out like this I find it substantially easier to make sure I have exactly what I need.
Related content
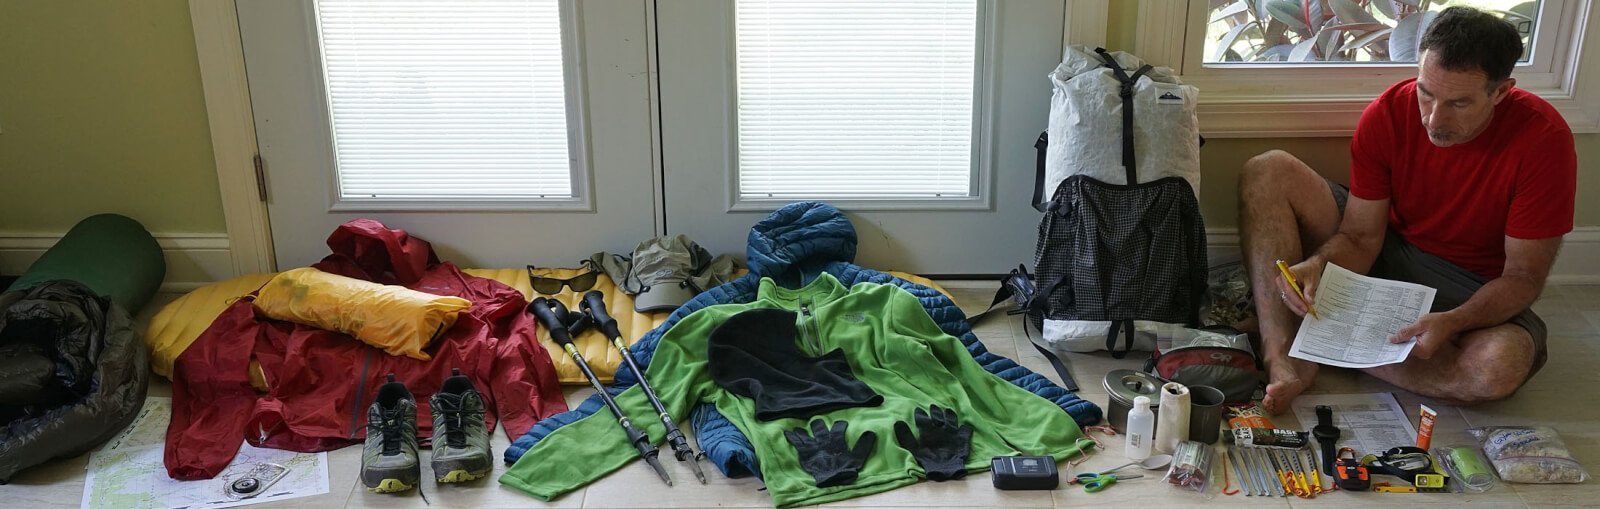
Make it fast and easy to pack all the right stuff and forget nothing: Use a gear checklist and lay things out clearly in groups in a room dedicated to the task. I usually leave stuff laid out until I leave for my trip.
2. Don’t go crazy spending money on a bunch of new Gear
I suggest that you only buy a new piece of gear if you really need it and know exactly what you want. Otherwise, borrow from friends or rent gear until you have enough information to make a good decision. Early season trips are a great way to gather information about what gear works best for you — and what doesn’t work and needs to be replaced. That being said, if you know what you want, early season sales are a great place to look for stuff on closeout or steep discount. For instance:
- Cheap Lightweight Backpacking Gear
- REI Member Rewards Event: Members save 20% on one full-price item and one REI Garage item
- Campsaver.com: Huge Spring 20/20 Sale. Save 20% Around The Site Coupon Code 4UTWNTY
- or full time discounters like Sierra Trading Post
3. Keep Your Food Simple
Almost all the food you need for a backpacking trip is at your local supermarket or in your kitchen cabinets at home. Nuts, PB&Js, Chocolate, Dried Fruit, Energy bars etc. And for a three day trip you don’t need to vary food all that much. Alison and I usually eat most of the same food each day for short trips which keeps things easy and simple. Again packing to a Food List helps. Many meals can be made at home with commonplace ingredients. We have a number of simple and easy to make meal recipes here. For those who don’t want to make their own meals, there are some simple and healthy freeze dried meals that work great like this Black Beans & Rice. We doctor it up into one of our favorite dinners by adding grated cheddar cheese, corn chips and possibly some hot sauce. The recipe is here.
Bonus tip: As a reality check, weigh all your food before the trip. It should add up to 1.5 to around 1.8 pounds/person/day. If it’s outside these limits, something is likely wrong.
Related content
- Best Backpacking Food | simple and nutritious – great food ideas as well as nutrition guidelines
- Backpacking Food List for 7 days – easily adjusted to a 2 or 3 day early season trip
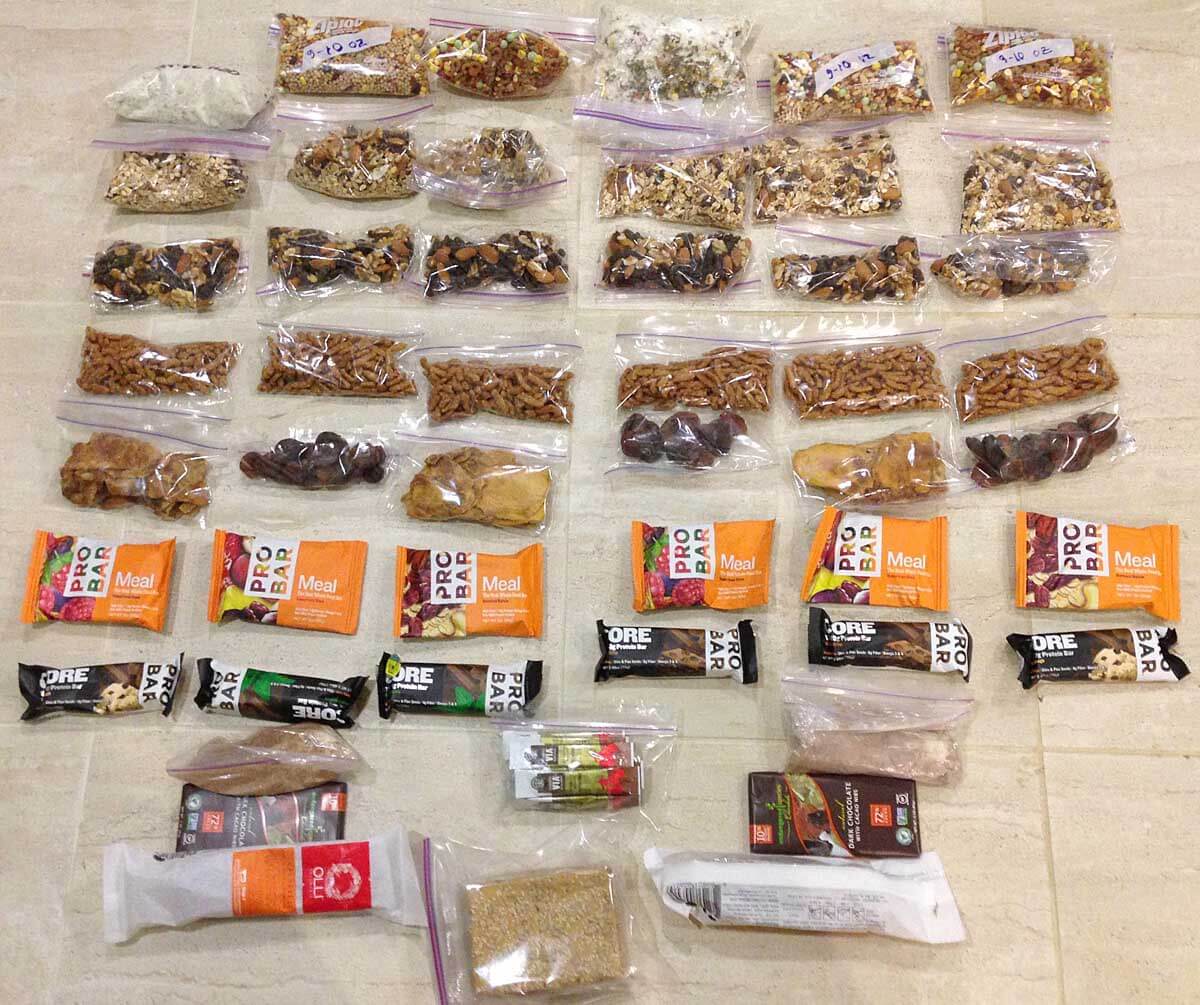
A simple and quickly assembled set of food for a 6 to 7 day trip. Aligning food in rows per/day helps to organize and provides a useful check that you’ve packed correctly. Almost all the food was purchased at Whole Foods and our Local Supermarket.
4. Don’t wait until the last minute to assemble gear and food!
Have all your gear sorted at least three days before your trip start. That way if you can’t find an important item you’ll still have time to go to a local store or order it from Amazon Prime. (It’s always something small and essential you can’t find like a headlamp, compass, pot, or fuel bottle…) And this will also allow you to make sure everything fits in your pack. Note: If you might order gear from cottage manufacture’s (I do), you’ll need to order 6 -8 weeks in advance.
5. Do some pre-tip hikes | Use the socks and shoes you intend to wear on the trip
Related content
If you buy new shoes and socks do it weeks before your trip so you can have some time to use them—at least walking around the neighborhood. This is the #1 way to prevent blisters! Note: Get trail runners! They’re light, easy on you feet and will make your trip a more fun. Don’t forget to use your trekking poles on your hikes. Our favorite trekking poles are the $40 Cascade Mountain Tech Carbon Trekking Poles. They are as good but 1/3 the price of the best trekking poles.

Altra Lone Peak shoes
Altra Lone Peak Trail Shoes, M’s & W’s @REI: These are Alison’s and my favorite backpacking and hiking shoes. These are the most comfortable shoe after a 30+ mile day on the trail. One key is the massive toe room that is so kind to trail-swollen feet at the end of the day. They are light and have a zero drop heel for a more natural stride. These come in both Men’s and Women’s models. Some of our favorite socks are SmartWool PhD Light Mini, Darn Tough 1/4 UL w cushion or DeFeet Wolleators.
6. Get a Weather Report
This will give you some peace of mind that you will be warm safe and dry. That is, the weather report will let you pack a tent, clothing, and sleeping bag, etc. appropriate for actual weather conditions. (Note: For most trips of 3 days or less, this weather report should be fairly accurate. But, If you are going to the mountains make sure you get a mountain forecast as mountains tend to be cooler and wetter than lower areas.)
Related content
- For weather weenies: the NOAA hourly weather graph is among the most informative & accurate
- Weather Underground has one of the best & easiest to understand 10-day forecasts.
7. Bring a book, some tunes (with earbuds!), podcasts or other nighttime diversions
It’s human nature not to sleep the best your first night out and early season nights can be long . Having something to entertain, distract and relax you can be a big help to getting to sleep early.
Related content
Fun fact: when sleeping in a new place the human brain alternately sleeps one side of the brain less than the other. This keeps you more alert while you sleep—presumably to keep you safer in a strange place. But this makes it harder to get to sleep and a lighter sleep once you are asleep.
- How to use your Smartphone as the Best Backpacking GPS
- 10 hacks and accessories for better smartphone hiking photography
- Best Satellite Messenger inReach vs SPOT?
- Best Lightweight Backpacking Electronics Gear
- Best Backpacking Cameras 2018
Always Bring a Backup Battery!
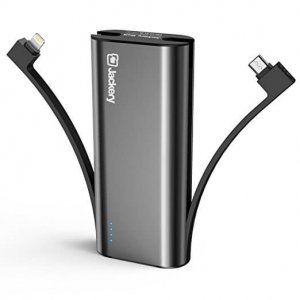
With its built-in cables the Jackery Bolt can charge a lightening device and micro-USB device at the same time.
Yeah, it seems like just about everything needs some juice these days. And many people are using their smartphones as their primary navigation device. As such, it’s a huge bummer if you drain the battery all the way down. (always bring a set of paper maps and real compass tho!) My three favorite lightweight and high capacity USB backup batteries are:
- Jackery Bolt 6000 mAh USB Battery (pictured right)- With two built in cables (lightening & micro-USB) it will charge just about any backcountry electronics. It has a faster charging rate than the EasyAcc below but has slightly less overall capacity.
- EasyAcc 6000mAh USB Battery This has slightly more capacity (tested) than the Jackery battery but has a slower charging rate & only a built micro-USB cable (altho you can attach your own lightening cable to charge an iPhone). It can charge a large phone like a Galaxy S7 about 1.4x and a smaller phone like an iPhone 7 2.3x.
- Anker PowerCore 10000 (only 6.4 oz) this is the lightest option if you need to recharge your electronics a lot. It can charge a large phone like a Galaxy S7 ~2.5x and a smaller phone like an iPhone 7 ~3.5x. Its limitation is that it only has one USB port for a cable.
- And of course for a SPOT messenger and many headlamps a spare set of lithium AAA batteries.
8. Evaluate the following before your trip
- Prior to the trip, setup your tent*, sleeping bag, and sleeping pad in the backyard or a local park. Preferably with your hiking partner. This makes sure you have all the parts and pieces and everybody knows what they are supposed to do. Inspect the tent, rain fly and floor for any damage. Get into the tent and lie down side by side and make sure everything is copacetic, air pads don’t leak etc. Do you feel comfortable enough to get a good night’s sleep? Is the tent too small and claustrophobic? Early season has longer nights and the possibility of spring rains so you might be in the tent for a while. As such it’s nice to have enough room. [*Note: it really helps to have the tent setup instructions. If you don’t have them you can usually download them online for your tent or one close to it.]
- Fire up your backpacking stove and heat some water. Make sure your fuel canister is full.
- Check that your water filter pumps water easily and/or that your water treatment chemicals are in date.
- Try on your clothing and make sure it still fits, doesn’t have rips and tears and doesn’t smell funny. [yeah, occasionally I put away unwashed clothing!]
9. Keep your Trip Short
A 2 to 3 day weekend trip is likely the best option for your first trip of the season. And don’t overreach on distance. Most of us haven’t reached our peak conditioning early season. Keeping the miles reasonably short will make walking fun and prevent temper flare-ups from exhausted trip members. In addition, since it’s the first trip for the year — you’ll want to be in camp with plenty of time to set up the tent, collect water, cook dinner. An added benefit of the shorter hiking days is that you’ll likely have time to savor a sunset over a cup of hot chocolate.
10. Keep your trip local
There are far less logistic issues with arranging a local trip. And shorter travel time to and from trip trailheads leaves you more time to enjoy the backcountry. Also, it’s likely a local area you are familiar with, making many things easier. And while early season has fewer backpackers, you may still have other campers at the most desirable campsites. My suggestion is to embrace the company and make friends with your fellow outdoor enthusiasts — enjoy the evening. [There will be plenty of time for longer more aggressive trips later in the year where you can have your solitude.]
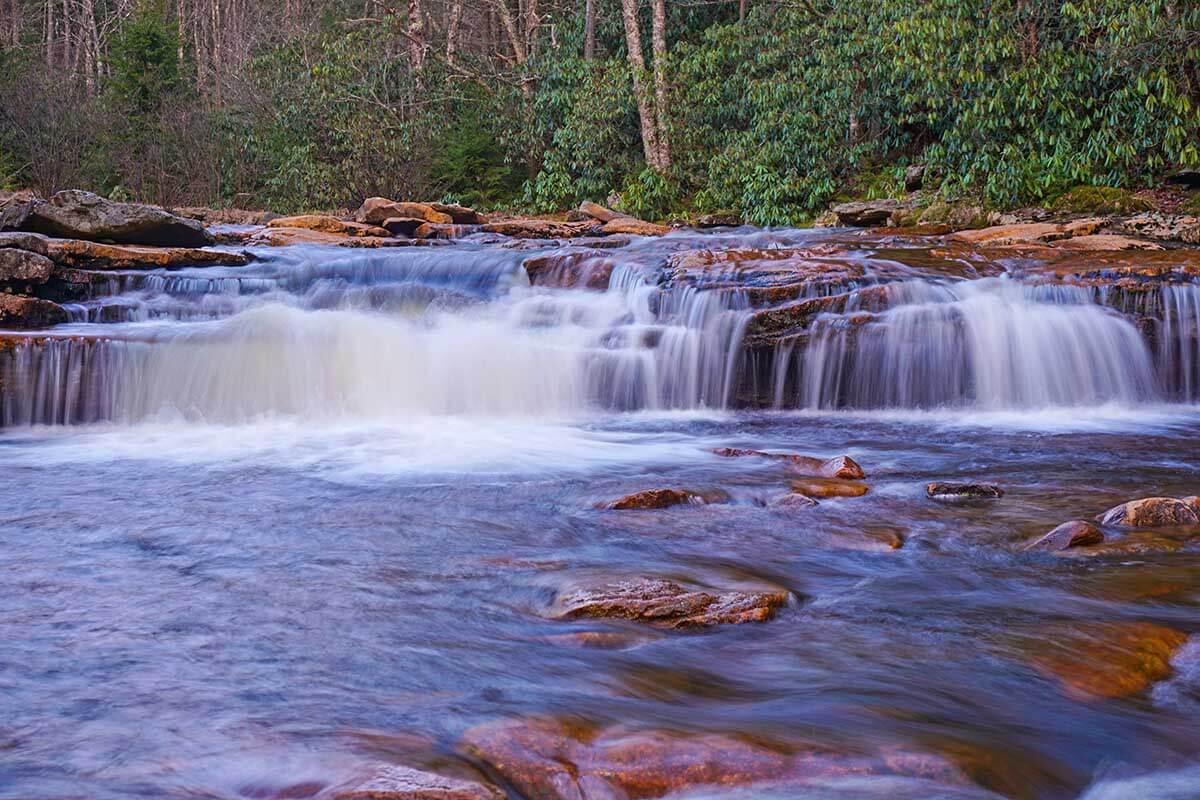
There are many local options for lovely areas to backpack and camp. This beautiful waterfall in Dolly Sods is by an extremely popular backcountry campsite easily accessable to people from the Washington DC Area. Even in early spring, you may have company. My suggestion is to embrace the company and make friends with your fellow, like minded outdoor enthusiasts.
11. Don’t Worry So Much About Wet and Cold
If you have the right gear (see gear list below) you’ll do fine. And a local trip in a more controlled area is the perfect place to practice and get good experience in these conditions. Finally, if for some reason things do get intolerable, it’s likely not all that far to hike out to the car.
Related content
- Top Mistakes Using the Layering System – How to Stay Warmer and Drier
- Rain Jacket Durability | How to Select the Best Durable Rain Jacket
- Guide to Lightweight Down Jackets and Pants for Backpacking
- The Art of Sleeping Warm | A Guide to Sleeping Bags and Quilts
- Why You Won’t Freeze or Starve Backpacking
12. Take notes on what worked and what didn’t work
After the trip, change out gear and modify your technique as required. If you do need new gear, don’t wait until the last minute to buy it before your next trip. Clean and wash your gear after the trip and then properly store it in a dry area.
Closing Thought – Embrace Your Mistakes!
One of the main purposes of an early season trip is to shake-out your gear and technique. As such, it’s OK, even desirable to make mistakes. Better to make your small blunders in a safe, controlled local place than on your big destination trip of the year. That way you can start that trip on the John Muir Trail ready to roll, with your kit and technique dialed in.
Bonus Tip – Keep your Trip Fun
The overarching principle for this post is to keep your trip and trip planning as enjoyable as possible. Alison and I have one rule for every trip: If either of us is NOT having fun it’s time to stop and make a NEW plan. That is, a plan that puts FUN back into the trip.
Wishing you a great start to the backpacking season, -Adventure Alan
Disclaimer
This post contains affilate links. If you make a purchase after clicking on the these links, a small portion of the sale helps support this site at no additional cost to you. I do not receive compensation from the companies whose products are listed. For product reviews: unless otherwise noted, products are purchased with my own funds. I am never under an obligation to write a review about any product. Finally, this post expresses my own independent opinion.


