
Bikepacking the GAP Trail and C&O Canal Trail
Introduction and Trip Highlights
Bikepacking the GAP Trail and C&O Trail from Pittsburgh to Washington DC is a superb mix of natural beauty, wooded trails, quaint towns, & American history. It’s the perfect introductory trip for those new to bikepacking. But it’s just as suitable and rewarding trip for accomplished riders. Virtually all of the trail is away from traffic on flat, wide, non-technical dirt trails (double track) that do not require great riding skills.
If you have even a slight interest in bikepacking, one of the hottest and fastest growing ways to explore the outdoors, this is the trip for you. Most trails are heavily wooded with a distinct wilderness feel — many follow along scenic rivers like the Potomac, Monongahela, and Youghiogheny. You can rough it or glamp it — your choice. Each night you can sleep in a bed at a cute B&B, eat at restaurants — or just as easily you can tent it in a beautiful campsite and munch on takeout or camp food. The local, trailside towns are super bike friendly. They actually like you! In short, this bikepacking trip has something for everyone. So it’s no surprise that the Great Allegheny Passage (GAP) Trial is known as “America’s Friendliest Long-Distance Rail-Trail.”
Finally, bikepacking the GAP Trail and C&O Canal Trail has super easy logistics. This trail is easily accessed by car or train from much of the Mid-Atlantic, Northeast and Midwest (there is a no-car needed option). In fact, we did this trip front door to front door without ever using a car. Supplies are easy to get from trailside towns and there are tons of camping, lodging, grocery store and restaurant options for every taste and budget. Finally, there are outfitters that will take care of gear and/or shuttles for you — a big stress reducer for non-planners that just want to enjoy the trip.
We give you a packing list & explain how to best load the gear onto you bikes — using either pannier or frame bag techniques.
Already a Backpacker? You’re 80% There!
This is a perfect introductory Bikepacking trip. The trails are easy to follow and are within the abilities of most casual bike riders (road or mountain bike). In addition, if you are already a backpacker, the transition to bikepacking is super easy — it’s almost the same gear. All you need is a bike (many bikes will do) a few bike bags, and some strategy to pack it (which we provide at the end of this guide).
Finally, if you are not a camper, you can sleep in a bed every night and dine out for your meals. Similarly, it is just as easy to camp out every night if you prefer roughing it.
This Guide Has Everything You Need
- Day by day, detailed route descriptions, with mileages and elevation profiles
- A GPX file of the route Our up-to-date GPX file of the route includes the two major detours, and the optional Western Maryland Rail Trail
- Gear Packing Information | what gear to bring, what not to bring
- How to Pack Your Bike | This may be the most confusing subject about bikepacking. We cover what bike bags to get and where best to load them on your bike.
- Detailed information logistics to trip start/end, including low-carbon, a no-car needed option via Amtrak
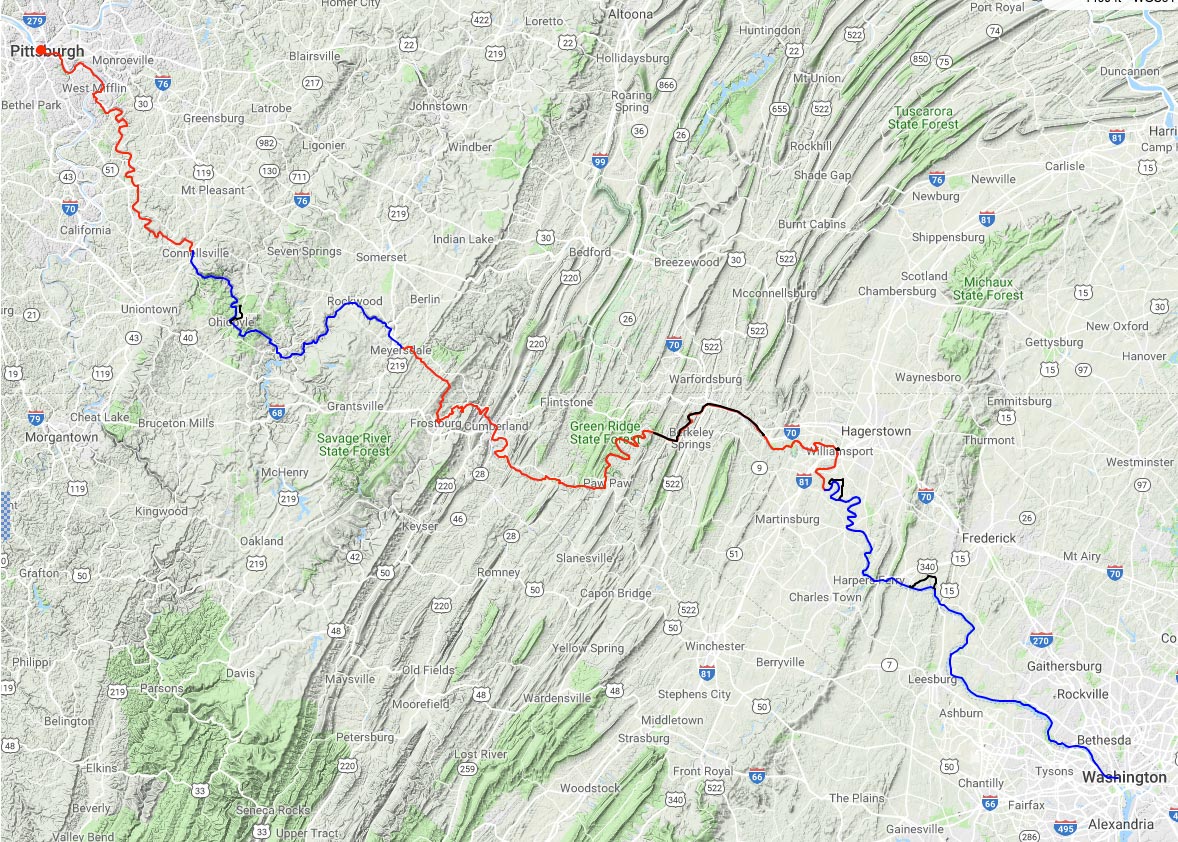
The combined Great Allegheny Passage Trail and C&O Canal Trails go 333 miles from Pittsburgh PA to Washington DC. Virtually all of the trail is away from traffic on dirt trails, mostly rails-to-trails and the old towpath along the C&O canal.
6 Highlights
Bikepacking the GAP Trail and C&O Canal Trail
Perfect first-time bikepacking trip! Virtually all of the trail is away from traffic on flat, wide, non-technical dirt trails that do not require great riding skills. No grinding/too-long days. Pick any daily mileage that works for you. You can rough it or glamp it as you wish. Each night you can sleep in a bed at a cute B&B, eat at restaurants — or you just as easily can tent it in a beautiful campsite and munch on takeout or camp food. The local, trailside towns are super bike friendly. They actually like you! In short, this bikepacking trip has something for everyone. Finally, we give packing instruction and tips for those new to bikepacking.
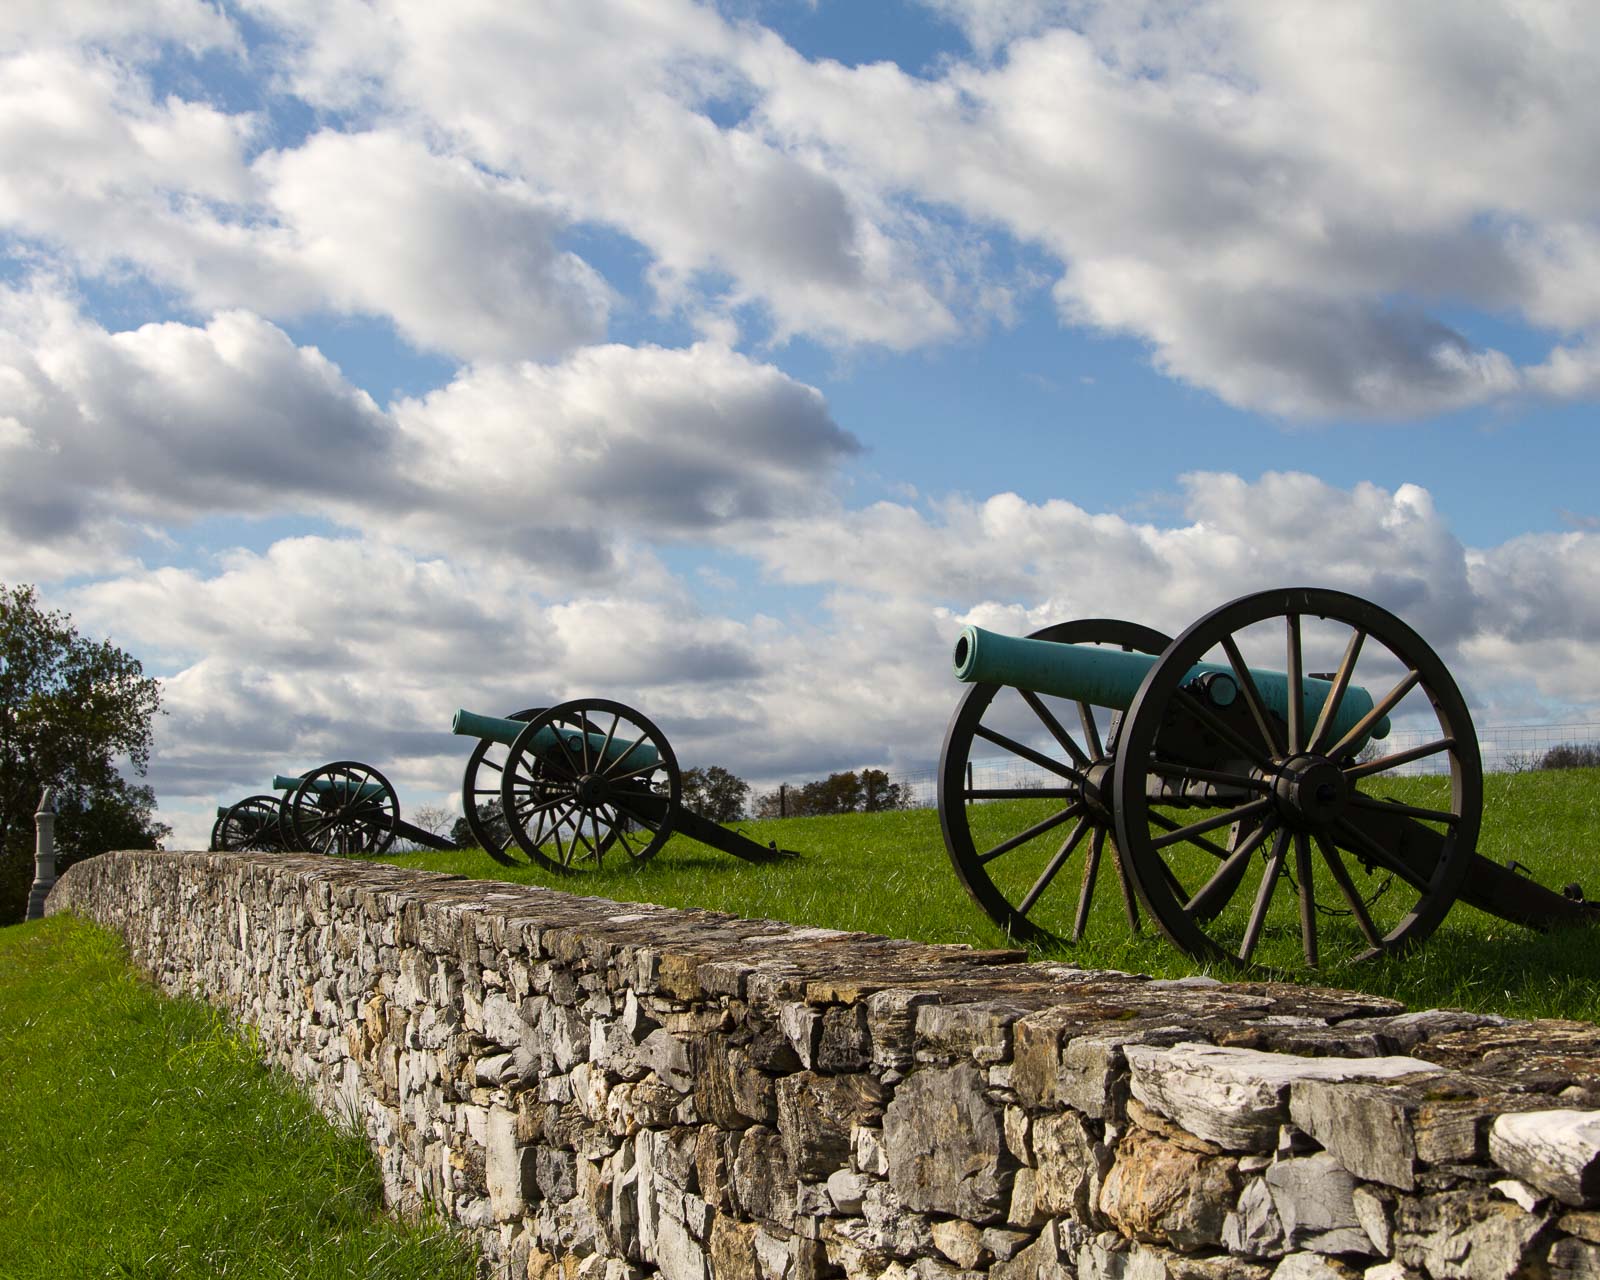
Antietam Battlefield National Park is worth a side trip.
The whole route is an open-air museum of American History! from riding along historic steel mills in the “Iron Valleys” near Pittsburgh, to Harper’s Ferry WV, to civil war battlefields like Antietam, to quaint out of the way towns with small restaurants and cute B&Bs, the old railway grade over the Eastern Continental Divide, to Cumberland, Maryland and the locks of the C&O Canal.
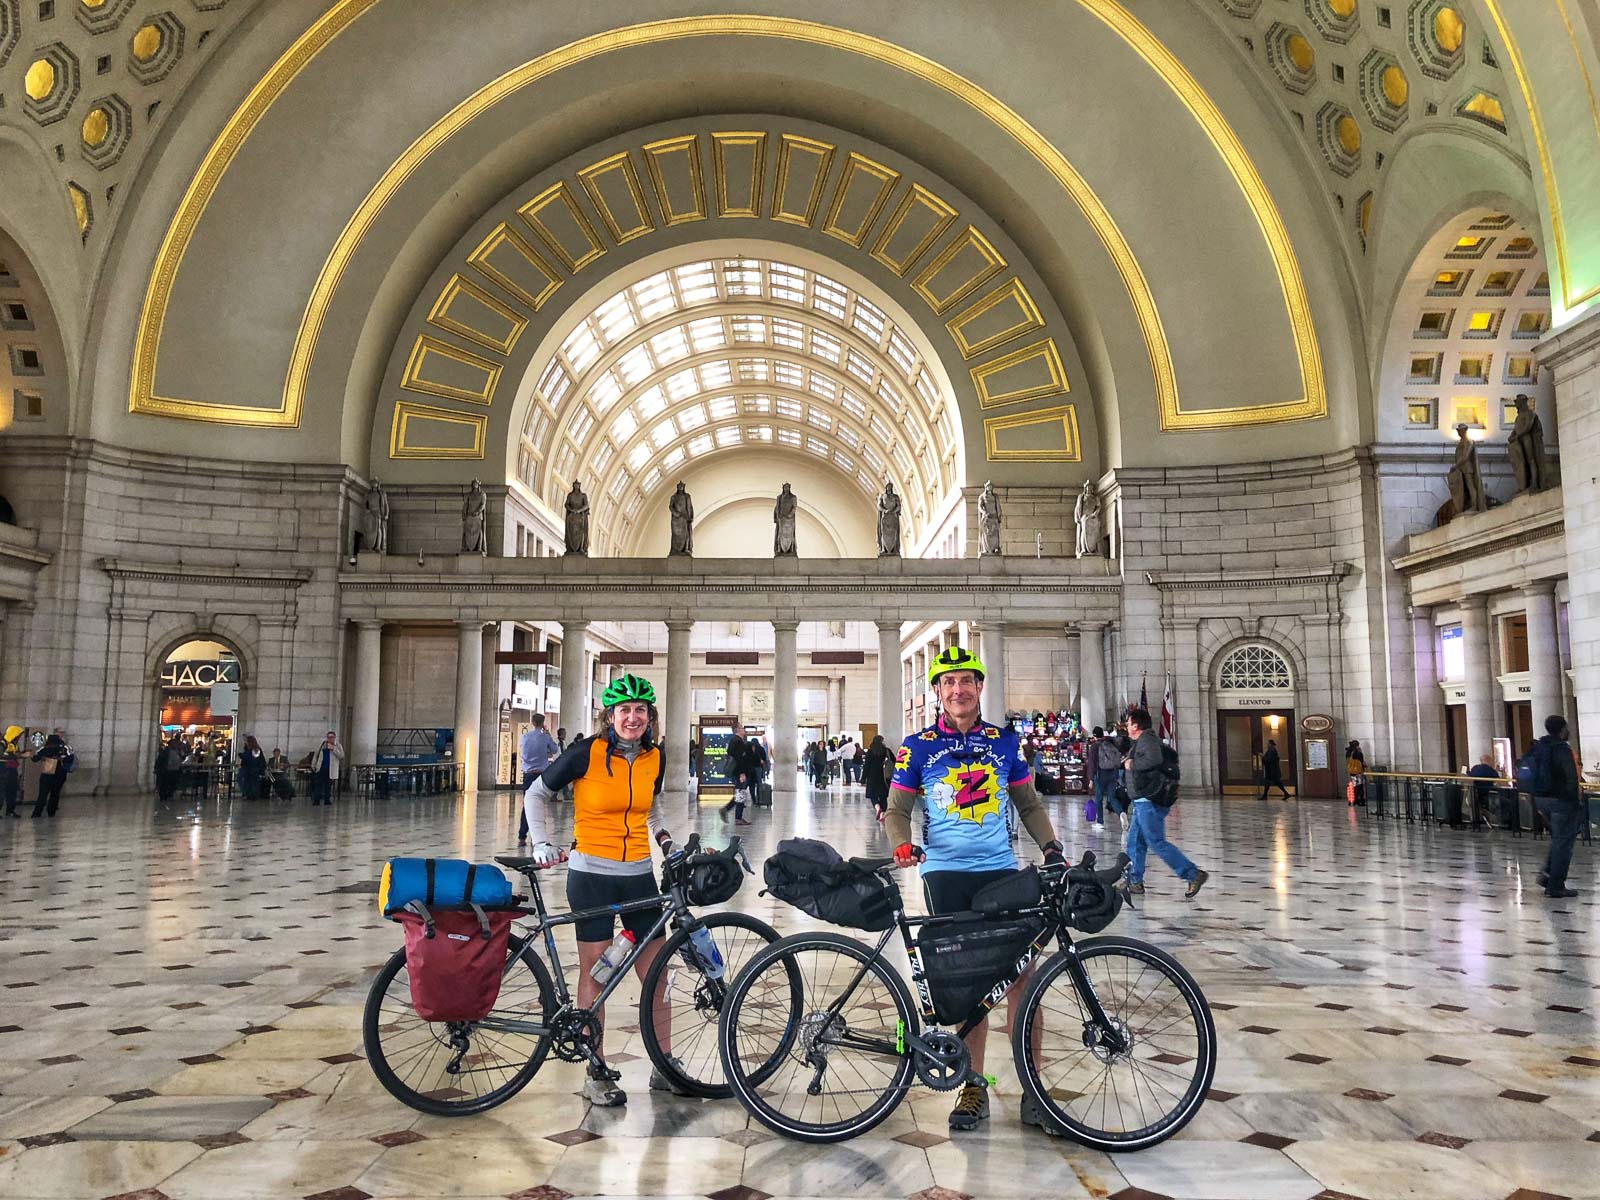
Trip start in historic Union Station in Washington DC
Super easy stress free logistics. Taking the train is a totally relaxed way to shuttle between start and finish. And yes, you can take your bike on Amtrak. A bonus is exploring historic Union Station in Washington DC.
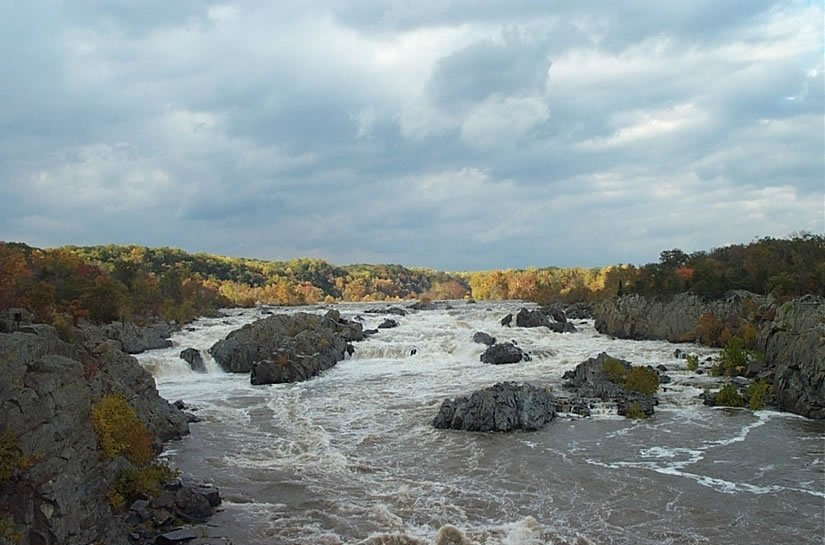
Great Falls on the Potomac, the “Niagara Falls” of the mid-Atlantic.
Great Scenery. The route travels along the famous Monongahela, Youghiogheny, Potomac and Shenandoah Rivers. Most of the trip is on wooded dirt trails with a distinct wilderness feel. There’s great views and excellent camping riverside.
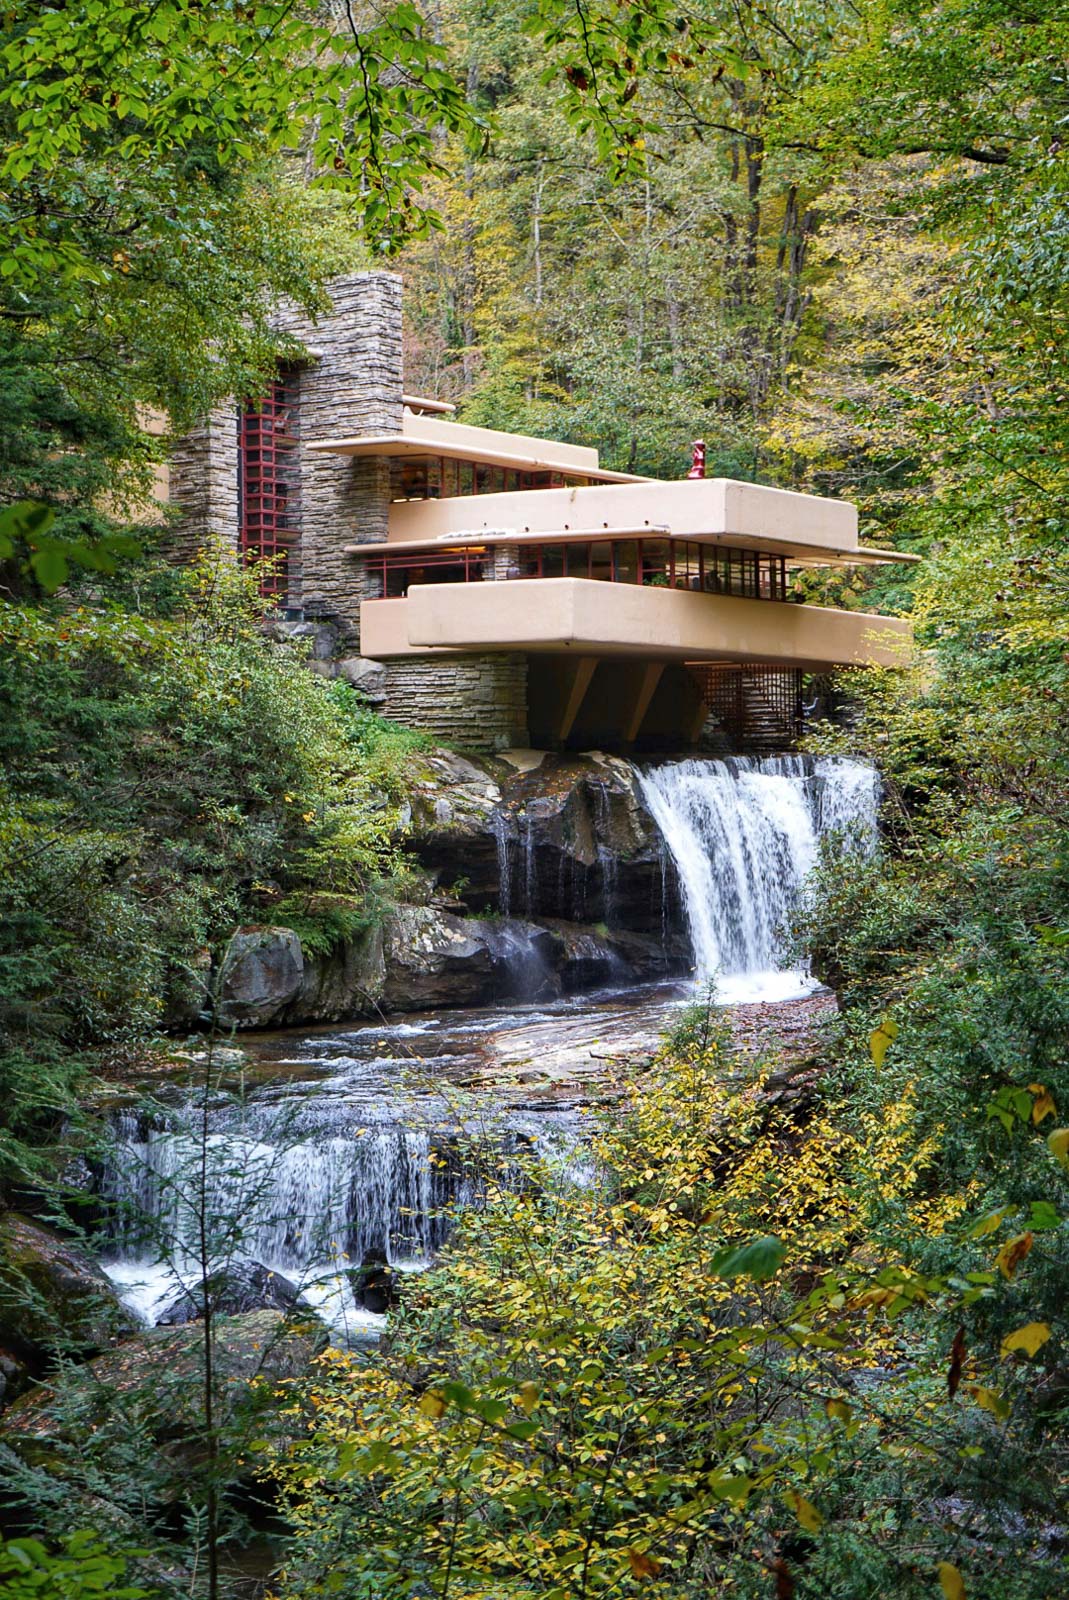
Fallingwater is arguably Frank Lloyd Wright’s masterpiece. It’s a short and highly recommended side trip. It’s pretty much in the middle of nowhere, so not somewhere that you can easily visit unless you are riding the GAP trail. Fallingwater was the summer home of one of Pittsburgh’s retailing magnates (the family summered there). The home is known as one of the greatest architectural achievements of the 20th century.
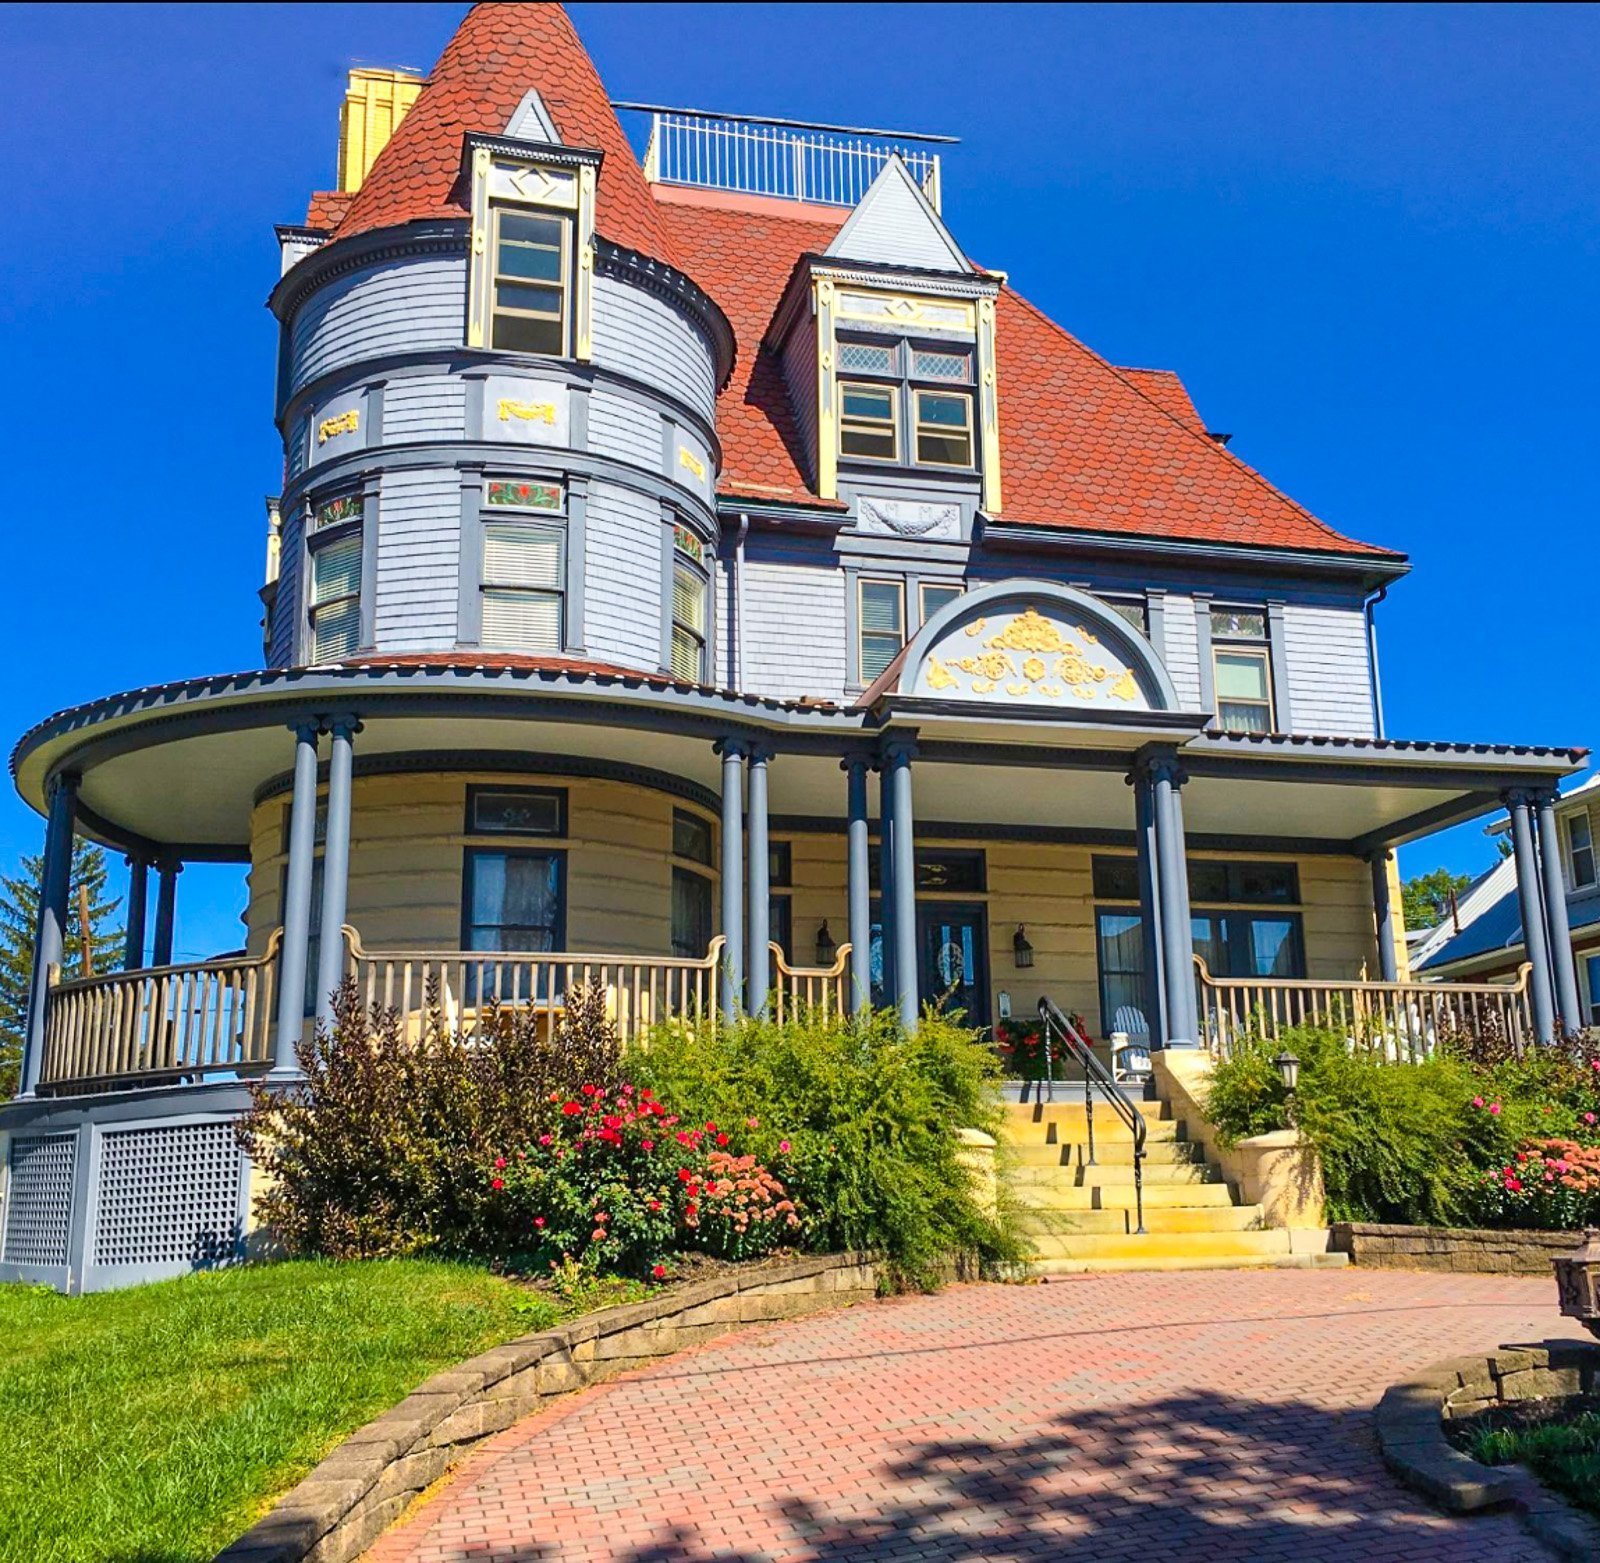
Levi Deal Mansion Bed & Breakfast in Meyersdale, the Maple Syrup Capital of Pennsylvania.
Quaint out of the way towns, with cute B&Bs that are super bike friendly! The Levi Deal Mansion B&B (pictured) is a few blocks from the Great Allegheny Passage hiking and biking trail in Meyersdale PA. This bike friendly town, the maple syrup capital of Pennsylvania, is filled with bike welcoming B&B’s. We stayed at Yoder’s Guest House that had a huge garage converted to a “bike garage” with extensive bike racks, including a dedicated bike repair area with tools and pumps. [The owner’s told us that 80% of their business comes from folks biking the GAP Trail!]
Top Facts | Bikepacking GAP Trail and C&O Canal
Location – Pittsburgh PA to Washington DC. The path travels through Pennsylvania, West Virginia, Maryland, and ends in Washington DC
Duration – 6 moderate days (~55 miles/day) | 7-8 easy days (~40 miles/day)
Distance – 333 miles. Total ascent 7,000 ft. Total decent 7,700 ft.
Segments – The trip can easily be broken into two parts to be completed separately:
. Great Allegheny Passage trail (GAP trail)| 148.5 miles, Pittsburgh to Cumberland, MD
. C&O Canal Towpath Trail | 184.5 miles, Cumberland, MD to Washington, DC
Level of Difficulty – Easy to moderate. This is within almost anybody’s biking skills. No need to camp out unless you want to.
Estimated Riding Speed – Casual cyclists with an OK bike and moderate load will likely average 8 to 10 miles per hour. Fit cyclists with a suitably sophisticated bike and a light load will likely average 12 to 15+ mph.
Season – March to October/November (based on the closing of the tunnels). Best time is Spring and Fall. High summer can be hot and muggy. October is great for fall colors and fewer people. But by October, it may be getting cold in the mountains (it snowed on us one night).
Trail Type: Mostly flat, wide, non-technical dirt trails — most trails are converted rails-to-trails and canal towpaths (no single track). In general, the GAP Trail is converted from abandoned rail beds and is mostly made of a crushed limestone surface. It’s well maintained and generally in good condition. The C&O Canal Trail is dirt and gravel and not as well maintained. Expect some washed out sections, submerged and muddy stretches, and detours around unrideable trail.
Recommended Bikes – A Gravel Bike is ideal, although a Mountain Bike would also work great | Tires 35mm or larger preferred. See the light and effective gear we took on this trip.
Getting There – To get to the trip start in Pittsburgh, we took an Amtrak train, the Capitol Limited, that allowed us to put our bikes (and gear) on the train in DC’s Union Station and disembark in downtown Pittsburgh. We spent the night in Pittsburgh since the train arrives pretty late, and the next day, started on the trail. The route can be done in reverse as well.
Lodging & Camping – As you plan your trip, there are plenty of websites for lodging options as well as campsites along the trail. The gaptrail.org has both lists of campsites as well as lists of lodging along the trail. Alternatively, just google the town you are going thru, and see what google (or your favorite lodging finder website) recommends. (Trip Advisor seemed to do well.)
Food – Food is plentiful along the trail in the towns you pass through. The gaptrail.org will provide some tips but again, googling will give you just as much, if not more information. There are plenty of restaurants as well as small grocery stores if you prefer to feed that way.
Maps – GAP Trail Map | C&O Canal Map (NPS)
GPX File – Our excellent GPX file of the route includes the two major detours, and the optional Western Maryland Rail Trail.
Note: Our maps and .gpx files are provided free for your personal use. We are happy for you to use them! But please respect our work and copyright and don’t re-publish or distribute them to others. Thanks!
References – Great Allegheny Passage Site 1 https://gaptrail.org/ GAP/C&O Planning Site https://bikecando.com/default.aspx, and even a SmartPhone App which will find food and lodging, etc. along the trail.
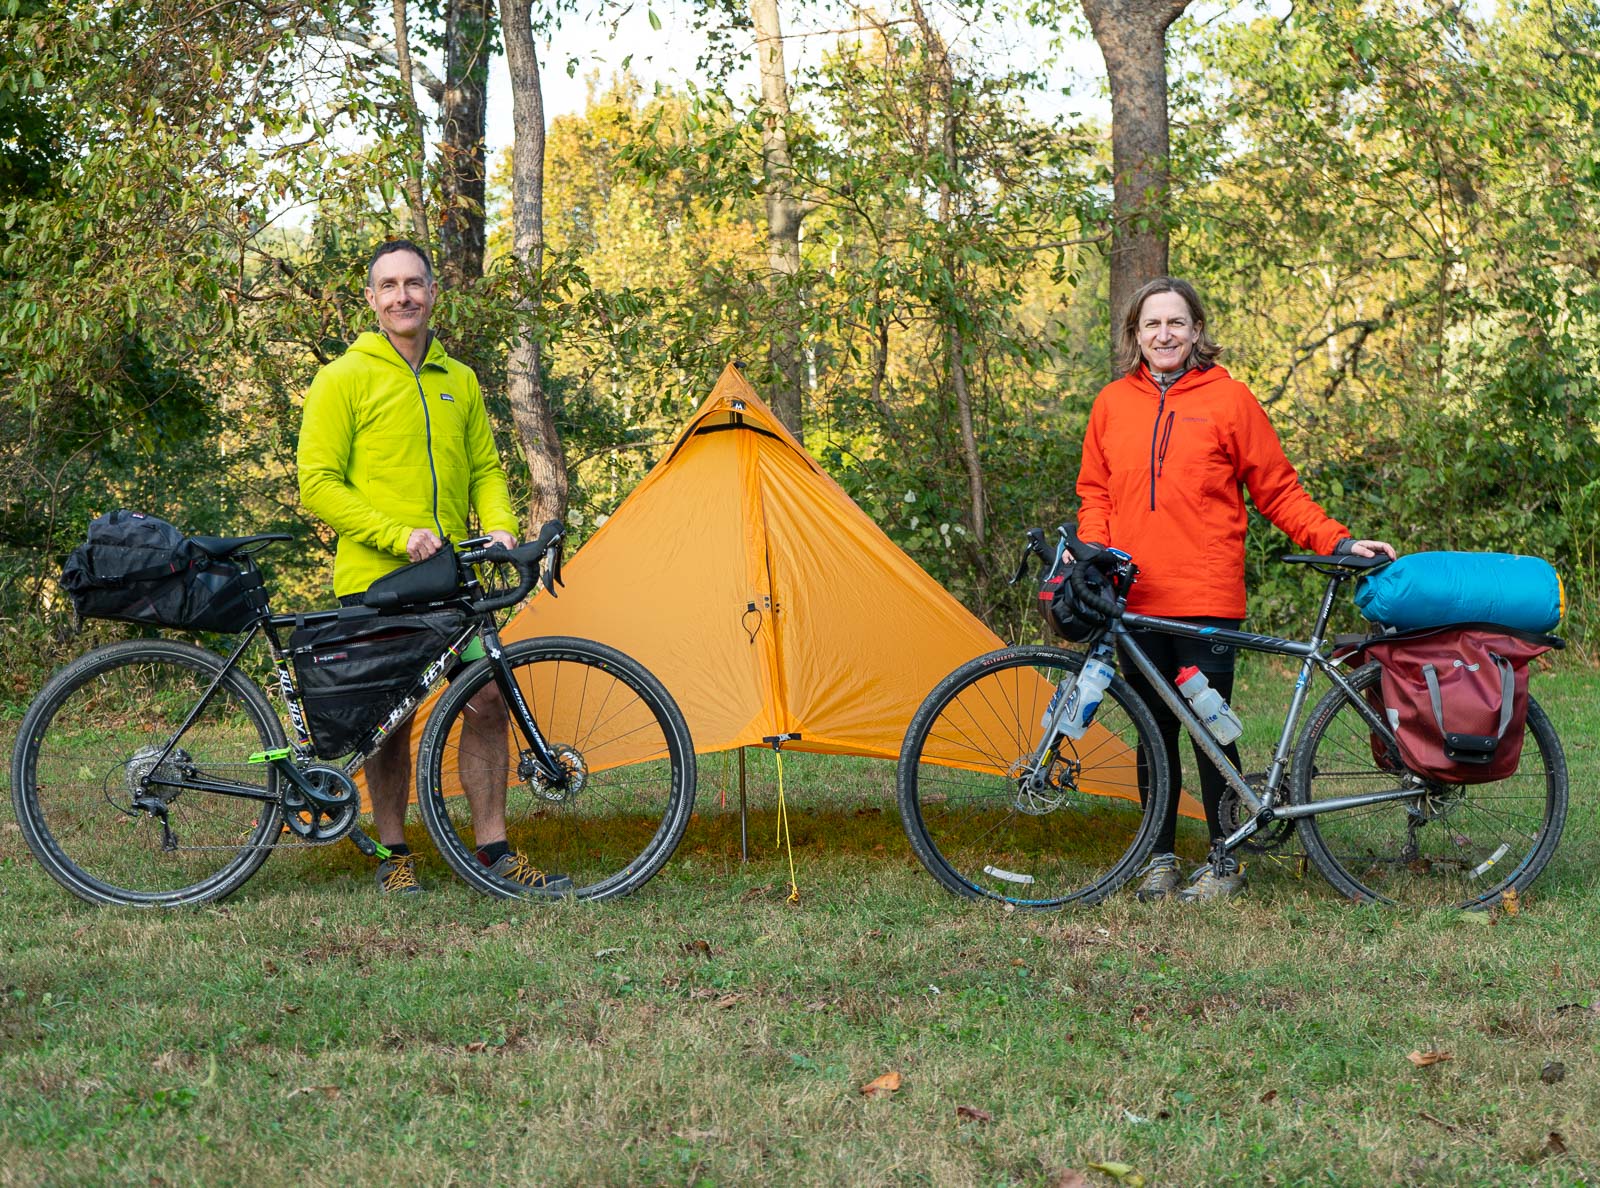
Traveling light! Our bikes and our shelter at the campsite just before the 3,118 foot Paw Paw tunnel. You can see that we had two different bike packing strategies that we discuss in the brief overview of how to pack your bike.
The Route | Bikepacking GAP Trail and C&O Canal
Bikepacking GAP Trail and C&O Canal is one of the better known bikepacking routes in the US. There are maps, websites, trip guides, and even an app which makes navigation almost a non-issue. While the entire trail is 333 miles, most maps break the length into two trails: the Great Allegheny Passage trail (GAP trail) at 148.5 miles and the C&O Canal towpath at 184.5 miles. The GAP trail is overseen by a coalition of non-profit organizations focused on keeping the trail in good shape. As such, the GAP trail is in good condition, well marked, and the path easy to navigate on a bike. The C&O Canal, on the other hand, is owned by the National Park Service (NPS) who seems to have less resources for maintaining the trail and facilities (and recent flooding along the Potomac has been a significant problem). While there are sections the NPS is working on to improve, in general the C&O Canal is in worse condition than the GAP Trail with washed out sections necessitating detours, biking over exposed tree roots, a lot of uncleared debris on the trail and crossing muddy areas where moderate bike handling skills are a help (but these sections can be walked). On the plus side the C&O Canal Trail is a bit more remote than the GAP trail, and for the most part, runs between the canal and the Potomac River making it quite scenic and a beautiful second half of the trip.
GAP Trail and C&O Canal trail also qualifies as another one of our low-carbon trips as you can easily take the Amtrak train to the start of the trip. See our other Low Carbon Trips via Amtrak. In fact, Amtrak stops at Cumberland, MD which is the break between the GAP and the C&O Canal trail which means you can easily do half the trip, and still keep it low carbon.
Route History
The 333 miles of the combined route was finished with the completion of the final portions of the GAP trail in 2013 (and the last tunnel connection completed in 2014). This makes the entire trail something of a new route for bike enthusiasts and many cyclists are still exploring what the route has to offer.
Super Bike Friendly
One of the reasons we are keen on bikepacking GAP Trail and C&O Canal is all of the biker-friendly resources, and cyclist-tourist amenities along the route. What that looks like in practice is hotels allowing you to wheel your bike into their lobby (and up to your room), B&B’s with converted bike repair areas (i.e. pumps, tools, and other fix-it items), and food establishments allowing you to dine in with your cleats, bike shorts, or whatever you are biking in and will provide you with take-out containers to fit your bags. In summary a pleasure to ride!
Shuttle Your Bike on the Train
Super simple! To get to the trip start in Pittsburgh, we took an Amtrak train, the Capitol Limited, that allowed us to put our bikes (and gear) on the train in DC’s Union Station and disembark in downtown Pittsburgh. The other end of the Capitol Limited is Chicago so you can get on there and head east to Pittsburgh. The train heading west arrives Pittsburgh pretty late so we spent the night in Pittsburgh and the next day, started on the trail.
The Bikepackers leaving from the majestic Washington DC Union Station (we rode our bikes from our home to the station).
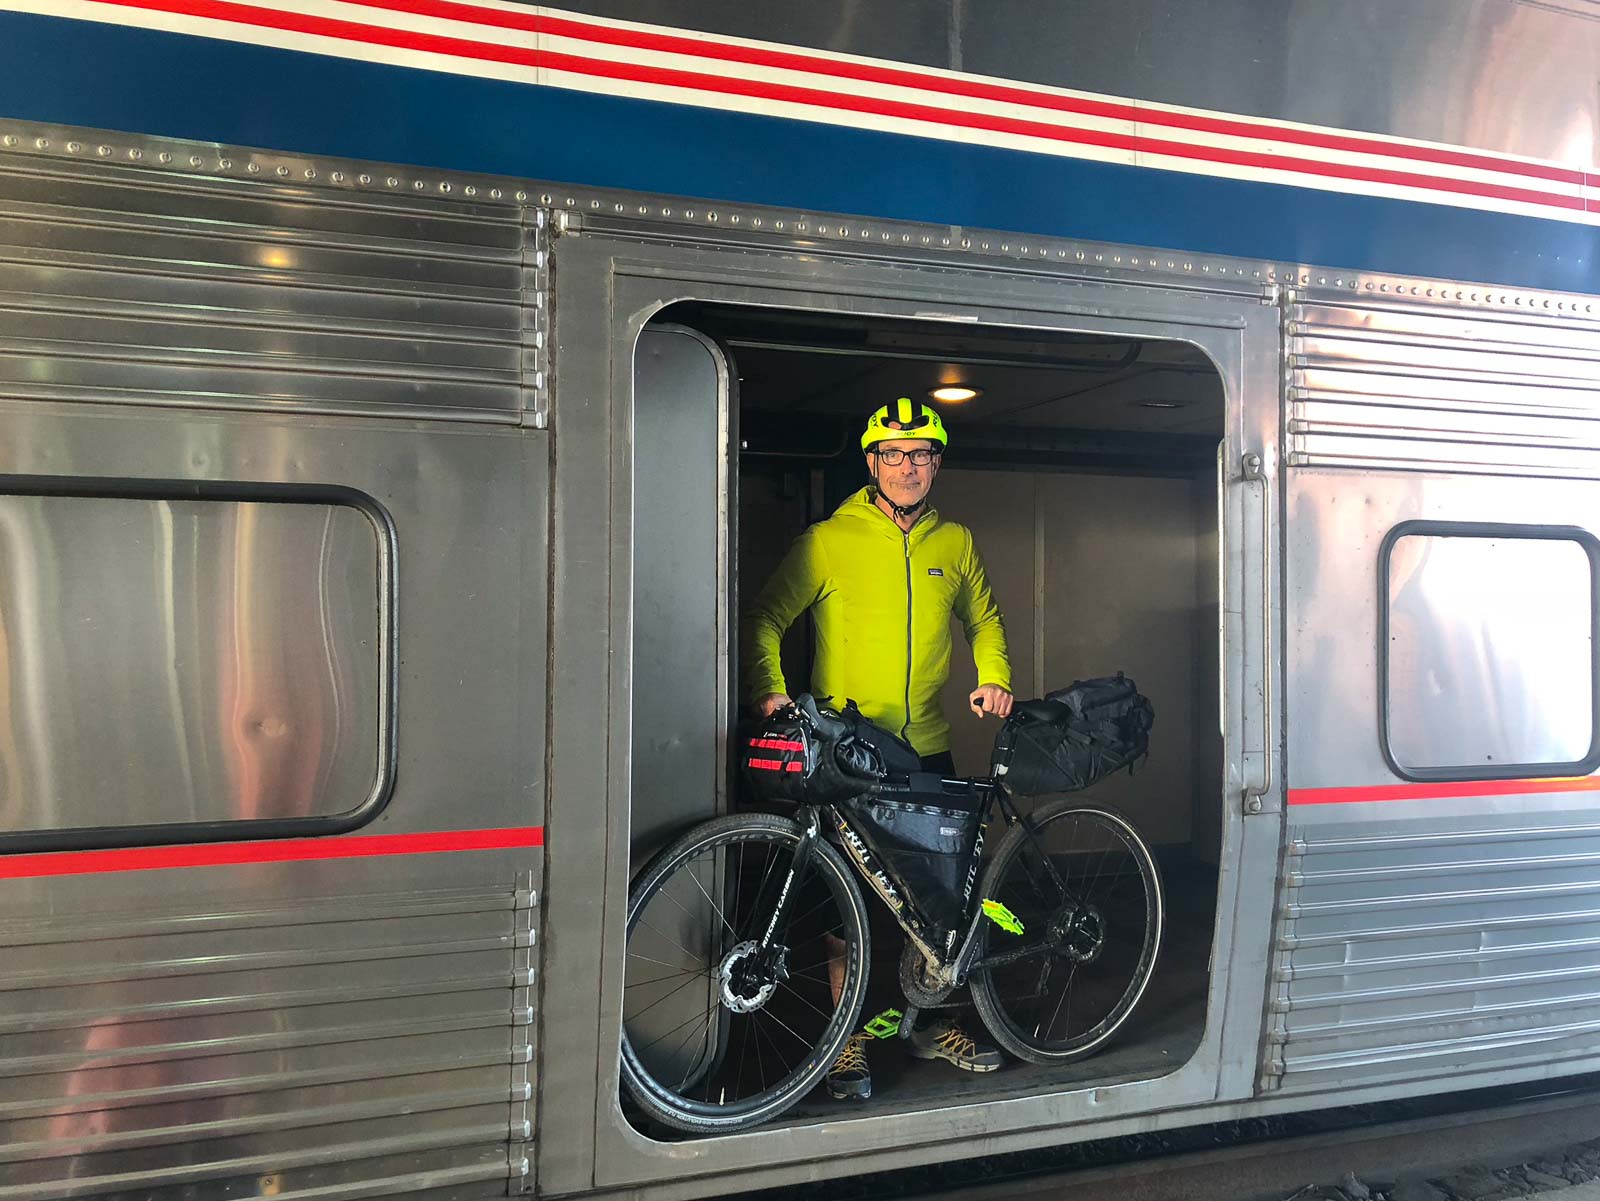
Alan getting on Amtrak’s Capitol Limited train, heading west to route start in Pittsburgh. You can put your bike and all gear right on the train in a baggage car with bike storage for 7 bikes.
Day by Day Guide
to Bikepacking GAP Trail and C&O Canal
Day 1 Pittsburgh, PA to Connellsville, MD
60 Miles | 1400 ft ↑ | 1250 ft ↓

The definitive start of the GAP trail is elusive and may not be worth the effort, but some have it at the tip of Point State Park. It’s likely easier to start under the Liberty Bridge in downtown Pittsburgh, which is plenty close enough. The easiest landmark to look for is the Golden Triangle Bike shop.
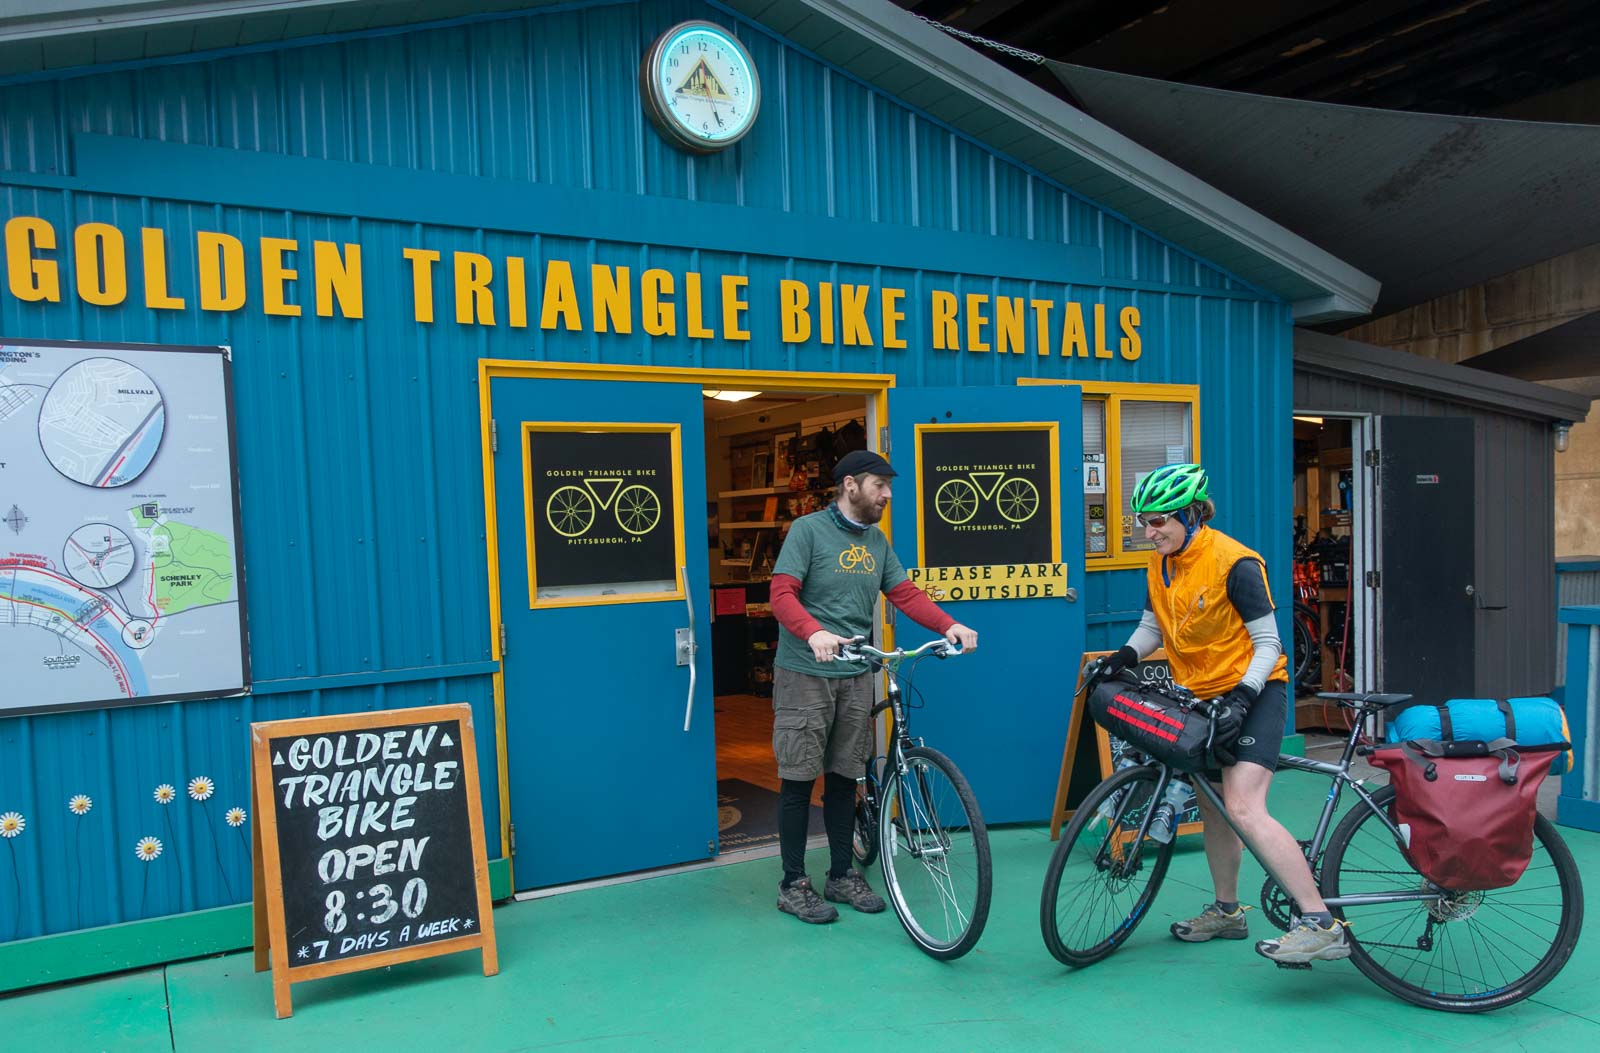
Meeting the folks at the Golden Triangle Bike Shop. They can totally hook you up with bikes and gear for your ride.
Not only does the Golden Triangle Bike shop rent you bikes for tooling around Pittsburgh, but they can completely outfit you for a self-guided bikepacking trip along the GAP and C&O Canal trail. Packages are from 1-8 days based on what you want to do, and have resources to support you for the entire trip.
For the first 19 miles of the trip you will be biking on a nicely paved path. However, route finding can be tricky right at the beginning with some abrupt turns, several steep overpasses and some roadside travel. You’ll need to pay attention.
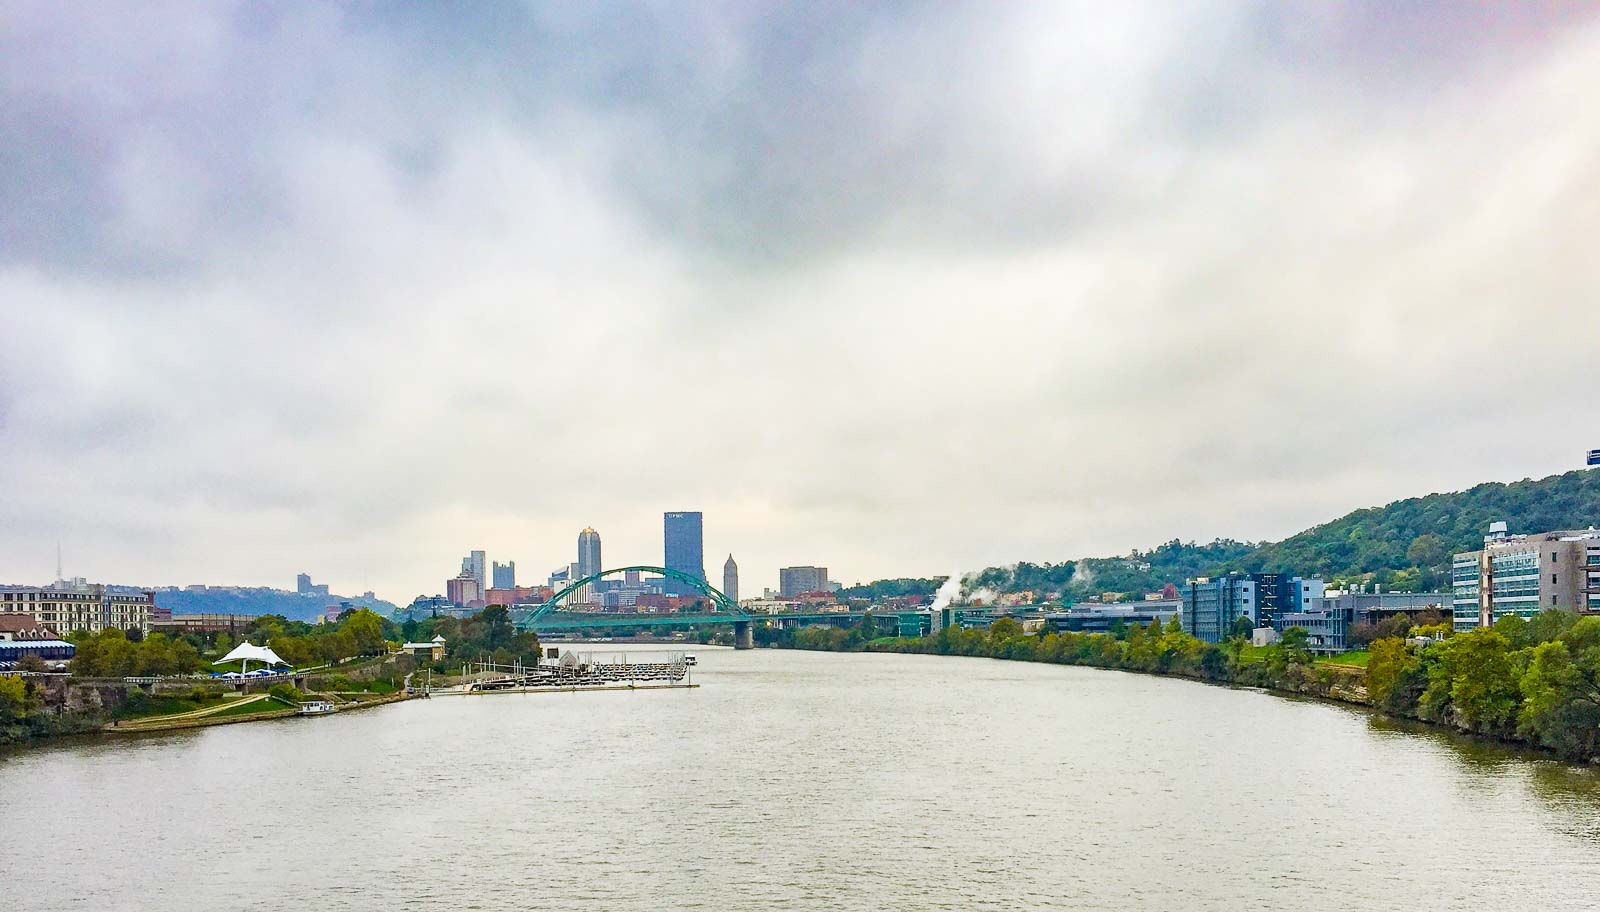
As you leave Pittsburgh, you get some great views of the city.
Getting out of a major city by bike can be challenging and this one is no exception. As such, we recommend using your GPS on active navigation until you clear Pittsburgh (or the first 19 miles). After that, you are on crushed limestone and you can just use the mileage on your bike GPS as the route becomes quite straight forward.
It is no surprise that large portions of this trail fall under the category of rails-to-trails conversions. As such, the biking is either flat or gently sloping with a wide path. In fact, your first rails-to-trail bike experience is on day one, the P&LE RR (Pittsburgh and Lake Erie Rail Road) built in 1875 which, oddly enough never made it to Lake Erie, but does make for easy biking.
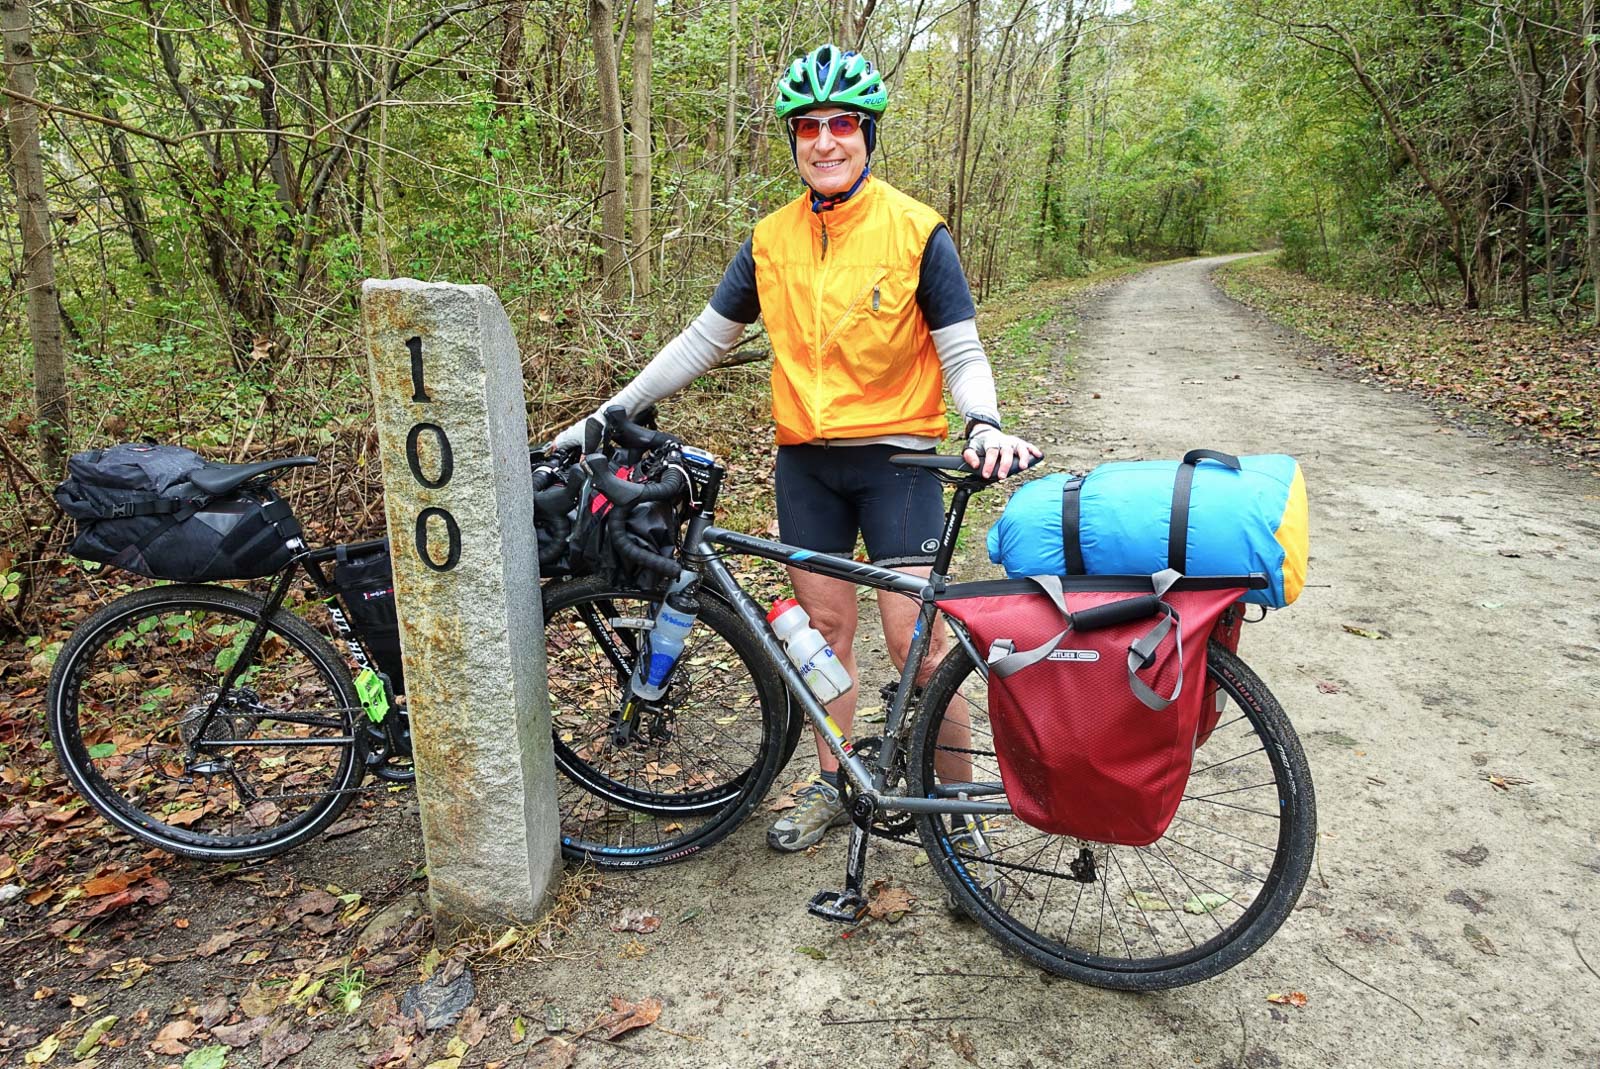
The 100 mile marker on the Gap trail (along the P&LE rails-to-trail conversion). Remember, you are counting down from mile marker 150. Note the smooth trail.
Along the P&LE path, mileage is well signed, there are many porta potties, picnic tables, etc and as such, we averaged about 14+ mph with loaded bikes. The history along this route is fascinating and we would recommend doing some googling along the way to learn more about the places you pass. Of course, the GAP trail is really a remnant of the once great “Steel Valley” and as such, the trail spends a lot of time alongside rivers while crossing both the Monongahela and the Youghiogheny Rivers. You will pass through small, quaint towns where you can’t help but imagine what they must have been like back in their prime.
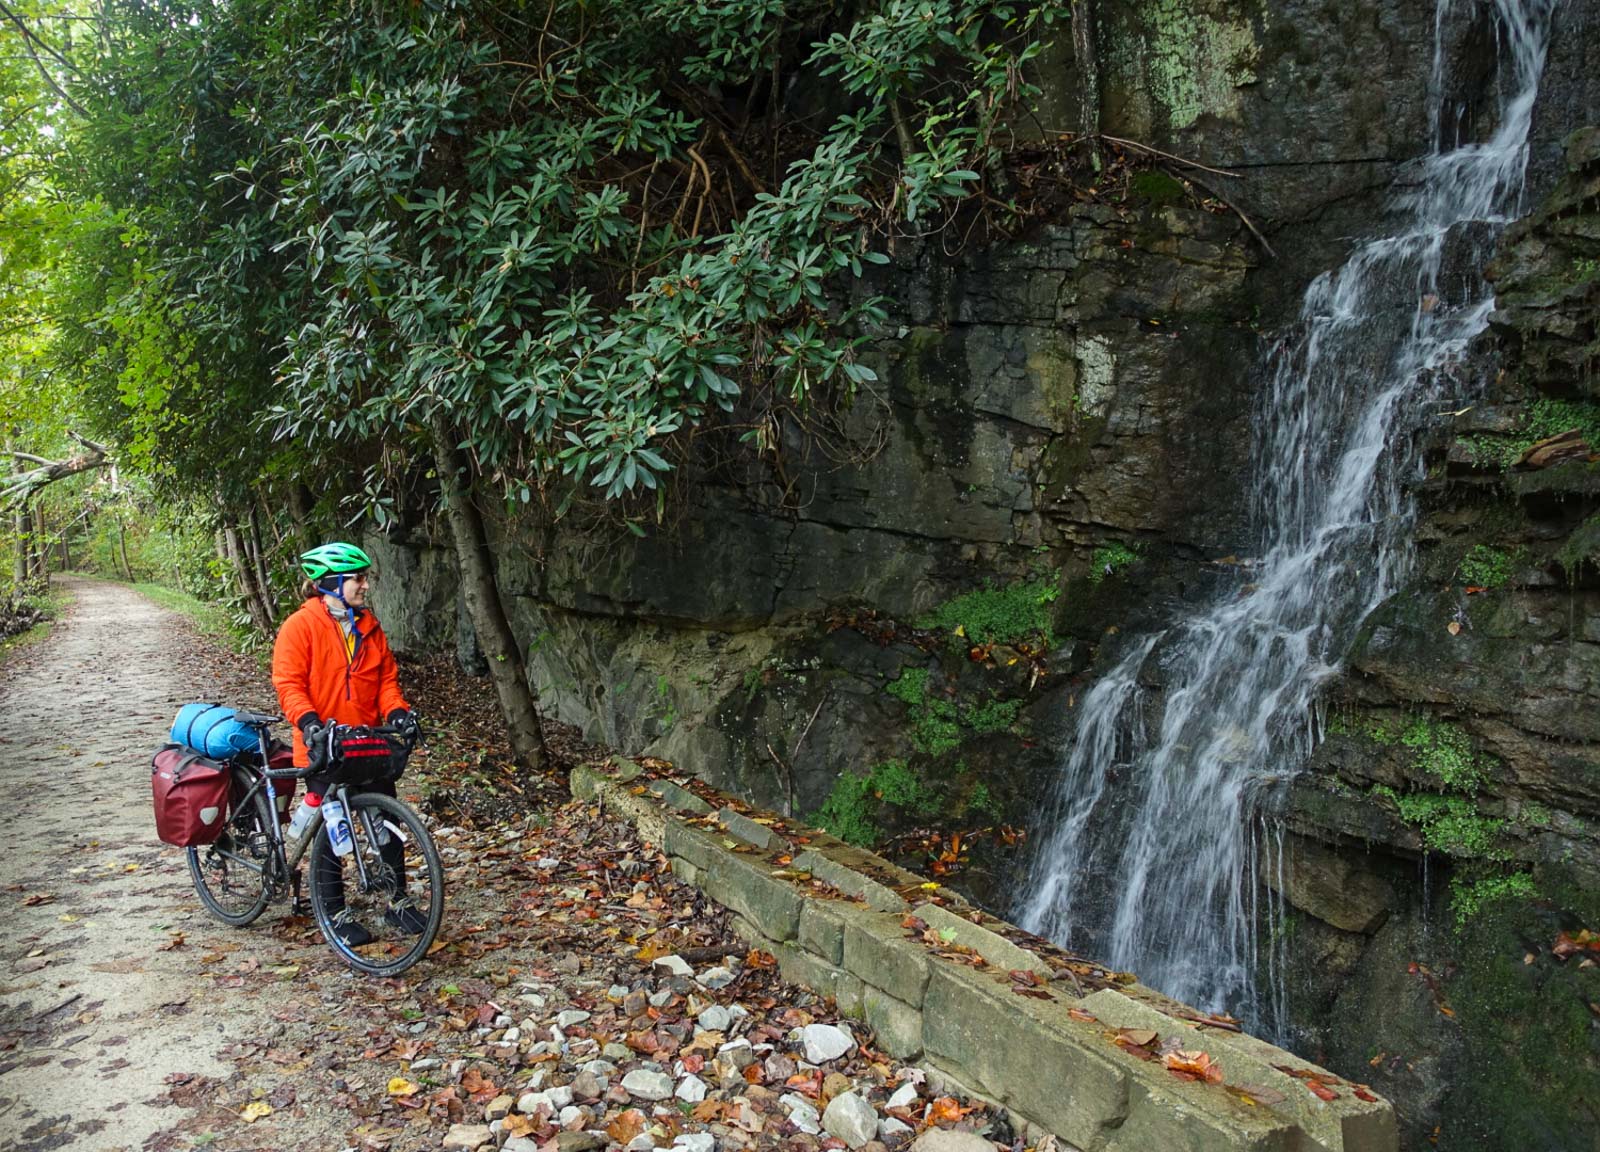
Alison beside a waterfall on the gap trail
We stopped for lunch in West Newton and stayed the night in Connellsville. Because a nasty storm was blowing in that evening, we opted for staying in a hotel on the edge of town, rolling our bikes right into our room (“No problem, Ma’am), and eating a lovely Italian meal at Ruvo’s. Listening to the hail and sleet hit our hotel window that night was nothing short of sublime.
Day 2 Connellsville, PA to Meyersdale, PA [w optional trip to Fallingwater]
57 Miles | 2750 ft ↑ | 1550 ft ↓

Upon leaving Connellsville, you immediately pick up the old Western Maryland RR rails-to-trails conversion, of of many while bikepacking GAP Trail and C&O Canal Trail.

Reading a placard on the old Western Maryland railroad.
It is really Day 2 that you realize you are going uphill. Because it is a gentle grade, the uphill is not very noticeable but in reality, you are climbing to the Eastern Continental Divide to a height of 2392 feet. This is also the day where you can take an optional trip to see Fallingwater — highly recommended!
FALLINGWATER ASIDE: For those not familiar with Fallingwater, this may be Frank Lloyd Wright’s masterpiece. Because of its location, it is not somewhere that you can easily visit–unless you are riding the GAP trail. Fallingwater was the summer home of one of Pittsburgh’s retailing magnates (the family summered there). The home is known as one of the greatest architectural achievements of the 20th century and actually has a waterfall running thru the middle of it (see picture below).
Fallingwater, by Frank Lloyd Wright (this is the photo that everyone takes). It really is this great.
We highly recommend the side trip when Bikepacking GAP Trail and C&O Canal Trails. You will need to make reservations ahead of time and cost is $30/pp. Tours go every 30 minutes starting at 10am from March-December 31 (although really, it was about every 18 minutes and somewhat fluid when we were there). We parked our bikes at Wildness Voyageaurs in Ohiopyle and for $25/person, they shuttled us up and back to Fallingwater. Of course you could bike there, but we were on a somewhat tight schedule and didn’t want to take the extra time.
When you arrive at Ohiopyle, a fairly small town, you will find an abundance of supplies, good restaurants or sandwiches to grab and eat by the river.
We continued on until Meyersdale, at 2,106′ which also had a few options for stores and restaurants. The weather was still colder than expected so again we opted for a B&B that night. Yoder House was very nice and offered a reasonable rate with a fully equipped bike garage.
Day 3 Meyersdale to Paw Paw, WV
60.5 Miles | 1450 ft ↑ | 3000 ft ↓

From Meyersdale, it was only 8 miles and 300’ of easy riding up to Eastern Continental Divide 2392’. As you enter into the tunnel that signifies the E Continental Divide, there is a map painted on the wall showing your route. Here you can easily see how much climbing you have actually done.
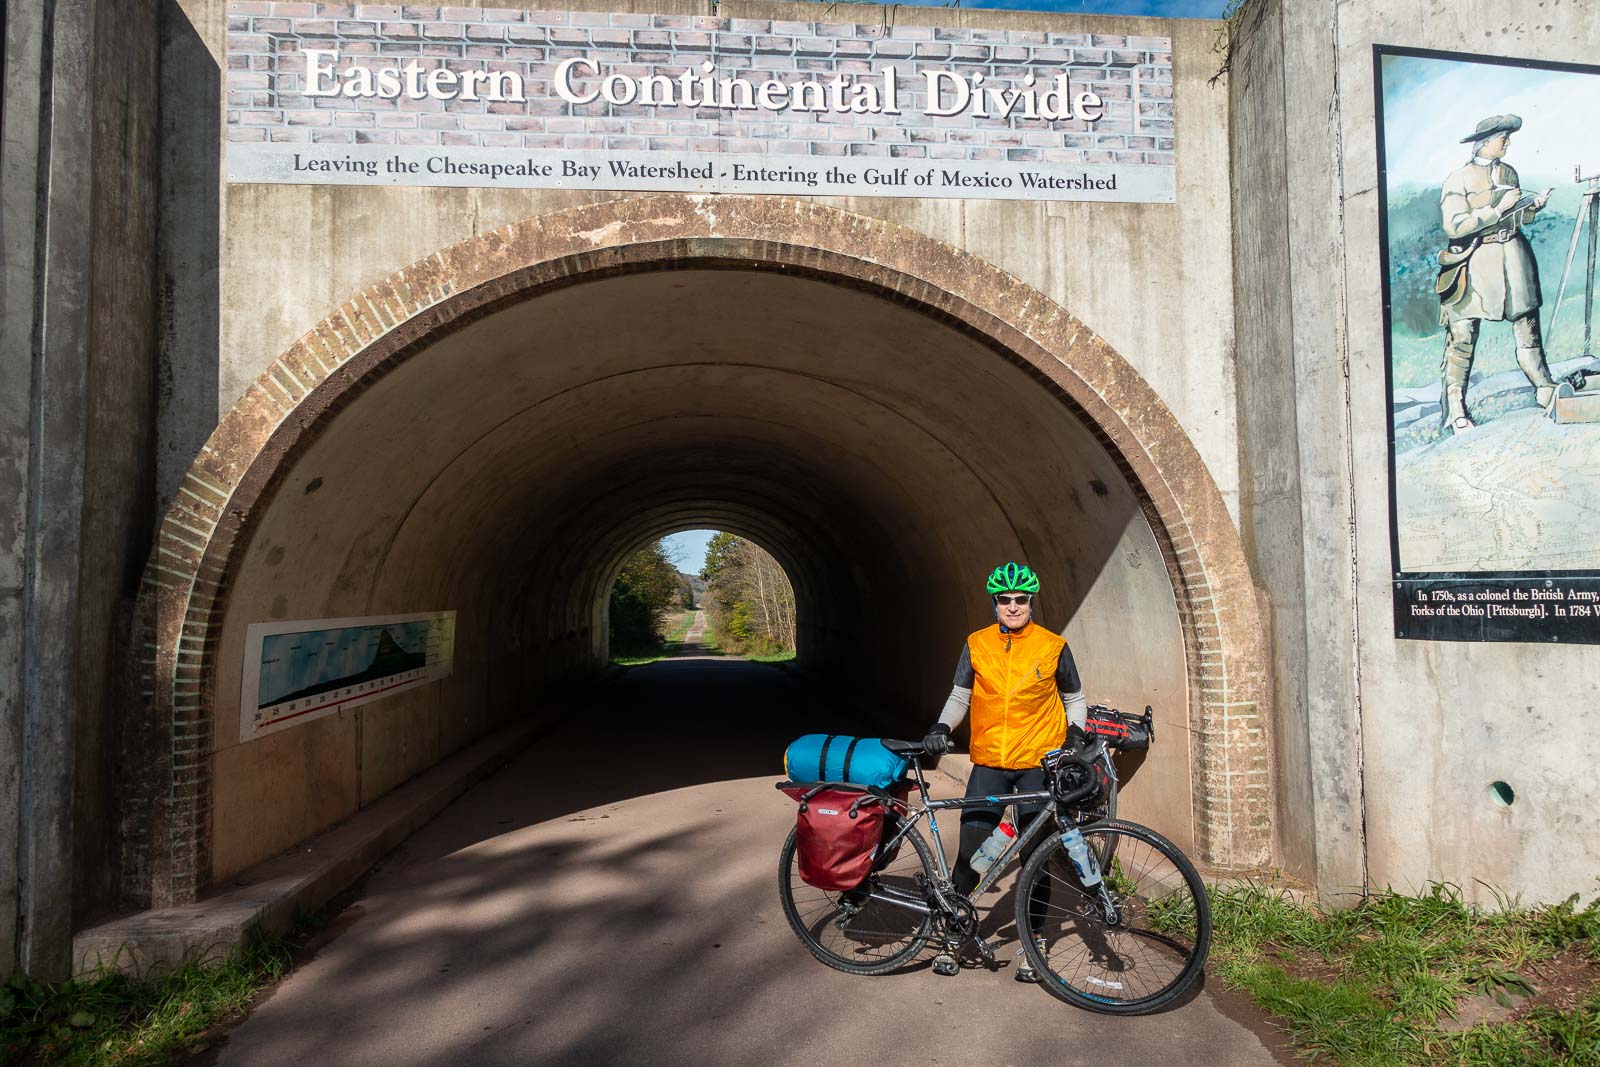
Crossing the Eastern Continental Divide. This is the literally the high point of the trail.
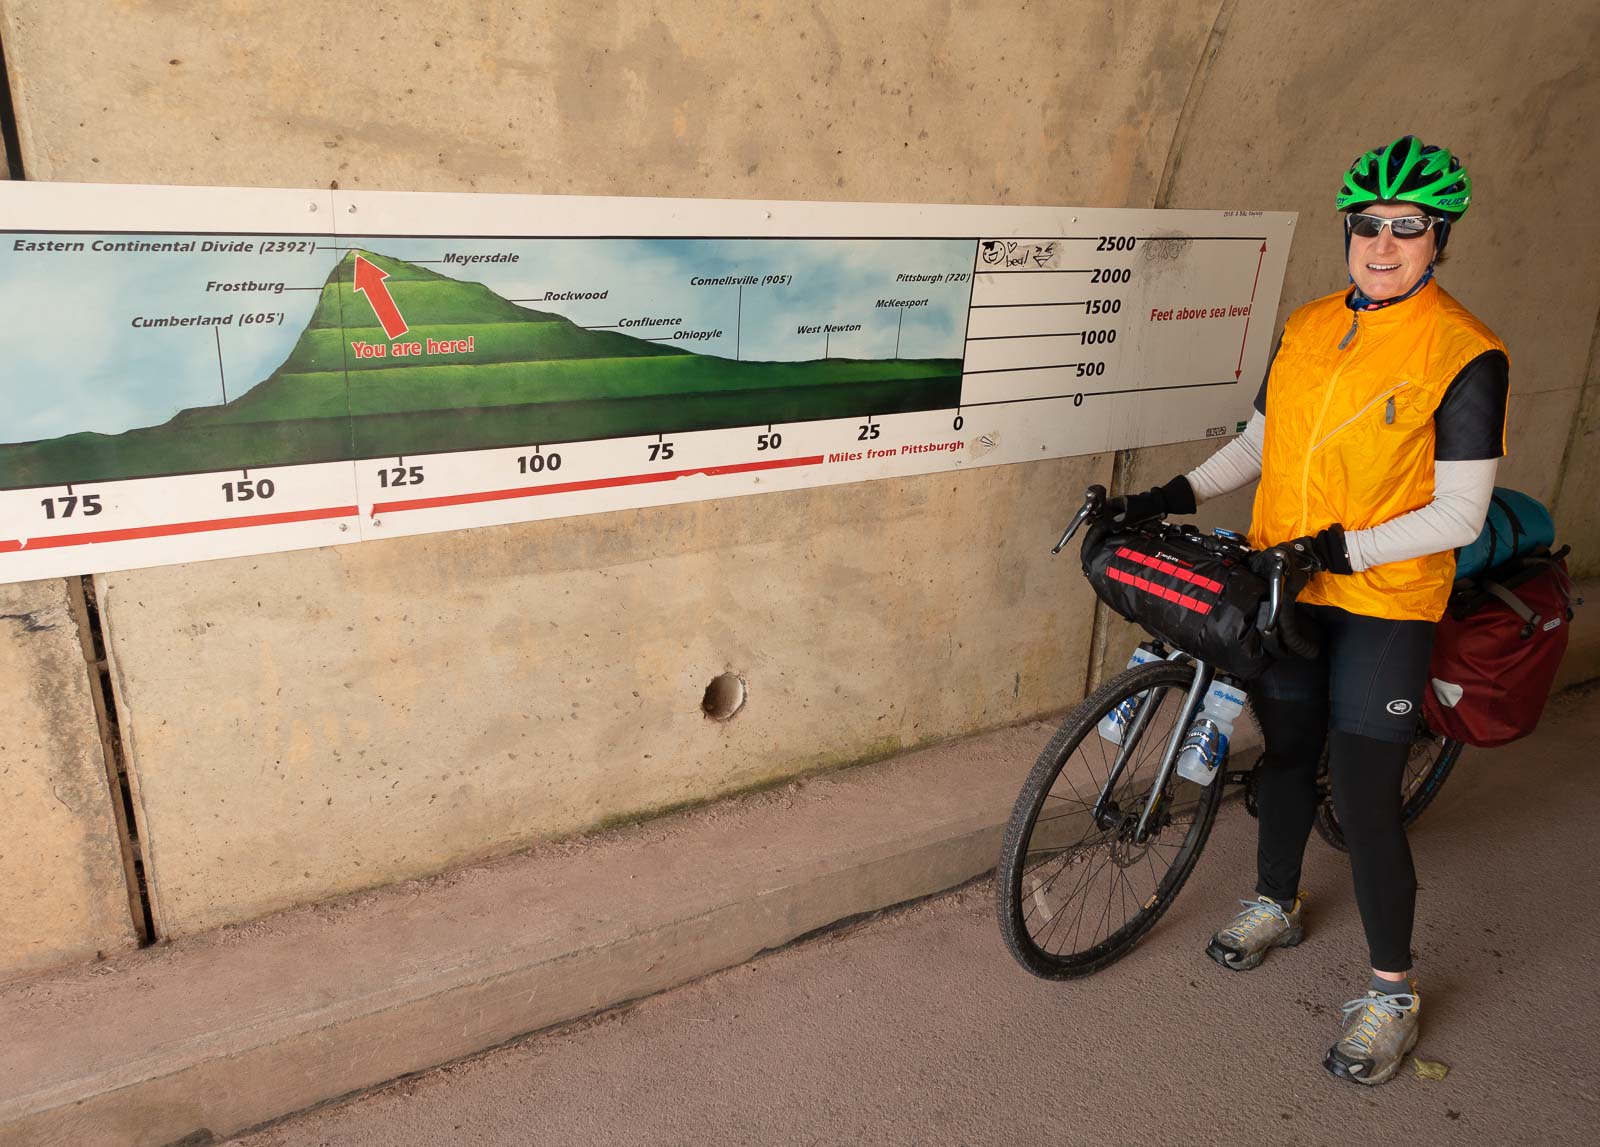
We hadn’t realized how much we climbed to get to this point, and then further realized the bonus downside of this route | Bikepacking GAP Trail and C&O Trail
On the other side of the Divide, it is all downhill until you get to Cumberland — down like a rocket 24 miles and 1800’ to Cumberland (at 605′). Note that you will cross through several tunnels on your downhill.
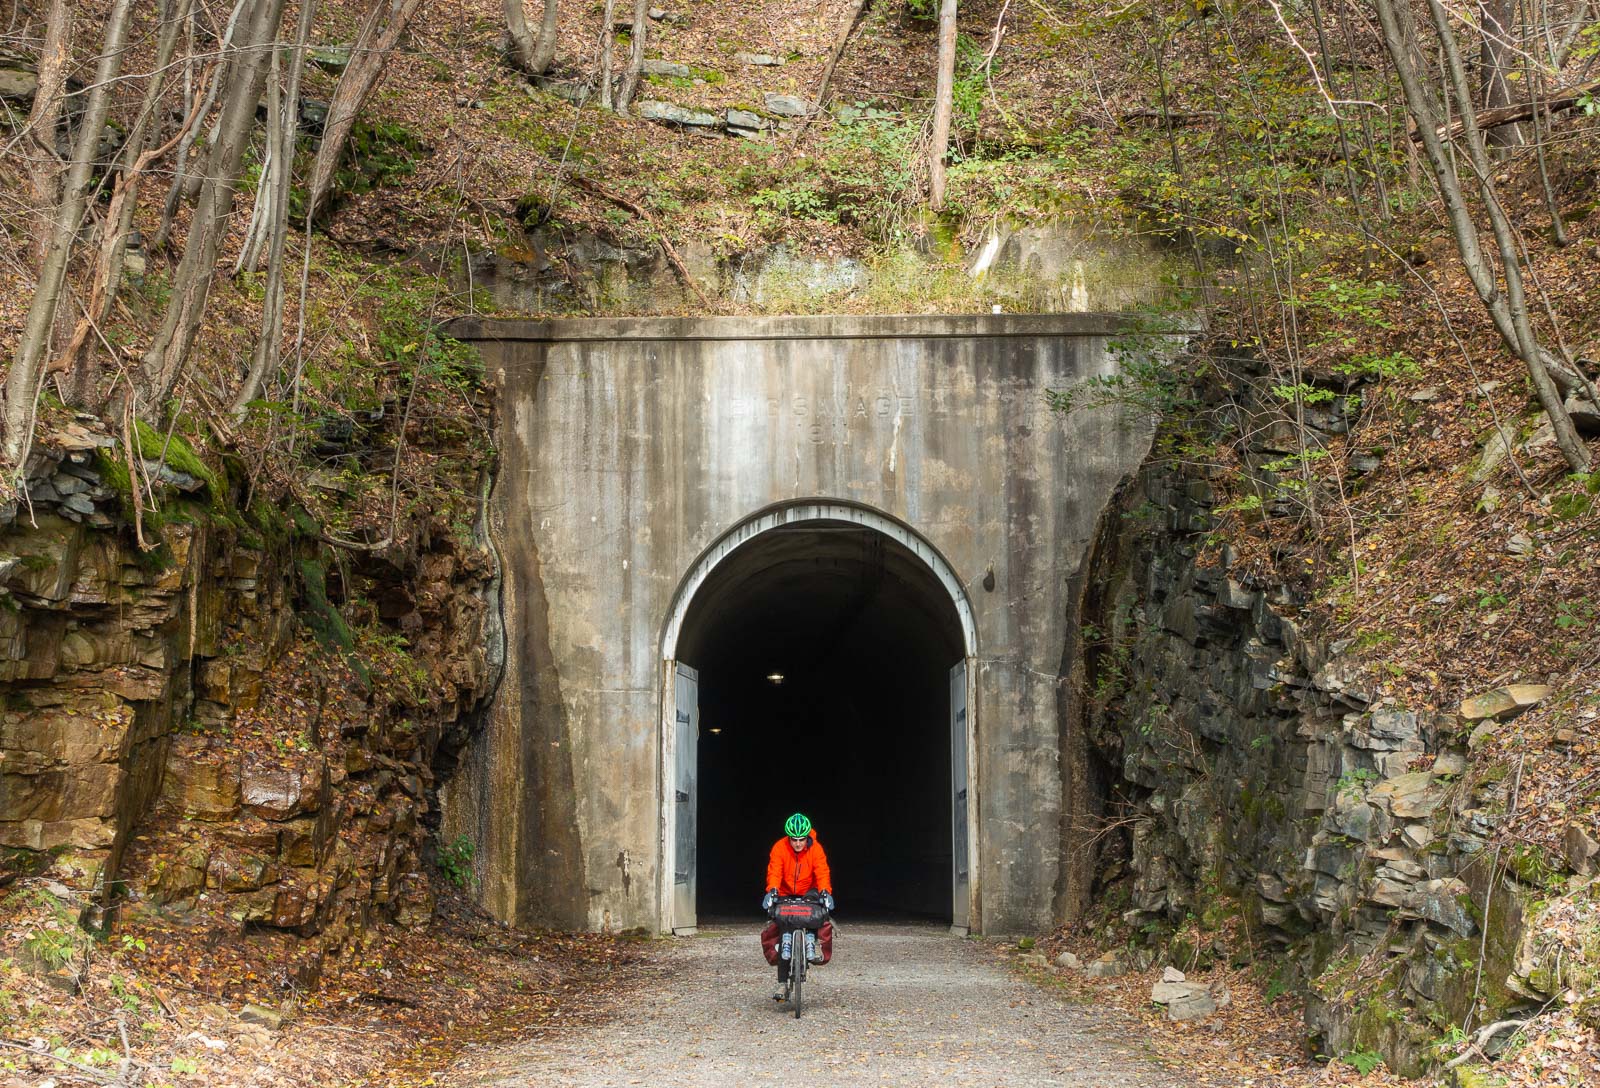
The 3,294 ft long Savage tunnel is closed at the end of the season | Bikepacking GAP Trail and C&O Trail
The Savage tunnel, the longest at 3,294 feet, is well lit. It is also closed between late November and early April. The Borden Tunnel, at about mile 17, is 957 feet and unlit so caution is advised. Most of this downhill trail does not have views and is in the shade of trees.
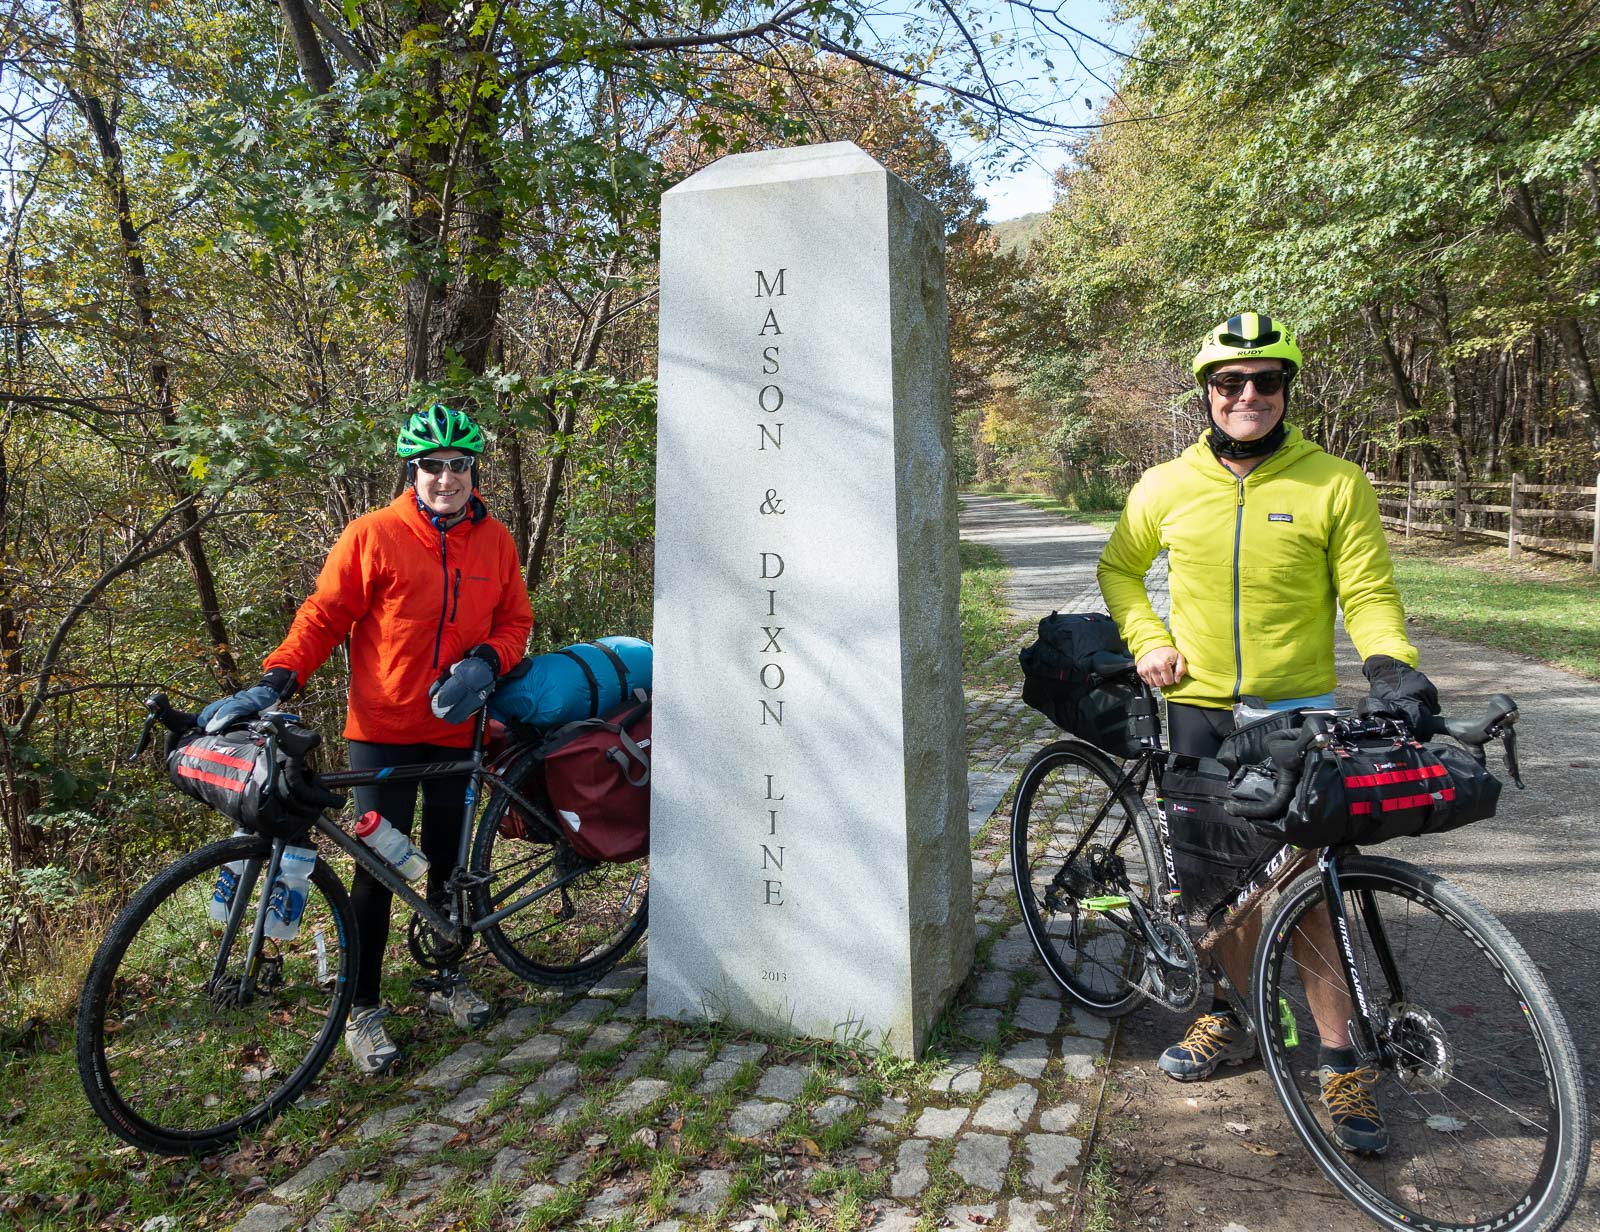
Obligatory stop/photo at the Mason Dixon Line
The other memorable note of the downhill is the Mason Dixon Line around mile 21. Finally, right after Frostburg you are forced to share the trail with the Western Maryland Scenic RR (the only remaining active part of the Western MD RR). In the off season, that’s not a problem but in peak summer, you will need to be cautious as the trail crosses the railroad a number times. The last two miles into Cumberland are paved.
In Cumberland, you have many options. If you are done biking, you can take Amtrak back to Washington, DC. or to Pittsburgh and/or Chicago. If you want to continue onto the C&O Canal, the trail goes right through Cumberland with many options for food, lodging and services. Right at the start of the C&O Canal in Cumberland is a Bike Shop, Cumberland Trail Connections. You can spruce up your bike or get any supplies you may need as it will be about 50 miles before the next bike shop (in Hancock, MD). The good news is that from here on out, your options for NPS campsites become plentiful.
As you head south of Cumberland, although the landscape is pretty, the focus at this point is to get used to the C&O Canal path which is quite different than what you have just been riding on. Just south of Old Town, near lock 68 is the confluence of the north and south forks of the Potomac River. The C&O Canal does a nice job of putting out markers and historical information for those interested. The history of the locks themselves is worth some researching to learn more.
Aside on the Locks: construction on the locks completed in 1850 at Cumberland, MD. It was intended to go all the way to Pittsburgh, PA but was cut short due to the railways. The canal operated from 1831 until 1924 transporting coal to Washington, DC but was closed in 1924 due to the constant flooding that washed away the route. In 1971, the canal was established as a National Historical Park.
Today, there are hiker/biker campsites about every 5-7 miles along the towpath available on a first come, first serve basis. Each campsite has a water pump, picnic area, firepit, and latrine.
We stopped at a campsite in Paw Paw, just shy of the tunnel, spending the night with a group of inner city kids rafting.
Day 4 Paw Paw to South of Williamsport (Opequon Junction)
66 Miles | 550 ft ↑ | 750 ft ↓

Because we were camped very close to the famous Paw Paw tunnel, we came upon it first thing in the morning. It is a very long (3,118 feet) CANAL tunnel (meaning water running in it, see picture below) with a very narrow elevated trail on the side, above the water. There are no lights in tunnel so be sure to have your headlamp handy and go slowly as the elevated trail surface is very uneven. Some may choose to walk their bikes.
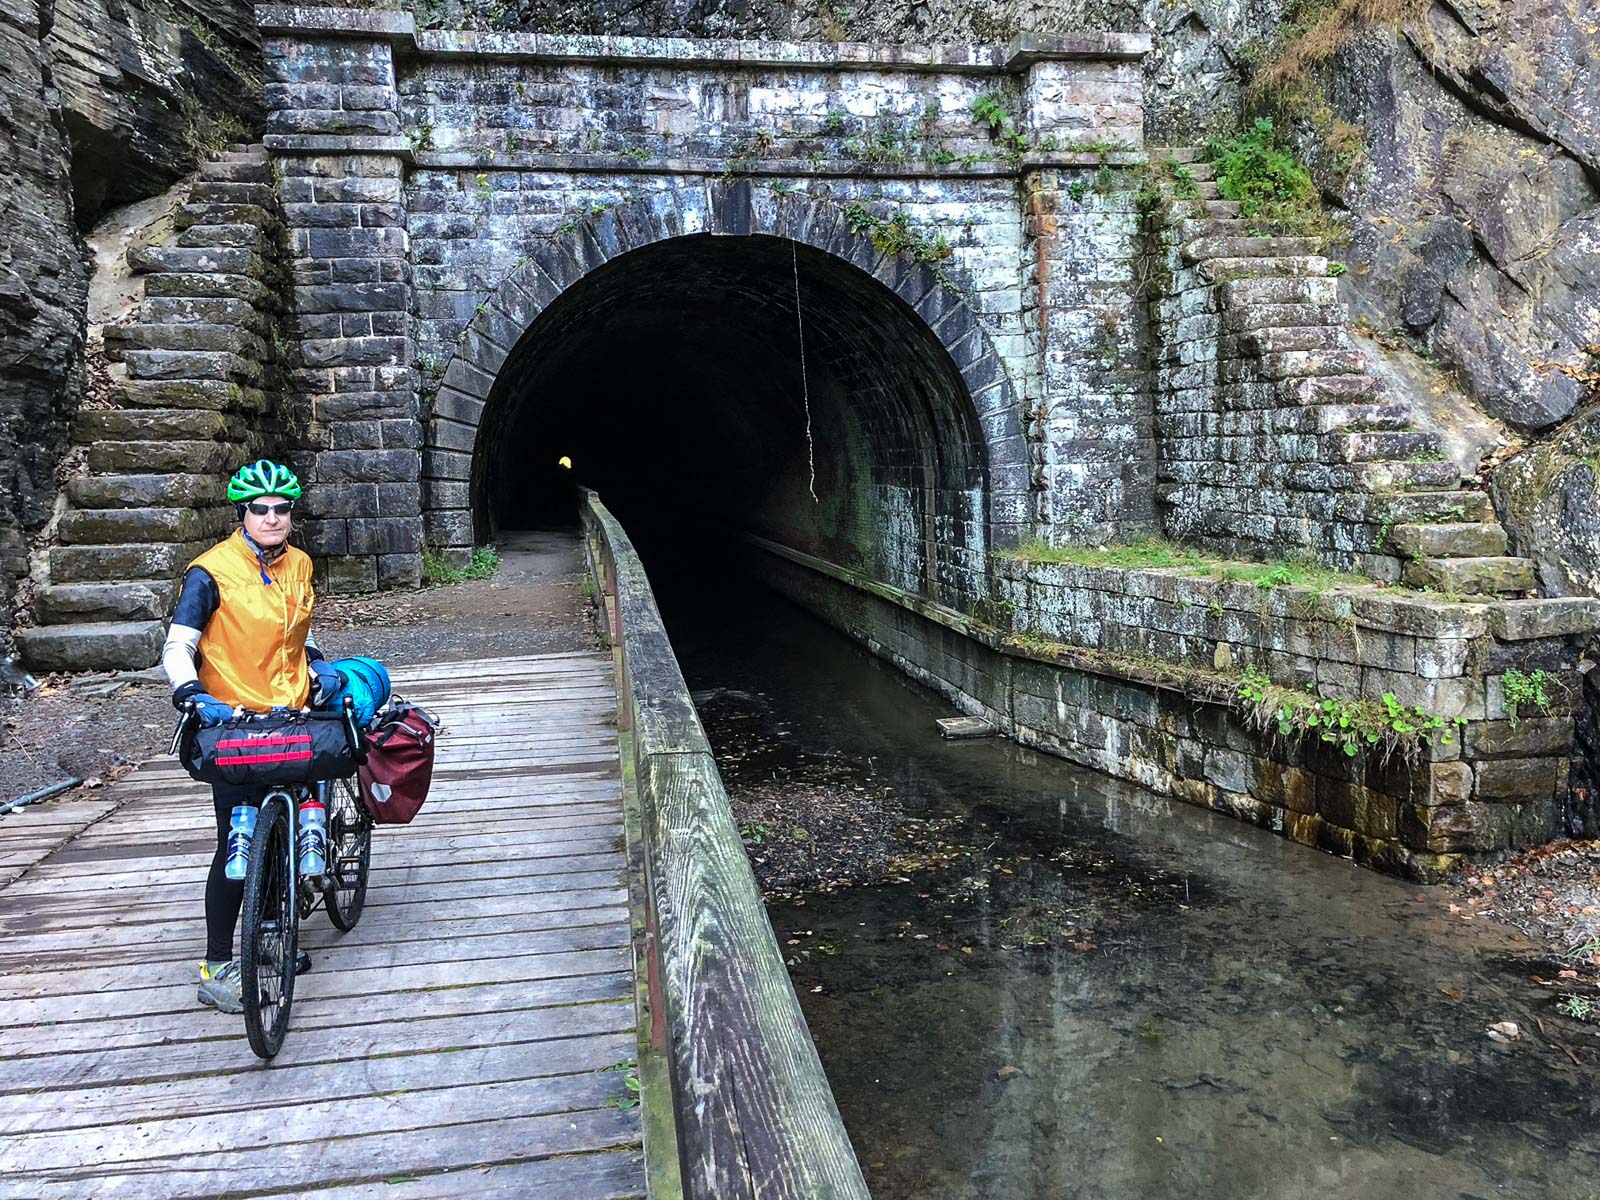
The famous Paw Paw tunnel. Note the canal full of water which means you get to bike on the very small path up against the left wall of the tunnel. The little dot is literally the other end, 3,118 feet away. No lights in this tunnel so BYO.
We had heard of and then saw the detour available around the tunnel although we chose to go through it. We understand this tunnel also closes during the winter months.
Heading out of the Paw Paw tunnel, early morning
The trail south of Paw Paw improved slightly compared to the rest of the C&O canal trail up to that point. What does a rough C&O Canal trail look like? In general, it means rough/wet/muddy sections that required an elevated level of biking handling skills. There is also plenty of debris on the trail that riders need to watch carefully otherwise, you can get sticks stuck in your wheels and drivetrain as we did. What makes all this worse is the blotchy sunlight on the trail such that navigating trail debris, pot holes, tree roots, and large branches in the trail problematic enough to slow ones progress considerably.
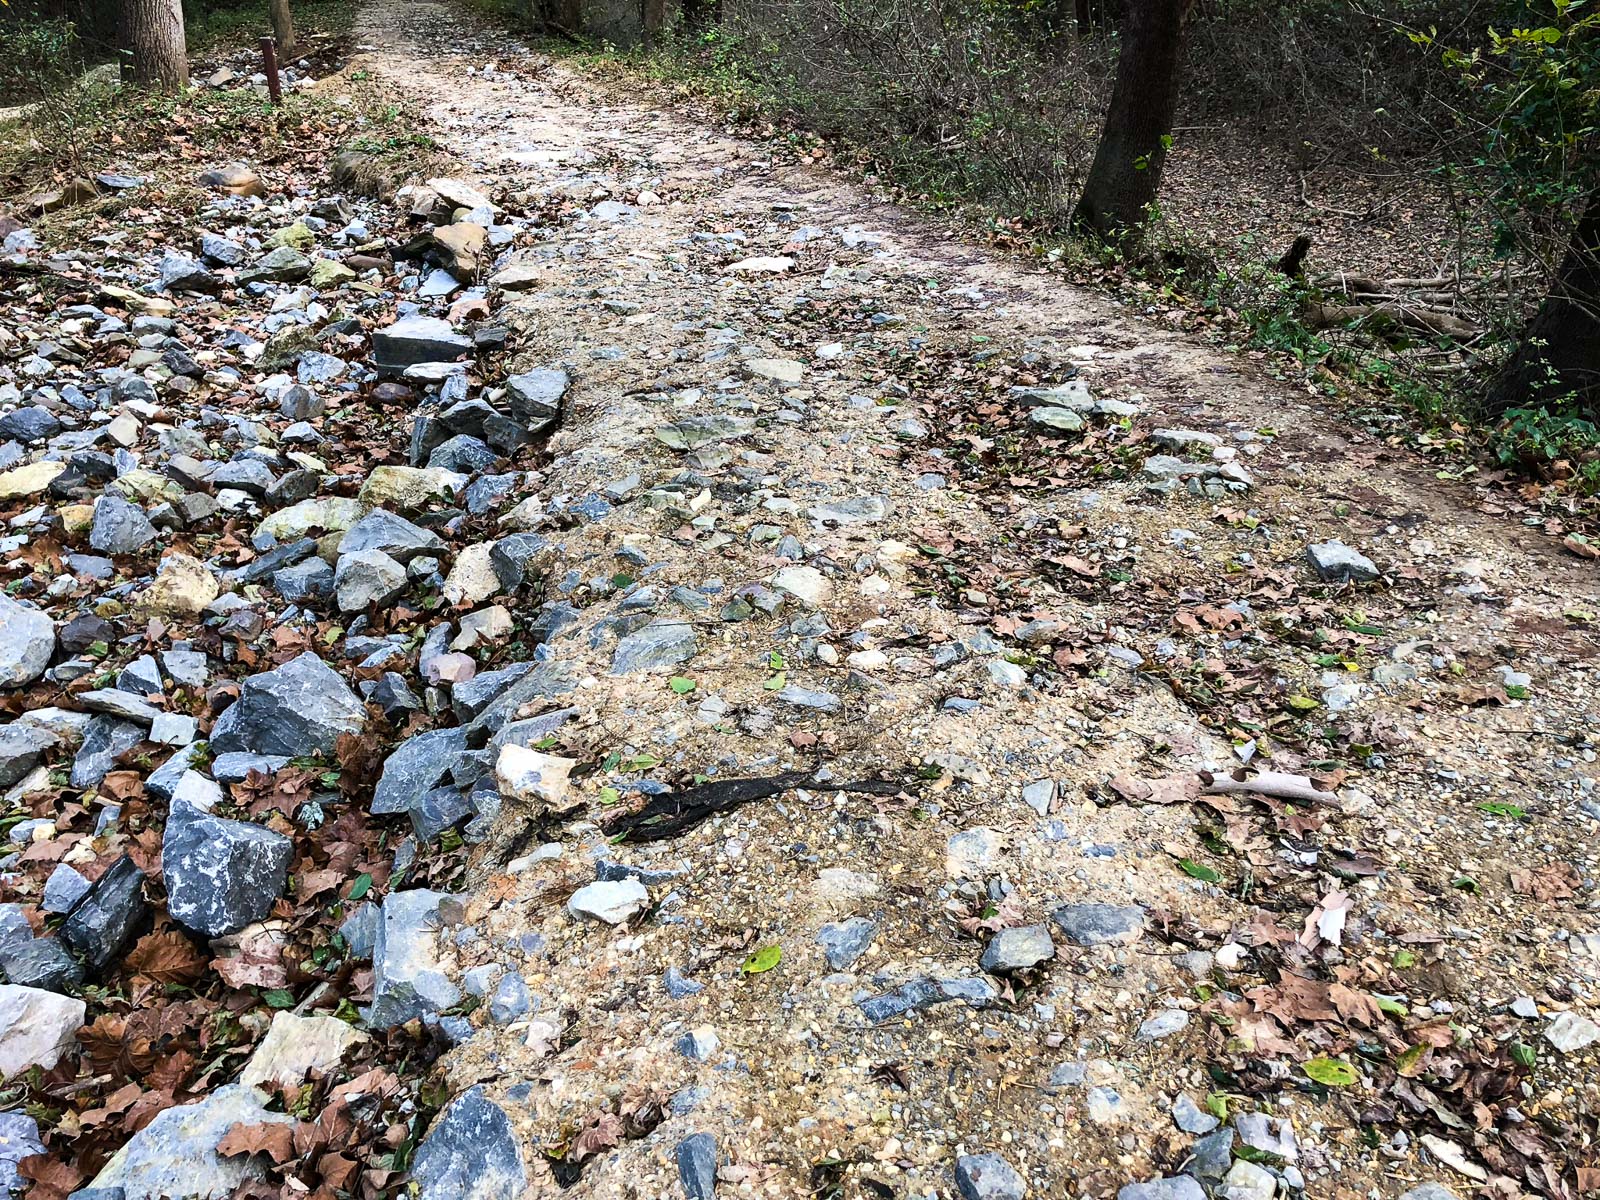
Typical rough C&O Canal trail terrain. Although this is on the rougher end of what you may encounter, it is not unusual to find this on the trail.
Little Orleans is the next ‘big’ town you come to but we missed it completely (even though we were looking for the turnoff), so be careful if you intend to stop here. We instead stopped in the town of Hancock which is directly on the trail. It has a nice bike shop/outdoors store and a nice but quirky restaurant. — Buddy Lou’s. Both are right on the paved path on the far side of the canal.
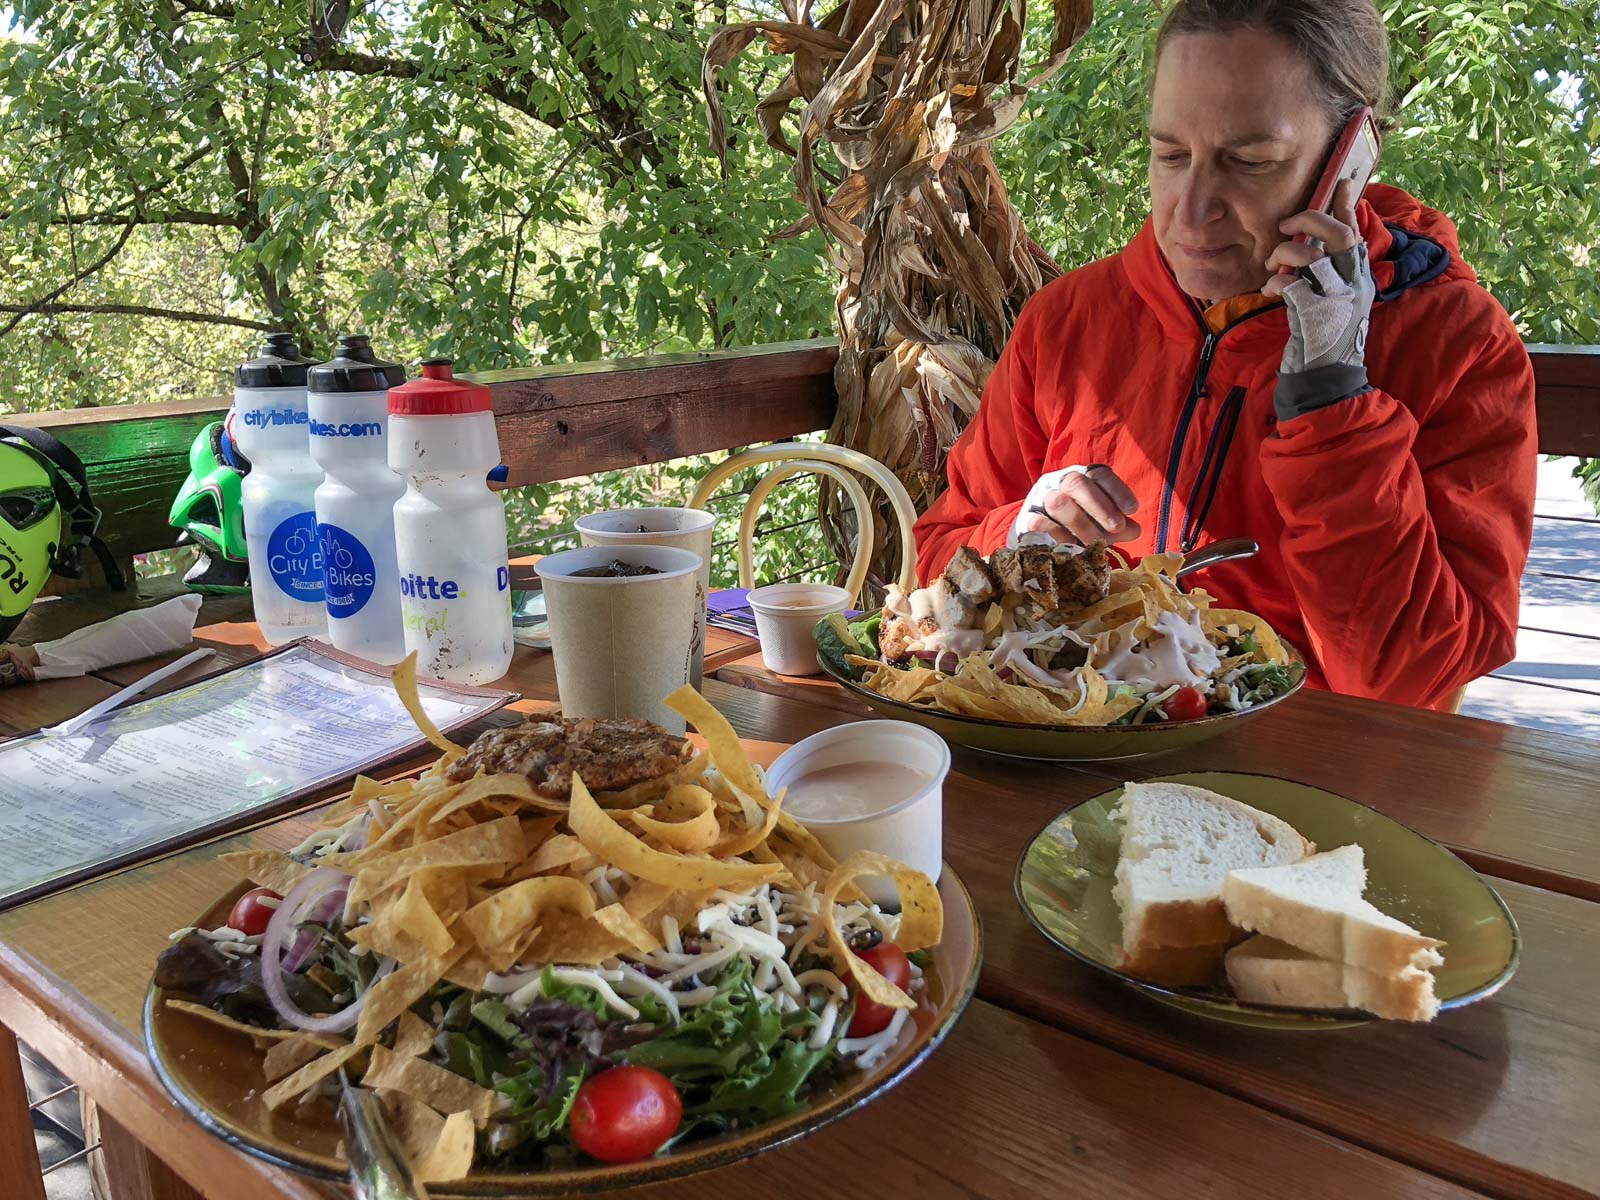
A huge and delicious salad for lunch in Hancock MD. The outdoor deck was lovely at Buddy Lou’s!
If you need a break from the pounding of the C&O Canal’s tough terrain, you are in luck! Just south of Little Orleans, at lock 56 (eventually, the path is supposed to extend to Little Orleans), you can hop the Western Maryland Rail Trail, a paved path which parallels the C&O for about 40ish miles. At some point, the trail will force you back onto the C&O but enjoy it while you can!
Be advised: if you do take the paved path, you will miss the Round Top Cement Mill ruins at Lock 53.
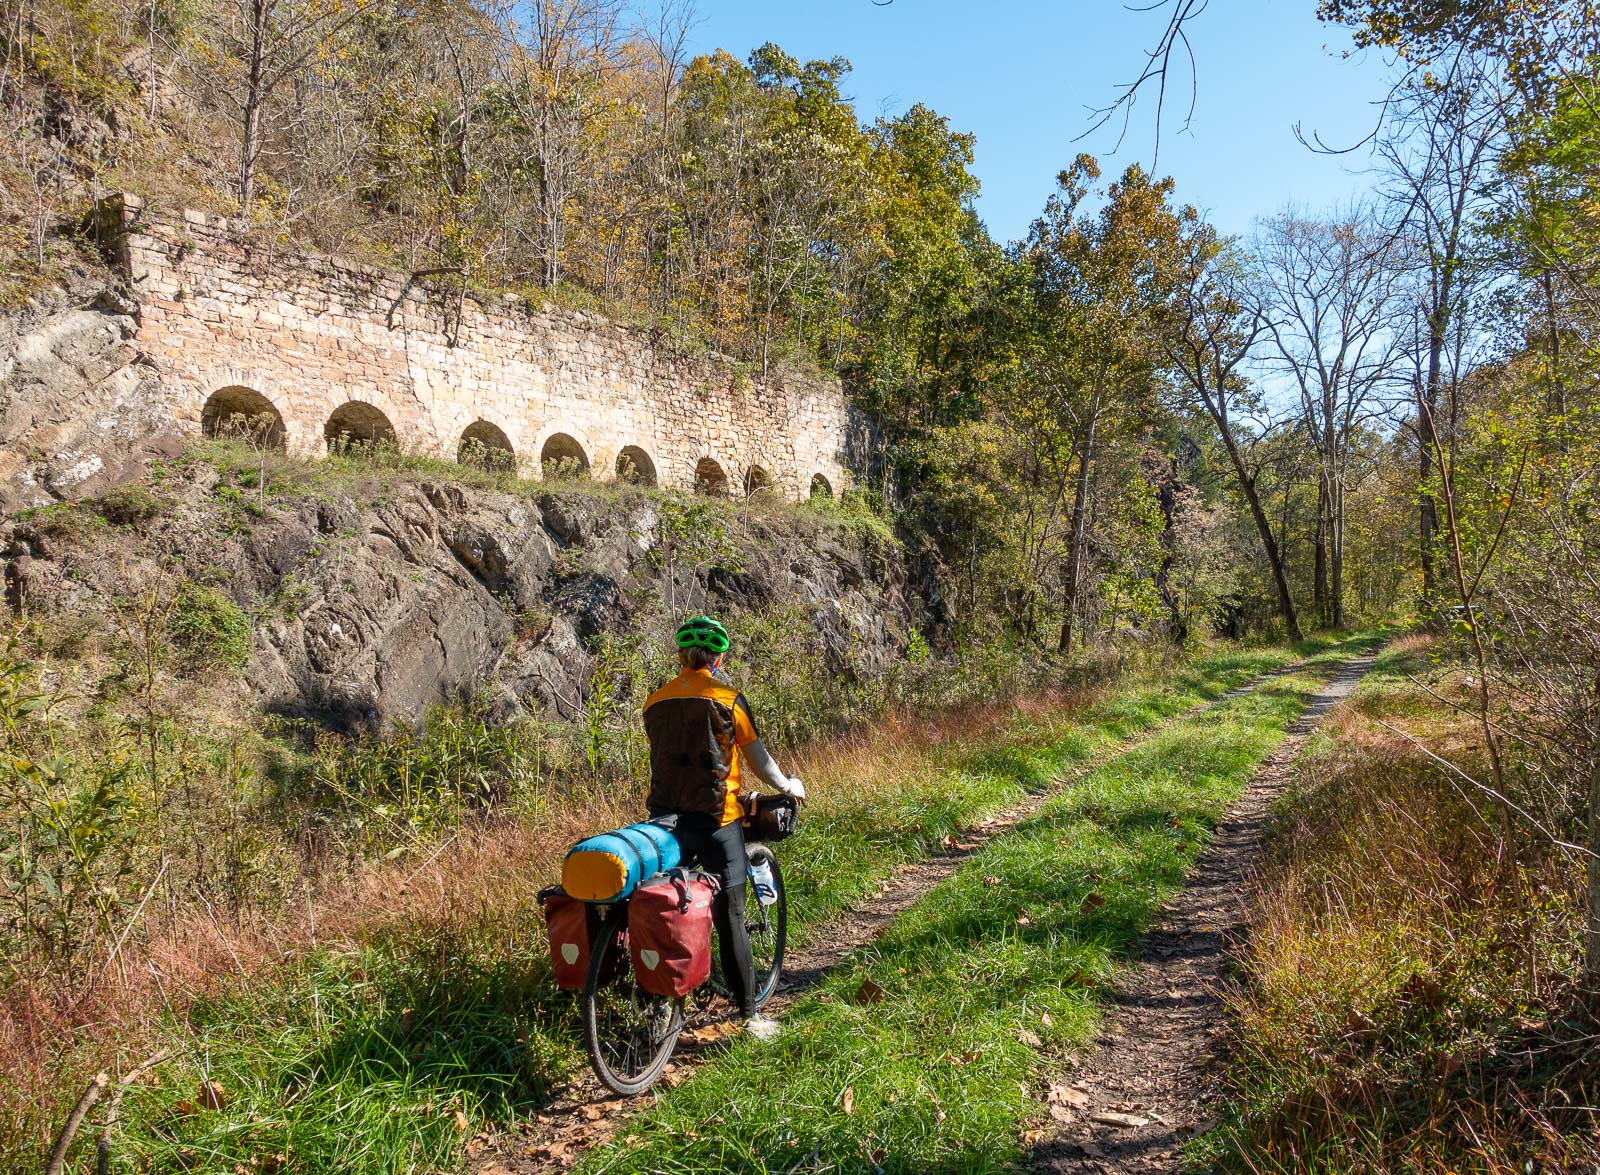
The Round Top Cement Mill ruins at Lock 53. Note the condition of the path is typical for the C&O Canal Trail. If you take the paved path just south of Little Orleans, you will miss these ruins. Then again, you will also miss riding on this path.
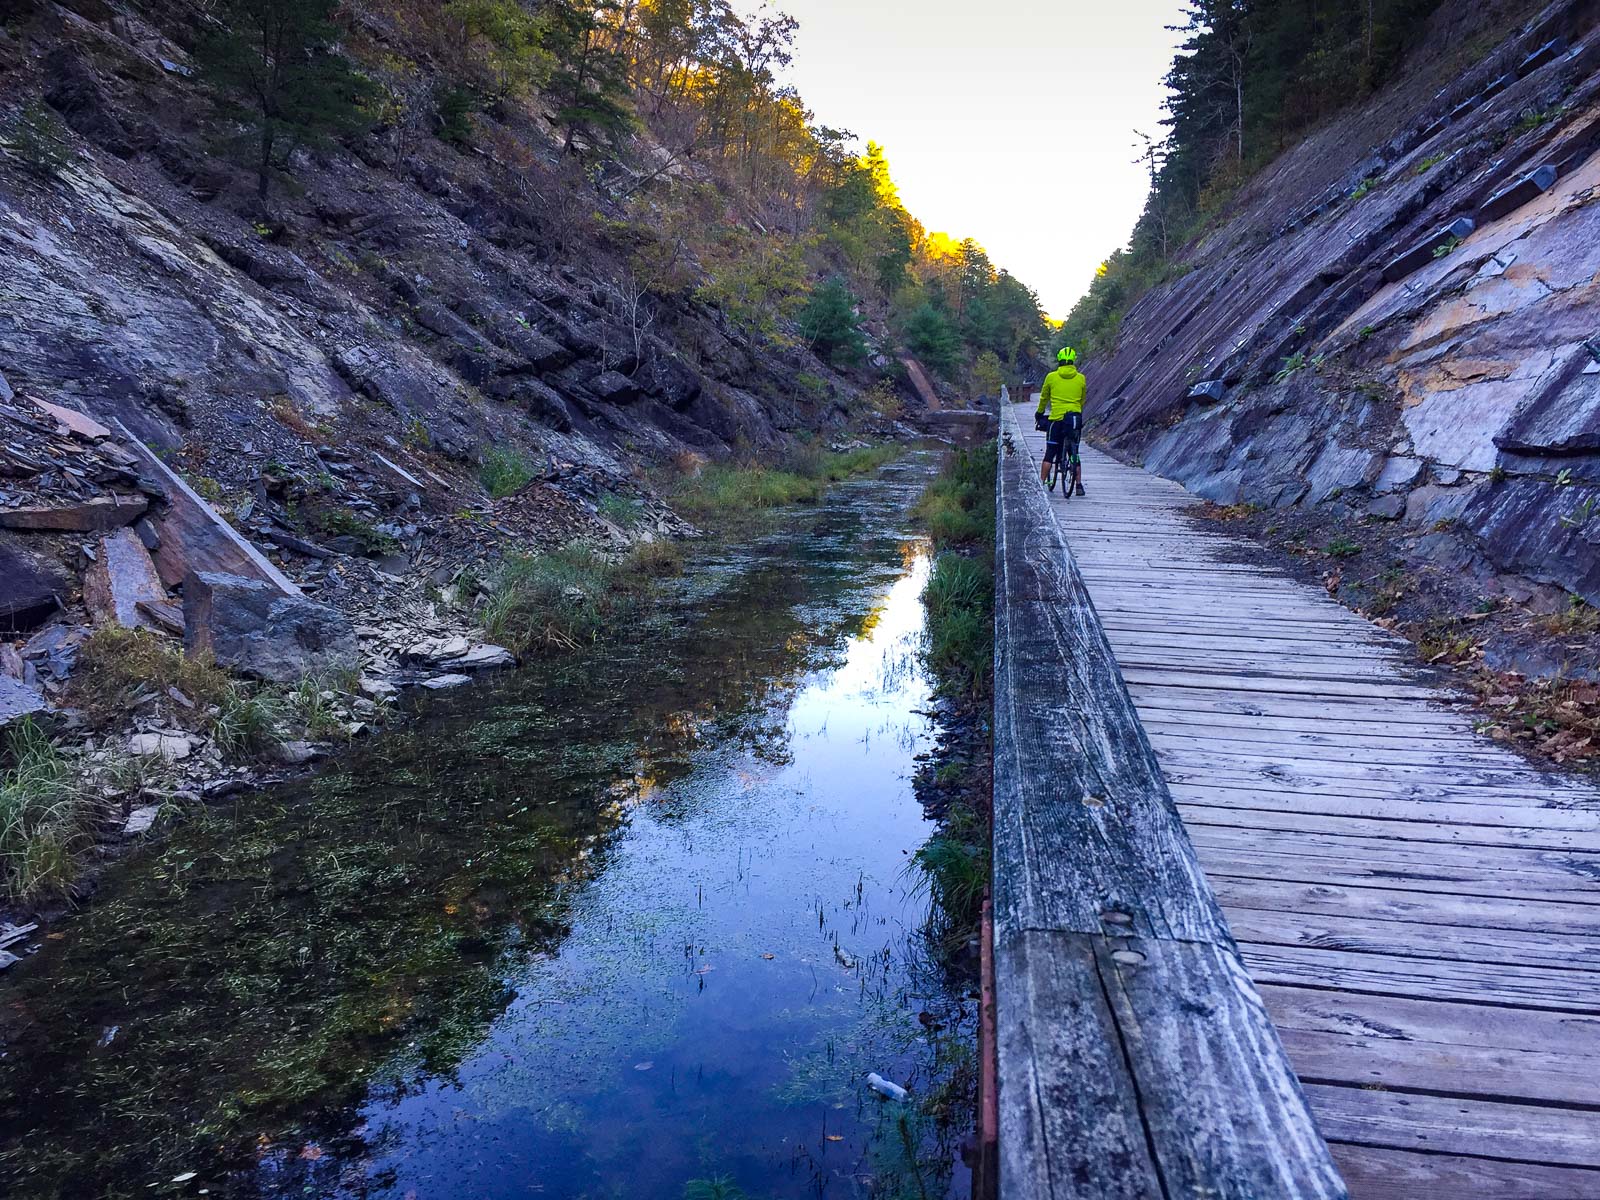
Following that, there is a fun cliff path that goes along the Potomac.
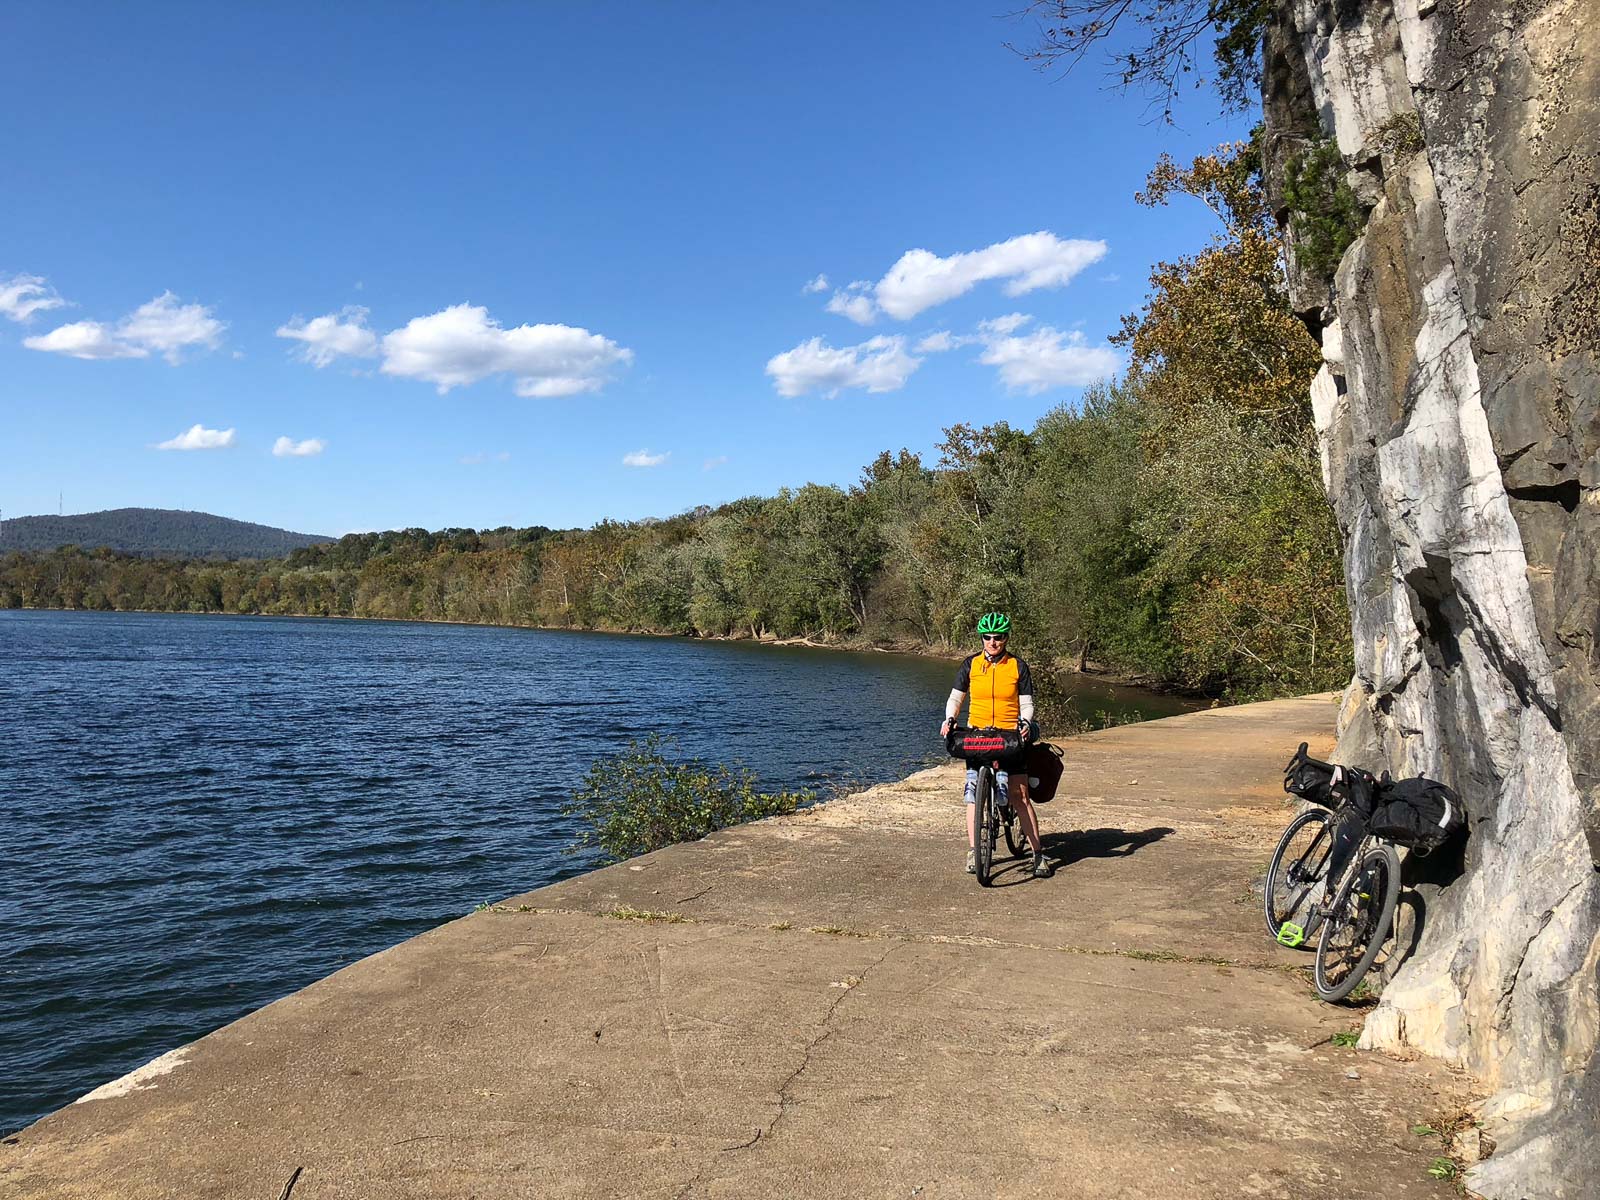
Riding along the cliff cement path next to the Potomac
You will also pass several more options for campsites. McCoys Ferry looked particularly nice, as did the Four Locks area. Lock 43, south of Williamsport is the midpoint of the canal.
Unfortunately, the C&O Canal goes under construction from time to time resulting in long detours. We found one in Williamsport which had us detouring uphill and through the center of town. Although a bit longer of a route, it allowed us to grab sandwiches at the Desert Rose Cafe in downtown Williamsport which was a treat along with the pumpkin bread.
After Williamsport, we found the path to be recently flooded and was therefore very bumpy and uneven to traverse. We camped at the Opequon Junction Campsite that night.
Days 5 and 6 | Opequon Junction to Washington DC
90 Miles | 850 ft ↑ | 1150 ft ↓ (most will split this into two days)

Options for Days 5 and 6
90 miles is a lot to do in one day. Fortunately there are a number of ways to split this up into two days. One option is to bike a short Day 5 to Harper’s Ferry (which has many advantages, including spending an afternoon and night exploring the town and getting a good meal). Then get up early the next morning and make the 70 mile push to DC. One way to shorten this long last day would be to have the shuttle (see more information below) take you directly from Harper’s Ferry to the Catoctin Aqueduct. This avoids the hazardous detour from Brunswick to the Catoctin Aqueduct (which appears to be permanent closure where you can either use a shuttle or ride on the road). With the shuttle, your last day would become a more manageable 51 miles.
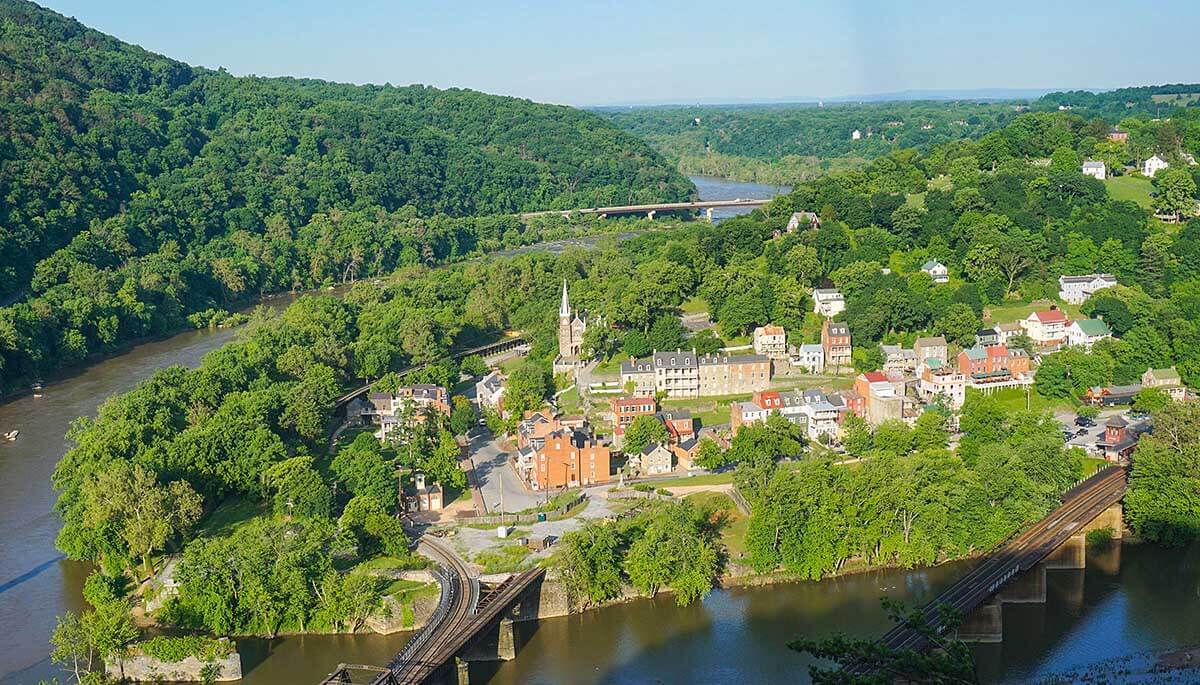
Harpers Ferry, WV is well worth an overnight stay and exploration. “Harpers Ferry National Historical Park is considered one of the best walking parks in America. The views are sublime, the history compelling, the restored town a work of historical art.” (from the National Park Service Website). You can get this great view from the highly recommended hike up to Overlook Cliffs via the Maryland Heights Trail.
But many folks may want to camp on Day 5 at one of the numerous campsites between Opequon Junction and Washington DC. Note that once you pass Brunswick MD, food and lodging options along the trail become extremely scarce (although you could detour off the trail to them).
Note: Part of what made this trip especially sweet for us is that on Day 5 we rode our bikes back to our home in Washington DC. We just took a left on the Capital Crescent Trail to Bethesda Maryland and on to Northern DC. As such, we also cut off some of the day’s mileage vs. riding all the way into Georgetown DC. Even so it was a very long day, and we would only recommend this to very fit bikers with trail hardened butts.
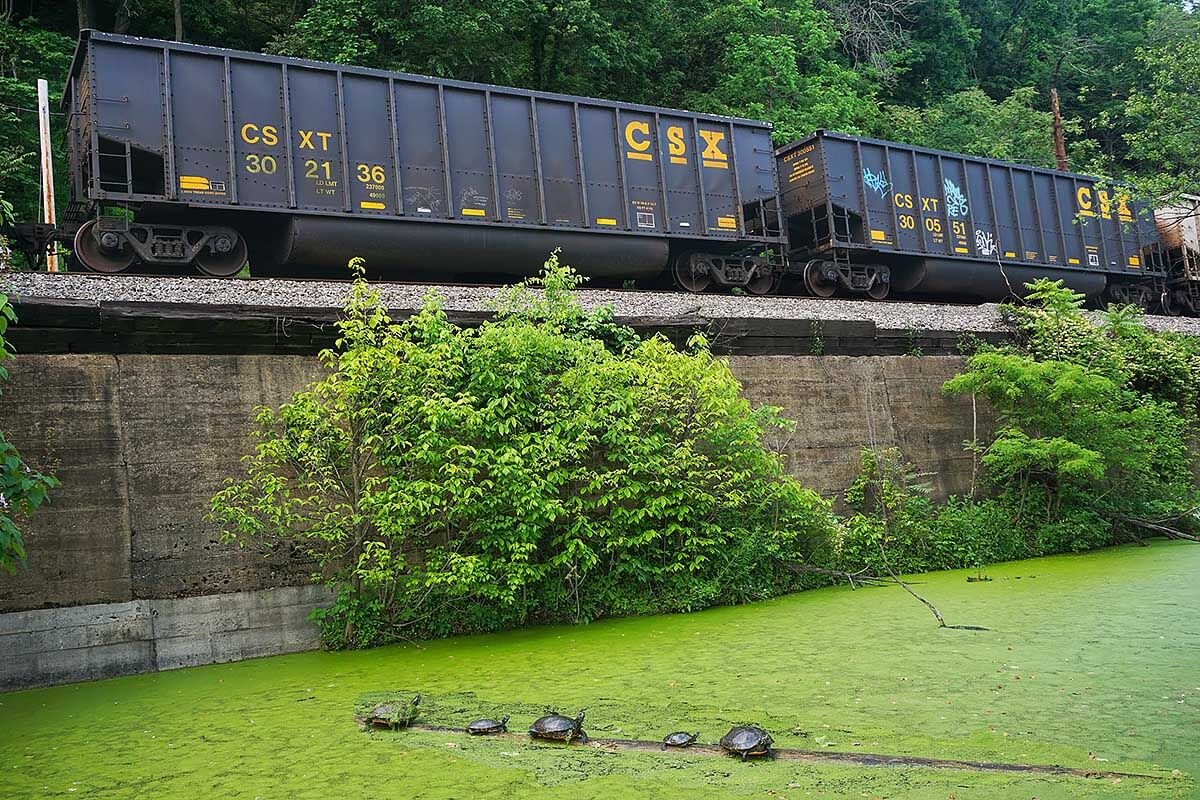
Turtles in the historic Chesapeake & Ohio Canal on the Way from Harper’s Ferry to Brunswick, MD.
Route Description
This last day we ran into two major detours. The first was right out of camp in Opequon Junction. The signs were difficult to follow and at some point, we had to turn to our phones to guide us back to the trail. All-in-all, it was about a 10 mile detour which luckily, only took us 1-2 miles out of the way, but was truly frustrating as the detour signs just ended at some point. We understand this section is now “somewhat open.” That is the Park Services says: “Big Slackwater: Dam #4 – Burnside Farm (Milepost 84.4 – MP 90.0) Open, This section is open but be prepared for muddy and slick conditions caused by river silt.” We would take this message seriously and still consider taking the detour.
Antietam Battlefield National Park is worth a side trip.
This is also the day you will pass by Antietam (the historic civil war battle field), which had a lovely campsite. If you are so inclined, it is a quick side trip to the actual battle field. From there, you pass through Shepherdstown, WV. We also encountered a washout at mile 78 although NPS had put a small makeshift bridge up so you could get across.
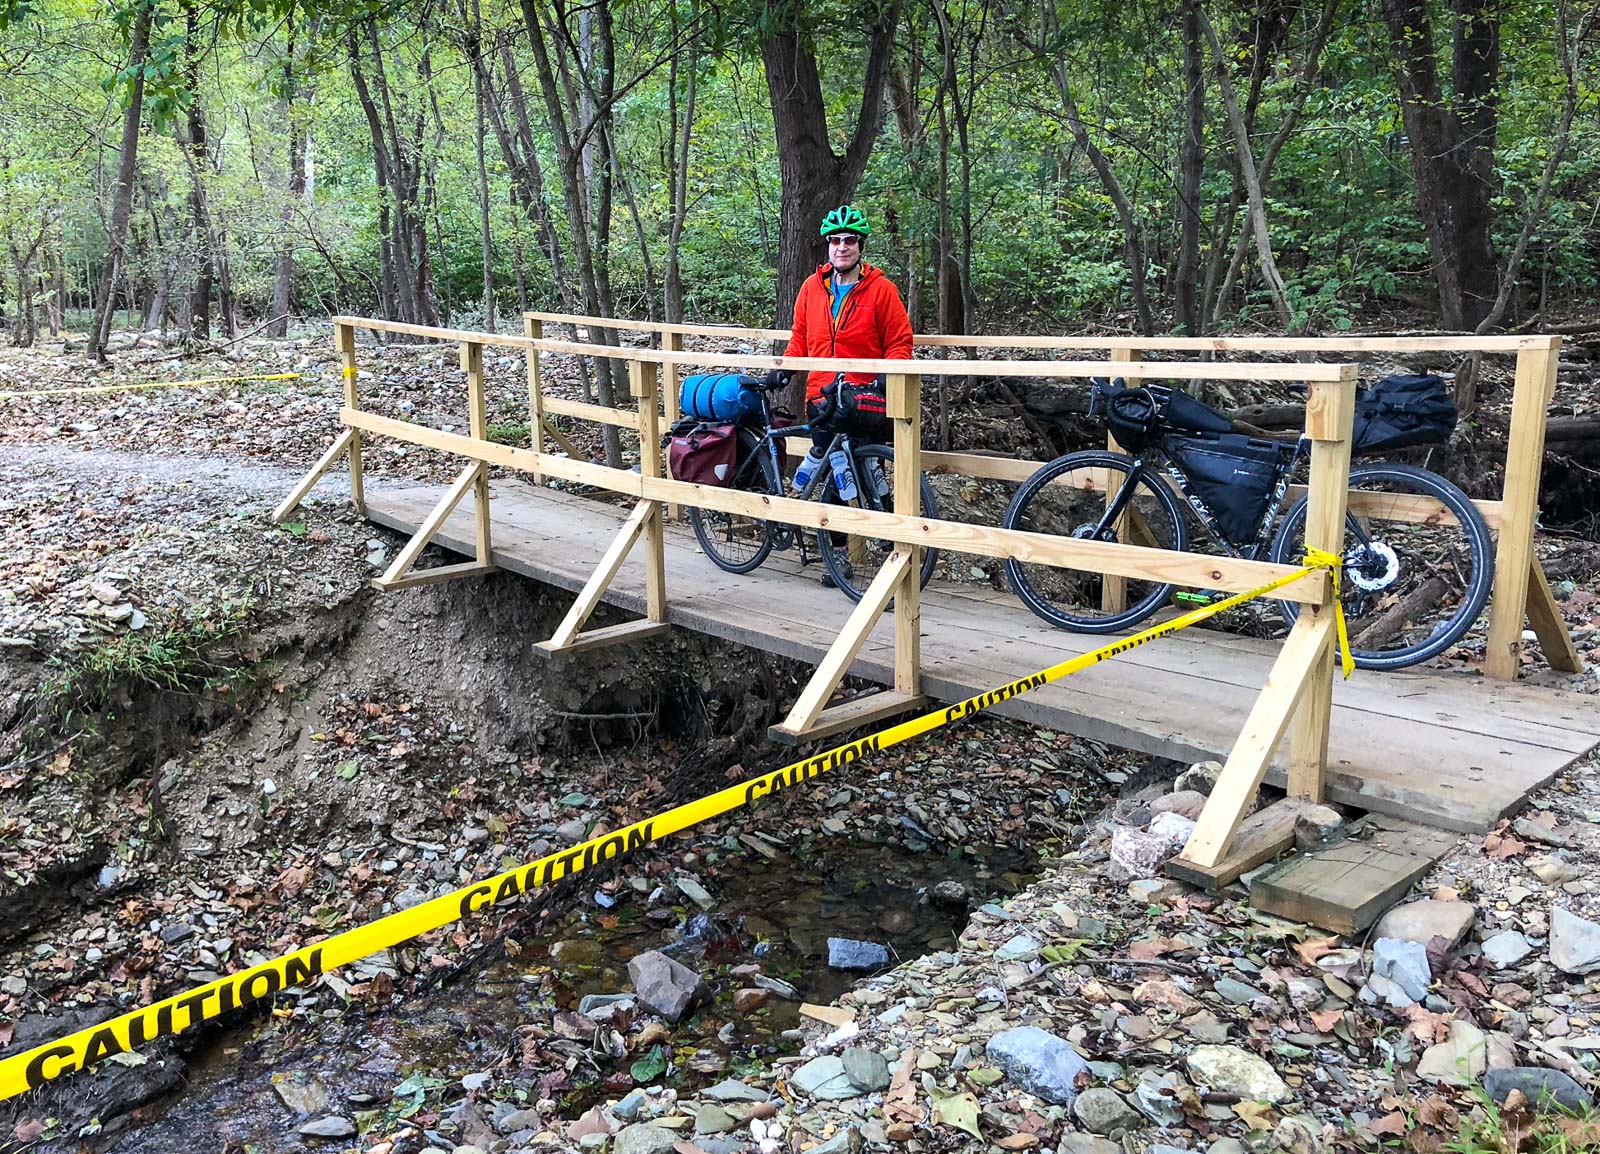
NPS recently constructed this bridge to cross a washed out section of trail.
Between Shepherdstown and Harper’s Ferry, the path was about as bad as we encountered the entire trip. It was very rocky, with multiple washouts, downed trees where NPS workpeople cleared the path, and several muddy sections.
By the time you get to Harper’s Ferry, WV, you may be done for the day. Harper’s Ferry is always worth a stop with great shops, lots of history, and beautiful scenery. Note that the stairs up to the pedestrian bridge to Harper’s Ferry are steep and difficult to maneuver with a loaded touring bike. Some people (especially those with very loaded/heavy bikes) lock their bikes on the canal side and walk over although we would strongly recommend taking your bags and valuables into town with you.
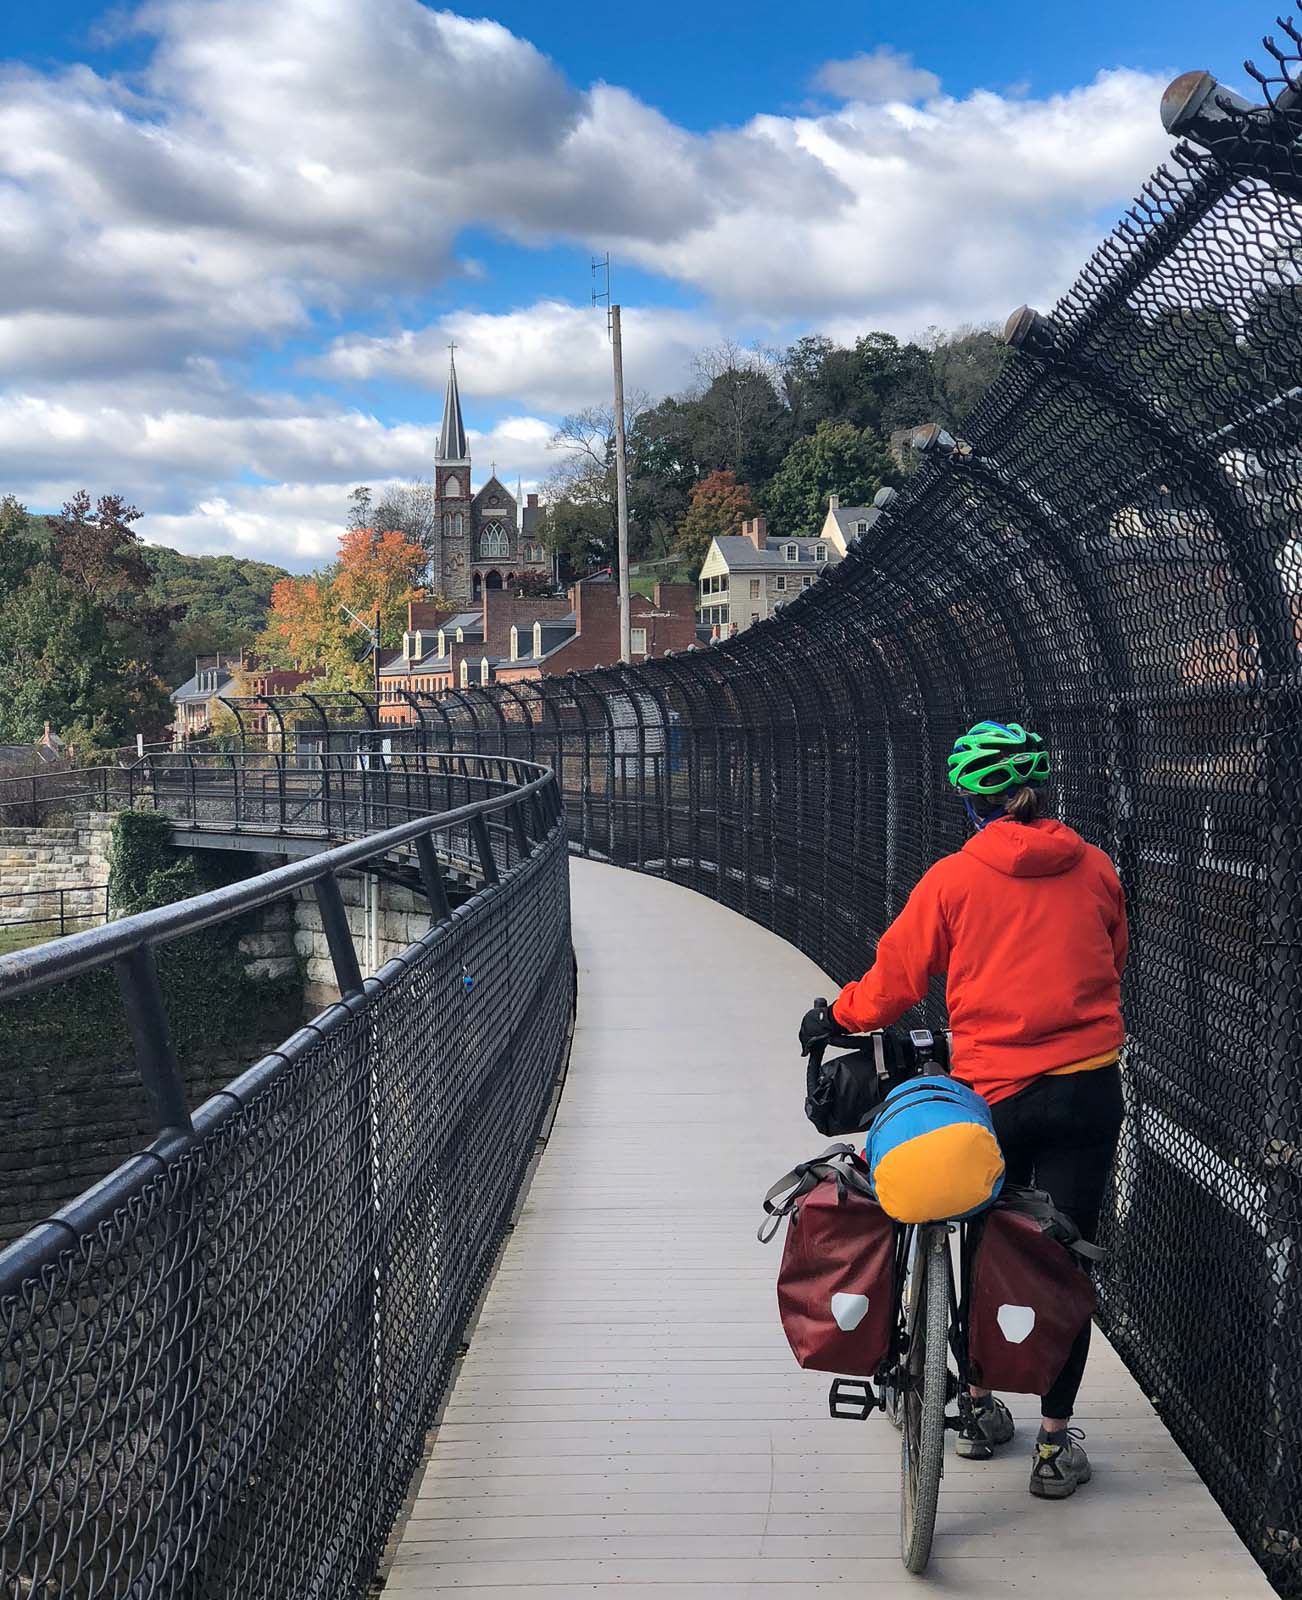
Crossing the Potomac River via pedestrian bridge into historic Harper’s Ferry
We opted to continue into Washington DC which meant hitting yet another major detour, this one dangerous. From the NPS website:
- Catoctin Aqueduct- Brunswick Family Campground (MP 51.5–MP 54) Towpath Closed. Due to a washout. There is no detour in place at this time due to unsafe conditions on adjacent roadways. From the west, exit the towpath at Brunswick (MP 55), or from the east at Lander Lock 29 (MP 50.9). Please contact Shepherdstown Pedal and Paddle at 304-876-3000 or River and Trail Outfitters at 301-834-9950 to arrange for a shuttle around the detour. Due to repeated flood events, attempts to install a temporary bridge have been halted. The park is working on a long-term solution.
What makes this detour unsafe is that the “re-route” (which is included in our GPX track for the trip) goes along some busy roads with high speed traffic, in particular Point of Rocks Road. To complicate matters it is fairly hilly which means that some of the time you will be going slowly uphill on a loaded bike with high speed traffic passing you. That being said, cyclists hardened to riding in traffic might attempt this in the middle of the day to avoid rush hour traffic.
This detour makes the last day even longer but such detours are part of the C&O Canal trip and our best advice is to closely watch, and then plan for them on the NPS CO & Canal Web Page. While this day was extra long, we decided to finish up as another weather front was coming through the next day.
On your way back to DC make sure you stop at Great Falls for incredible views. (It’s accessed by a series of bridges and boardwalks leading out to Olmsted Island.)
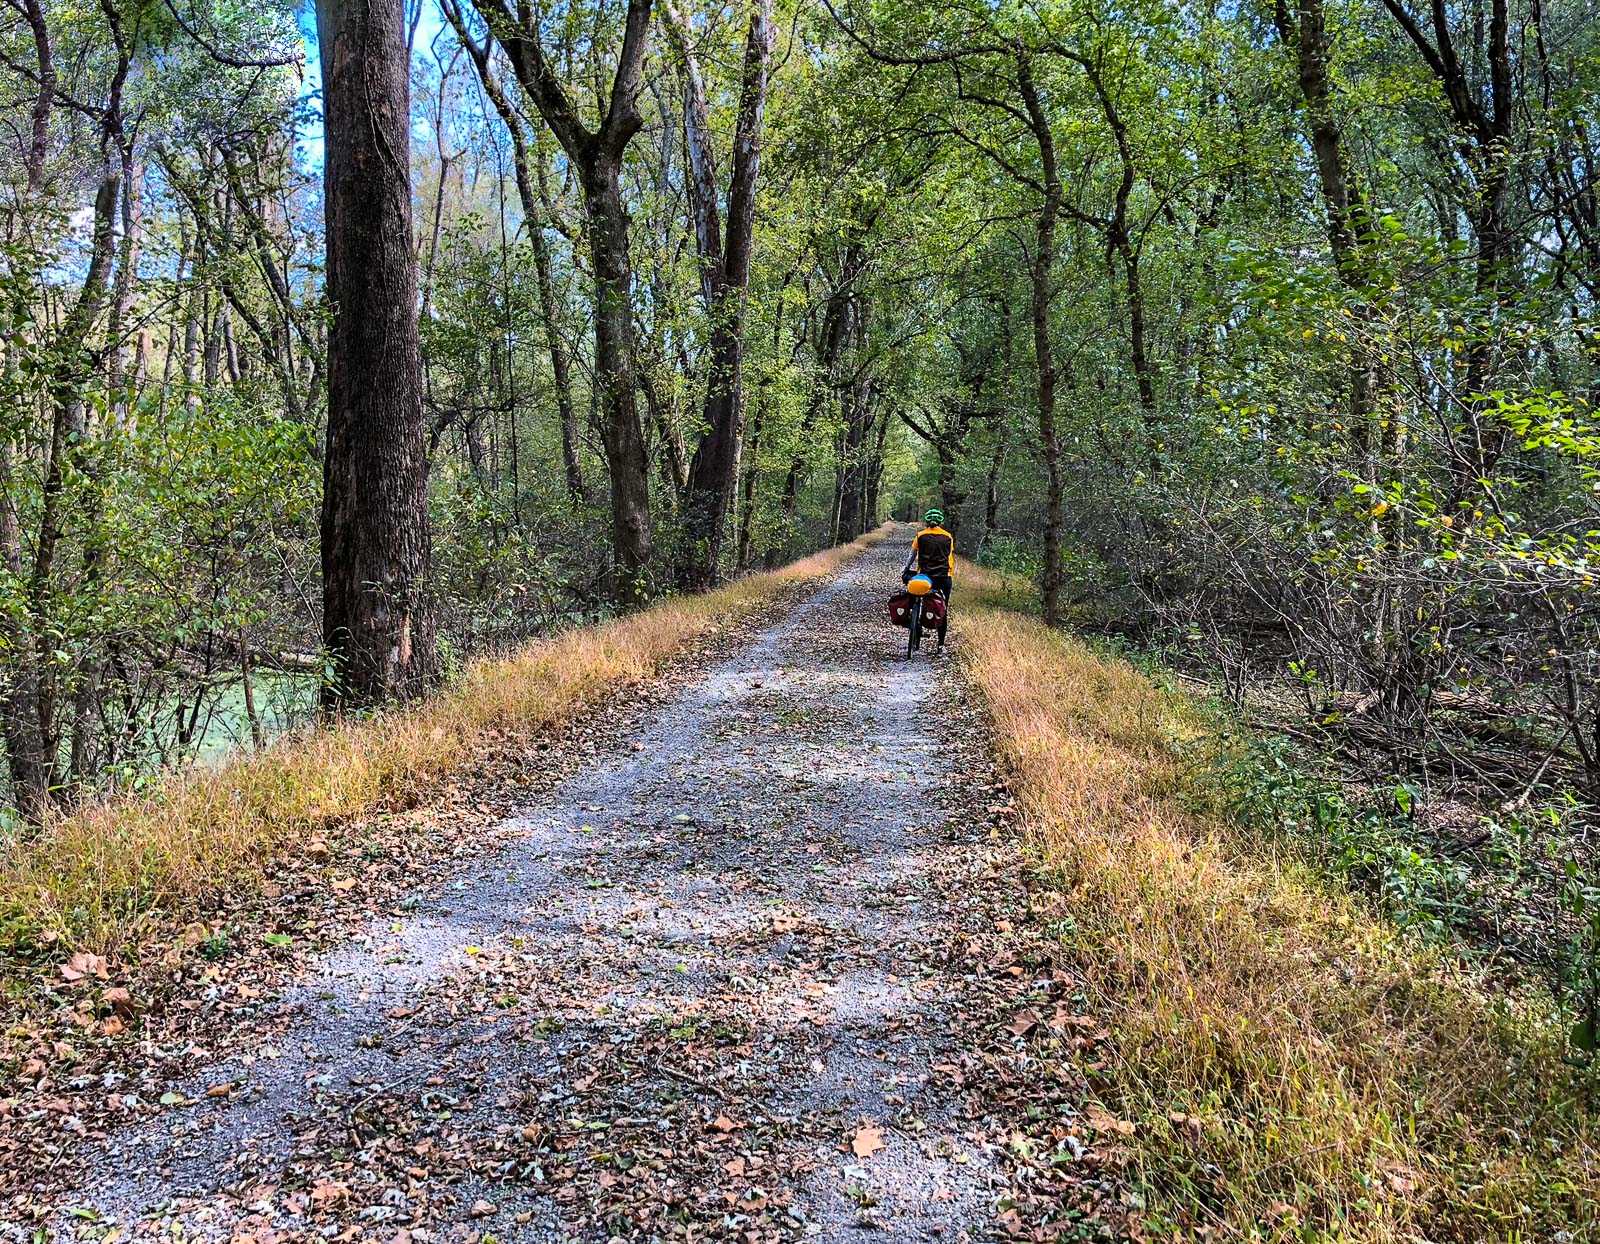
Biking along the C&O Canal
Overview of Gear For Bikepacking
As we said earlier in this guide, if you are a backpacker you’ll likely have much of the gear you need to bikepack. The only bikepacking specialized gear you’ll need are the bags to store that gear on your bikes. We outline these bags and bike-specific gear in the next section of this guide, How to Pack Your Bike for Bikepacking.
90% or more of the gear we brought (e.g. tents, sleeping bags, pads, stove, clothes, etc.) was just our standard ultralight backpacking gear. As such, Our 9 Pound Full Comfort Lightweight Backpacking Gear List, which has been a top ranked list for over 10 years, is the perfect starting point for packing up for a bikepacking trip. This gear is light, compact, and thus perfect for loading on a bike.
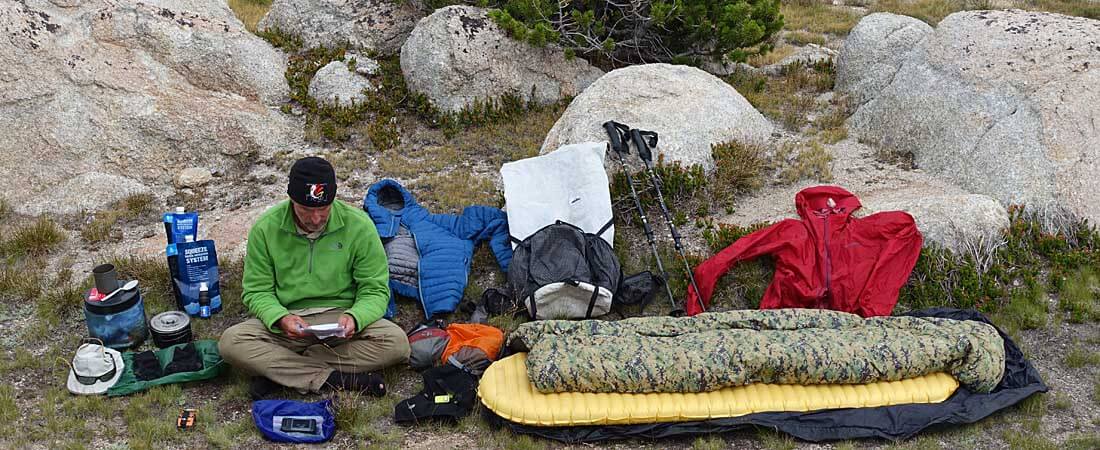
Here are a few highlights of gear we brought
And 90% of it is from our 9 Pound Full Comfort Backpacking Gear List
Note: Storage space in bike bags is limited. Gear that packs small and does take up a lot of space is the gear you want. As such, a very compact tent and sleeping bag (see examples below) go a long way to winning the battle of space. And bring only the clothes you need. Extra clothes will quickly fill up your bags if you aren’t careful.

Bike Bags
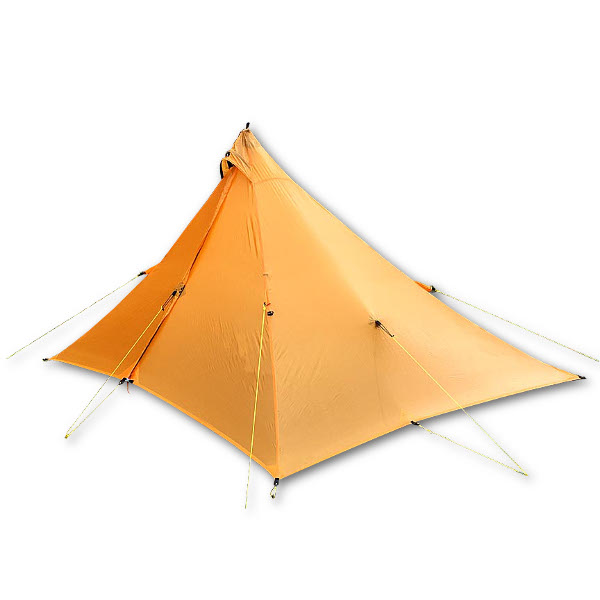
Pyramid Tent | Mountain Laurel Designs Duomid XL
1.3 lbs | 65 ft2
This tent is super compact! Alan was able to fit this spacious (but compacts extremely small) tent, poles, stakes and both our “Women’s” version of the XLite, (yes, all the men we know use it) into his Sweetroll Handlebar bag!
The Mountain Laurel Designs Duomid XL Pyramid Tent at 2x the living area of most backpacking tents and is a marvel of engineering. Like all pyramid shelters, it’s lighter, and much larger and stronger than any traditional tent or tarp tent — but also compacts much smaller — making it perfect for cramped bikepacking bags. We absolutely love its asymmetrical pitch. By keeping the support pole off center, the floor area is divided into two sections; sleeping (70%) and backpacking gear storage (30%). So, unlike other pyramids, couples looking to share a two-person sleeping bag or snuggle will be able to do so without interference from a center pole. And unlike regular pyramid tents, the asymmetrical layout keeps the sleeping area dry even with the door open. The award-winning MLD’s Duomid XL will keep you warm, dry, and protected in any environment you choose to camp. Budget Pyramid Tent: Make sure to check out the $265 MLD DuoMid in SilNylon.
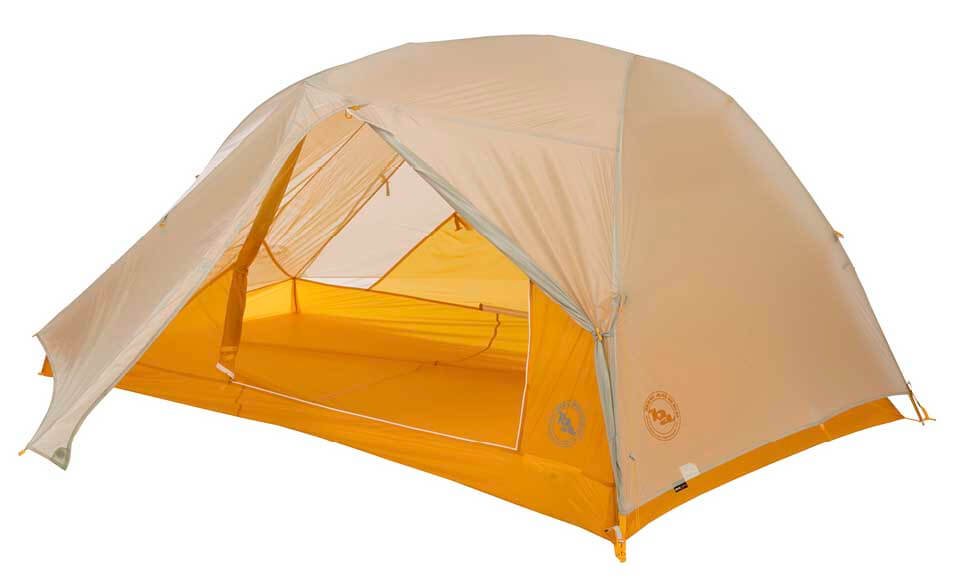
Conventional Tent | Big Agnes Tiger Wall UL3
2.6 lbs | 38 ft2
Looking for a light and compact tent you can buy at a major retailer? The Big Agnes Tiger Wall UL3 Tent combines the best of the heavier and fully featured Copper Spur Series tents, with the lighter and lower cost of the Fly Creek Series. But to save weight and cost, it is semi-free standing like the Fly Creek tents. That is, the two rear corners need to be staked out. We prefer the Tiger Wall UL3 Tent for it’s huge interior volume and livability for two people vs. the smaller Big Agnes Tiger Wall UL2 Tent. For a lower cost tent checkout the REI Quarter Dome 2 Tent a good value in a lightweight freestanding backpacking tent with lots of vertical room or some of our Budget Backpacking Tents & Shelters.

+30 F Premium Backpacking Quilt
19 oz
Note: Quilts have a better warmth to weight ratio and cost less than sleeping bags. And just as important they are more compact to fit on your bike. For the details of why this is so see our 2019 Buyers Guide to Lightweight Backpacking Quilts
NEW | REI Co-op Magma Trail Quilt 30
19 oz
New for 2019 | Off the shelf and ready to go! | | REI Co-op Magma Trail Quilt 30. We are super stoked to see REI offer a quilt version of the award winning Magma series bags! Pair this with the “Women’s” version of the XLite, (yes it fits men fine — all the men we know use it) and you will be toasty warm at night. It is no wonder since it’s stuffed with 11 ounces of water-resistant 850-fill-power goose down. What’s not to like!
+30 F Premium Backpacking Quilt | our choice!
15 oz
Note: Quilts have a better warmth to weight ratio and cost less than sleeping bags. And just as important they are more compact to fit on your bike. For the details of why this is so see our 2019 Buyers Guide to Lightweight Backpacking Quilts
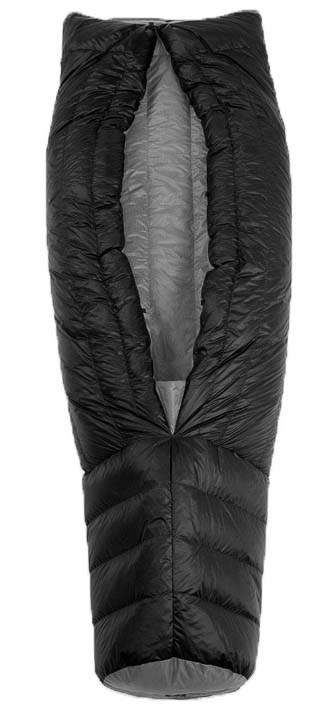
Hammock Gear Premium Burrow Quilt
What we used and Staff Favorite, is the $250 Hammock Gear Premium Burrow Quilt at 1/2 the cost of top end sleeping bag and weighs less. The HG Premium Burrow Quilt is a perfect combination of value, weight and performance! It is highly customizable with different sizes, fabric colors and weights, as well as the type and amount of down fill. You can get a Zipper Footbox which allows it to be spread flat. Or a sewn foot box is fully enclosed/fully insulated, and thus allows no cold spots (my choice). There is an optional Sleeping Pad Attachment Kit.
For those on a budget: The standout value is the $160, 19 oz Hammock Gear Economy Burrow 30 ºF down quilt. That’s less cost than most synthetic sleeping bags and it is 1/2 the weight.

Therm-a-Rest NeoAir XLite Sleeping Pad – Women’s
12 oz
You’ll want a true air mattress to compress small on your bike and save space, and this is the best all-around sleeping pad!
This is the “Women’s” version of the XLite, but it’s the right size for most backpackers. All the men we know use it — for tall men, as long as the end of the pad hits mid-calf you should be fine (Alan’s 6’5″ hiking partner uses one!). Best of all, at 12 oz and with an R-value of 3.9, it’s warmer and lighter than the “Men’s” version. Super warm and super comfortable we find its closer to a 3+ season pad and have happily used it to well below freezing! As such, we find that it works well even into the colder shoulder seasons of late fall and early spring, so you can skip the weight and cost of the Therm-a-Rest NeoAir XTherm Sleeping Pad.

Jetboil MiniMo Cooking System
14 oz
A very compact stove with great usability and fuel efficiency. Alison and I got by with a 4 oz fuel canister that conveniently fits inside the pot.
The best Jetboil Stove! The award winning Jetboil MiniMo Cooking System gives you all of Jetboil’s new technologies: A proprietary regulator and enhanced regulator diaphragm for consistent performance down to 20°F. And their redesigned valve gives you better simmer control. Finally, we’re huge fans of the wider pot. It’s easier to eat out of and clean and has a more fuel effect shape to boot. No wonder this is the stove we take guiding. We can make tons of coffee for clients in no time. And a caffeinated client is a happy client.
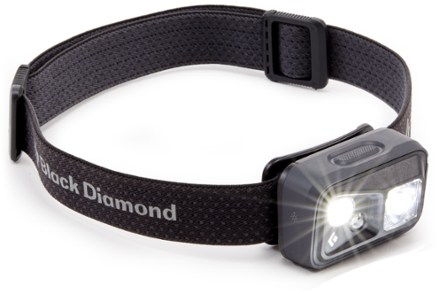
Black Diamond Spot Headlamp
3 oz
There are some very long and very dark tunnels on this trip. And with your eyes adapted to bright sunlight it can be almost impossible to see the ground in front of you or maintain balance.
The Black Diamond Spot Headlamp is the light I take when guiding. It is the one headlamp that will do it all — while still being light at only 3 oz. It can put out brilliant 300 lumens of light to safely travel/climb on technical terrain, or make an all-night emergency exit on rough trails. But it is also dimmable and tame enough for camp use. In it’s 8 lumen “camp mode” it will last you a season of hiking on a single set of batteries.
Bikepacking Specific Gear
This bikepacking specific gear is obviously not on our 9 Pound Full Comfort Lightweight Backpacking Gear List.
- 2 Spare tubes, patch kit, tire lever
- CO2 inflator and CO2 cartridges (most light pumps not effective)
- Alternate tire inflator Topeak Mountain Morph Pump (heavy but works)
- Park Tool I-beam mini tool
- Zip ties
As noted earlier, most of your backpacking gear will work for bikepacking. The only additional pieces you need to get will be a bike and the bags. We used two different methods of packing: Alan used frame bags (left photo) and Alison used panniers (right photo).
Alison’s Set Up | Rear Panniers & Handlebar Bag
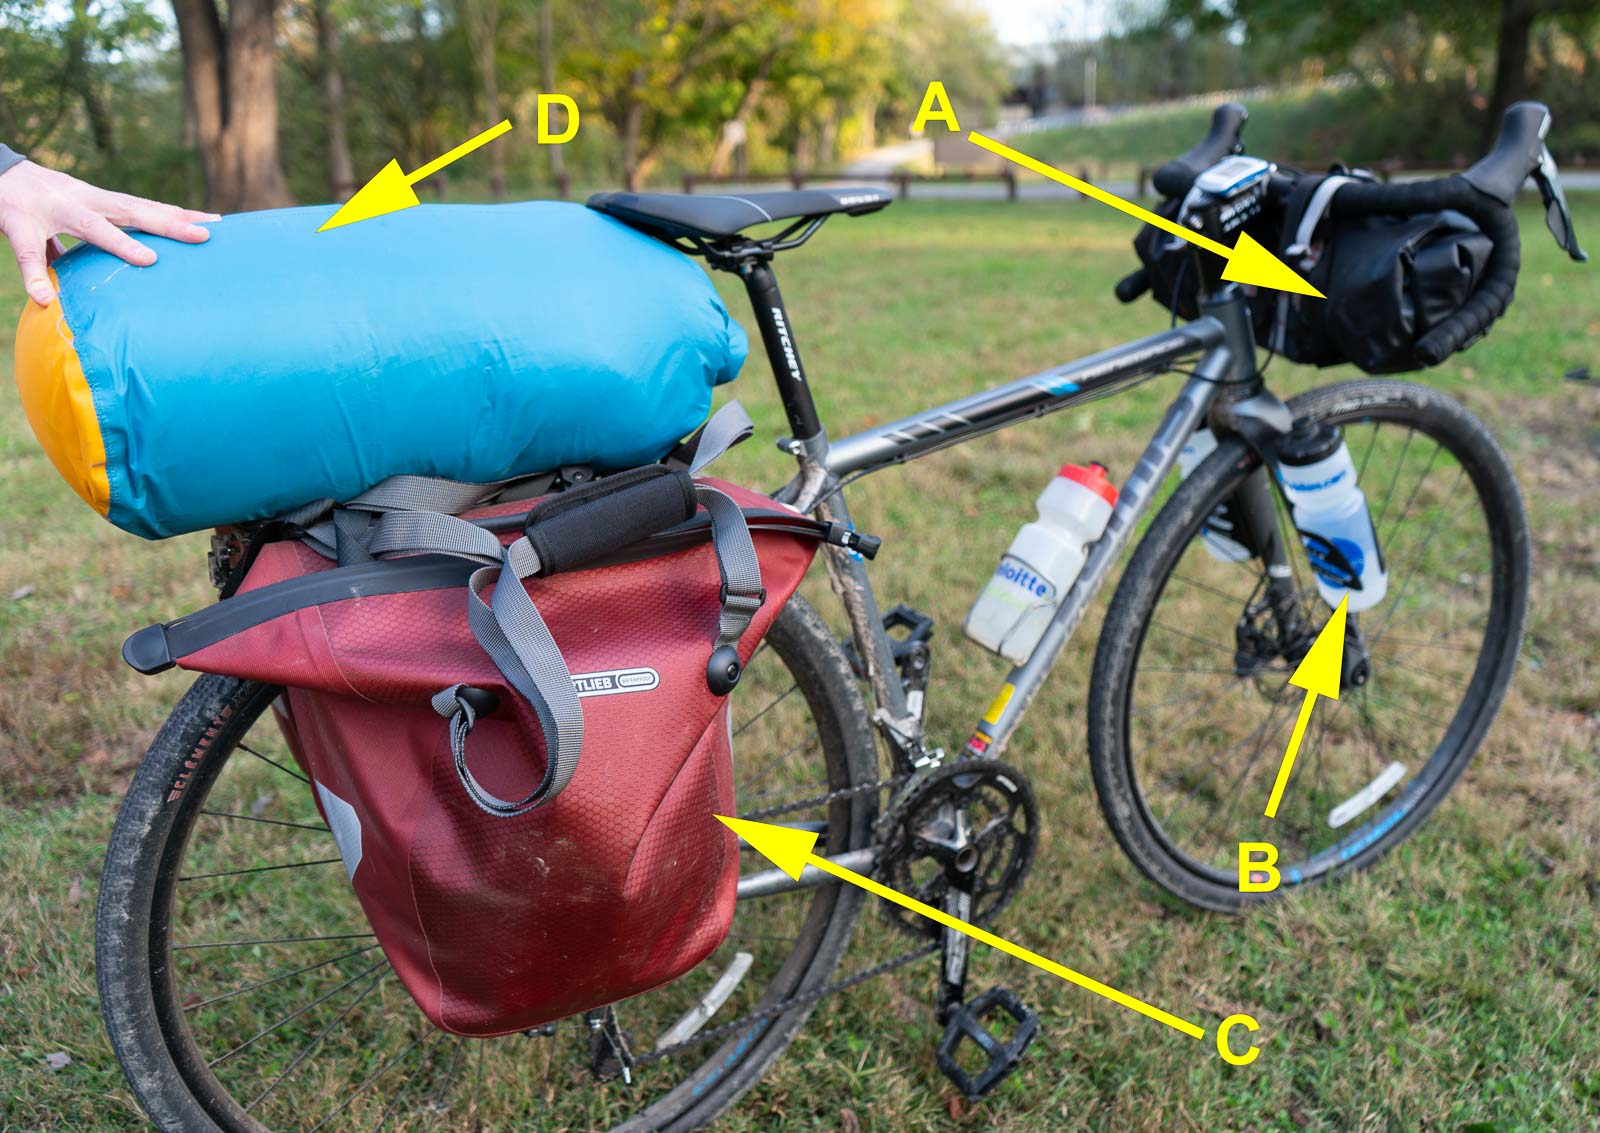
The trick to using rear-only panniers is weight distribution. Because the panniers (and rack) hold much of the weight, you need to have sufficient weight on the front of your bike to balance things out and keep the front wheel solidly on the trail. Two water bottles and a sweetroll were put on the front of Alison’s bike to keep her weight evenly distributed. The reason Alison opted for panniers was because her bike ended up being too small for most of the frame bags for the main triangle (e.g. no size Ripio fit). Panniers were the logical alternative. And honestly, if your bike already has a rear rack they are cheaper, hold more and are easier to pack than Alan’s frame-bag setup.
Alison’s bikepacking set up was essentially a set of panniers with balancing weight up front. A) Sweetroll between handlebars B) Waterbottles up front to balance weight C) Panniers holding most gear D) Waterproof stuff sack holding down sleeping quilt for two.
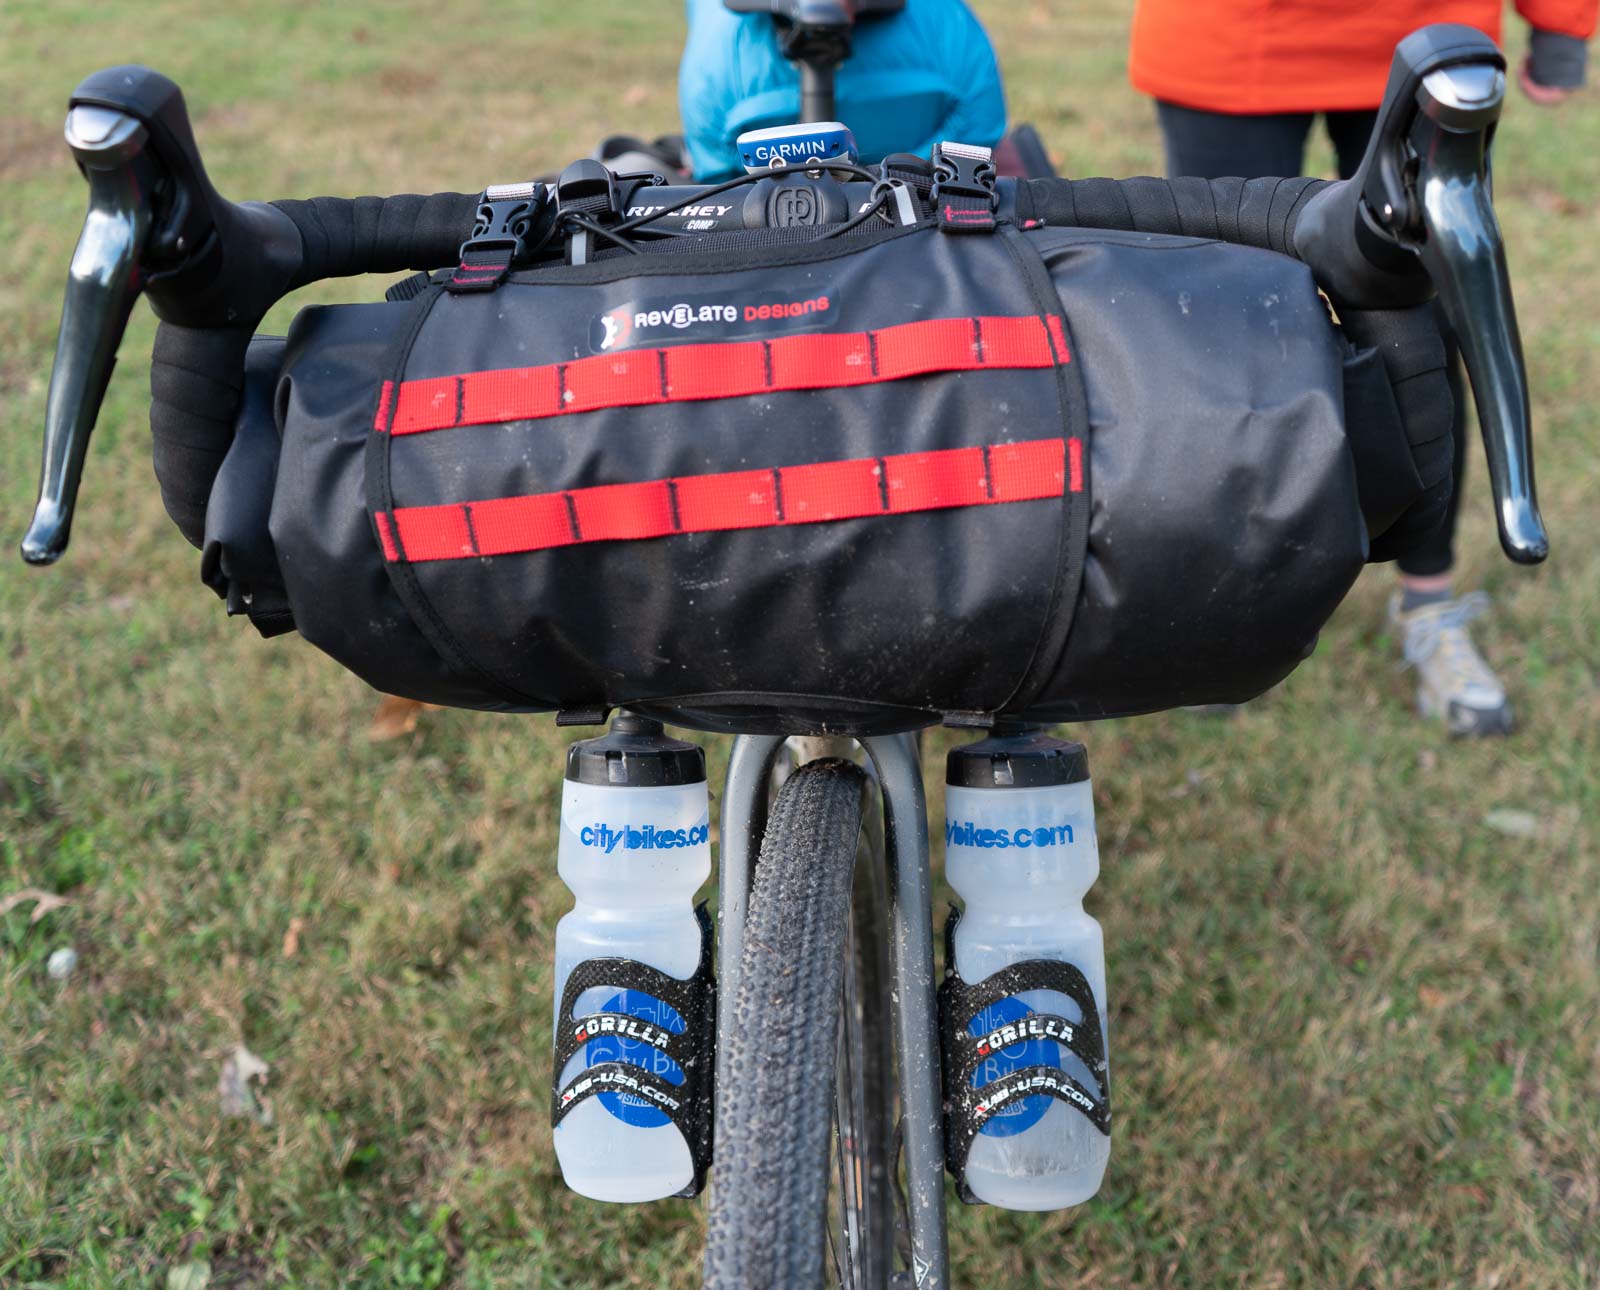
Looking at the front of Alison’s bike. The two water bottles remained full throughout the trip. Although the sweetroll looks like it would impede your handling with a road/drop handlebar, we did not find that to be the case. Once properly positioned you can brake and shift just fine. Obviously, the sweetroll bag works great with a flat mountain bike bar.

Renegate Expat, Gravel Bike, Lists for $1,200
Alison used a Renegate Expat bike that she got at close-out for $900.

(A) Revelate Designs Sweetroll Medium Handlebar Bag
Sweetrolls hold a surprising amount of gear. Being fully waterproof with dual entries means your gear stays dry and you have somewhat easy access. That said, taking the sweetroll on and off required a bit of work so we would only recommend it at end-of-day stops. While the bag looks like it would impede your hands from maneuvering the gear shifters and brakes (on a drop/road-bike style handlebar), we never had that problem. [And of course it works great on standard mountain bike flat bars.]

(B) Secure Water Bottle Cages
Two large, fork-mounted water bottles do wonders to put more weight up front on the bike to balance out the rear panniers and keep the front wheel firmly on the trail. (Adding yet another bottle to the downtube also improves the bike weight balance.) But on bumpy trails, water bottles have a habit of launching out of a standard cage. We prefer the tried and true XLAB 38-Gram Gorilla Carbon Cages to securely hold our water bottles.

(B) Fork Mounted Water Bottles
Fork mounted water bottles are an elegant and space saving way to balance out a bike with rear panniers. On Alison’s rear-pannier only setup, much her weight is in the back of the bike making the front wheel a bit “light.” Adding two water bottles on the front wheel and one in the down tube (along with the sweetroll handlebar bag), brings the bike into a sweet balance. We prefer the larger 26 oz bottles, both for extra water capacity on the trail and to get more weight forward on the bike.

(C) Ortlieb Bike-Shopper Panniers
The panniers Alison used were actually “shopping” panniers. They are lighter than most panniers and waterproof. And at 20L per bag they hold hard large quantities of gear (off trail bags are not needed for this trip, and tend to be smaller and heavier). But any set of panniers will do as long as they are waterproof. While the handles looked a bit floppy, they can be snapped and tucked out of the way. We never had a problem with them snagging or getting in the way.

(D) Sea to Summit eVAC Dry Sack, 20L
Because the bike rack on Alison’s bike had room, it was easy to put our down sleeping quilt on the top of the rack. To ensure that the quilt stayed dry, we used a 20L dry bag that had eVent material. Of course, you can put whatever you’d like in this drybag but for us, the quilt was most useful as it takes up a bunch of volume, leaving more room in the panniers. What isn’t shown in the picture are the two straps used to secure the dry bag to the bike rack.
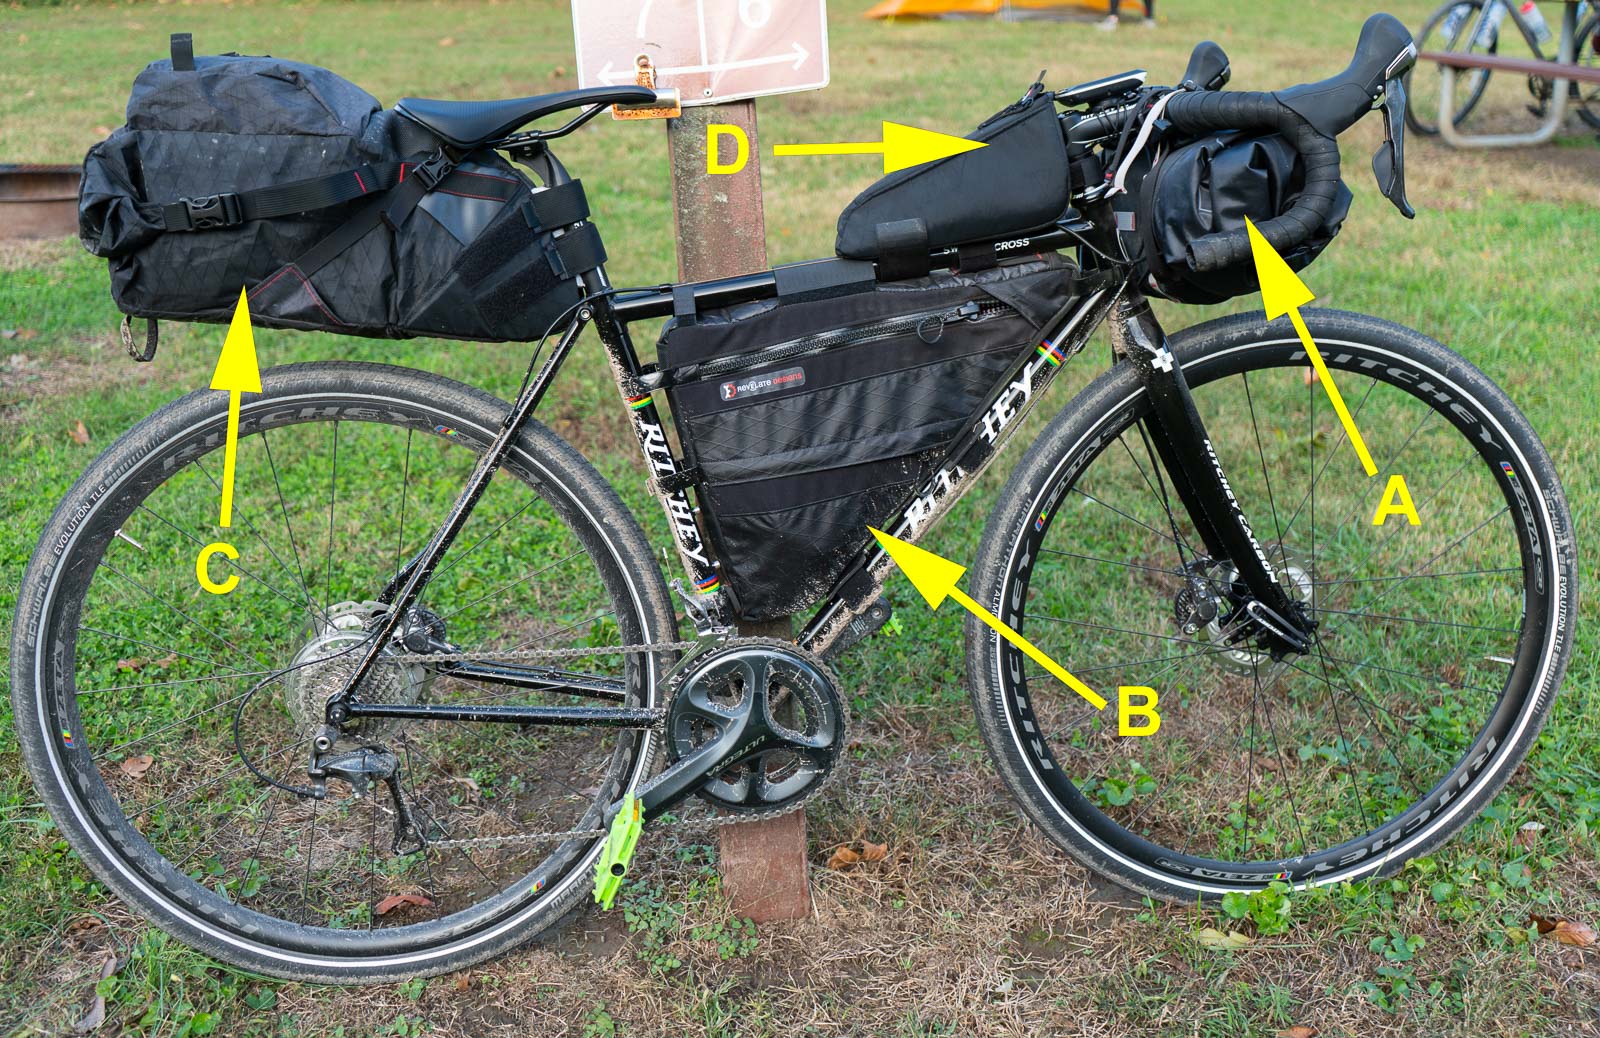
Alan’s Set Up | Framebags (no racks)
Alan’s bike was slightly bigger and so he could opt for a full set of frame mounted bags for the trip. There was plenty of room in this setup for all his gear. While there are several manufacturers, we used all Relevate products because, in the end it all came down to fit and function. We made several trips to our local REI store (with bikes in tow) to see what fit best for each of these bags. And do not feel bad bringing your bike into the store to try the different bags out. Better there than at home or on the trail!
Alan used a set of frame mounted bags for his gear which distributed the weight nicely. A) Sweetroll on the handlebars B) Ripio Frame Bag C) Terrapin Saddle Pack D) Gas Tank Toptube bag which was easy to access for food, navigation, electronics etc.
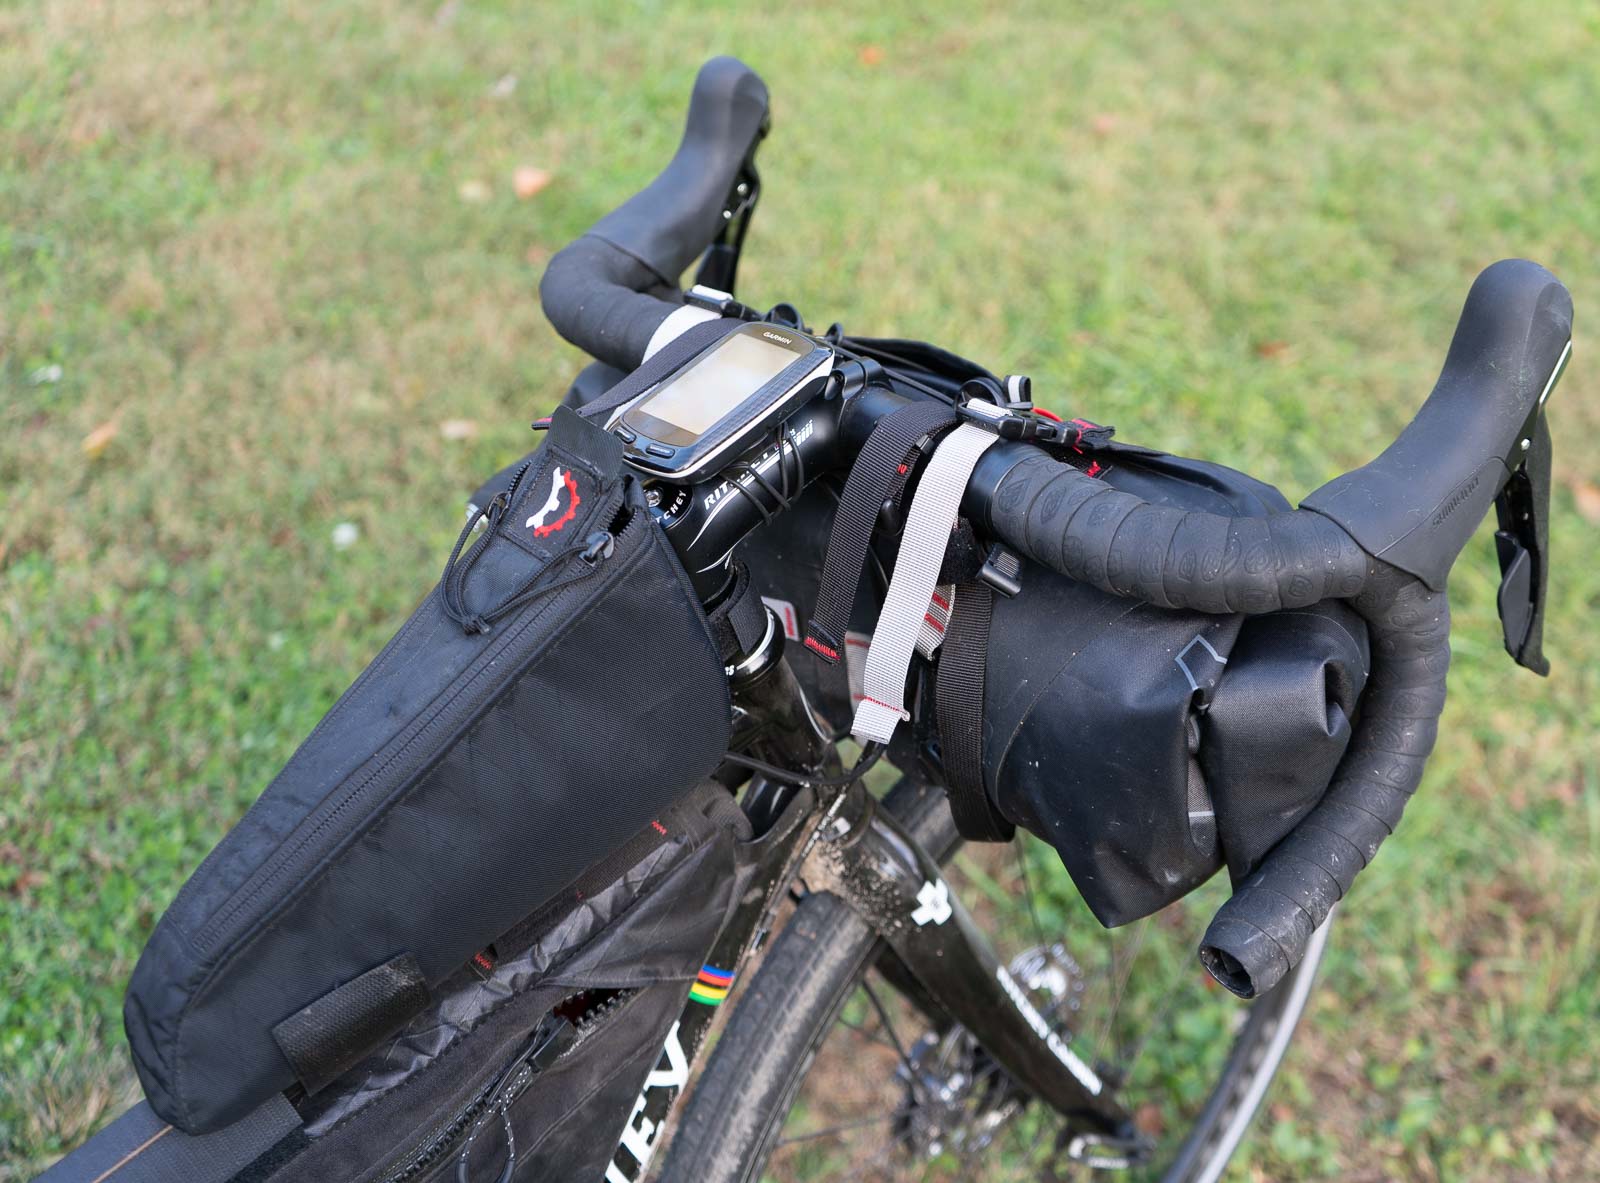
A close up view of Alan’s cockpit area showing a top tube bag and his GPS for navigation

Alan’s Bike | Ritchey WCS Swiss Cross Disc Bike
Alan used The Swiss Cross Disc which although made for cross racing did well on the gravel trail. Alan has raced road bikes on and off for 40 years. As such, he’s super comfortable with this frame geometry.
(A) Revelate Designs Sweetroll Medium Handlebar Bag
Sweetrolls hold a surprising amount of gear. Being fully waterproof with dual entries means your gear stays dry and you have somewhat easy access. That said, taking the sweetroll on and off required a bit of work so we would only recommend it at end-of-day stops. While the bag looks like it would impede your hands from maneuvering the gear shifters and brakes (on a drop/road-bike style handlebar), we never had that problem. [And of course it works great on standard mountain bike flat bars.]
(B) Revelate Designs Ripio Bike Frame Bag

(C) Revelate Designs Terrapin System Saddle Pack | 14 or 8 Liters
Alan’s Seat Pack was borrowed from a friend. It was a 14L Revelate Designs bag that held a lot of gear. Relevate has a 14L seat bag (which we would recommend) but it contains two pieces, one holder and then a dry bag that fits into it. Although a bit more finicky, it is worth the extra space to use the 14L bag. REI may or may not have the 14L bag. If not, check the Relevate Site.

(D) Revelate Designs Gas Tank Bike Frame Bag (Top Tube bag)
The tear-drop panel opening shape maximizes the top tube storage area nicely. All these bags are waterproof which makes them tough and ready to ride whenever you are. The grippy top tube wrap helps to keep the bag upright and where you want it to be and the strong zipper never stuck once for us.
Disclaimer
This post contains affiliate links. If you make a purchase after clicking on the these links, a small portion of the sale helps support this site at no additional cost to you. I do not receive compensation from the companies whose products are listed. For product reviews: unless otherwise noted, products are purchased with my own funds. I am never under an obligation to write a review about any product. Finally, this post expresses my own independent opinion.

