The 10 most scenic wilderness trips for spring backpacking in Washington, Oregon, and the greater PNW. These hikes are not to be missed!
Also called the Mountains of the Moon the Rwenzoris have a dizzying array of spectacular plants, trees, animals, & varied landscapes that make you aware, at all times, that you are in a place like no other on the planet. And of course, you can stand on a glacier at over 5000m (16,000 ft) with world class views of Africa below you.
The Huemul Circuit El Chalten Patagonia is one of a few ways for mere-mortal for hikers to see the vast Southern Patagonian Ice Field, the 2nd largest non-polar ice field.
Bikepacking the GAP Trail and C&O Trail from Pittsburgh to Washington DC is a superb mix of natural beauty, wooded trails, quaint towns, & American history. It’s the perfect introductory trip for those new to bikepacking. But it’s just as suitable and rewarding trip for accomplished riders. Virtually all of the trail is away from traffic on flat, wide, non-technical dirt trails (double track) that do not require great riding skills.
The Finger Lakes Gorges should not be missed. And don’t let their popularity dissuade you from hiking and exploring these gems. Like Yosemite or the slot canyons of Utah, these gorges are held in high regard for a reason so hike them!
Chile’s new Patagonia National Park has it all — the high glaciated peaks of the Andes, wide valleys with ice cold glacial rivers, forests of southern beech hanging with moss, & startlingly green glacial lakes. It may soon be the “Yellowstone of South America”
The Cerro Castillo Trek might be the best trek in Patagonia you’ve never heard of. It rivals drama and beauty of the Torres del Paine W Trek, yet has far less visitors.
We believe this is the best guide to the Torres del Paine W Trek and Circuit Treks, in-print or online. This guide was inspired by Alison and I finding a scarcity of accurate and up-to-date information anywhere…
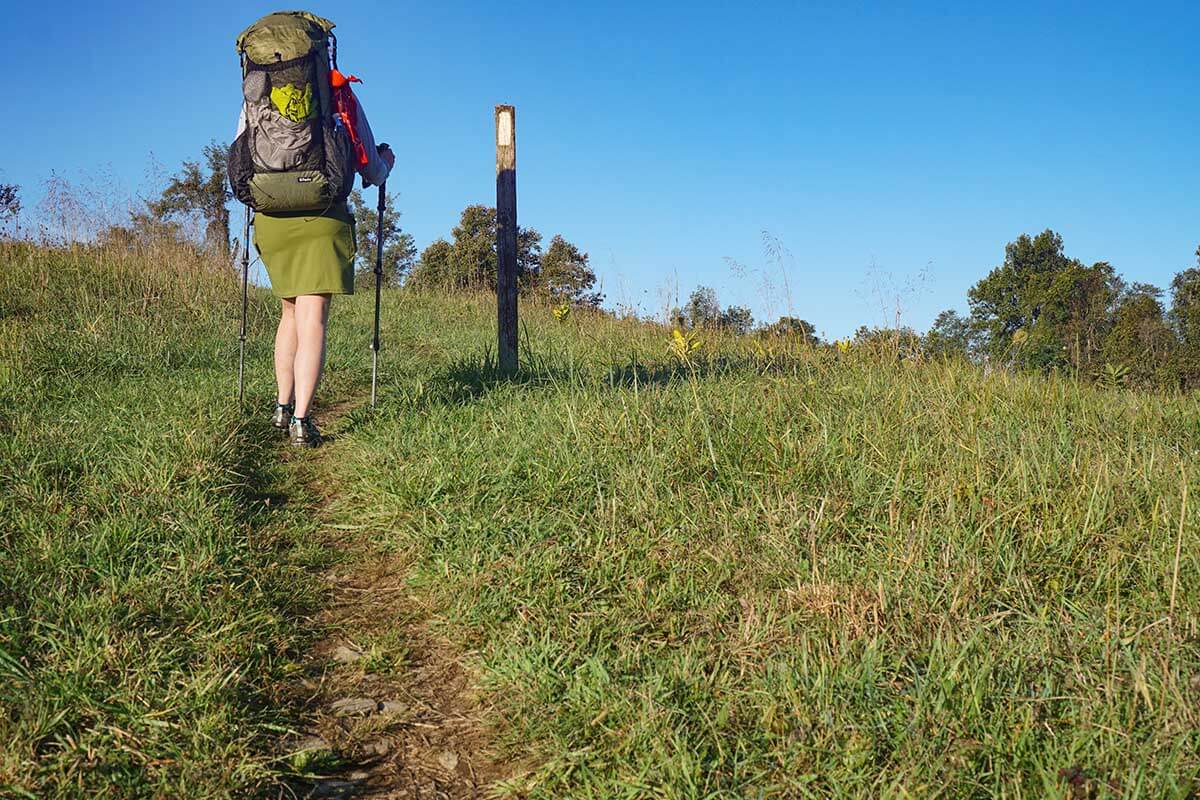
This Guide to the AT Section Hike – Shenandoah to Harpers Ferry, is an installment of our no-car-needed, low carbon AT hiking Guides. This beautiful section has the infamous roller coaster, along with great vistas like Raven Rock and Sky Meadows Park. It connects two popular AT trailheads—Shenandoah National Park (Front Royal, VA); and historic Harpers Ferry, WV. When combined with our Low Carbon Section Hike via Train – Harpers Ferry to Harrisburg PA , you have ~180 great miles of the AT easily accessible by public transportation. Hike green!
(lead photo: late afternoon at Raven Rocks overlook. Fall colors just starting)
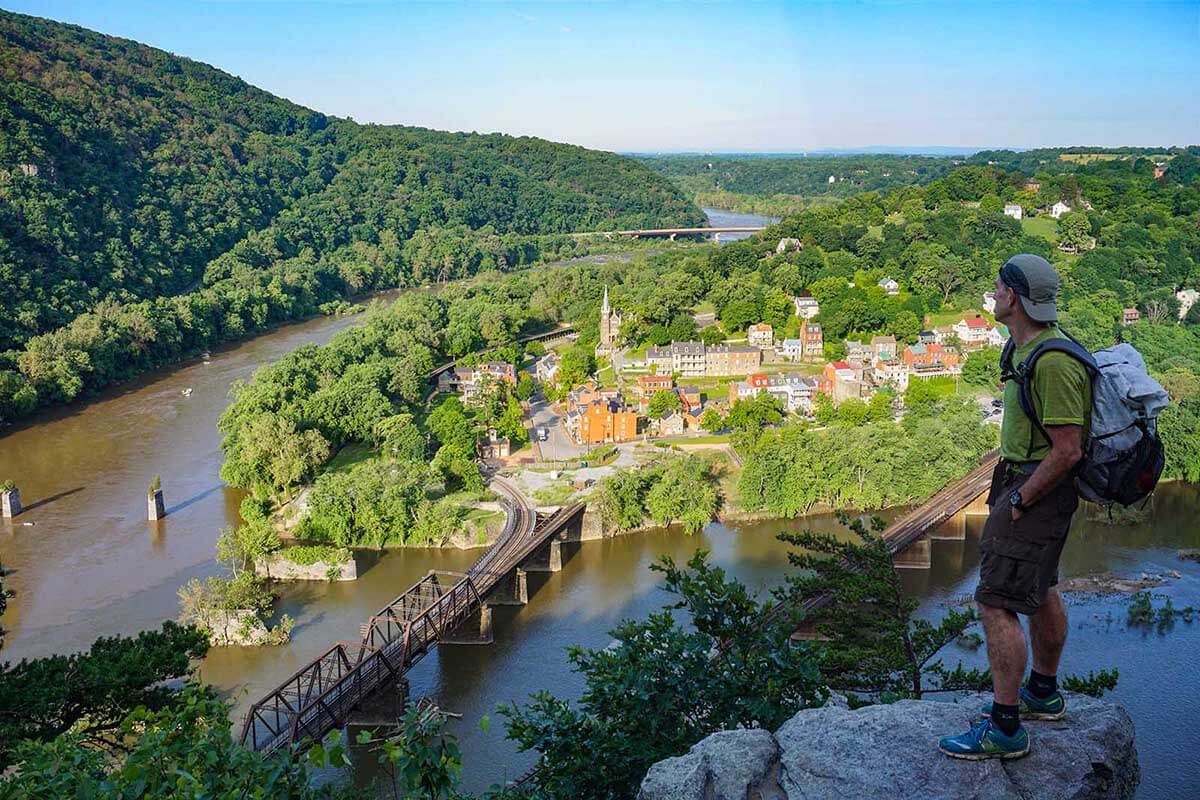
The hike ends in historic Harpers Ferry, WV and it’s well worth an overnight stay and exploration. “Harpers Ferry National Historical Park is considered one of the best walking parks in America. The views are sublime, the history compelling, the restored town a work of historical art.” (from the National Park Service Website)
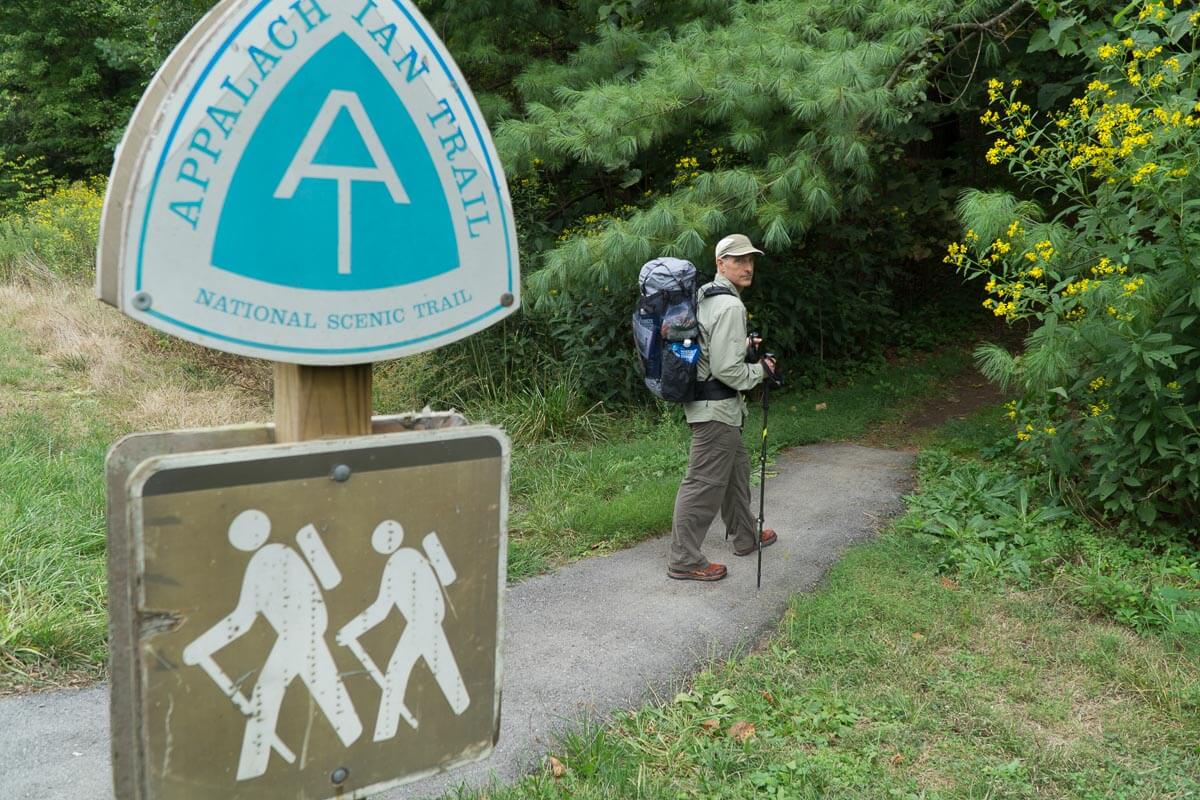
A Series of Guides to Low Carbon Section Hikes on the Appalachian Trail
We are big fans of leaving the car at home when we go hiking. Because the AT goes through or near urban areas, it’s not difficult to section hike portions of the AT using only public transportation. Many of these are among the nicer sections of the AT. This guide is for an AT section hike that you can undertake solely using public transportation from Washington, DC. This 54 mile AT section could be done in one long weekend (3-4 days, e.g. an extended Memorial, or Labor Day weekend). It would also be a great hike for fall color viewing as it has somewhat less foot traffic than the adjacent Shenandoah Park.
Installment 1: Low Carbon Appalachian Trail Section Hike via Train – Harpers Ferry WV to Harrisburg PA, 124 miles
Installment 2: This post – Low Carbon AT Section Hike – Shenandoah to Harpers Ferry, 54 miles
Stay tuned as we add more Low Carbon Section Hikes on the Appalachian Trail…
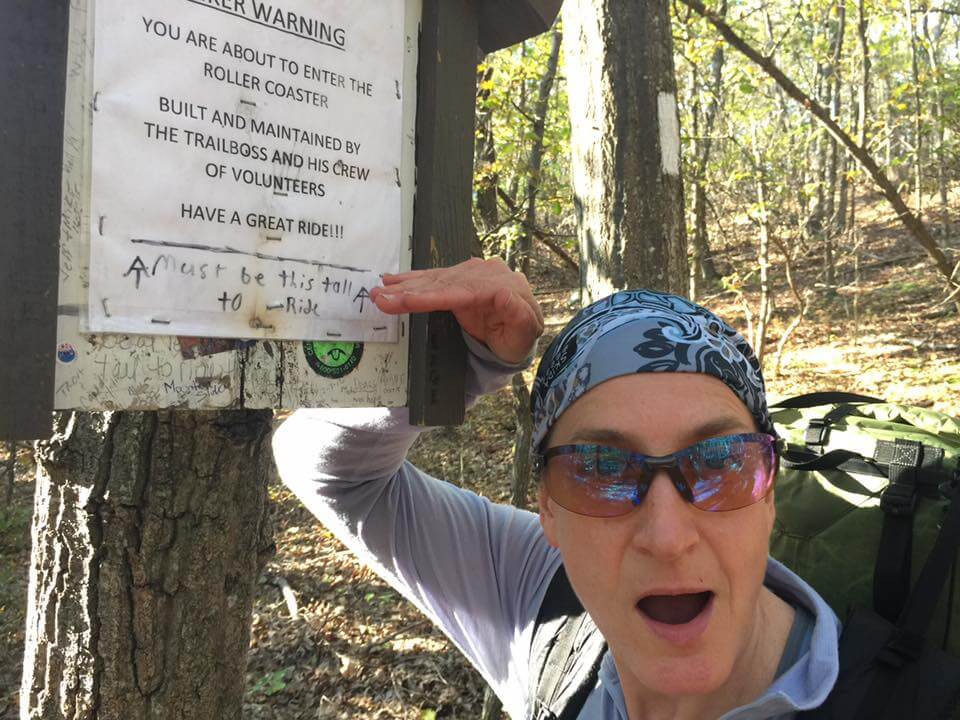
“[You] MUST BE THIS TALL TO RIDE!”
The start of The Roller Coaster, an infamous section of the AT with over 10,000 feet of elevation change in only 13.5 miles! And that was only part of our FUN for the day. Alison’s face says it all.
Top 5 Highlights of this Section of the AT
- Blue Ridge Vistas: This section of the AT is just gorgeous. There are numerous overlooks including the famous Raven Rocks, and the endless ridge top vistas from Sky Meadows Park. Because of the wonderful overlooks and clearings on this section, it would be a great hike for fall leaf viewing.
- Blackburn Trail Center: When you arrive at the Blackburn Trail Center, you are greeted by the trail boss and his wife. More often than not, trail magic will appear making the end of the roller coaster that much sweeter.
- Bears Den Hostel: This rustic stone building from the 1930’s is a gem on the AT. The hiker deal for $30 includes: bunk, shower, laundry, soda, pizza and a pint of Ben & Jerry’s ice cream. Our trip didn’t allow us to overnight there, but we did stop for the $0.50 Cokes out of the fridge and a lovely break on the lawn for a snack and rest at a covered picnic table.
- Ride the Roller Coaster: The world renown roller coaster is a 13.5 mile section of trail that closely resembles a roller coaster. Ok, not really. It’s really about 10,000 ft of elevation change in a very short distance that will keep you fully entertained.
- Harpers Ferry Overnight: Any hike that includes an overnight in Harper’s Ferry is a good hike. The town is so lovely, it is always a highlight.
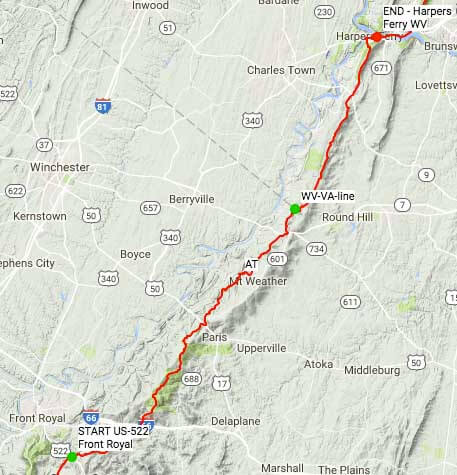
Overview map of the 54 mile route.
Quick Trip Stats
- The trip takes between 3-5 days
- 0 mile – trip start, Shenandoah Park N Boundary near Front Royal, VA
- 54 mile – trip end, Harpers Ferry, WV
Transportation Time
- START: 2.5-3.0 hrs downtown Washington DC to trip start near Front Royal, VA (via commuter bus and Uber),
- NEW OPTION: Megabus has a new Washington to Front Royal direct run (2.2 hours)
- END: 2 hrs from trip end in Harper’s Ferry, WV to Washington Union Station (via train)
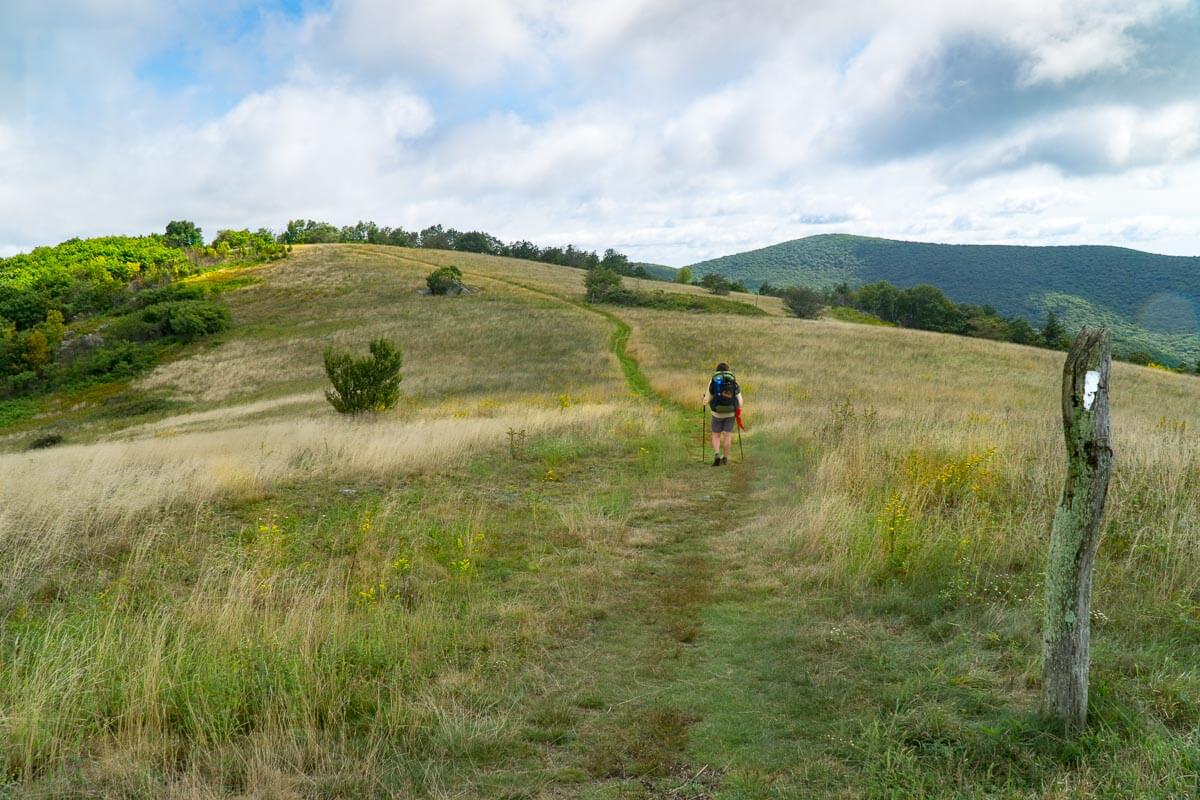
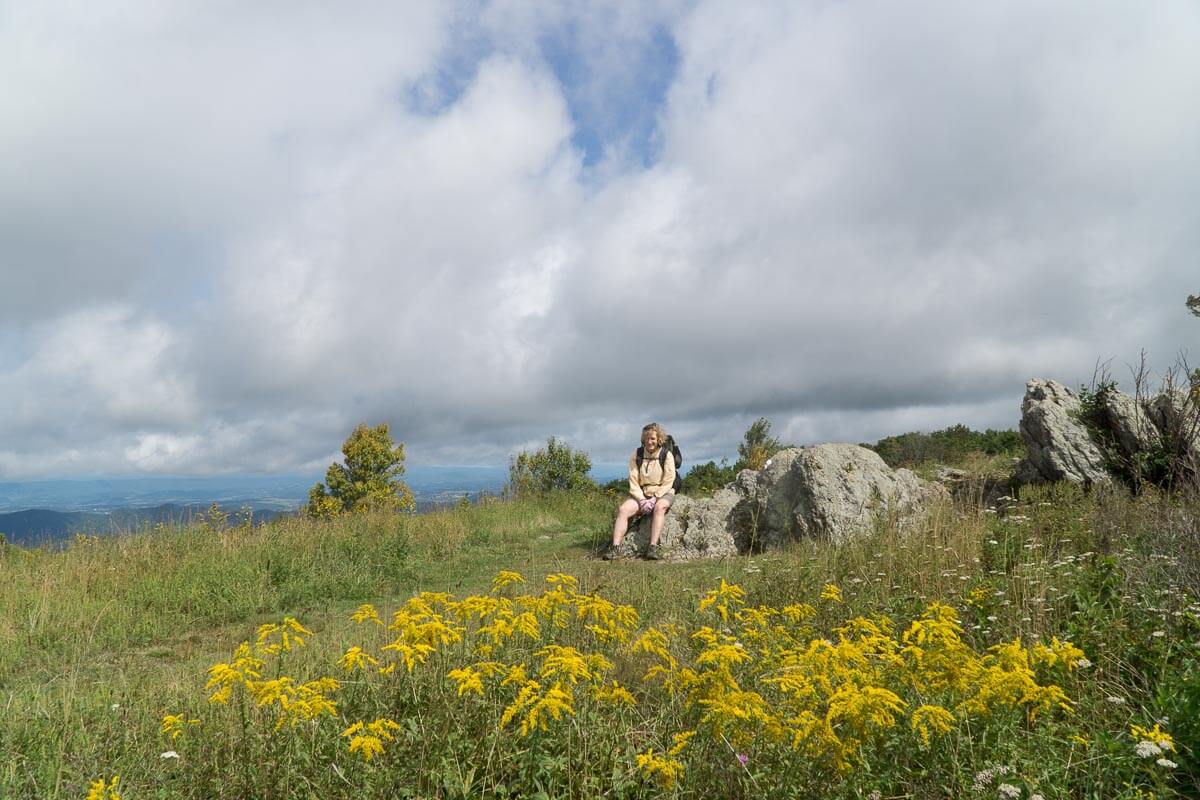
Beautiful mountain meadows and views: Alison hiking up to one of the many great vistas at Sky Meadows Park.
Overview – Low Carbon AT Section Hike – Shenandoah to Harpers Ferry – No Car Needed
This guide is meant to supplement the many excellent general guides to the Appalachian Trail (AT). As such,
- Our guide gives more detail to this specific section of the AT, and in particular how to access it by train and bus from much of Northeast US.
- Lighten your load: The GEAR (link) and FOOD (link) for the light packs we used to efficiently and comfortably hike the AT. We believe this will make the hike more pleasant for others.
- And finally, we discuss the places we most enjoyed on the hike in both text and photos.
What’s in this Trip Guide
- Logistics: link on how to use trains and other transportation to and from the start and end of the hike
(including a bit of info on lodging in Harpers Ferry, WV) - Some of our favorite places: link to Photo Essay & Trip Description
- Gear: a link to list of GEAR that made our trip more FUN (kept our packs around 12 pounds!)
- Food: a link to list of the FOOD we took to save food weight but still eat healthy
- Waypoint and Mileage Table: link to Waypoint and Mileage Table
- Maps: link to our recommendations for maps and guidebooks
- Harpers Ferry: link to ideas about where to stay and what to do in historic Harpers Ferry
Waypoint and Mileage Table
The table below is in scrollable window or you can see the table full page here, as a Google Sheet
Maps and Guides
The Appalachian Trail is possibly the most documented trail in the world. There are many excellent guides. Our favorite guide is David Miller’s (AT trail-name, AWOL) “The A.T. Guide Northbound.”
We supplement it with the following AT Pocket Profile Map(s):
“Appalachian Trail Map AT-11 Front Royal VA – Harpers Ferry WV AT”
$13 Train: From tip end at Harpers Ferry, WV, it’s only an hour and $13 via train to our front door in Washington DC!
Logistics – Getting to and From the Hike
Trip Start
This hike begins at the northern end of Shenandoah National Park. You don’t need to enter the park, just begin on the outskirts of it on the more easily accessed AT crossing of US 522. Unfortunately, as of this writing, there was no public transportation directly to Front Royal from Washington DC. So we had to string together two transportation modes to get to the trip start at around 6:00 pm.
AFTERNOON OPTION
- A Omniride commuter bus leaves from multiple locations in downtown DC and goes directly to a commuter parking lot in Gainesville, VA. Cost was $6.50 using SmarTrip card or $8.75 with cash. Heading out of the city, commuter buses only leave in the afternoon “after work.” First bus leaves DC at 3:30pm ish (depending on where you pick it up) putting you in Gainsville around 5:20pm.
- From there, you can Uber (about 30 min) to the start of our trek (ask to go to Trumbo Hollow Hike Trailhead). This Uber trip costs about $50. Not cheap, but worth not having to shuttle, thus allowing us to do a one-way trek while still going low carbon. And the train ride back is only $13.
- Using public transportation, the earliest you can expect to arrive at the hike start will be around 6:00pm. You should still be able to reach the Jim & Molly denton shelter by dark. (See more options in description below.)
NEW MORNING OPTION
- Megabus has one trip a day from Washington Union Station, leaving at 9:20am arriving Front Royal Crooked Run Park & Ride at 11:40am (cost $30).
- From there, you can Uber (about 15 minutes, $20) to the start of the trek (ask to go to Trumbo Hollow Hike Trailhead).
NOTE: The combination of Uber/Lyft with the train (or bus) is a game changer for low carbon hikers. The ability to hook into a scheduled train or Greyhound route makes what used to be a “close-but-no-cigar” hike, into something quite doable.
Trip End
The easiest thing is to overnight in Harper’s Ferry and catch an early morning MARC train (Brunswick Line) back into Washington DC’s Union Station (or a few Suburban Maryland stops before DC). The MARC trains are super early, but that’s OK as you’ll get back into DC in time to catch many of the early trains and commuter buses to your final destination.
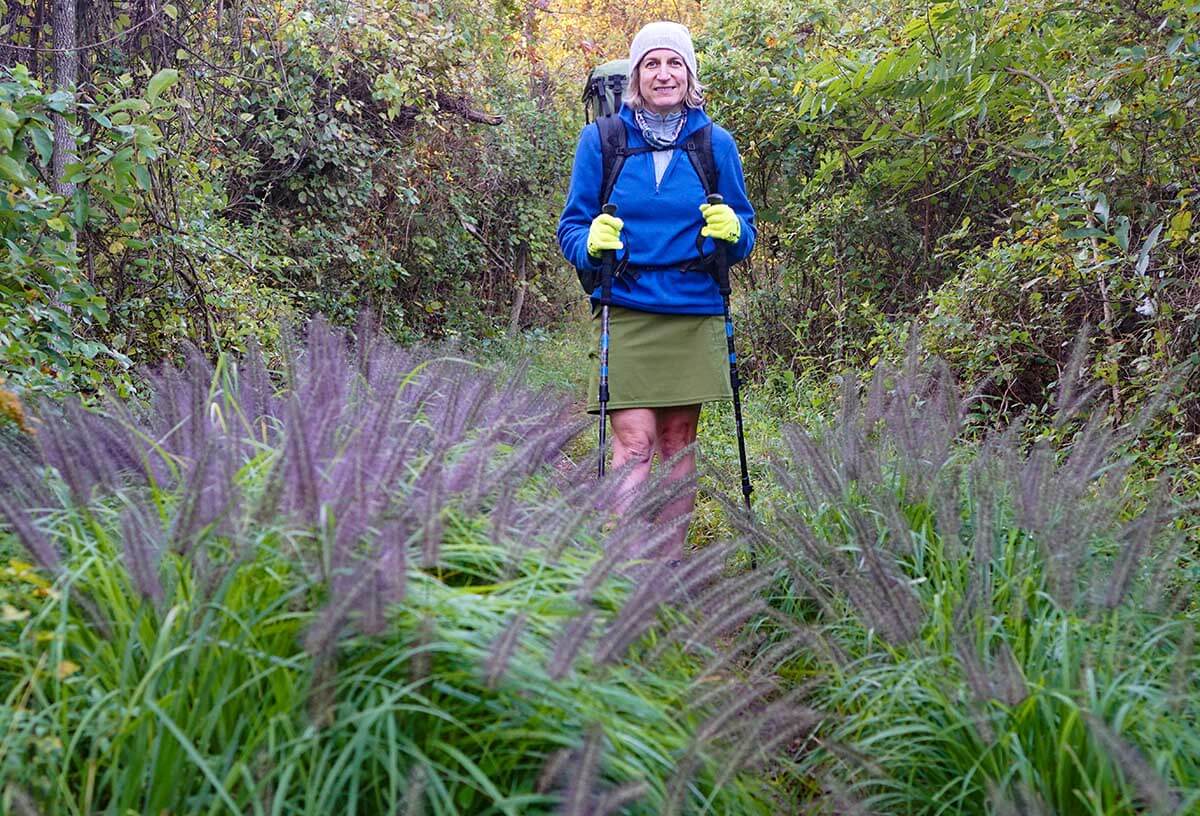
A crisp fall morning on Day 2, perfect for some hiking on the AT!
Brief Route Description and Trip Highlights – a Photo Essay
The section between Shenandoah National Park and Harpers Ferry is a rather popular section hike. The multiple overlooks and great overnight camping options make it a very nice section the AT. It follows the Appalachian Ridge for 54 miles through the State of Virginia culminating in a breathtaking walk across the Shenandoah River Bridge into West Virginia and the city of Harper’s Ferry. There is only one park you walk thru, Sky Meadows State Park (which has its own stunning overlook). Otherwise, this section is a nicely challenging walk on the AT.
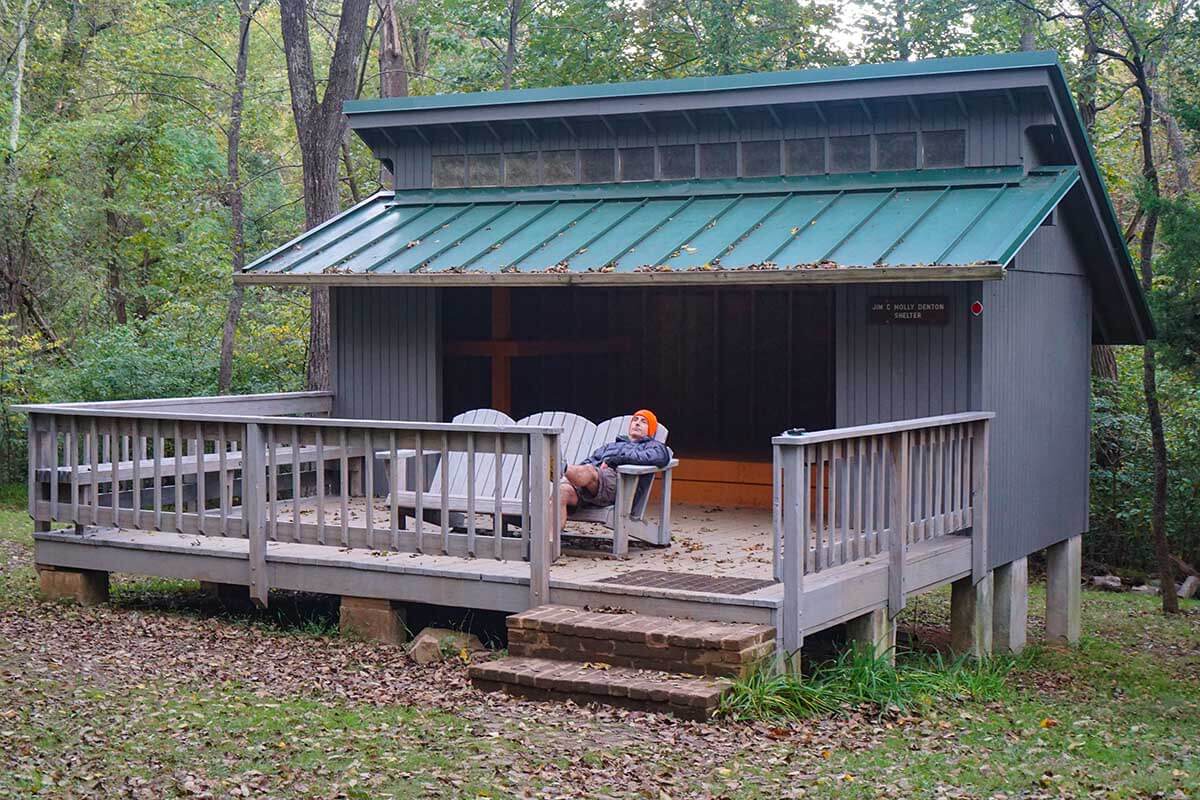
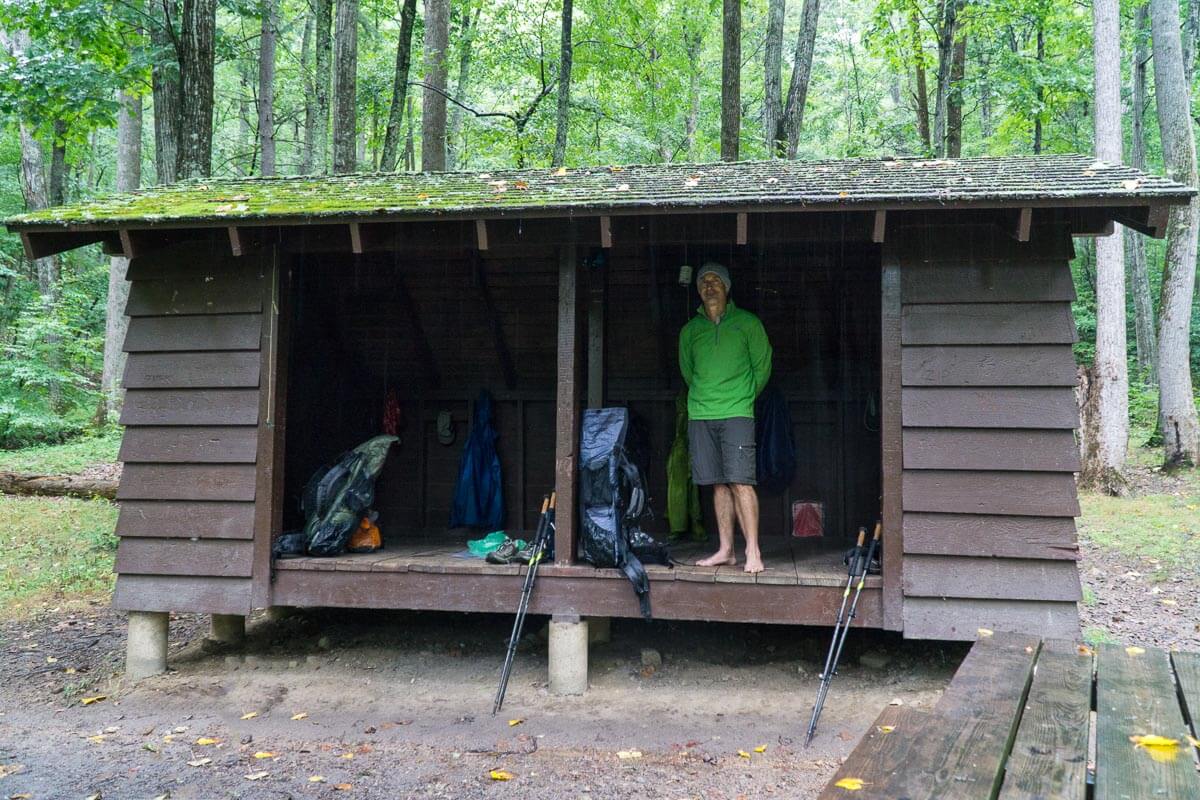
Relaxing on an Adirondack “Bench” at the recently renovated Jim & Molly Denton Shelter. It has a covered picnic pavilion and a solar shower!
If you start hiking in the late afternoon/early evening, you will likely stay at the Jim & Molly Denton Shelter. It’s a straight 5 mile shot from the trip start at US 522. You’ll be rewarded with a newish shelter, a lovely picnic pavilion, and a solar shower! Overnighting in Front Royal is another option and there are several hostel/hotel options there as well. (Front Royal hotel owners are well acquainted with AT trekkers and often provide a ride to/from the trail.)
First Full Day
Your first full day (if you started hiking the nite before) will be lovely. Keep an eye out for great overlooks because you come upon them very quickly. Sky Meadows State Park, really does have superb mountain top meadows and views. It’s a great lunch spot. After that, you also get to cross the not-so-lovely, first of two death-defying major highways on this section (no bridge, no stop signs, just put your big boy pants on and run for your life) at John Marshall Highway (VA55). We ended our day at Rod Hollow Shelter in prep for roller coaster day. Several nice campsites and hammock hanging areas are available at this shelter.

Sunrise above our hammocks at the Blackburn Center.
Day 2
First thing up the next day is riding the roller coaster! As the AWOL in The A.T. Guide notes, it’s really “13.5 miles of tightly packed ascents and descents.” Besides an amusement park aspect, this day also contains the Bears Den Hostel (an overnight option). The Bears Den Hostel was our lunch spot and we enjoyed a covered picnic table, a few cokes, and some shade from the sun. Shortly after the Bears Den you cross your second death-defying major highway, Pine Grove Road (VA 7).
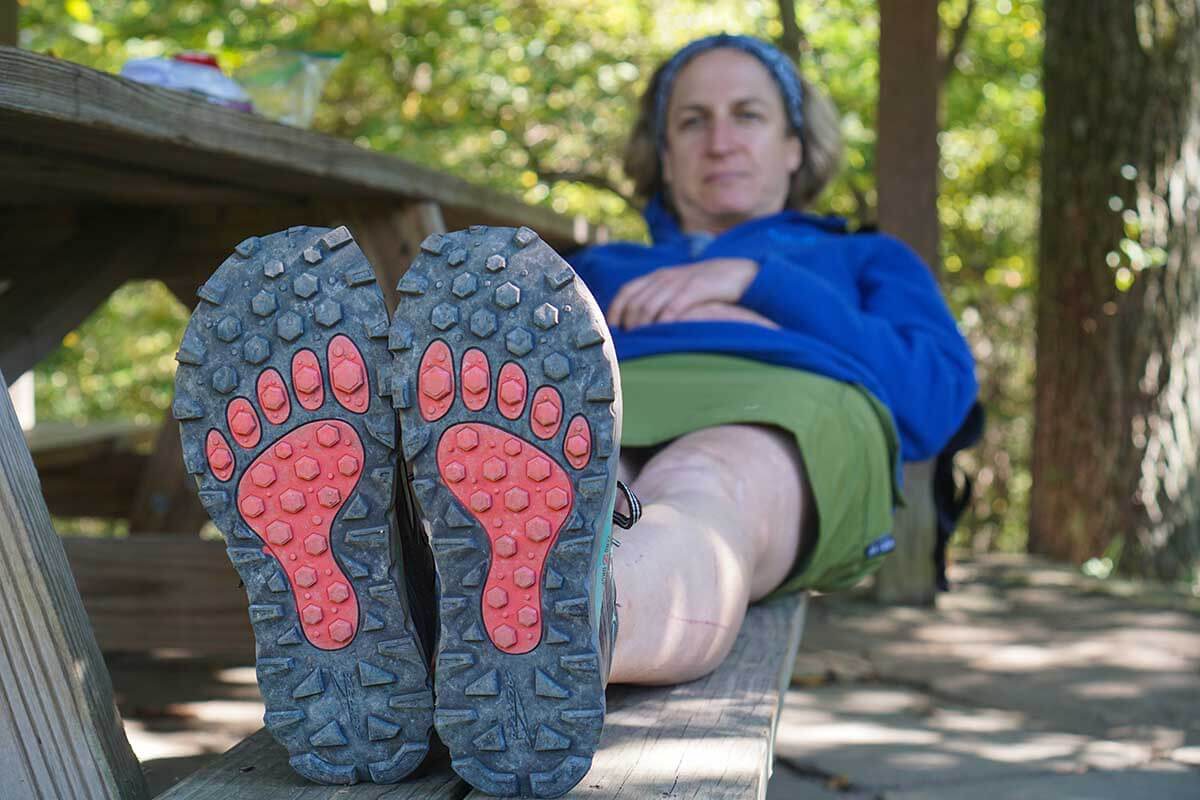
Lunch and a feet-up rest at the shaded picnic table at the Bears Den. We grabbed a couple of 50 cent Cokes out of the fridge!
If you live after crossing VA7, you get the privilege of hiking up to see the spectacular Raven Rocks overlook (lead photo of the guide). If it’s a weekend get ready for invasion of the day-hikers. The good news is that you drop the day hikers with your first step past the Raven Rocks. We ended our day at Blackburn AT Center which was quite a treat. They have tent sites, and a smallish cabin for hikers to stay in (no shelter tho), picnic tables, and fresh water from a tap. The AT Center is the meeting place for trail workers so there is a lot of activity surrounding the facility. As a result, trail magic often happens here. (Note: the Blackburn Center is a significant drop down and ascent back up to the AT.)
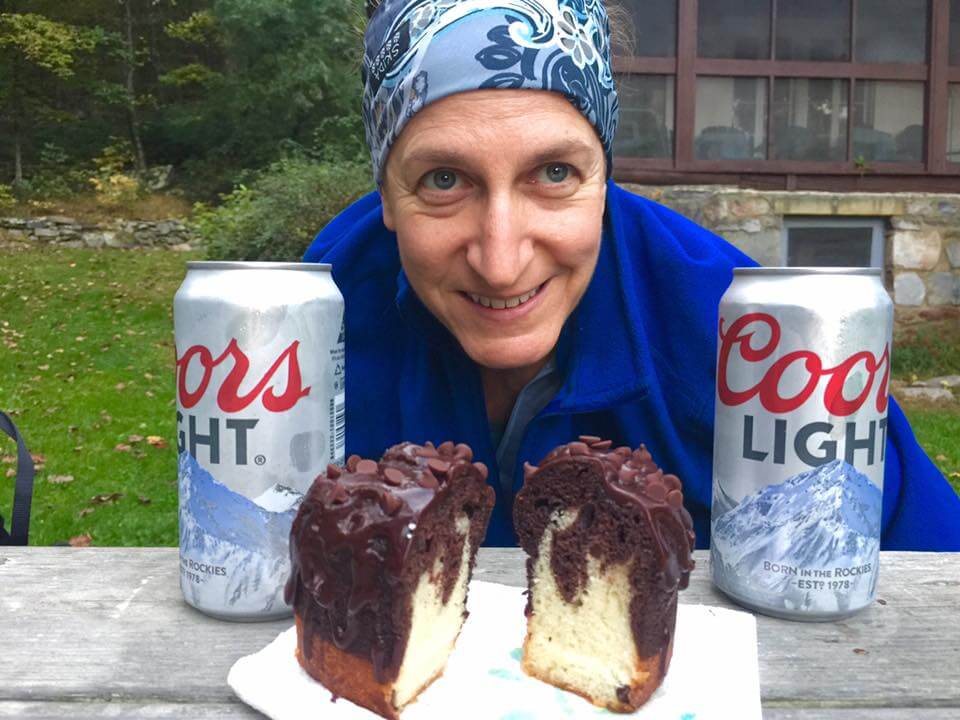
Cold beer and chocolate cake trail magic at the Blackburn Center. Who knew these two food groups tasted so good together?
Into Harpers Ferry – The Final Day
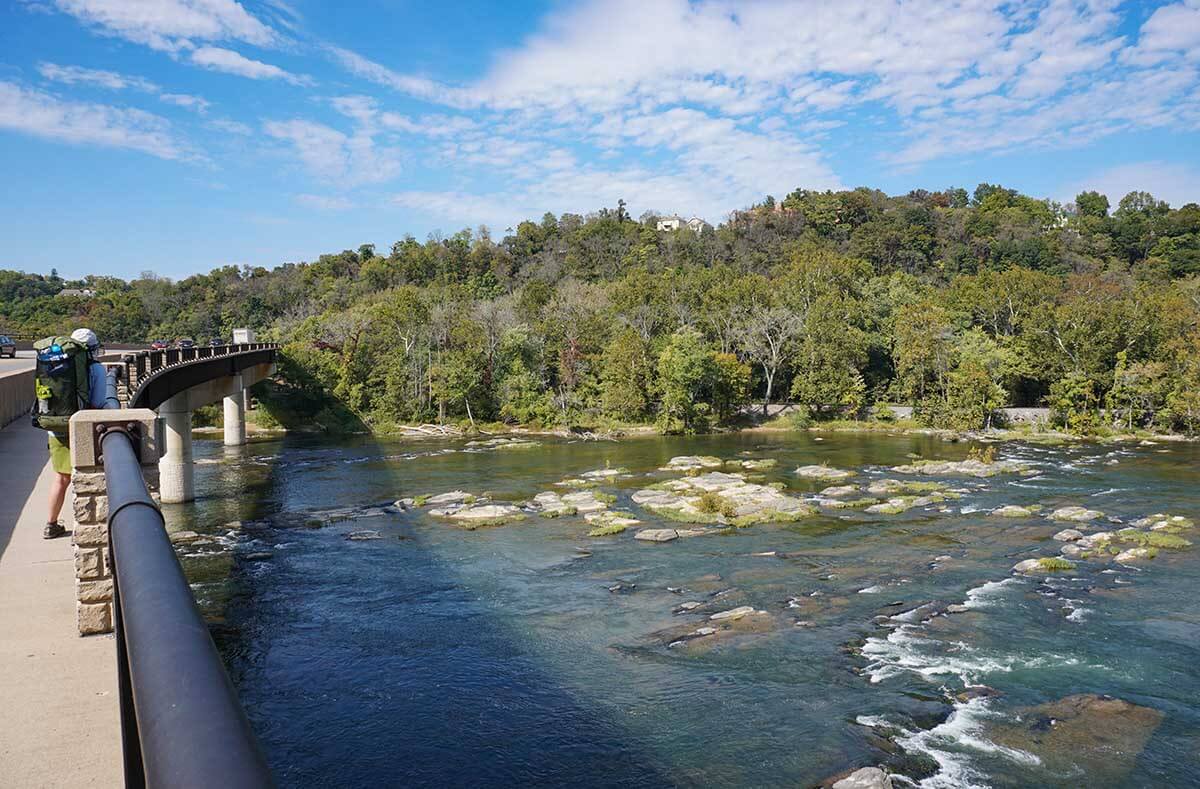
Rt 340 Bridge across the Shenandoah River as you enter Harpers Ferry.
Our last day was a walk into Harper’s Ferry. We wanted to enjoy some time in Harper’s Ferry so organized our section hike to do so. After Blackburn AT Center, the last section is fairly flat and offered up a nice stretch for your legs post-roller coaster. Coming into Harper’s Ferry is quite majestic as you cross the Shenandoah River Bridge to enter into the city.

We saw a number of these beautiful, and delicate Rough Greensnakes as we approached Harpers Ferry.
In Harpers Ferry we stayed overnight at the Econolodge as we had heard good things about it. We liked the location. Excellent WiFi and a box of trail magic available for the taking. Breakfast is always welcome and although they said it started at 6:30am, a full breakfast was out for the taking at 6:00am which helped us make our train. (If you arrive earlier or can stay a bit later in the morning, the nearby Guide Shack Cafe has the best coffee in town and serves light breakfast food.)
What to do in Harpers Ferry: Here’s a link to ideas about where to stay and what to do in Harpers Ferry
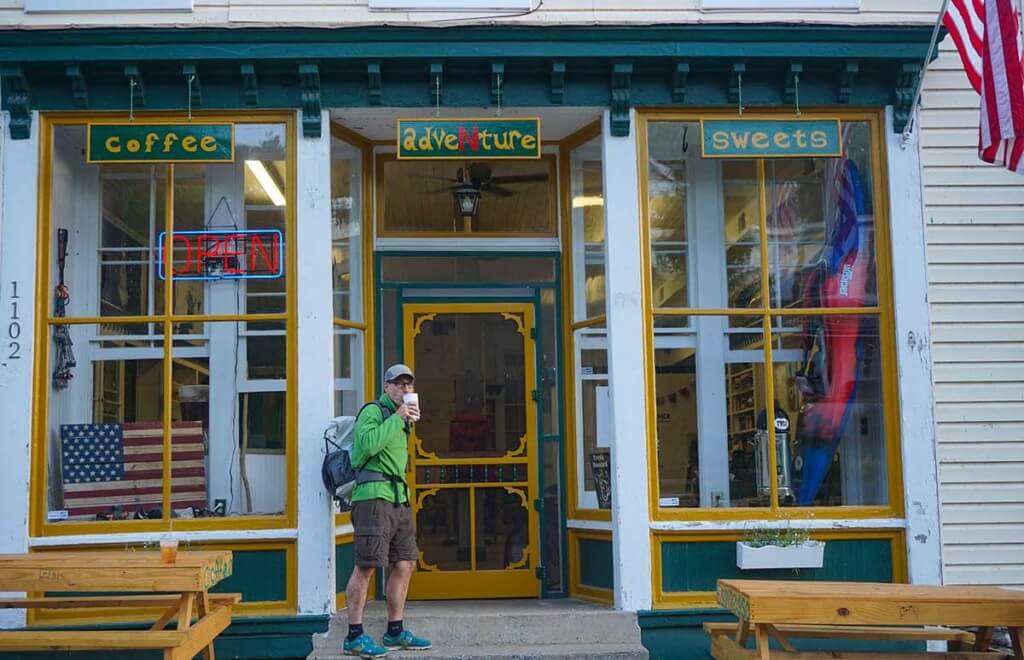
Adventure Alan under the sign for Adventure and as always finding the best coffee in town! The Guide Shack Cafe is veteran owned, veteran operated and sources its coffee and food from veteran owned Co’s! It opens early for coffee/breakfast.
As of November, 2017 Amtrak offers service to Roanoke, VA. This makes another stunning section of the AT accessible via public transportation to most of the East Coast. This hike is just south of Shenandoah National Park. It’s every bit as beautiful as “The Shen” but wilder and without the crowds! The guide that follows gives you all the information you need to do this Appalachian Trail Section Hike – Roanoke to Shenandoah National Park. Leave the car at home and hike green!
(lead photo: dawn over the Shenandoah Valley from Cedar Cliffs Overlook. One of the highlights of this AT section is the great ridge walking with superb views)
More superb ridge walking: The Appalachian Trail as it meanders over Cole Mountain Bald.
A Series of Guides to Low Carbon Section Hikes on the Appalachian Trail
This is the 3rd installment of our no car needed, Appalachian Trail (AT) Hiking Guides. We are big fans of leaving the car at home when hiking. Because the AT goes through or near urban areas, it’s not difficult to section hike portions of the AT using only public transportation. Many of these are among the nicer sections of the AT. This guide is for an AT section hike that you can undertake solely using public transportation from Washington, D.C. and/or much of the east coast. This 134 mile AT section could be done in one long’ish week (7-11 days). It would also be a great hike for fall color viewing as it has much less foot traffic than the adjacent Shenandoah Park.
Trip 1: Low Carbon Appalachian Trail Section Hike via Train – Harpers Ferry WV to Harrisburg PA, 124 miles
Trip 2: Low Carbon AT Section Hike – Shenandoah to Harpers Ferry, 54 miles
Trip 3: this post Low Carbon AT Section Hike – Roanoke to Shenandoah National Park, 134 miles
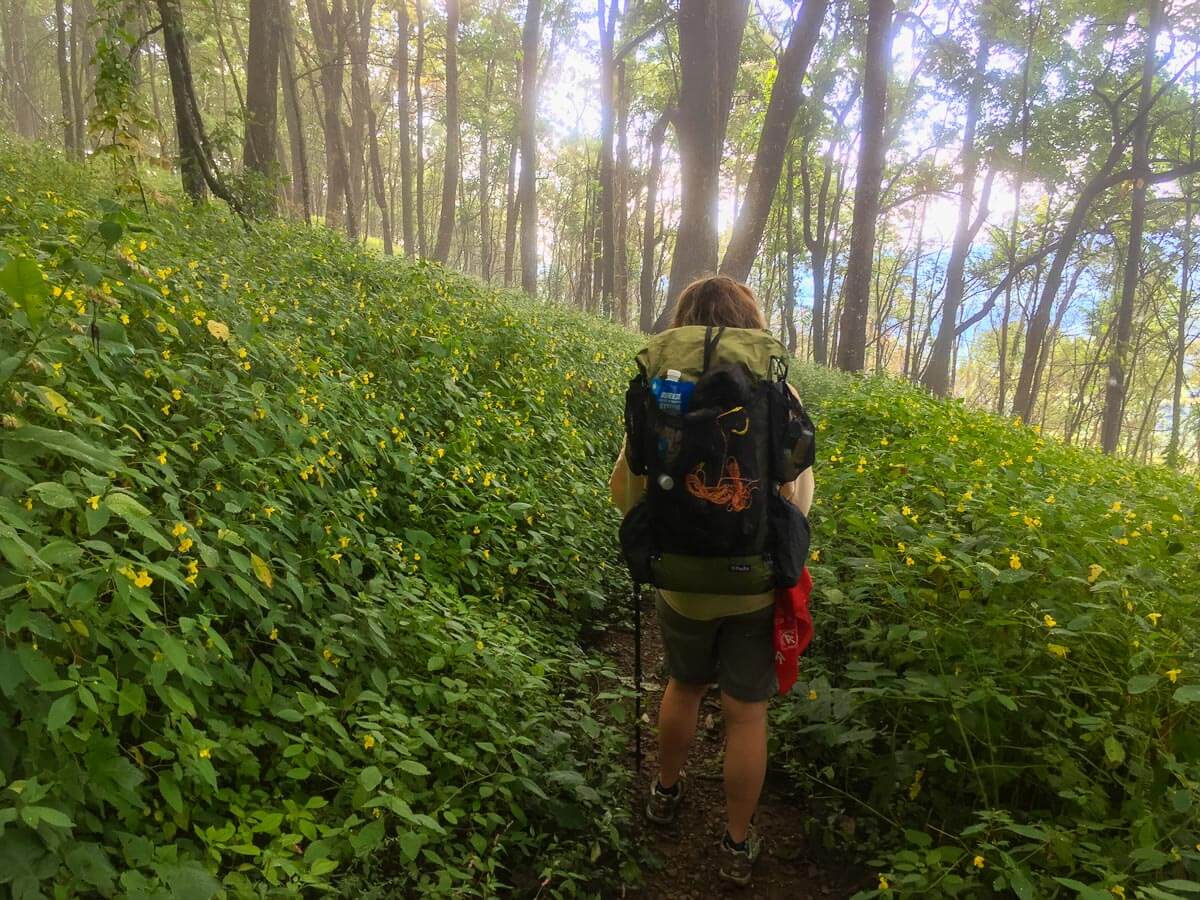
Many sections of the Appalachian Trail were lush with late summer wildflowers like this climb to Saltlog Gap & Bluff Mountain.
Top 5 Highlights of this Section of the AT
- Amazingly wild and remote for Central/Northern Virginia. This section goes through many Wilderness Areas with few road crossings and tons of wildlife and wildflowers!
- Far less crowded — but as good as or better than the adjacent Shenandoah National Park
- Great ridgetop walking with superb views
- Cole Mountain Bald and Three Ridges Mountain (both great mountain tops)
- Many scenic bridges: including the James River Bridge (longest foot traffic only bridge on the AT)
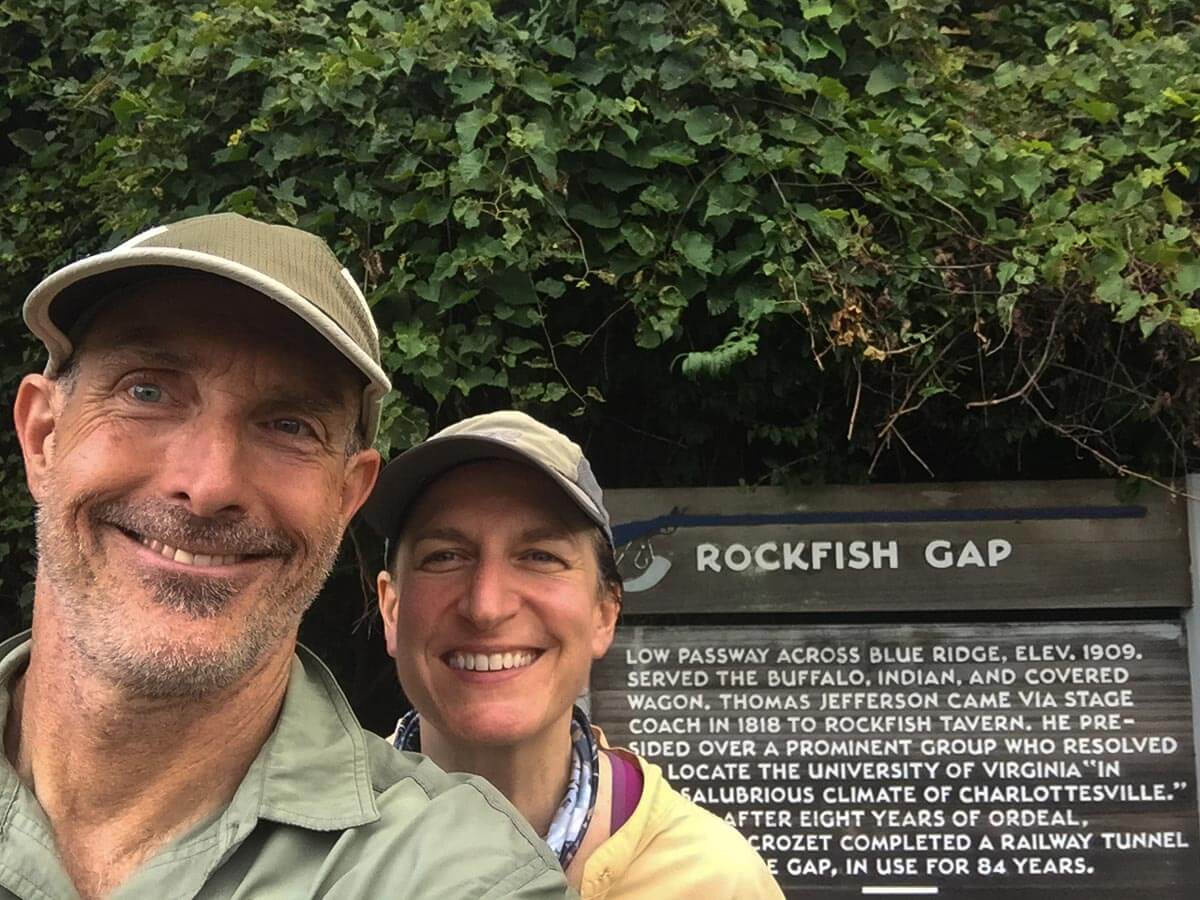
Overview map of the route – Roanoke VA to Rockfish Gap VA (Charlottesville)
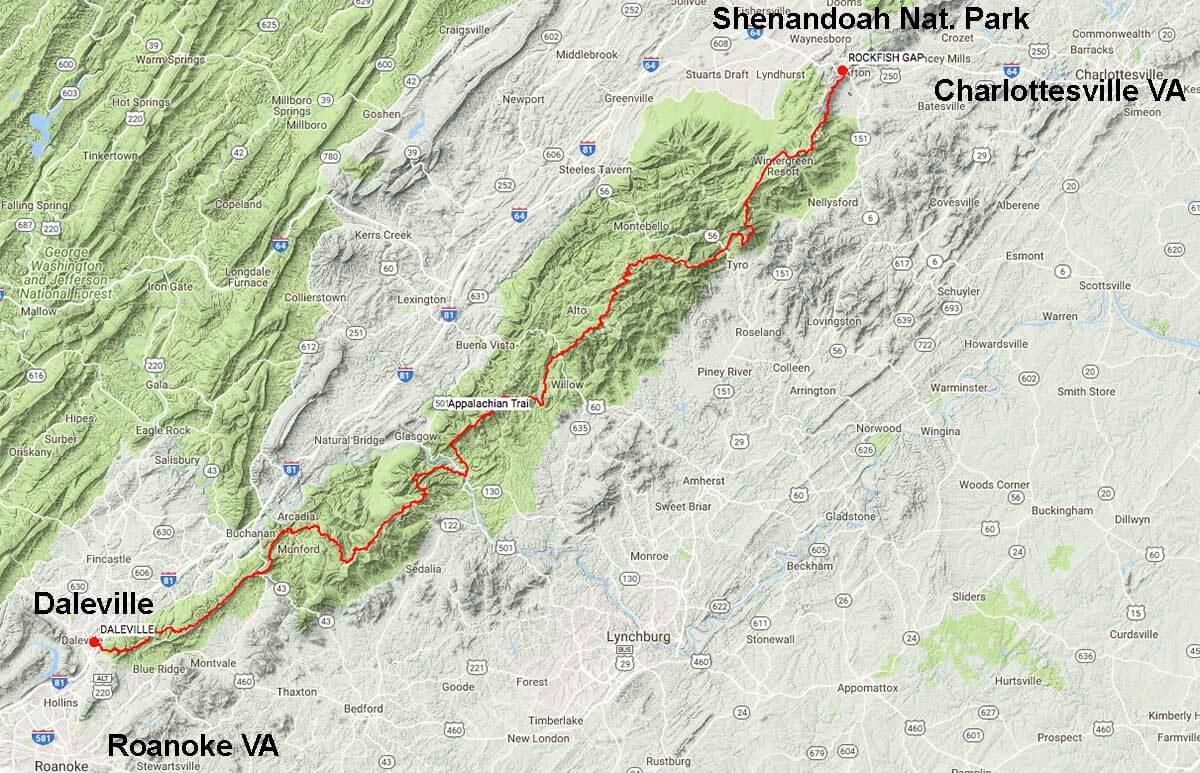
Way less crowded but no less beautiful than the adjacent Shenandoah National Park! The trip starts in Daleville, VA (near Roanoke) and goes 134 miles along the Blue Ridge to Rockfish Gap, the southern border of the Shenandoah National Park. [CLICK ON MAP TO ENLARGE]
Quick Trip Stats
- The trip takes between 7-11 days [We did it in 6.5 days]. You can also do it in parts.
- 0 mile – trip start, Daleville, VA near intersection of I-81 and US 11 (Lee Hwy). It’s about 20 min N of Roanoke, VA
- 134 mile – trip end, Rockfish Gap, the intersection of the Blue Ridge Parkway and I-64. It’s about 25 min W of Charlottesville, VA, and marks the southern border of the Shenandoah National Park.
- 23,000 feet of elevation gain/loss
Transportation Time
- It’s about 5 hours on the train from Washington Union Station* (Wash. DC) to Roanoke, VA. Train times are convenient, leaving Washington at 4:50pm (right after work) and arriving Roanoke at 10:00pm.
- It is another 20 minutes to trailhead via Uber or Lyft from the train station.
* NOTE: These trains actually originate in Boston so you can catch the same train anywhere along the Northeast Corridor and it will bring you directly to Roanoke.
THE DETAILED TRIP GUIDE
Appalachian Trail Section Hike – Roanoke to Shenandoah National Park
This guide is meant to supplement the many excellent general guides to the Appalachian Trail (AT). As such,
- Our guide gives more details for this specific section of the AT, and in particular how to access it by train and bus from much of Northeast US.
- Lighten your load: The GEAR (link) and FOOD (link) for the light packs we used to efficiently and comfortably hike the AT. A light pack will make the hike more pleasant for everyone!
- And finally, we discuss the places we most enjoyed on the hike in both text and photos.
What’s in this Trip Guide
- Logistics: link on how to use trains and other transportation to and from the start and end of the hike
- Some of our favorite places: link to Photo Essay & Trip Description
- Gear: a link to list of our LIGHT GEAR that made our trip more FUN (kept our packs around 15 pounds for the entire 134 mile trek without food resupply)
- Food: a link to list of the FOOD we took to save food weight but still eat healthy. Important since this AT section is lean on close-to-trail food resupply options.
- Waypoint and Mileage Table: link to Waypoint and Mileage Table
- Maps: link to our recommendations for maps and guidebooks
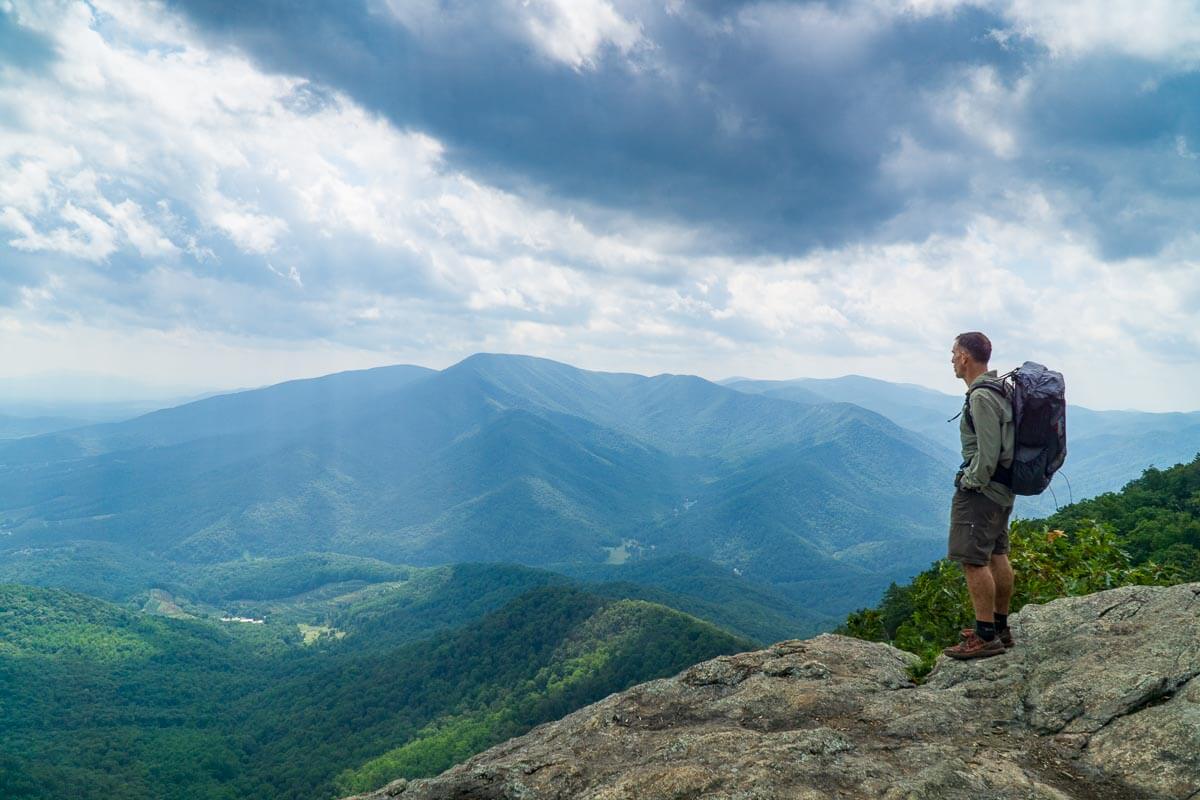
The rocky crest of Three Ridges Mountain had some of the best overlooks of the entire trip. Alan looks south across the valley of the Tye River to the opposing ridge of “The Priest.” [Heavy clouds are the remnants of Hurricane Harvey that devastated Houston.]
Logistics – Getting to and from the Hike
To Trip Start
This hike begins at Daleville, VA, just north of Roanoke, VA on US 220. We recommend taking the train, spending the nite in Roanoke or Daleville, and starting your trek first thing the next morning.
- As noted, there is a NEW train from Washington Union Station to Roanoke, VA that begins on Oct 31, 2017. The times are well-suited for a week or weekend trek. The train leaves Washington at 4:50 pm Monday-Friday and arrives Roanoke, VA 9:55 pm — about 5 hours. The saver fares are around $37, one way. Slightly different times Saturday and Sunday. See schedules on www.amtrak.com
- From the train station, you have several options. The train drops you right in downtown historic Roanoke. If you want to get a good nite’s sleep, and treat yourself, stay in the grand Hotel Roanoke (www.hotelroanoke.com), literally across the street from the train station. If you want to get closer to the trail (and stay somewhere a bit cheaper), you can stay steps away from the AT at the Howard Johnson Express, Daleville (a favorite of AT thru-hikers).
- Either way, you can catch an Uber or Lyft to the HoJo’s or the trail-head (about $25) from the train station.
NOTE: The combination of Uber/Lyft with the train (or bus) is a game changer for low carbon hikers. The ability to hook into a scheduled train or Greyhound route makes what used to be a “close-but-no-cigar” hike, into something quite doable.
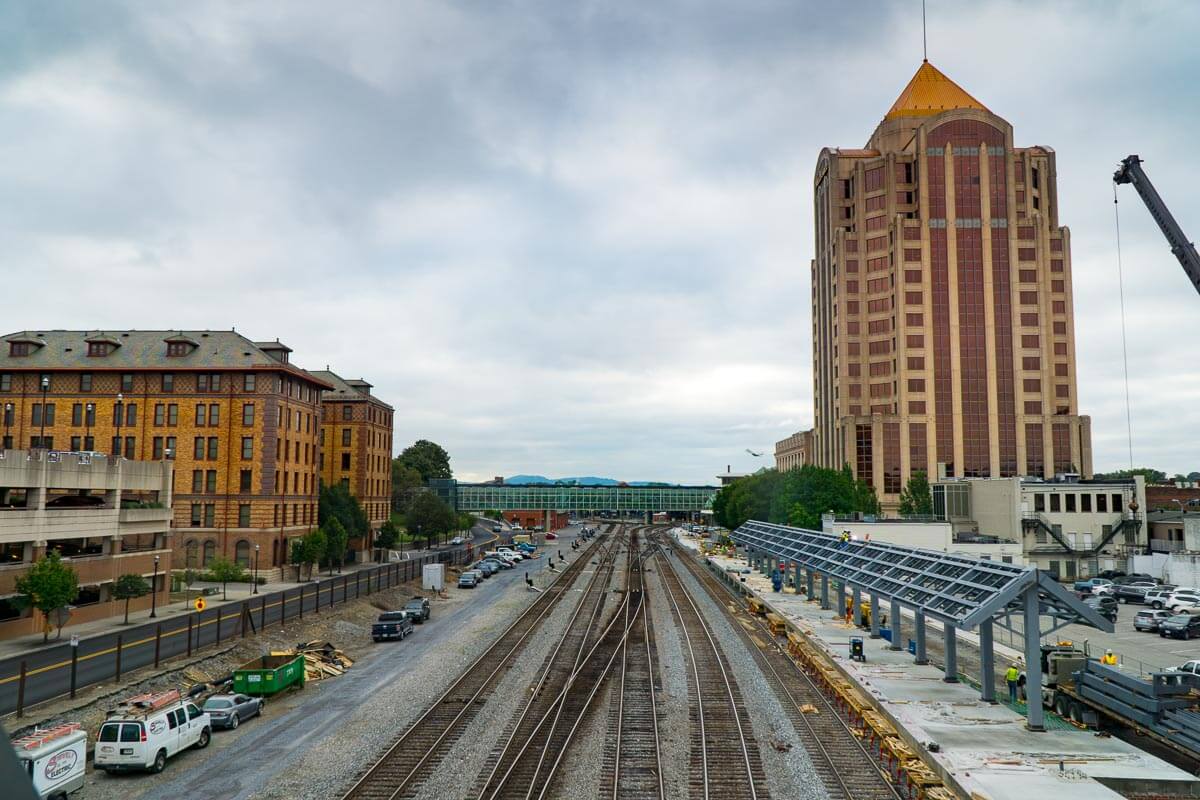
Construction of the new Amtrak Train platform in historic, downtown Roanoke VA. Service starts on October 31, 2017. The tall building on the far right with the copper roof is the Wells Fargo Building. The building on the left is the old Norfolk and Western railroad office building. The station is right next to the Historic Roanoke City Market District and Hotel Roanoke, “the vibrant center of downtown Roanoke featuring historic buildings, live theater, museums, art galleries, shopping, a variety of restaurants…”
At Trip End
The trip ends at Rockfish Gap, just before the Appalachian Trail enters the Shenandoah National Park. We found it surprisingly easy to get an Uber or Lyft from there to Charlottesville (we waited 10 minutes). Cost was about $35-45. Once in Charlottesville, take either the Amtrak train or the Greyhound Bus to get back up north.
By Train-cheapest train tickets are $25-30, one way
- 7:09am, Train 20, The Crescent -comes thru from New Orleans heading north early (goes all the way to New York Penn). But this train is often times late so watch the times on the Amtrak.com app, time is 2 hr 44 min to Washington.
- 8:52am, Train 176, Northeast Regional ONLY MON thru FRI — this is your quickest option if weekdays work for your hike at 2 hr 22 min. This train ends in Boston.
- 11:13am, Train 156 Northeast Regional ONLY ON SAT, SUN –this is your quickest option if the weekend works for your hike at 2 hr, 22 min to Washington. This train ends at NY Penn.
- 3:19pm, Train 50, The Cardinal, ONLY SUN, WED, FRI –comes thru from Chicago heading north (goes all the way to NY Penn) but can also be late so watch the Amtrak app for times. Time is 3 hours to Washington.
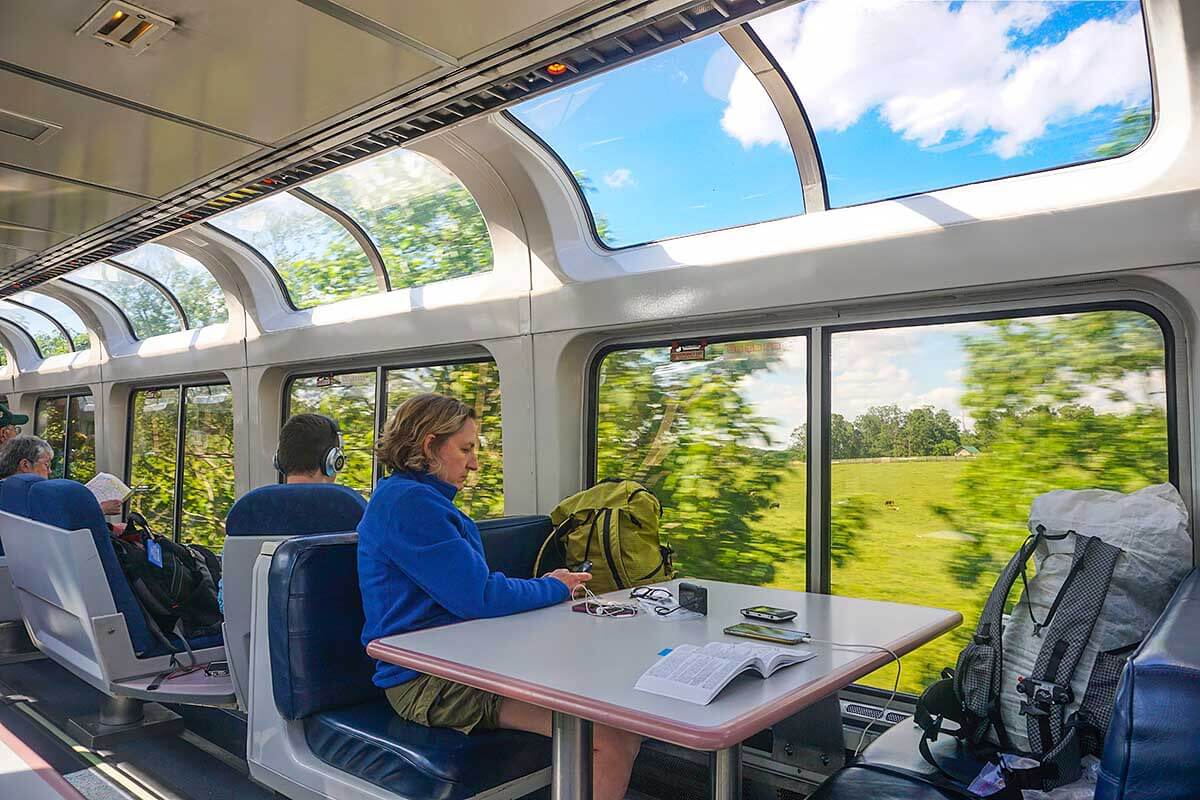
These Section Hikes are quickly accessible via train (Amtrak) from most major Mid-Atlantic and Northeast cities. No shuttle woes and miss all the heinous weekend traffic, serenely traveling on the train. [Picture is from our Low Carbon Trip 1: Appalachian Trail Section Hike via Train – Harpers Ferry WV to Harrisburg PA, 124 miles]
By Bus- cost around $20, one way 7 days a week
- 8:45am, 3 hours, (direct service to Washington D.C.)
- 4:50pm, 3 hours, (direct service to Washington D.C.)
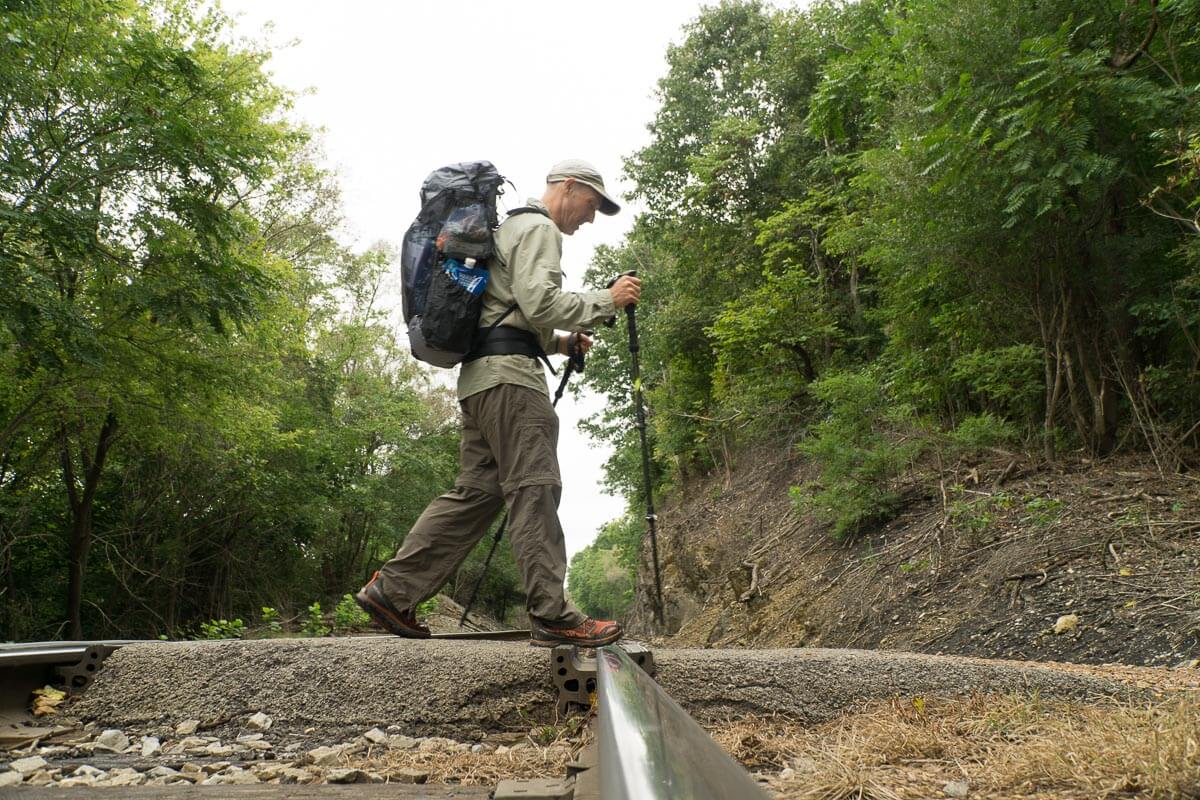
Day 1 of trek, AT railroad crossing is near Troutville VA. Photo: Ron Bell of Mountain Laurel Designs.
Maps and Guidebooks
The Appalachian Trail is possibly the most documented trail in the world. There are many excellent guides. Our favorite guide is David Miller’s (AT trail-name, AWOL) “The A.T. Guide Northbound.”
We supplement it with the following AT Pocket Profile Map(s):
“Appalachian Trail Map AT-9 – Buchanan VA – Rockfish Gap VA AT Pocket Profile”
Waypoint and Mileage Table
The table below is in scrollable window or you can see the table full page here, as a Google Sheet
Tips for Hiking This Section
- Shelters are not consistently placed at even distances. You may end up with a longer or shorter day than you wished so carefully plan each day.
- There are a few steep and rocky climbs. Make sure you pay attention to elevation profiles.
- Late season water can be scarce high on the ridges. It’s good to know where your next water sources are (and if it’s dry have a backup(s) as well).
- This section has no on trail or close-to-trail food resupply options. To resupply for food, you’ll need to go significantly out of your way. As such, we did the entire 134 section without resupply for food. This made the hike significantly faster and more efficient. But our packs were less than 15 pounds including the food we carried. Please see our food list, “Best Backpacking Food – simple and nutritious” to get the best nutrition for the lowest weight while still being tasty. It matters!
Trip Highlights – a brief Photo Essay
The start of the 134 mile trek in the Daleville/Troutville area is about 20 minutes north of Roanoke, VA.
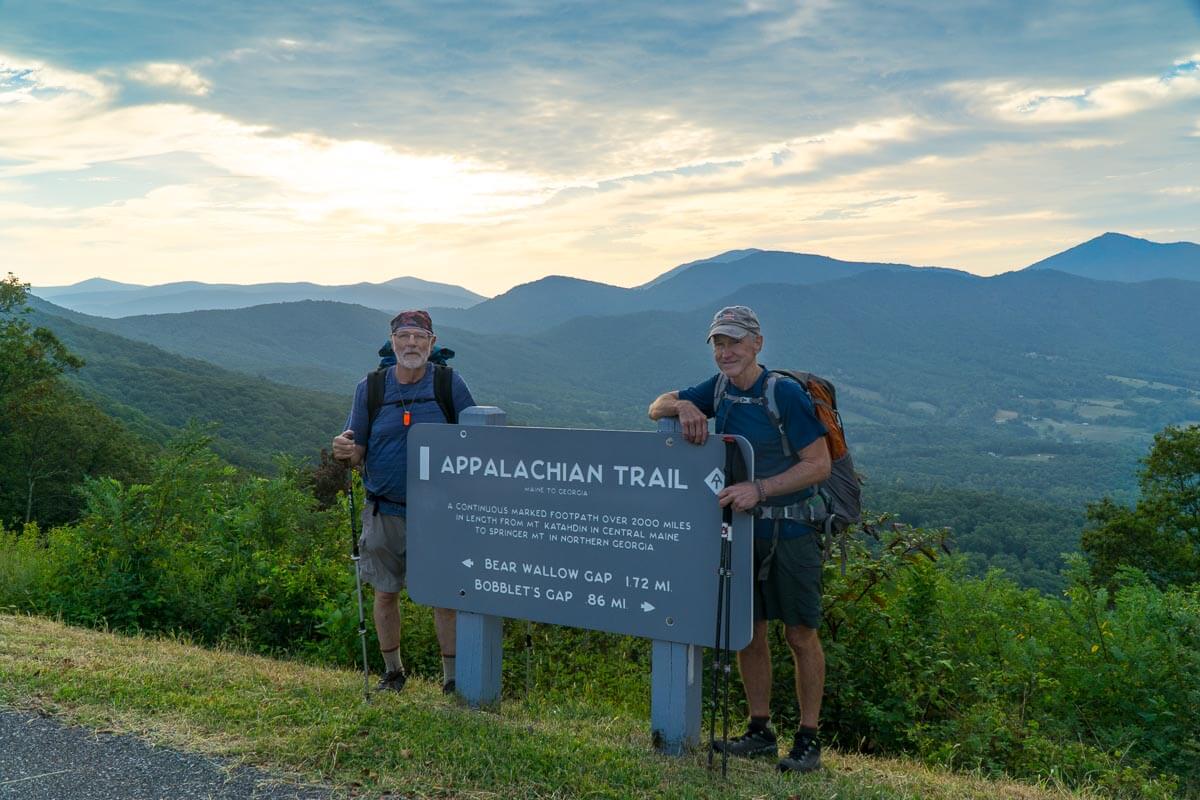
One of the best parts of hiking the AT is the interesting people you meet and share the trail with. Pictured are Rick Elliot and Kerry (?). I spent the first night of the trip with them at Bobblets Gap Shelter. Both are Vietnam Vets and cancer survivors. Long story short, but they always had plans to thru-hike the AT together when they retired. Then at retirement one of them got cancer and the other put off the trip until his friend got better. Then, when the first got better the other got cancer. By the time they were both well enough to hike they decided to do the trek in 500 mile sections, which is where I met them. Gotta love these guys’ spirit and positive attitude!
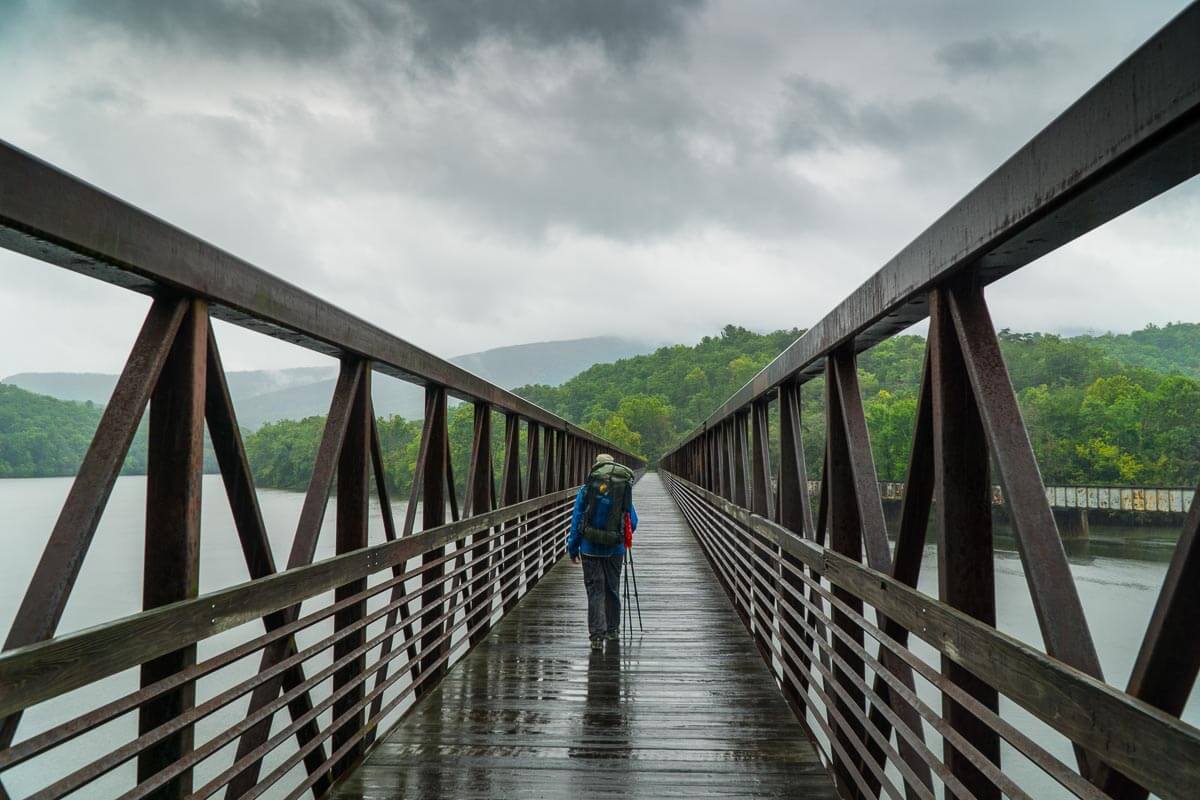
One of the many great bridges: Crossing the James River (yes, the same river Jamestown is on). It is the longest foot traffic only bridge on the AT. [Heavy clouds & rain are the remnants of Hurricane Harvey that decimated Houston. It rained hard for 3 days of our hike.]
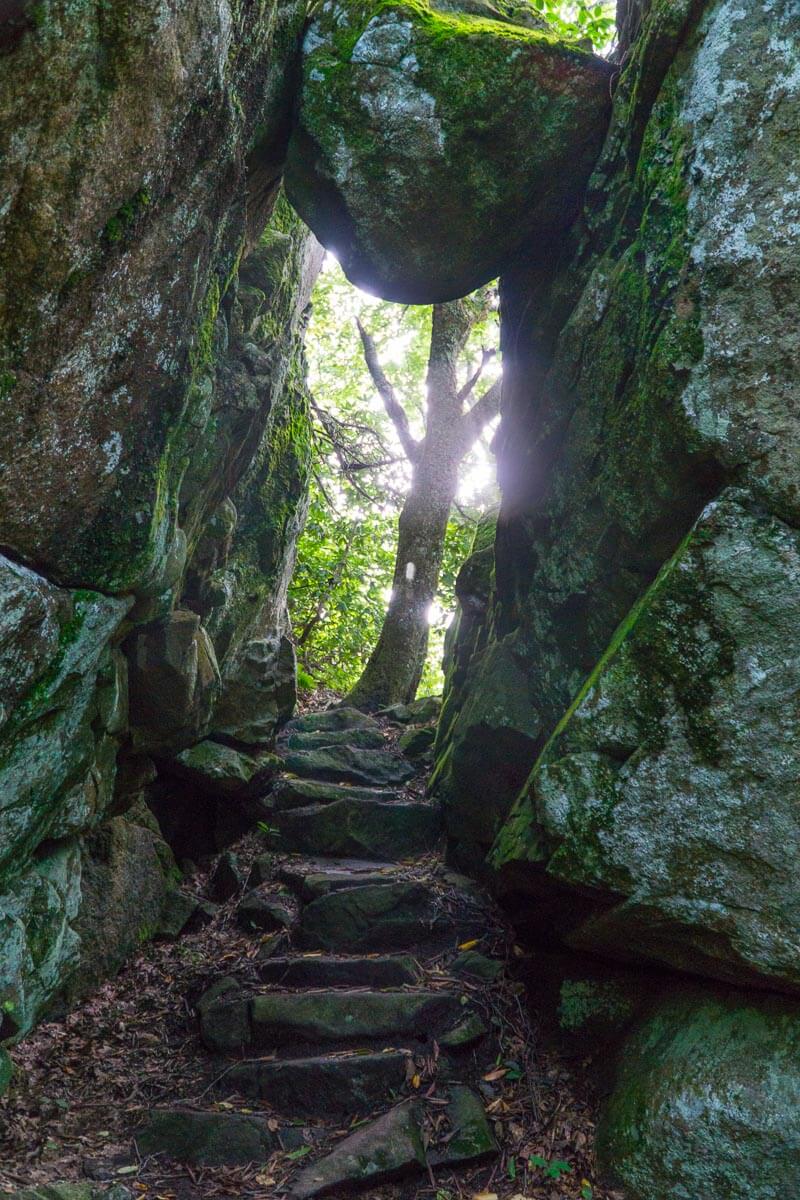
“The Guillotine” a perilously perched boulder wedged over a narrow slot that the AT passed through. You can see the white AT blaze at the end of the slot.
The tops of ridges can be a bit blustery (see Alison’s hair) but the wildflowers don’t seem to mind.
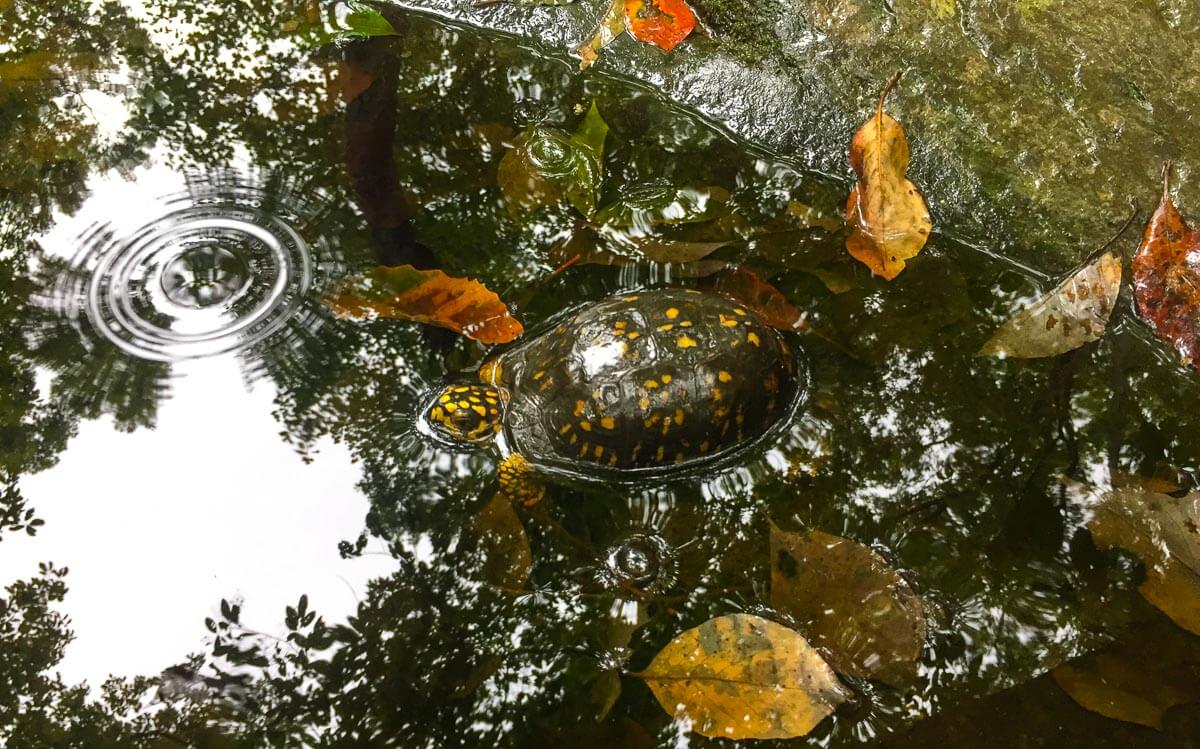
“I even had a salamander crawl up my leg one night in camp!” We hiked for 3 very wet days in the remnants of Hurricane Harvey. I don’t think I’ve seen as many turtles, frogs and salamanders just lovin’ life!
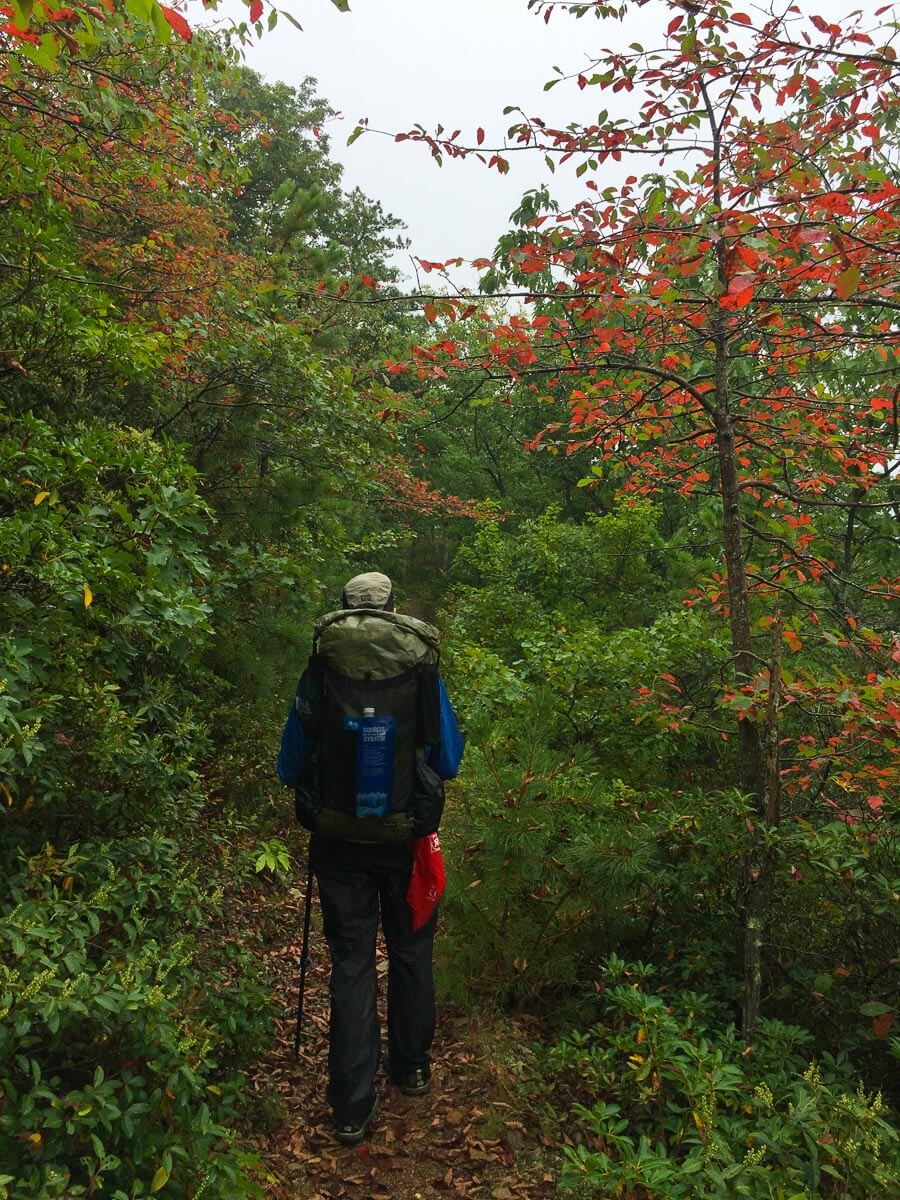
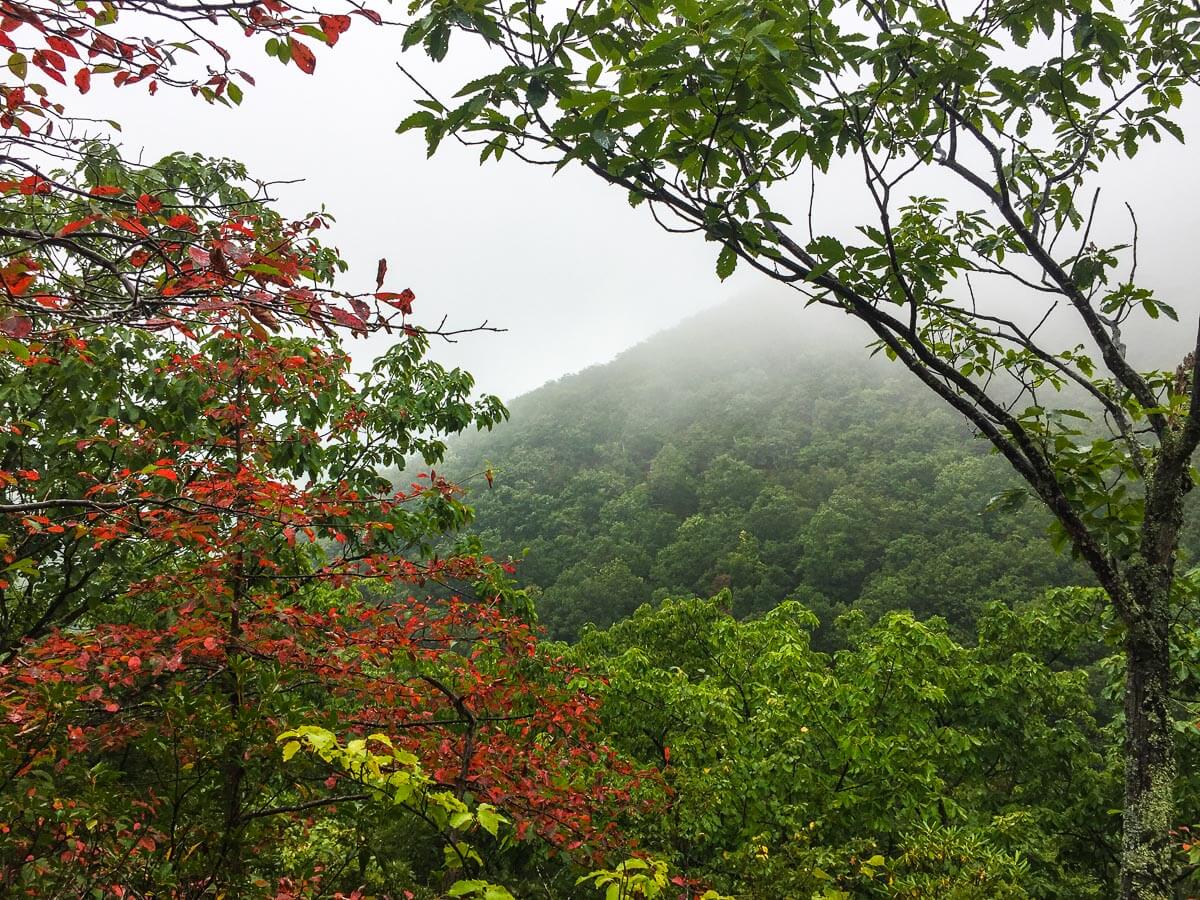
The rain enhanced early fall colors in the high mountains.
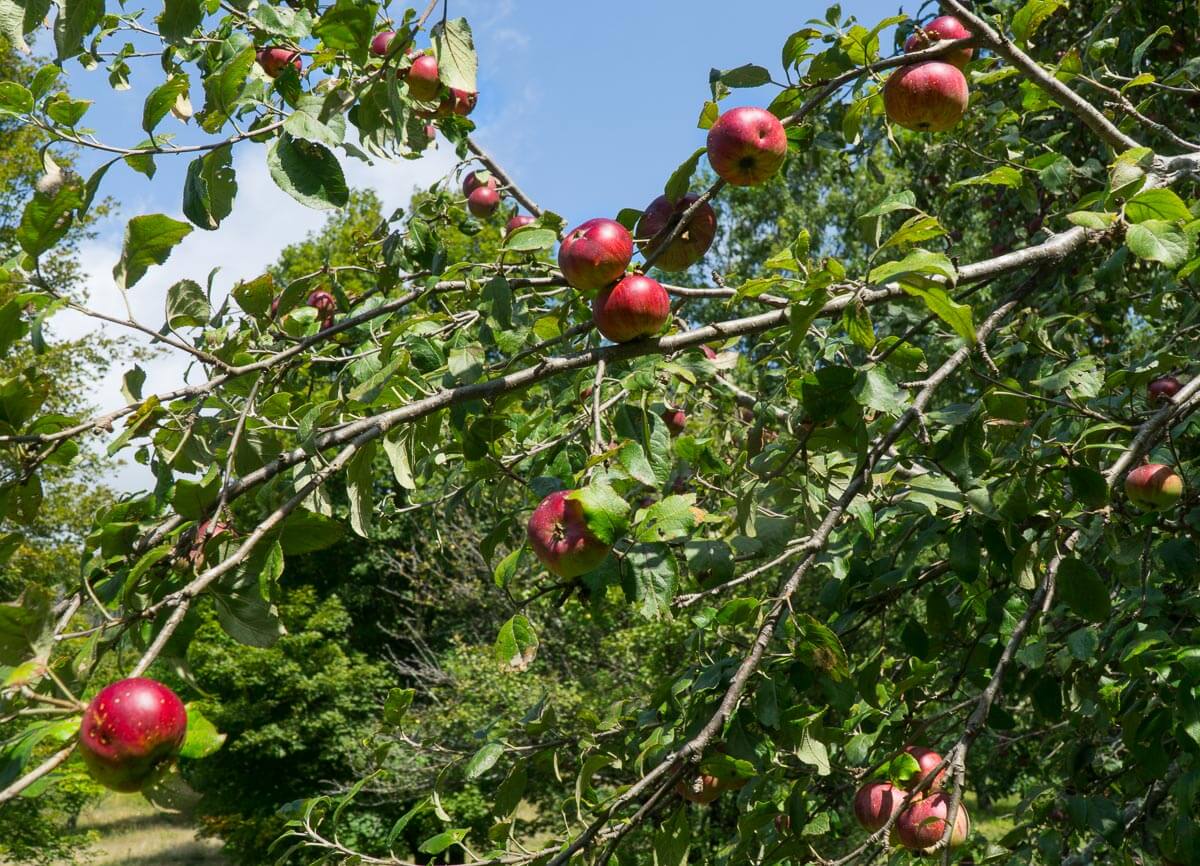
Apples from an old orchard directly over the AT. We picked apples with our feet still on the trail.
Moss covered John’s Hollow Shelter. We weathered some of the worst bands of rain here with sheets of water cascading off the roof overnight (thus the moss). We left warm and dry the next morning.
Trip End – Rock Fish Gap
There is a great kettle corn truck here. It’s even Trip Advisor rated! Get some while you wait for your Uber.