There is a lot of Lightweight Backpacking Gear on Amazon Prime! Here are our top picks for backpacking gear!
Backpacking with a partner? Try these tips for couples backpacking gear & ultralight backpacking gear to make your shared trip the best!
This article proposes a more realistic 13 Essentials that will better keep the modern hiker safe. This is because the Classic 10 Essentials (first proposed in the 1930’s) need an update for the 21st Century given the realities of a modern day hiker.
- First, a major conceptual trap of the traditional 10 Essentials is that they are all gear. I would counter that the two most important “essentials” are actually skill and knowledge items: 1) good trip planning and 2) the skill of staying found.
- Second, why should there be only 10?
- Third, why do none of the 10 Essentials take advantage of 21st century technology?
- And finally, some 10 Essentials are a bit arcane & don’t match the skills & habits of the modern hiker.
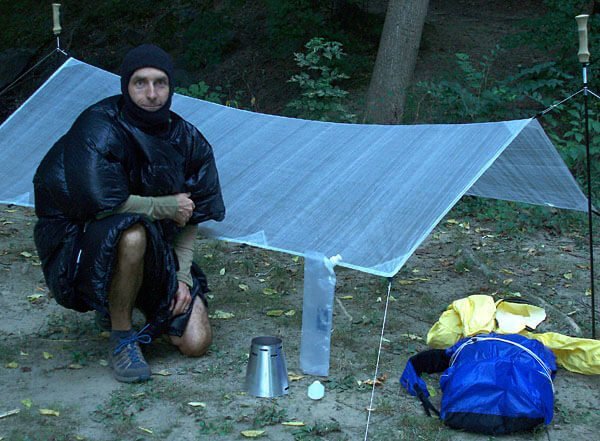
Lead photo: A “freak” summer blizzard in the Wind River Range. I was super grateful to have all my warm clothing, a bivy sack and 1/2 lb tarp. And even more appreciative I had the skills and knowledge to use them.
The 13 Essentials for the Modern HikerMy revised “essentials” are to help people be prepared for emergency situations outdoors. As such, it’s a good idea to bring them whenever you are in the backcountry—whether it’s just a long day hike, or a multi-day off-trail backpacking trip. The following 13 Essentials favors a pragmatic approach to bringing the right gear. First and foremost, it relies on your best piece of gear, what’s between your ears.
|
1 Trip Plan
Use what’s between your ears. More problems arise from poor planning and lack of information about a hike than from not bringing the right gear. So, whether you’re day-hiking or backpacking you should:
- Do your research on hiking distances, trail conditions, campsites and water ability. Good examples of this type of research are: Map kiosks/Information Centers at major trailheads or park publications like the excellent Zion Park Map and Guide, or guide books. Much of this info is now online.
- Then make an honest/realistic estimate of how far you’ll hike each day. Be conservative. You don’t want to end up stranded somewhere because you only hiked ¾ of the distance you expected. And in case you end up short, have a backup camp area with a water source.
- Get a weather report for your trip and then plan and pack gear for those conditions! Since 90% of hikers or backpackers take 90% their trips for 3 days or or less, this weather report should be quite accurate. My favorite weather app for both smartphone and desktop is Weather Underground.
- And once on your trip, you also need to watch the weather and be prepared to deal with “freak” weather. This is especially true in high western mountains where a summer blizzard is always possible. Even the lower elevation Appalachian Mountains can have some cold and severe weather in the warmer months. Usually park info sites will let you know what sorts of extreme weather might be possible. [Note: This does not necessarily mean going overboard with gear—just taking the right gear.]
- Leave a copy of your trip intineary with someone. See: How to make and use a Trip Itinerary.
2 Staying Found
Staying Found is the key navigation skill that experienced navigators always use but never mention.
| The highly effective, “Staying Found” approach to navigation is within the capability of all hikers. |
Good navigators rarely get lost because they have a good idea (Trip Plan) in their head of where they are going and what to expect. That is, they are vigilant and observant while they hike—always comparing what they see on the trail against the plan in their head. They continually monitor their progress and check for upcoming trail junctions, lakes, stream crossings, a steep climb, a section of bog & other features to confirm that they are on the right track. If they stray, they quickly identify & correct it. You should do likewise. It’s your first and best navigation “tool.”
3 Navigation Tools (not always paper map and compass)

(left) 21st century navigation tool: Gaia GPS App running on an iPhone. (right) Traditional nav tools: A fully featured compass with declination adjustment and paper USGS topographic map underneath. Both have pros and cons.
Important Note: I respectfully suggest that people read the Navigation Tools & Electronics Appendix carefully before commenting on this important topic. In particular, it covers the strengths and weaknesses of navigational tools, their proper use and the ways they can fail (yes, map & compass can “fail” too).
For Navigation – Take the tools you can actually use!
The first question that requires an honest answer is, “what navigational tools can I actually use?” Like having a bicycle but not knowing how to ride it, navigational tools (like a compass or USGS topographic map) without the knowledge to use them properly are not tremendously useful. It might even be dangerous if your are relying on them to navigate and keep you safe, but under false assumptions about your skills.
Topographic Map and Compass
If you are skilled with a map and compass, then take them. They are reliable, light, effective, inexpensive and don’t require batteries, or cell phone signal [I bring them on every trip.]
Alternatives to Topographic Map and Compass
But if you aren’t confident using a topographic map and compass there are alternatives. You might consider using tools that you are more familiar with and easier to operate— ones that you can reliably use in the field. Two options are:
- A Simple Hiking Map like the Zion Park Map and Guide and using Staying Found Navigation as described above. This is your first and best strategy even when you bring other navigational tools!
or - A Smartphone GPS App with dowloaded, Off-line Maps that does not need cell signal! (A quick test with your phone in airplane mode can determine if your App & maps work offline.)
A Smartphone GPS App Might be a Better Navigation Tool for Some Modern HikersMany traditionalists insist that a paper topographic map & compass are mandatory. But frankly, many modern recreational hikers may not have the map and compass skills to be able to rescue themselves using them. But they do have a lot of practice and skill navigating with their smartphones. And practice and familiarity are the key for successful use of a navigational tool! Therefore, properly used* a Smartphone GPS App might be a better option for some. [*Please see: Navigation Tools & Electronics Appendix for a caution and advice about using electronics in the backcountry, especially battery life management, backup batteries, and not relying on cell coverage.] |
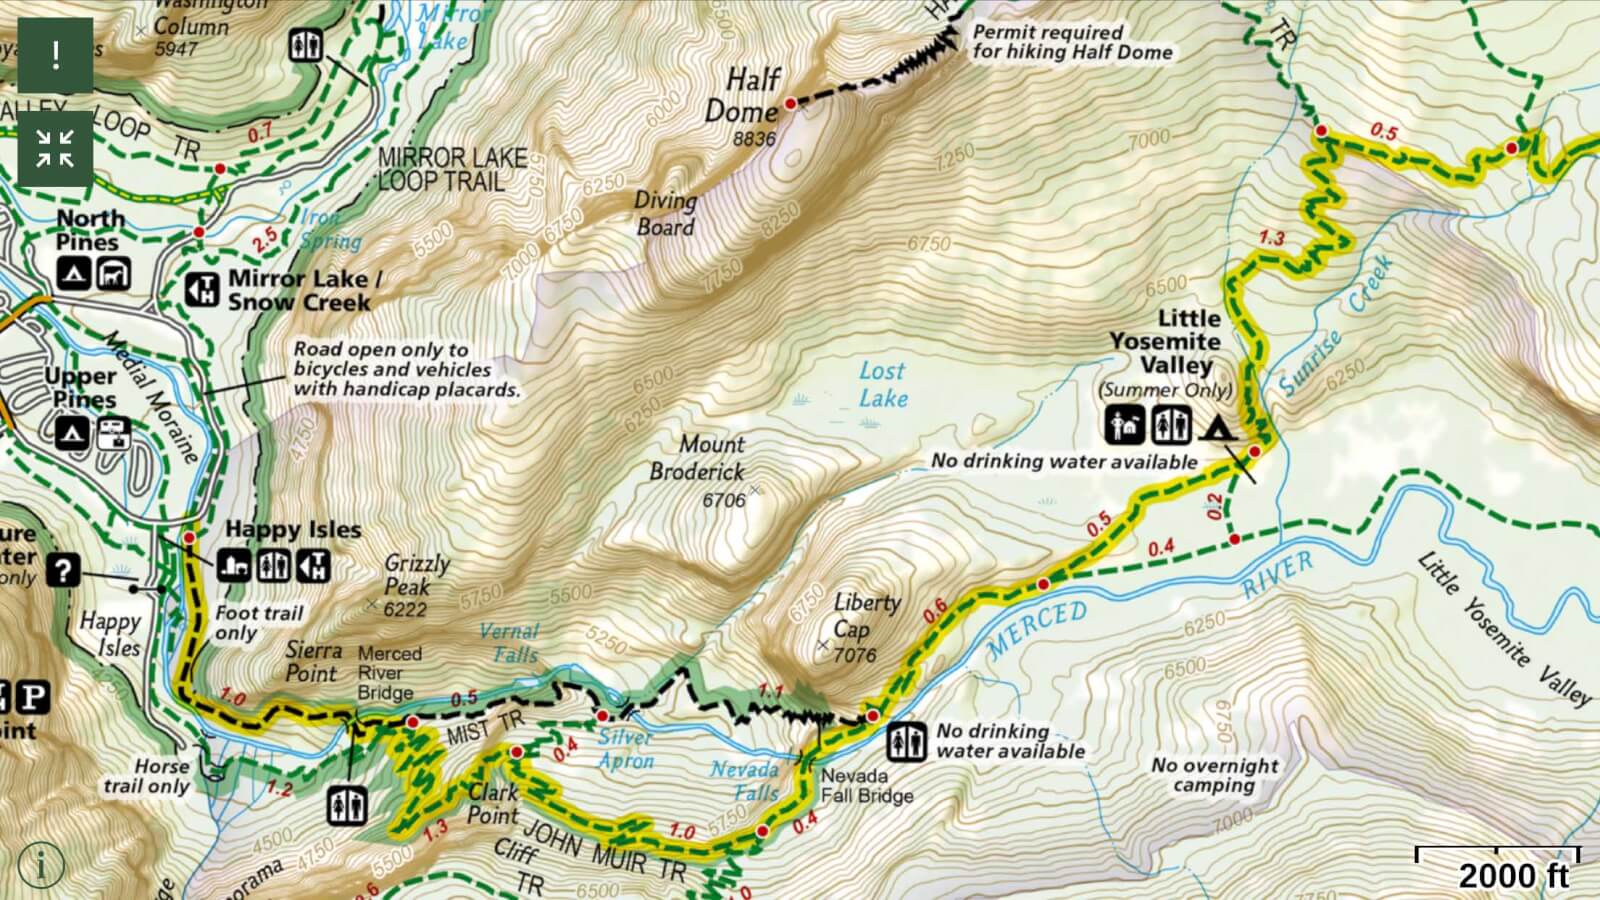
Start of the JMT in Yosemite. Screen shot of NG Trails Illustrated Map using Gaia GPS on an iPhone. The beauty of a smartphone GPS App like Gaia GPS is that you have many map sources at your finger tips at no additional cost and weight. E.g. NG Trials Illustrated, full USGS 7.5′ TOPO maps, Satellite Imagery, and other specialized maps. [click to enlarge and see full map detail]
4 – Protection from Sun and Bug Transmitted Diseases, Like Lyme
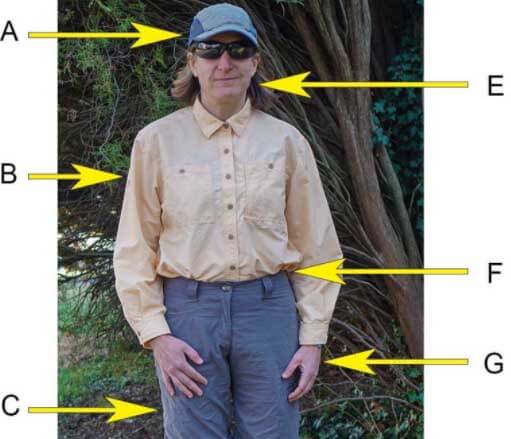
Full-coverage clothing is best for both sun and bug/disease prevention.
In addition to sun protection, I am adding bug protection to your basic trail needs. 2017 is forecast to be the worst year for tick/Lyme disease, and it’s only going to get worse in other parts of the US. Other diseases like Zika are also on the rise.
Your first and best option for sun and bug protection is appropriate full-coverage clothing like this. While chemical/skin applied sunscreen and bug repellants work (Picaradin Lotion is the most effective and long lasting without the problems associated with DEET) they are not nearly as long lasting or effective as sun & insect protective clothing and a good sunhat. And yes, wear those sunglasses. For more reading, see my piece on the Best Clothing & Repellants to Protect Yourself from Lyme and Zika.
5 – Insulation (extra clothing)
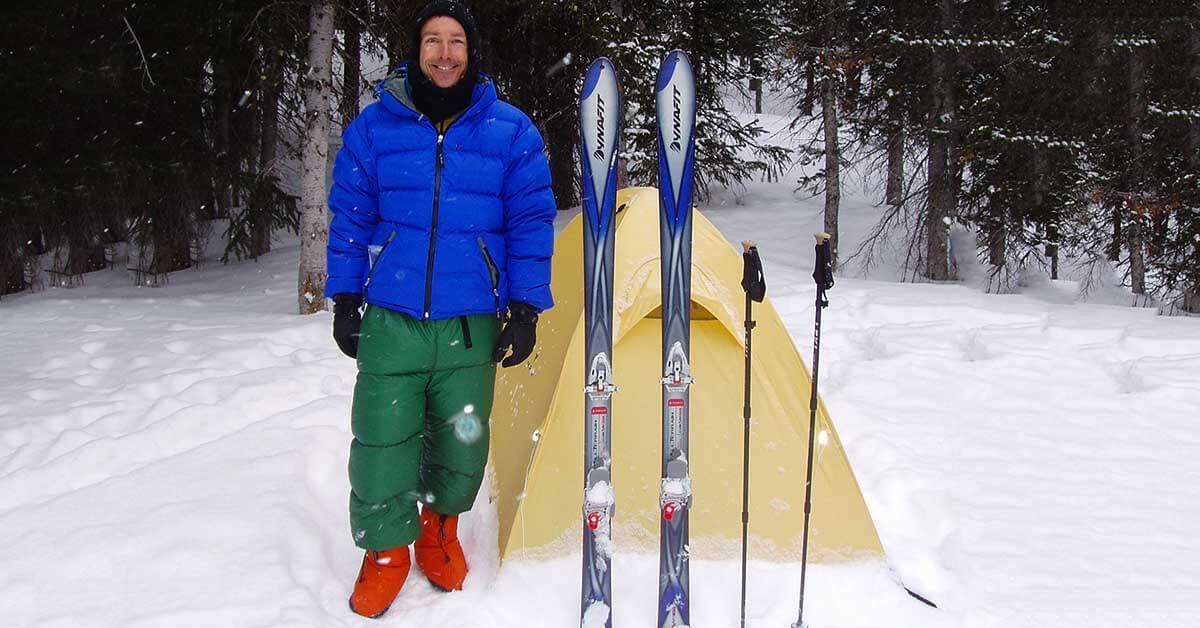
My warm clothing gets used on almost every trip. A good Down Jacket has saved my ass on numerous occasions such as a freak snowstorm on a summit, where I needed to stay warm enough to hike down to shelter and warmth. It’s also essential to keep an injured person warm until help arrives. Other invaluable pieces of warm clothing are a light rain jacket, warm hat and gloves like these.
While backup clothing is good, it’s usually best to first make the most of the clothes you are actually wearing. Towards that end, here’s a good piece on how best to use the clothes you are wearing: Top Mistakes Using the Layering System – How to Stay Warmer and Drier.
6 – Headlamp – A Good One!
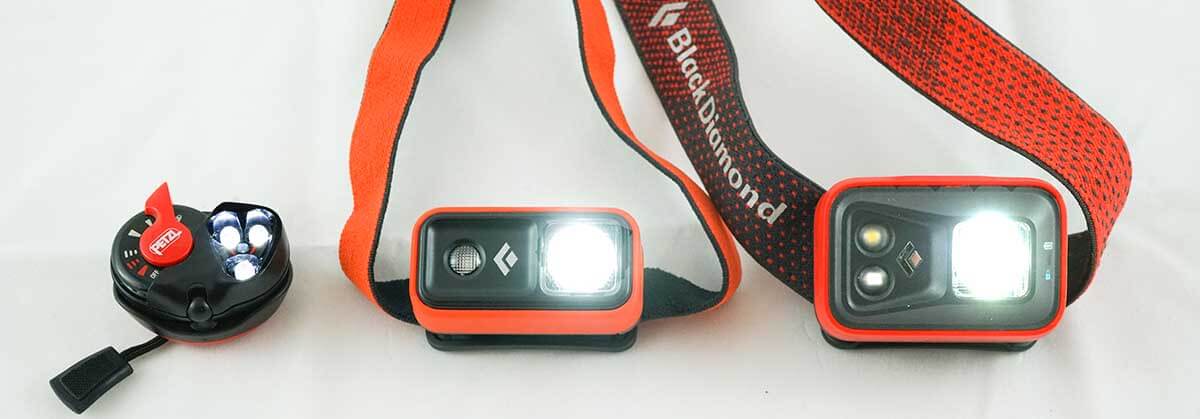
You need a seriously bright and long lasting headlamp to make an emergency retreat or exit. An example of a good one is the Black Diamond Spot Headlamp (right). The Black Diamond Ion (center) is marginally OK but would be better for following behind someone with a brighter light. On the left, the Petzl e+LITE Headlamp while low-weight and great for camp, is not bright enough for hiking.
If an emergency retreat or exit is necessary, your headlamp should be bright enough and last long enough that you can safely hike and navigate all night. To do that, you need a seriously bright and long lasting headlamp— putting out a beam of 50-60+ meters for ~12+ hours. A headlamp like this is likely in the range of 3 to 4 ounces. Examples: Black Diamond Spot Headlamp (Note: you only need one this strong for a party of hikers. The others following behind the leader can use smaller lighter headlamps, e.g. Black Diamond Ion.) And a spare set of batteries is always an excellent idea.
7 – Emergency Shelter
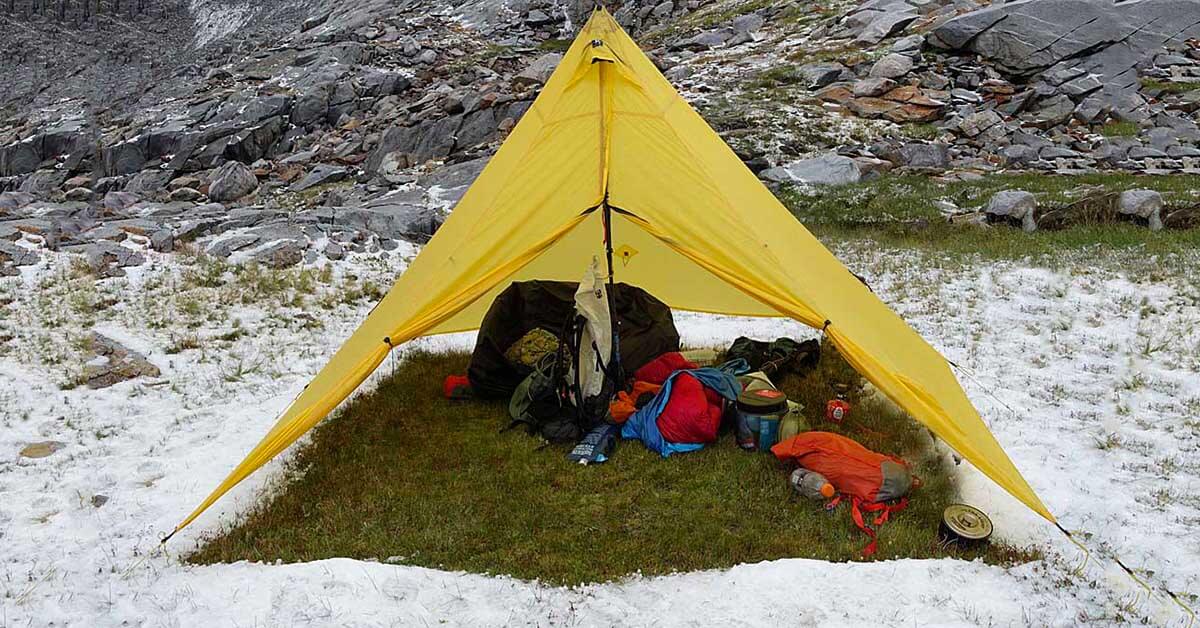
Tarps & pyramid tarps provide tremendous shelter at a fraction of the weight & cost of a traditional tent. As such, they are light enough to be used as both a primary and/or emergency shelter. [Yes, another summer storm. This time the High Sierras.]
True bivy sacks like these also make good emergency shelters and even the light emergency bivy sacs are OK. I am not a big fan of the paper thin, mylar emergency blankets as they can’t really be staked out to provide a true shelter like a tarp. That being said, they are certainly better than nothing.
8 – First Aid Kit
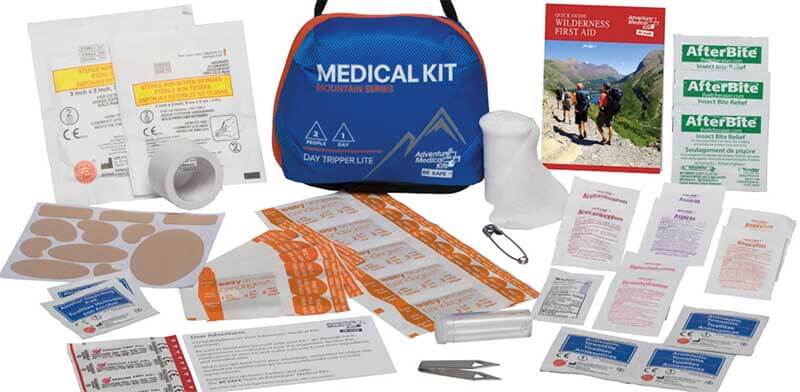
I prefer to assemble my own 3 oz First Aid Kit (see detailed list below) as I can do a better job for less weight than pre-packaged ones. My kit includes bandages, tape, gauze, wound wipes, antibacterial lotion, and OTC med’s like Tylenol, Benadryl, Sudafed, Nexium, Imodium. I also carry some Rx meds like antibiotics. But you can also buy a pre-packaged First Kid Kit like one of these.
Most of the injuries I have treated have been scrapes and cuts (abrasions and lacerations) and all I had to do was stop the bleeding (direct pressure, always) and clean it up and dress the wound. I rarely get blisters since I train in the same shoes and socks that I backpack in. Even so, I carry Leukotape Tape and tincture of benzoin to treat hot spots and mild/early blisters.
A small first aid guide/booklet (often included in kits) is a good idea. Or even better, take a Wilderness First Aid Course at REI, or from NOLS or Landmark Learning.
First Aid Kit | Detailed List
- Pain, fever inflammation | Naprosyn (Aleve), Ibuprofen, or Tylenol (fever) In ziplock pill bag available at pharmacies | 0.4 oz
- Foot/blister | Gauze + Leukotape Tape For taping over blisters, or pre-blister areas | 0.3 oz
- Foot/blister | Tincture of benzoin in micro-bottle. For getting tape or Bandaids to REALLY stick! | 0.2 oz
- Wound care | Bandaids + gel blister covers Assorted sizes – your preference | 0.5 oz
- Wound care | Antibact. packets + wound wipes. Wound cleansing, infection prevention | 0.4 oz
- Wound care | (12) 4×4″ gauze pads + 1 roll gauze Use duct tape to hold in place (from above – Repair Items)
- OTC meds | Benadryl, Sudafed, Nexium, Imodium, caffeine tablets. All in tablet/pill form | 0.4 oz
- Rx meds | Personal Dr’s Rx meds | 0.4 oz
- Pain serious | Dr’s Rx Painkiller. For serious injury, tooth abscess, etc. | 0.2 oz
- Storage/org | Bag Poly 5×8 to hold 1st Aid Kit 0.2 Keep size down. Can only put in what can fit in bag.
9 – Hydration (prudent amount of extra water)
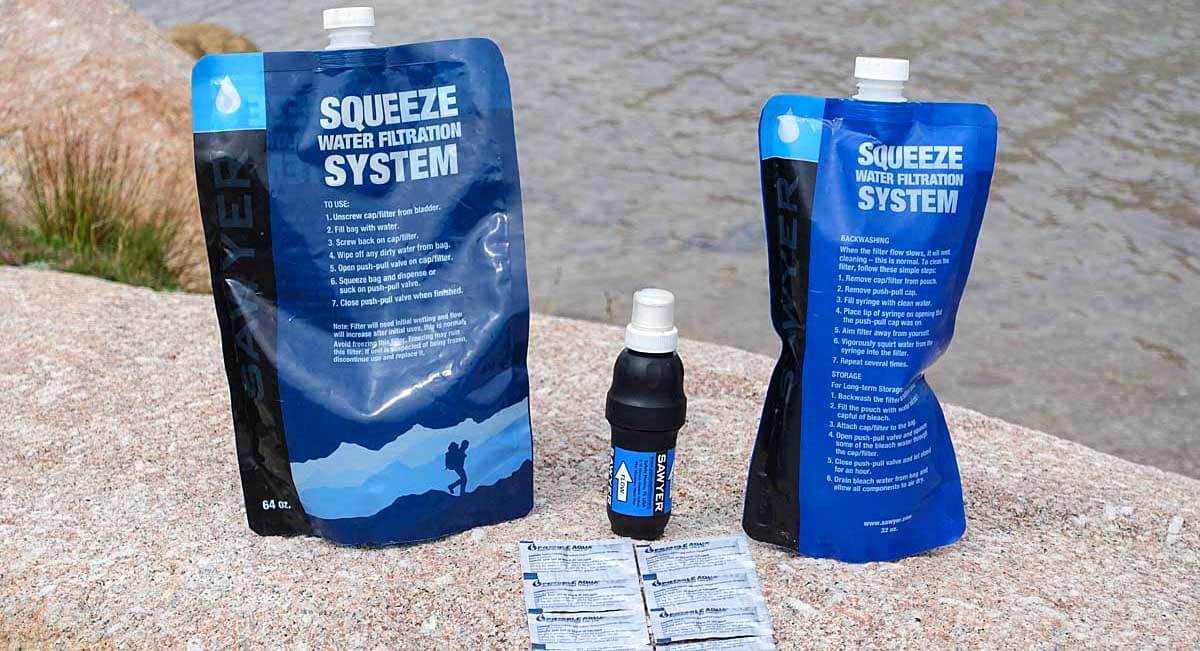
A light, inexpensive, fast and effective water purification and hydration system: Sawyer Squeeze Filter and Water Treatment Tablets
Yes, bring a prudent amount of extra water because human beings don’t do well without it. For hiking in the desert, extra water would likely be right after Navigation Tools on the essentials list. But for most hiking and backpacking in the US, water is usually available every few hours. With a filter like the Sawyer Squeeze you can drink immediately at water sources. This means both quick, effective hydration/purification and less water to carry. An even lighter alternative (and backup system for a filter) are Water Treatment Tablets.
You may be drinking more water than you need: The healthiest hydration strategy is to drink when thirsty. The saying “If you are thirsty, it’s already too late” and “If your urine is yellow, you are dehydrated” are myths. In fact, over hydration (hyponatremia) is becoming more of a risk than dehydration. I’ve extensively researched this topic with experts in sports hydration here: “The Best Hydration – Drink When Thirsty.”
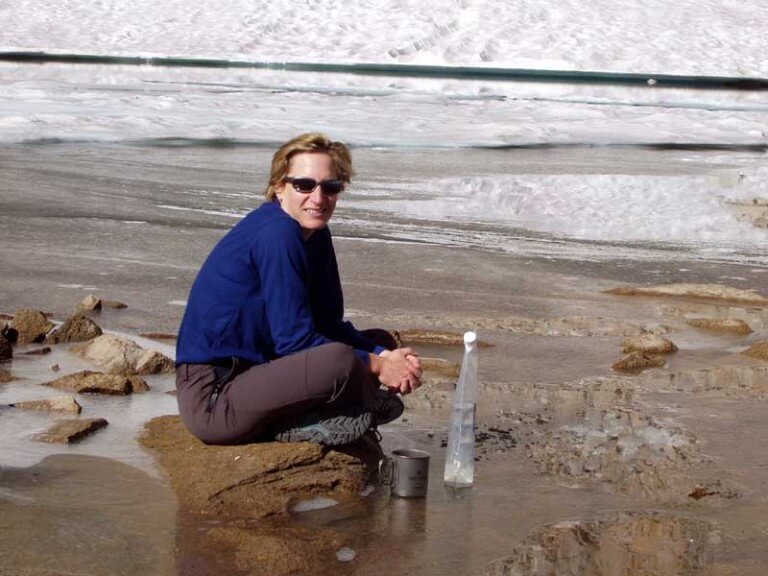
In cooler temps and/or where water is plentiful you may not need to carry as much extra water. Drink from the source, & you’ll likely not be thirsty by the time you reach the next water source. [But do know where your next water sources are.]
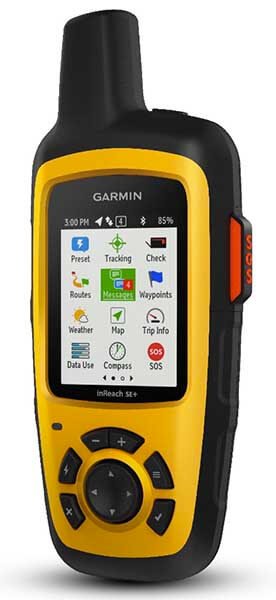
10 – SOS Device (satellite based, like inReach or SPOT)
This is #10 because as noted earlier, prevention (having a plan, intelligently executing it), & having the right stuff (items 3 through 9) is your first & best way to stay out of trouble.
But even with the best planning and execution, stuff like a serious fall, an on-trail appendicitis, serious concussion, or a heart attack can happen. A SOS Tracking Device is the best and most reliable way to summon help in such an emergency. Two-way devices like a Garmin inReach allow you to get medical advice to care for and treat the injured party before help arrives. And they are a big help to arrange/coordinate a helicopter rescue potentially saving a life. For one thing, the EMTs know the exact nature of the emergency and come fully prepared. Read more on selecting SOS/Tracking Devices and their use.
Note: Another benefit of two-way devices like a Garmin inReach is to get in-the-field weather reports.
As of 2023, we recommend ZOLEO Satellite Communicator is our SOS device of choice.
11 – Nutrition
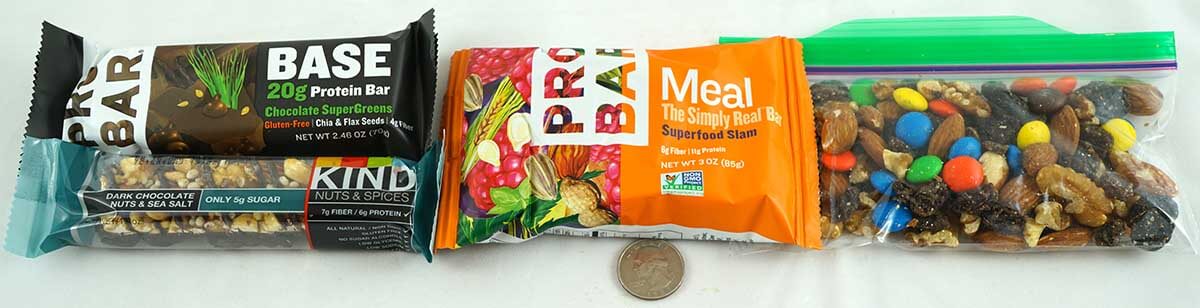
[Note: for a long day hike, 1 to 1.5 pounds of this nutritious food should work for most people]
It makes sense to bring an appropriate daily amount of food that is high in nutritional value and low in weight. (See: “How much daily food should I take?“) But unlike water, your body can go without food for much longer. Therefore, going overboard on too much extra food vs. a prudent amount is a trade off. Think of what other more useful gear for your safety you could bring for that same weight. For example, more warm clothes, a better shelter or an SOS device might contribute more to your safety. That being said, my favorite (extra/backup) foods are usually a high calorie energy bar, and homemade mix of dried fruit, nuts, and a few dark chocolate M&Ms. They are simple, fast, and don’t require cooking.
12 Repair Kit and Tools

While a repair kit is nice to have, I’m not sure it is a true essential. But it’s light so no big deal. I maintain my gear, inspect it before each trip and then treat it with care on the trail. Therefore, while I do carry a small repair kit, I rarely use it. And when I do it’s not for what I would consider an “essential” repair.
I carry a small pair of school scissors (technically part of my first aid kit) which are far more useful than a knife and they can be transported on an airplane. I also have duct tape, needle and dental floss, a few cable ties and a small tube of krazy glue and one of Aquaseal, along with a some Gear Aid Tenacious Tape. All together they weigh less than 3 ounces. For non-do-it-yourself folks, Gear Aid also has a nice pre-packed Repair Kit altho I wouldn’t take all of the items. And if you own a NeoAir sleeping pad, consider NeoAir patch kit.
13 – Fire (lighter/matches/fire-starters)
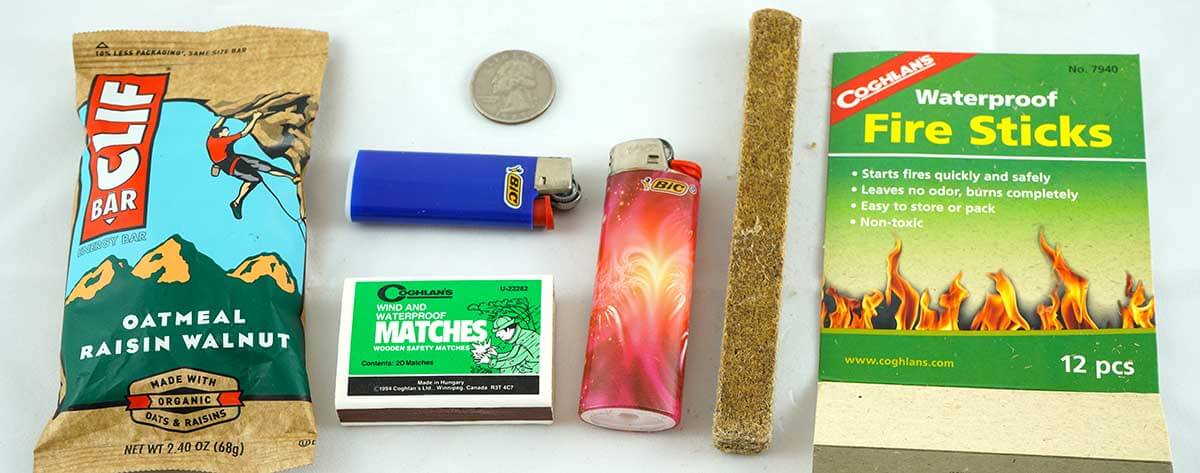
(right) Coghlans Fire Sticks are one of the easiest and safest fire starters to use. (center) A standard lighter is a first choice but Storm Matches are a good backup. (left) Most energy bar wrappers (mylar) also make great fire starters. And best of all I usually have a number of them in my trash bag.
While I do carry these fire starting items, they are last on this list. To this point, in over 40 years of hiking I have yet to use them in a dire emergency situation. Yes, I have started a fire a few times (where legal) to warm up and dry out a lot faster than getting into my sleeping bag in dry clothes—but this was more a comfort and convenience than an emergency. In contrast I’ve used my warm down jacket and my tarp a number of times for what I would consider to be an emergency or close to it. But my favorite fire starters, a lighter and energy bar wrapper (mylar), are already packed every trip so I have them by default.
Appendix – Navigation Tools & Electronics
A Critical Caution for Electronic ItemsNeither an electronic GPS App with maps, or a paper TOPO map will figure out the best off-trail route for you. In both cases you’ll need to understand what they show you. That is, you’ll need to be able to tell where things like impassible cliffs are, etc. And you still need to make in-field assessments of the best route while you hike off-trail.
Taking all this into account, electronic items are still serious tools that can do things that non-electronic tools cannot. |
Pick the Right Navigation Tools for YOU!
I’ve used USGS 7.5′ Topo maps and a traditional compass to navigate for over 40 years. Much of this off-trail, in difficult to navigate areas. They worked then and they still work now. BUT that doesn’t mean a traditional compass is the best navigational tool for all people.
I suggest that there is no perfect navigation tool. All have strengths and weaknesses. In the end its a personal choice. Select the right tools for you—tools that you have the skills to use and meet the navigational requirements for your trip. And whatever tools you decide on, you do need to know how to use them AND you’ll certainly want to bring a backup.
Paper Maps & Compass
a) Can I “use” a map and compass?
This is the first thing you should consider when deciding on the right navigation system for you. For example, can you can orient your map and compass to true north (taking into account declination), always find your location on the map, take a bearing to a point you want to navigate to, and then use the compass to sight and follow that bearing, taking into account elevation contours (reading Topo lines) and other physical features depicted on the map to make an informed decision on the best route. If not, you might want to 1) learn how to really use a map and compass and/or 2) consider a smartphone GPS App (or even a traditional GPS unit if you already have one).
b) What if you want to learn how use a map and compass?
If you want to learn map and compass skills, great. But to keep your newly learned map & compass skills sharp and effective, you’ll need to use them on a frequent basis. [Note: after teaching many people map and compass navigation, I’ve noticed a low retention rate for those that don’t regularly practice their map & compass skills each year.]
c) All types of navigation tools can fail – even maps
Contrary to what most say, paper maps and traditional compasses can “fail.” First, as stated earlier, many people are not proficient with them. This is a failure of sorts since the map and compass won’t deliver their intended function—and there are no backups to fix this. In addition, maps are accidentally left on a rock, they easily blow away in the wind, they mysteriously creep out of pack and pants pockets, and they can get ruined by water. A couple of times a year I pick up somebody’s full map-set that I found in the middle of the trail. Finally, compasses can be lost, misplaced or damaged (yes, I’ve had clients break a compass).
Smartphone GPS Apps
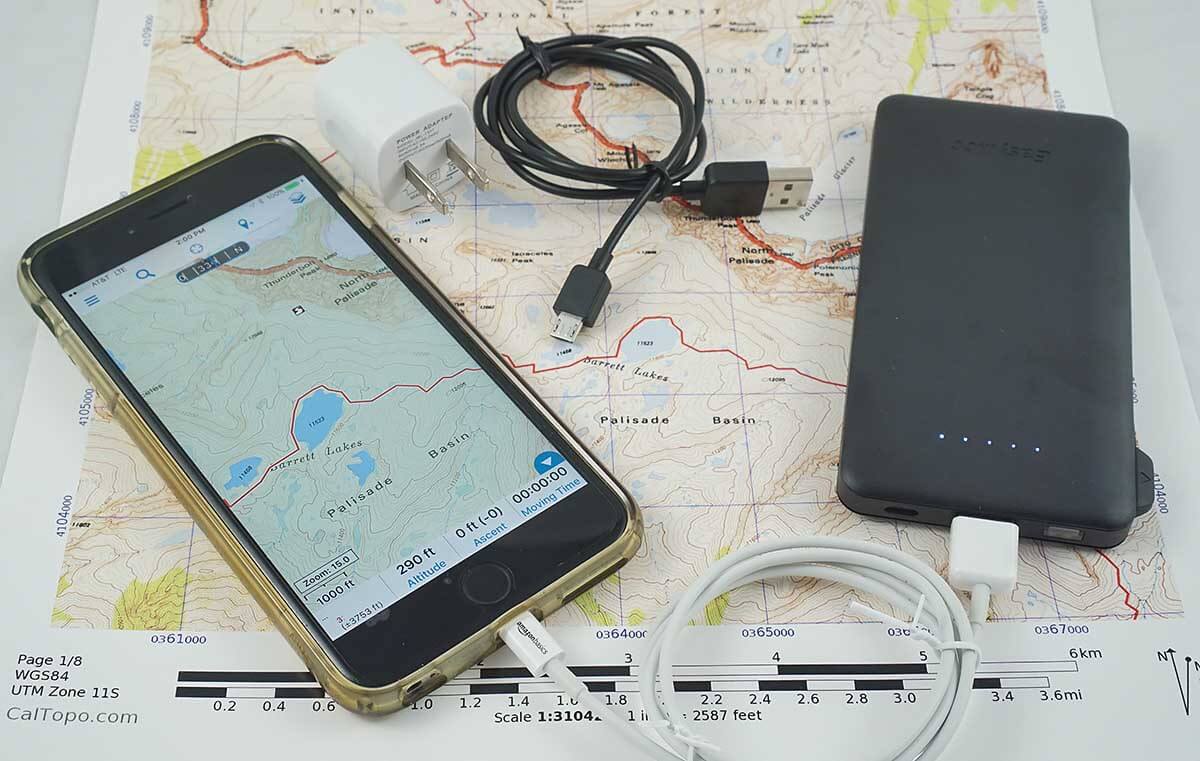
The EasyAcc battery on the right will recharge the iPhone 6 Plus two times. (The wall charger and micro-USB cable [top center] are only needed if you’ll have access to electricity mid-trip). See more in Best Lightweight Backpacking Electronics Gear.
Smartphone GPS apps (and traditional GPS units) work far better in low visibility conditions like white out and in the dark. I have navigated off of more than a few complex summits in complete whiteout with a GPS.
Finally, a big advantage of the smartphone GPS App is the maps are free and instantly downloadable. You can get superbly detailed maps for your hike in a matter of minutes. I’ve downloaded them from my motel room. In contrast, getting and/or printing paper maps is far more costly, time consuming and cumbersome (USGS 7.5 min Topo map are harder and harder to get).
Electronic Navigation Tools are not as unreliable as “experts” claim
- In five years of intense backcountry use my close hiking partners and I have never broken an iPhone or the GPS App. We’ve taken our iPhones on numerous packrafting trips in Alaska, winter rafting down the Grand Canyon, technical Canyoneering in Utah, climbing in the Wind Rivers and the Sierras, long hikes in the U.S.A, Turkey, Australia, Europe, and a canoe trip down the length of the Mighty Mississippi River. All without incident. No failures. No dead batteries.
- But as a backup, at least one hiking partner carries another smartphone with GPS App & offline maps. (sometimes even an alternate App and mapset).
- We do not need cell signal to use our GPS App.
- We get around 7 days of use before we need to recharge it—see more about iPhone/smartphone battery management.
- And a light USB battery gets us a couple more charges if we need them. The same USB battery charges all our other electronics like headlamps, cameras, and Garmin inReach. See more about field batteries for recharging electronics.
Always Bring a Backup Battery!It’s critical safety precaution to make sure your electronics are always available for use. My three favorite lightweight and high capacity USB backup batteries are:
|
These Two Great Lightweight Backpacking Gear Lists, 5 Pound or 9 Pound, will save you a lot of pack-weight but still keep a smile on your face. You will most likely be warmer, more comfortable, and sleep better than most campers carrying 2 to 3 times the weight in conventional/heavier backpacking gear.
The Two Great Lightweight Backpacking Gear Lists
- 5 Pound Practical Light Backpacking Gear List (link) New
The lightest gear that still makes practical sense. Focused on efficiency while staying warm, dry & safe - 9 Pound – Full Comfort – Lightweight Backpacking Gear List (link) My top gear list since 2008
Travel light but retain the convenience & comfort of “traditional,” familiar, easy to use backpacking gear
Note: all blue text is a link to content
These two great lightweight backpacking gear lists are suitable for most backpackers on most 3-season trips (spring, summer, and fall) in the lower 48 states of the US as well as most trekking (backpacking) trips world-wide. They will do you proud for:
- Appalachian Trail and other backpacking areas on the East Coast
- The Sierras, Rockies and other mountains of the Western US
- Cascade Mountains and Pacific Northwest
- The Canyons and Deserts of the Southwest
- Trekking Trips Worldwide (e.g. Patagonia, Europe, New Zealand, etc.)
Pick the Gear List that Suits You
| 5 pound Practical Light Backpacking Gear List | 9 Pound – Full Comfort – Lightweight Gear List | |
|---|---|---|
| 3 day wt | 11 to 13 lb* total pack weight for 3 days (*total wt includes gear, food, fuel & water) |
15 to 20+ lb* total pack weight for 3 days (*total wt includes gear, food, stove fuel & water) |
| Purpose | To travel as light as possible but be warm, dry & safe. Focused on efficiency. Whatever you like to do: enjoying great views, photography, swimming, fishing, getting extra camp time, or hiking long miles, this will give you more time to do it. Capable of 100+ miles w/o resupply | Travel light while retaining all the convenience and comfort of “traditional” backpacking gear. e.g. a freestanding tent vs. a tarp and a canister vs. alcohol stove. Gear is familiar and easy to use. Good for trekking almost anywhere worldwide. |
| Gear Sources | Uses some exciting, lighter & innovative gear from cottage manufacturers like Hyperlite Mountain Gear, ULA Packs, Mountain Laurel Designs, and Hammock Gear: (may need to wait a few weeks for some gear) | Uses more conventional gear (sometimes heavier) from mainstream commercial vendors like REI. Gear usually available off-the-shelf. |
| Pack | Under 1 pound: Frameless, with a good hip-belt & durable fabric. (Options for a frame pack for longer trips w/heavier loads.) | 2 pounds or under: Solid internal frame. Larger volume. Can carry a bear canister. From REI: Osprey Exos 48 Pack |
| Shelter | Around ½ lb/person: usually a tarp or a shared pyramid shelter | Around 1 to 2 lb/person: freestanding tent (an ultralight one), or a TarpTent |
| Other | Less “other stuff.” Minimal light | A few more comfort & convenience items |
My pack for 8 days: With a light pack you can cover a lot of trail miles in complete comfort—wanting for nothing. Pictured the HyperLight Mountain Gear Southwest 2400 pack on the GR 20 in Corsica.
Modify These Gear Lists to Your Personal and Trip Needs
By all means, fine-tune these lists to your particular trip needs and/or backpacking style. Just select from the optional or alternate gear items (already included in these lists). In addition, you may wish to use some gear from the 5 Pound List and other gear from the 9 Pound List. Mixing and matching between lists is fine.
The two modifications I often make to the 5 Pound Practical Light Backpacking Gear List are:
- Substitute a two-pound pack like the HyperLight Mountain Gear Southwest 2400 or 3400 pack ULA Ohm 2.0 or Circuit pack (or from REI:Osprey Exos 48) if reg’s require a bear canister, and/or if I am carrying a lot of food and/or climbing gear that pushes my my total pack weight above 20 pounds. Note: in areas where an Ursack is allowed I would go back to using a 1 lb frameless pack.
- Skip the tarp and use a MLD Pyramid or HMG Pyramid Shelter if I know (from a recent Wx forecast) that I will likely be camping exposed, above treeline in really cold/wet weather.
Hammock vs. Ground Sleeping (e.g. Tent)
Of particular note is that both lists have options for hammock or ground-sleeping (e.g. tent). In areas with plentiful trees like the East Coast of the US I feel that hammock camping has many advantages, see: Hammock Camping Part I: Advantages & disadvantages versus ground systems. When in the Sierras or other areas with few trees, the opposite is true and I usually cowboy camp on the ground in a 7 ounce bivy sack, only putting up a tarp when it is actually raining (or sharing a pyramid shelter).
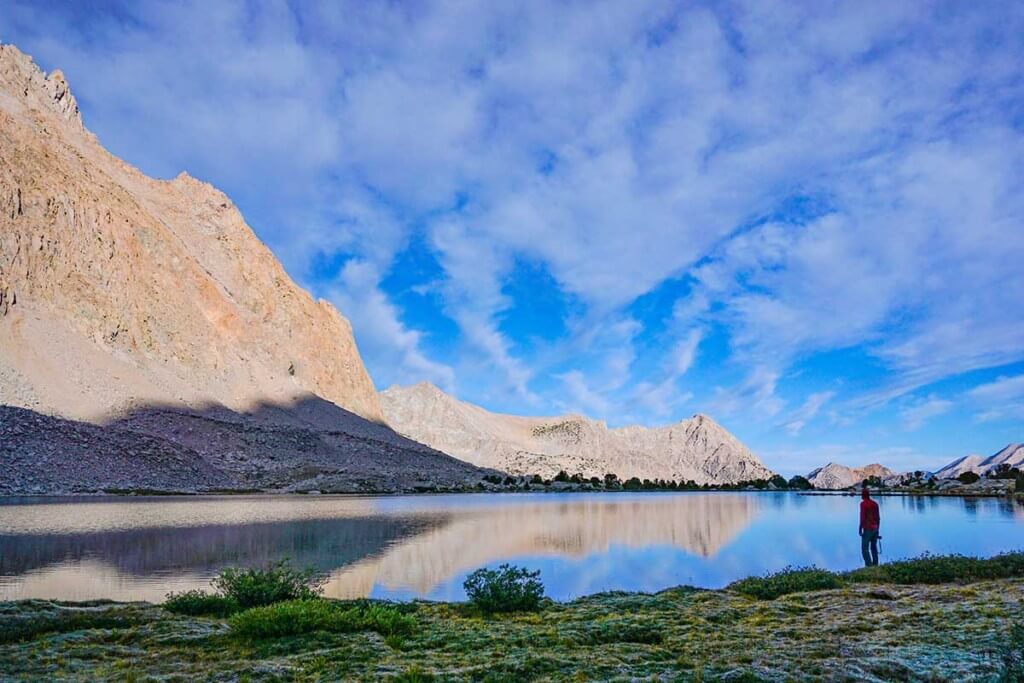
With a lighter pack you can get into some incredible areas like this that few people with heavy packs are likely to visit. (Off-trail in the High Sierra)
This “Techniques for Ultralight Backpacking” is the companion post to my 5 Pound Practical Ultralight Backpacking Gear List. It explains the underlying philosophy and criteria that integrates all the gear into a safe and effective ultralight kit. And most important, it gives you few tips on how best to use it.
Overview of Technique for Ultralight Backpacking
I originally created the 5 Pound Practical Ultralight Backpacking Gear List list for my 3-day, 102 mile section hike on the Appalachian Trail in Shenandoah National Park. See: “My Trip Report.” I was surprisingly warm, dry and comfortable on the trip in challenging late winter conditions. After my hike, I looked over the trip’s gear with a worldwide trekking perspective and saw that it was extremely similar to gear I have taken trekking for most of the US and worldwide. I concluded that this ultralight backpacking gear list was likely the lightest, most efficient & practical gear list for backpacking treks in the US and worldwide.
The5 Pound Practical Ultralight Backpacking Gear List works for 3-season treks (spring, summer, fall) in these locations and likely many more:
- Appalachian Trail and other backpacking areas in the East
- The Sierras, Rockies and other mountains of the Western US
- Cascade Mountains and Pacific Northwest
- The Canyons and Deserts of the Southwest
- Trekking Trips Worldwide (e.g. Patagonia, Europe, New Zealand, etc.)
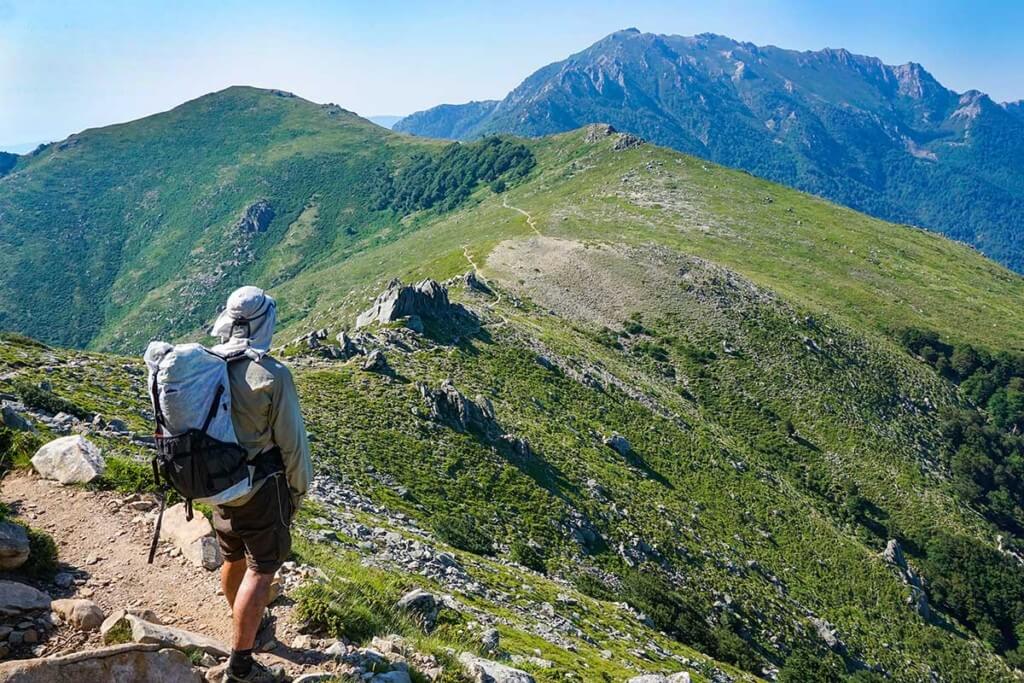
IN EUROPE, lead photo above: Using a ultralight pack with gear almost identical to what I used on the AT this spring, Alison walks a high alpine ridge in Corsica, France. The GR20 in Corsica is considered the hardest long distance trek in Europe and is legendary for its violent weather.
Definition of Practical Ultralight Backpacking
Guiding Principles for Practical Ultralight Backpacking
- My first priority is to enjoy myself and appreciate the terrain I’m walking through. Hiking at my own comfortable/efficient pace and watching the ever changing landscape unfold is my favorite way to fully appreciate the beauty of the backcountry.
- Being cold, wet, or hungry or getting a crappy night’s sleep sucks. I want no part of it.
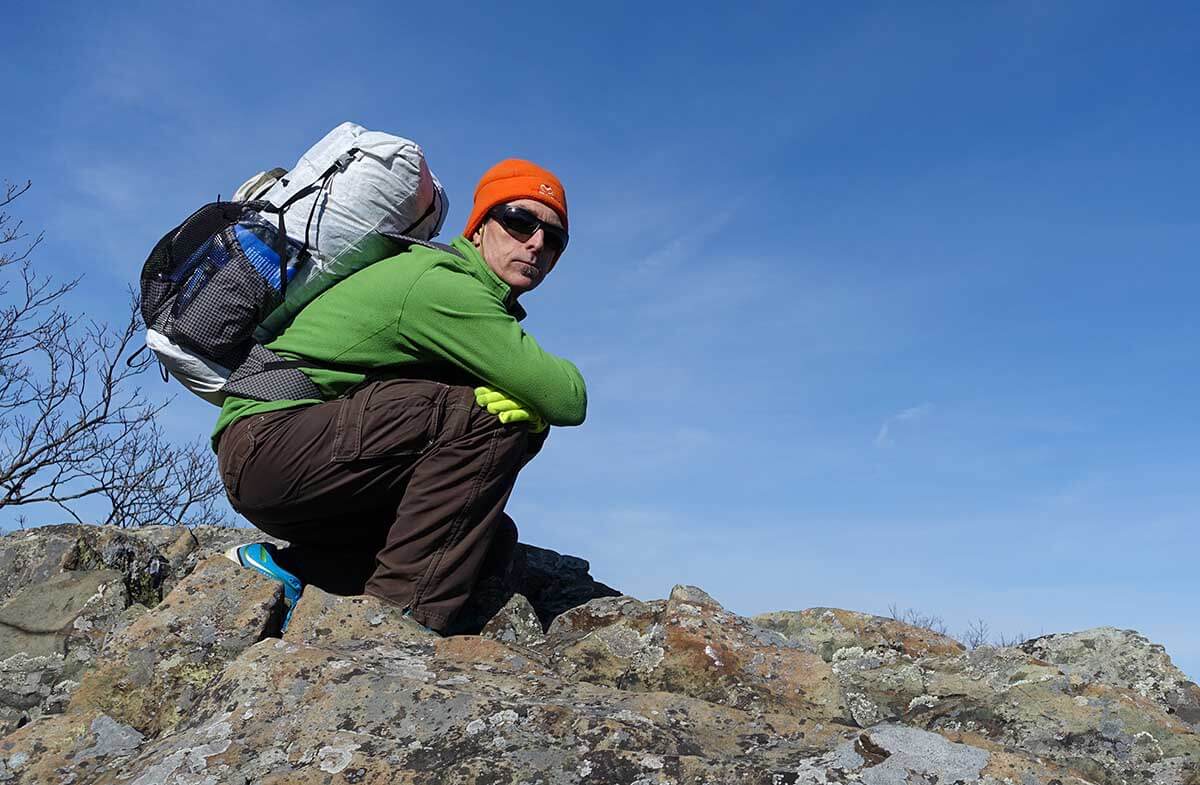
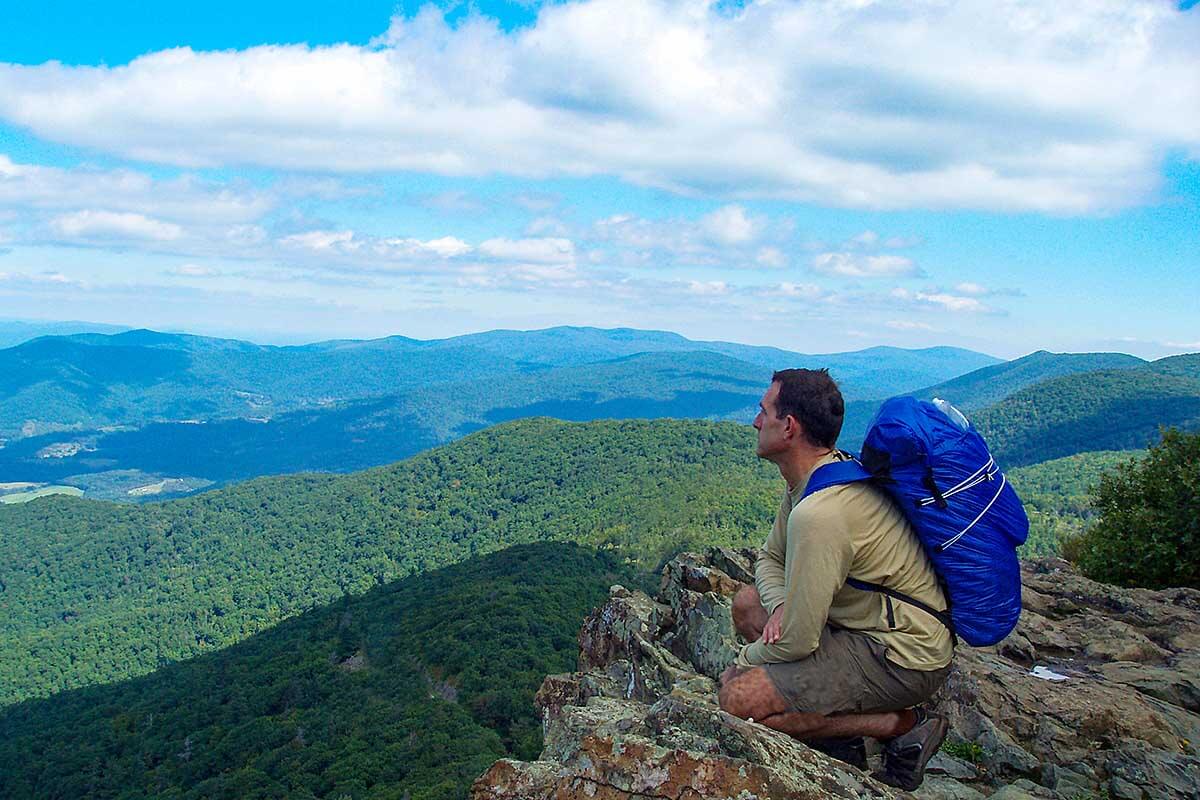
ON THE APPALACHIAN TRAL, the embodiment of practical light backpacking: My pack weighs only 10 Pounds (gear, food, water & fuel). With it I hiked a 102 mile section of the Appalachian Trail in Shenandoah National Park in 3 days. Covering that distance would not have been possible if my light gear weren’t also extremely efficient and practical. I was surprisingly warm, dry and comfortable in late winter conditions—snow, 40 mph horizontal sleet, cold rain, and hard freezes at night.
Philosophy and Techniques for Practical Ultralight Backpacking
Important Efficiency and Time Saving Considerations. Obviously a very light pack is still a significant contributor towards Practical Ultralight Backpacking, but it’s far from the only one. Other factors I consider important for keeping it fun, minimizing wear and tear on my body, and minimizing time wasted include:
- Food: I need to carry enough and the right food to sustain me from dawn to dusk hiking. I need appetizing, nutritious, and high caloric food. See Backpacking Food Page.
- Water: I minimize water carried (while still staying well-hydrated!). The key is to drink when thirsty and filter/drink at the source when possible. See Best Hydration – Drink When Thirsty
- A good night’s sleep: My shelter (tent/tarp/hammock) and sleep system (sleeping bag/quilt and ground-pad) should give me a great night’s sleep to recover from a long day day of hiking, and allow me to wake cheerfully ready to hike another day.
- Don’t waste time fiddling with gear: Messing around with “high-futz, high fiddle factor gear” wastes time, and reduces my daily time for fun things. For example, a light shelter with a complicated spiderweb of 9-12 guylines is not practical. The time it takes to stake out all those guylines (even worse in rocky ground) is not worth the few oz of weight savings vs. a shelter with 4-6 stakes or better yet, cowboy camping under the stars in a bivy sack.
- Quick access to gear while walking: Maps, food, water, camera, sunglasses, hats, gloves, etc. should all be available without breaking stride. Here, pockets are your best timesaving friend; the more the better. I use up to 12 walking-accessible pockets: 6 cargo pants pockets plus 2 side, 2 hipbelt, and 2 shoulder strap pockets of my pack. Rooting around in the main bag of your pack in the middle of the day to find some elusive item is frustrating and a huge time waster.
- Maximize available campsites: My gear should allow me to camp wherever I want at the end of my optimal hiking day—whenever I decide that I am done. I do not want my light gear to limit my options and force me to camp at inconvenient locations.
If I compromise any of the above to lighten my pack, my gear is no longer practical. That is, I will be less efficient, waste time and hike fewer miles per day if I cut more weight.
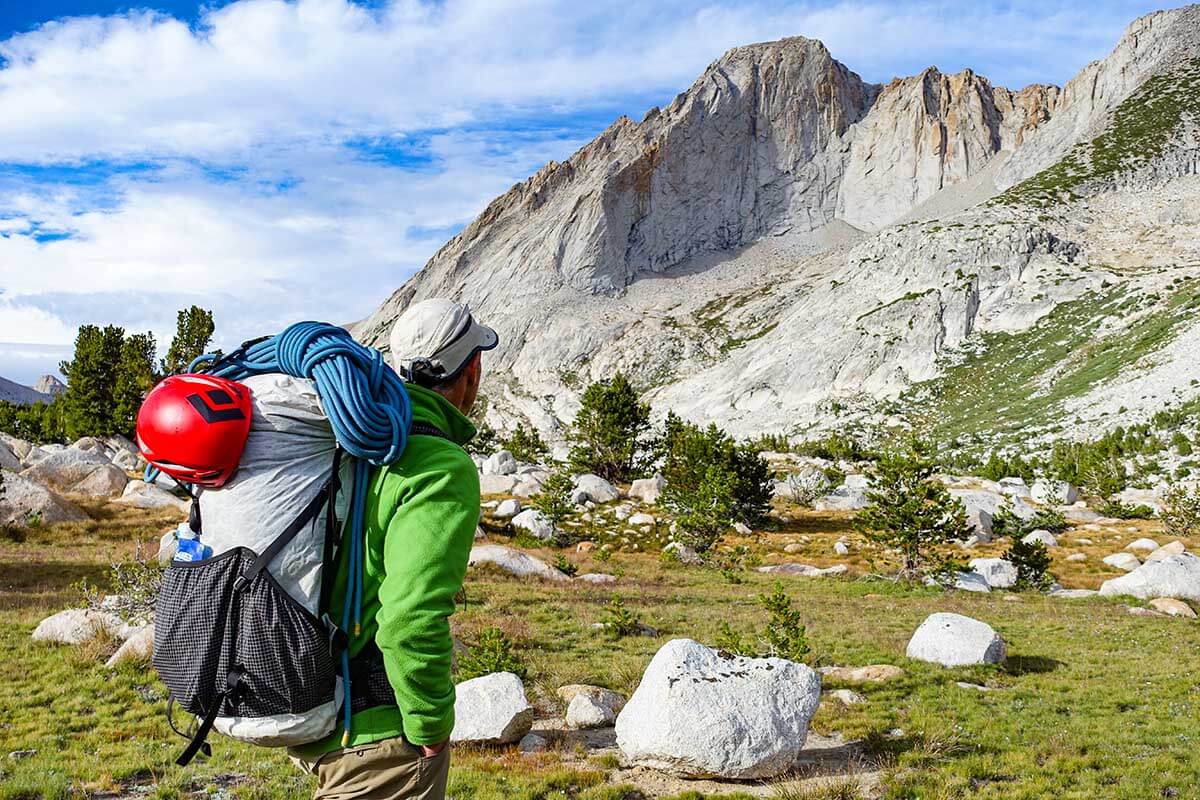
IN THE SIERRAS, modification to use a framed pack for a heavier load: I am using a HMG Pack with a frame to carry both a bear canister (required) and my climbing gear. This is too much of a load for a frameless pack. All other gear items are essentially the same as the “5 Pound Practical Ultralight Backpacking Gear List.” (Don and I climbed Mt Conness in the background.)
How your sleep system (hammock, tent, bivy sack, etc.) determines where you can camp
Hammock camping example: Let’s say you are hiking the Appalachian Trail. It’s mid-to-late-afternoon and you are plum tuckered—done hiking for the day but… you are midway between shelters/good campsites. There certainly isn’t any good camp-able area where you are. The ground is rocky, sloping, full of trees, and tree roots. There doesn’t seem to be any decent place to pitch a tent. Your options are:
- Continue another few hours to the next good campsite. Not an appealing option if you are already tired.
- Decide to do the best to camp where you are. It may take a bit of searching to find a remotely passible place for your tent. Even then it likely to take some time and effort to pitch it in a less than optimal “campsite.” [Believe me. It happens! I’ve seen more than my share of tents pitched in the middle of the AT by desperate hikers than ran out of time and/or energy. The actual trail was the only flat ground they could find.]
- Or if you had a hammock you could easily pitch it between two trees and enjoy the rest of your day.
As you can see your choice of a sleep system has an impact on where you can camp. Of particular note are choices for hammock camping vs. ground camping (i.e. a tent) and how your choice determines whether you have many or limited campsite options. In areas with plentiful trees like the Appalachian Trail, most ground is rocky, sloping and unsuitable for camping. There are limited camps with flat ground and they are usually far apart. Here hammock camping allows you more campsite options. All you need is two trees to hang from—that’s just about everywhere! The ground below you is irrelevant. Note: Hammock camping has many other advantages. See Hammock Camping Part I: Advantages & disadvantages versus ground systems.
Ground camping (bivy) example: When in the Sierras, other western mountains above treeline, or in other areas without trees like the desert, the opposite is true. Sleeping on the ground gives you more campsite options. For example, in the Sierras I usually cowboy camp on the ground in a 7 oz bivy sack—this has the smallest footprint and does not require stakes, giving me the most options for campsites—I can even tuck in between boulders or small shrubs to get out of the wind. I only put up a tarp when it rains. Otherwise, I am enjoying the stars at night. Tents with a larger footprint and more stakes reduce campsite options and take more time to setup and take down, although this is rarely a showstopper in the western mountains.
For distance oriented hikers: Let’s say that you are hiking near the end of the day and you can 1) reach the next campsite an hour before dusk or 2) you can reach the campsite after that by hiking an hour in the dark. In other words, you have two choices, 1) stop short for the day and loose an hour of daylight hiking time or 2) hike an hour in the dark to the next one. Hiking in the dark under headlamp, while possible is not efficient. Your pace slows trying to find good footing, your risk of injury goes up, and it is exceptionally easy to loose the trail at night, and very hard to relocate it. What would be optimal, and most efficient would be to camp right before dusk midway between the two camps. What camping gear you choose plays a role on whether you have the flexibility to camp right at dusk when it’s most convenient for you.
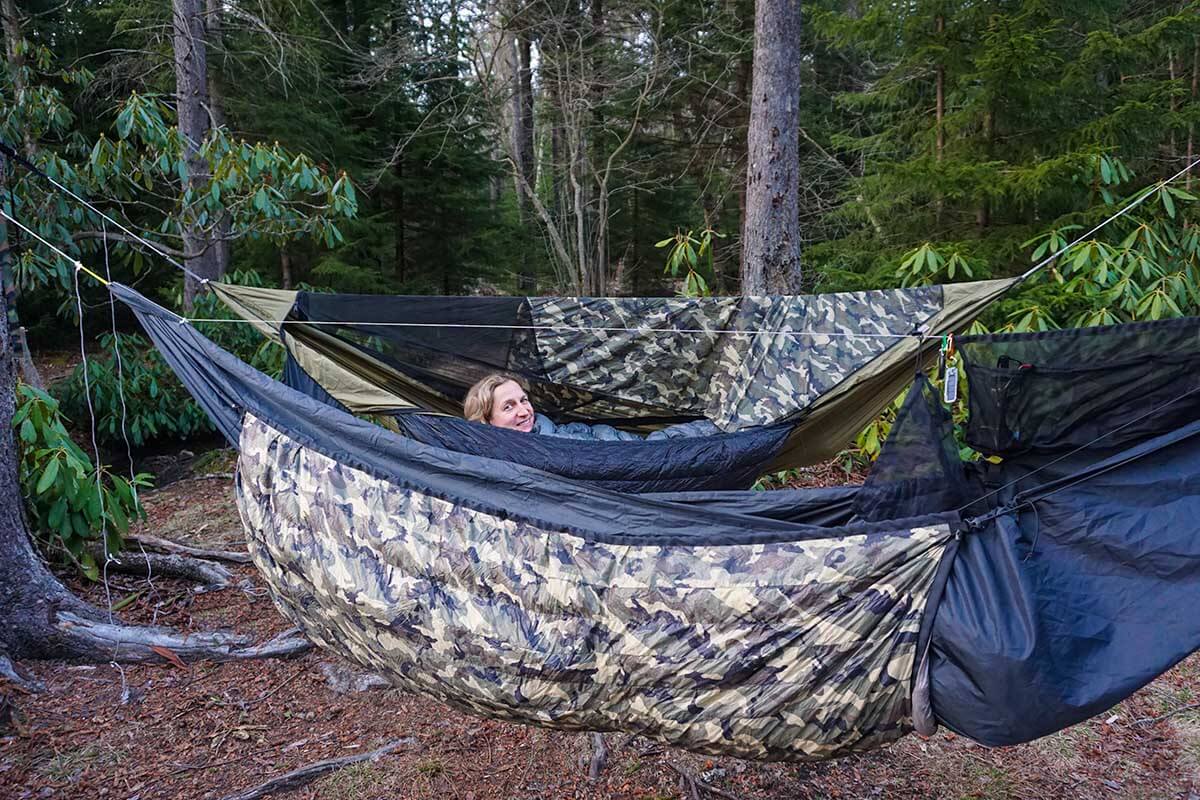
HAMMOCKS GIVE YOU MORE CAMPSITE OPTIONS IN THE EAST: Alison and I are happily sleeping side by side in hammocks above sloping ground with plenty of roots—ground unsuitable for tent camping. It went down in to the 20’s that night but we slept blissfully warm and comfortable. Great star gazing too!
I realize that some readers will be unconvinced by my enthusiasm for hammock or tarp camping even in areas with lots of good trees, or cowboy camping in a bivy sack. Therefore in the gear list, I also provide more conventional alternatives like TarpTents and Pyramid Shelters. If you are looking for full tent options, See: 9 Pound – Full Comfort – Lightweight Backpacking Gear List.
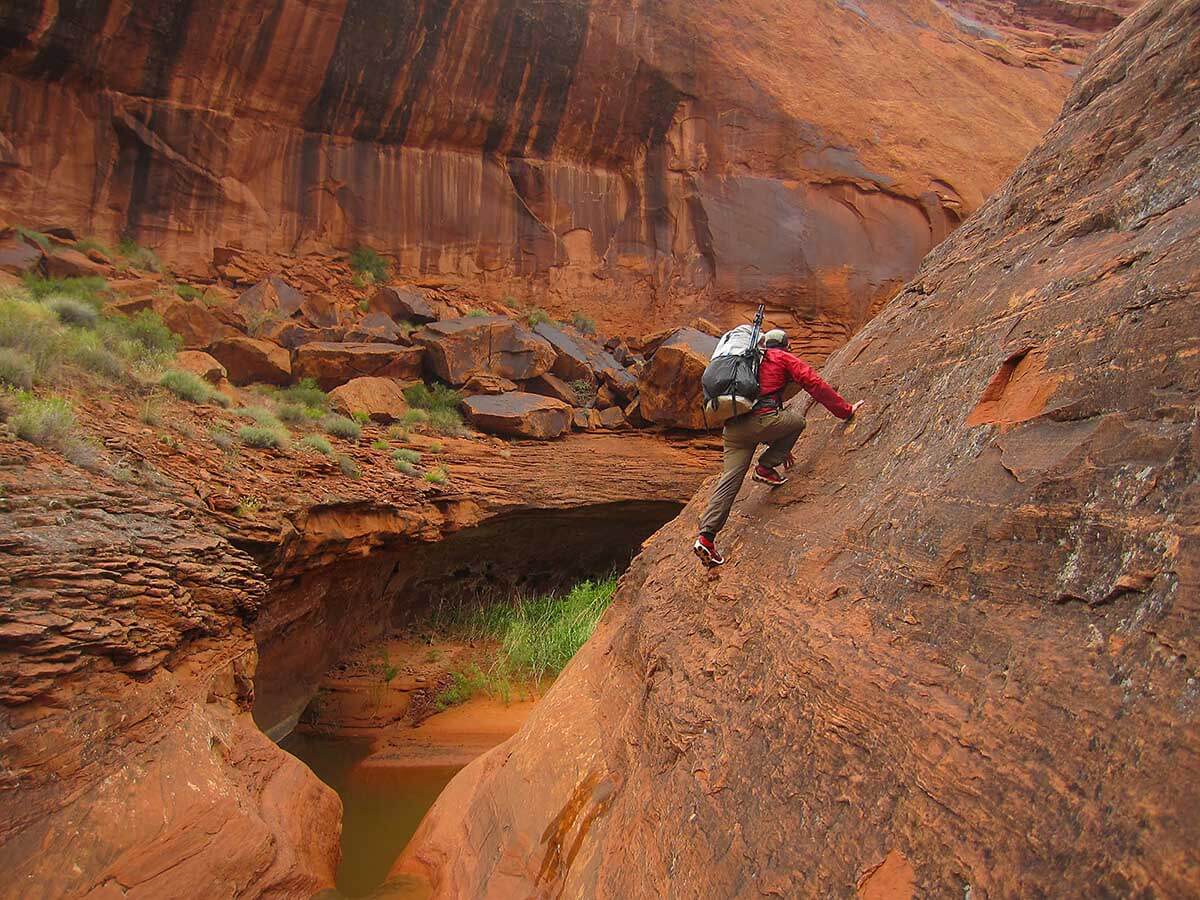
IN THE CANYONS AND DESERT SOUTHWEST: a light pack is essential to moving safely across slickrock. I am using a HMG Southwest 2400 Pack to handle the extra weight of a rope, a minimal set of climbing gear, and extra water for the desert environment.
Modifications to the 5 Pound Practical Ultralight Backpacking Gear List
Readers may wish to modify this list to their particular trip needs and/or backpacking style. As such, I have provided a number of optionals or alternate gear items in the list. Here are my two most common variations:
- Substitute a 2-pound framed pack (see picture above) like a Hyperlite Mountain Gear SW 2400 pack or ULAOhm 2.0 Pack if I am carrying a lot of food and/or climbing gear that pushes my total pack weight above 20 pounds. If regulations require a bear canister then I’ll need the larger volume of a HMG 3400 pack or a ULAOhm 2.0 Pack to fit a bear canister and all my gear. (Note: in areas where an Ursack S29 Bear Bag is allowed I would probably use a 1 lb frameless pack.)
- I will skip the tarp and use a MLD Pyramid or HMG Pyramid Shelter if I know (from a recent Wx forecast) that I will likely be camping exposed, above treeline in really cold/wet weather. Usually I am sharing the pyramid shelter with my wife or a climbing partner so the overall shelter weight per person remains around ½ pound—so no increase in weight.

IN EUROPE, modification to use a shared pyramid shelter: That stone wall is there for a reason. The GR20 in Corsica is legendary for its violent afternoon thunderstorms. Just a few weeks before our trip, a number of hikers died and many more were injured in a powerful storm. Alison and I chose to share a pyramid shelter. At only 10 oz, (280 g) per person and requiring 5 stakes, it is in keeping with the principals of practical light backpacking.
“Everything in its place and a place for everything.”Pockets keep gear organized where I can quickly find things, saving a bunch of time. Scrabbling into the main compartment of my backpack in search of some elusive item is never fun and wastes a lot time.
Update April 2016: I successfully completed this hike in 3 days.
See my trip report 10 Pound Backpack to Hike 100 Miles.
That’s the total weight of everything in my backpack—gear, food, water, and stove fuel. I used that 10 pound backpack to hike 102 with 22,000 feet of elevation gain of the Appalachian Trail through Shenandoah National Park in 3 days. No fair weather hiking, it was more late winter than early spring conditions—rain, sleet, light snow and hard freezes at night. I think I am very close to dialing in a Light Pack that is also supremely efficient at covering long trail miles. I used most of the gear listed below.
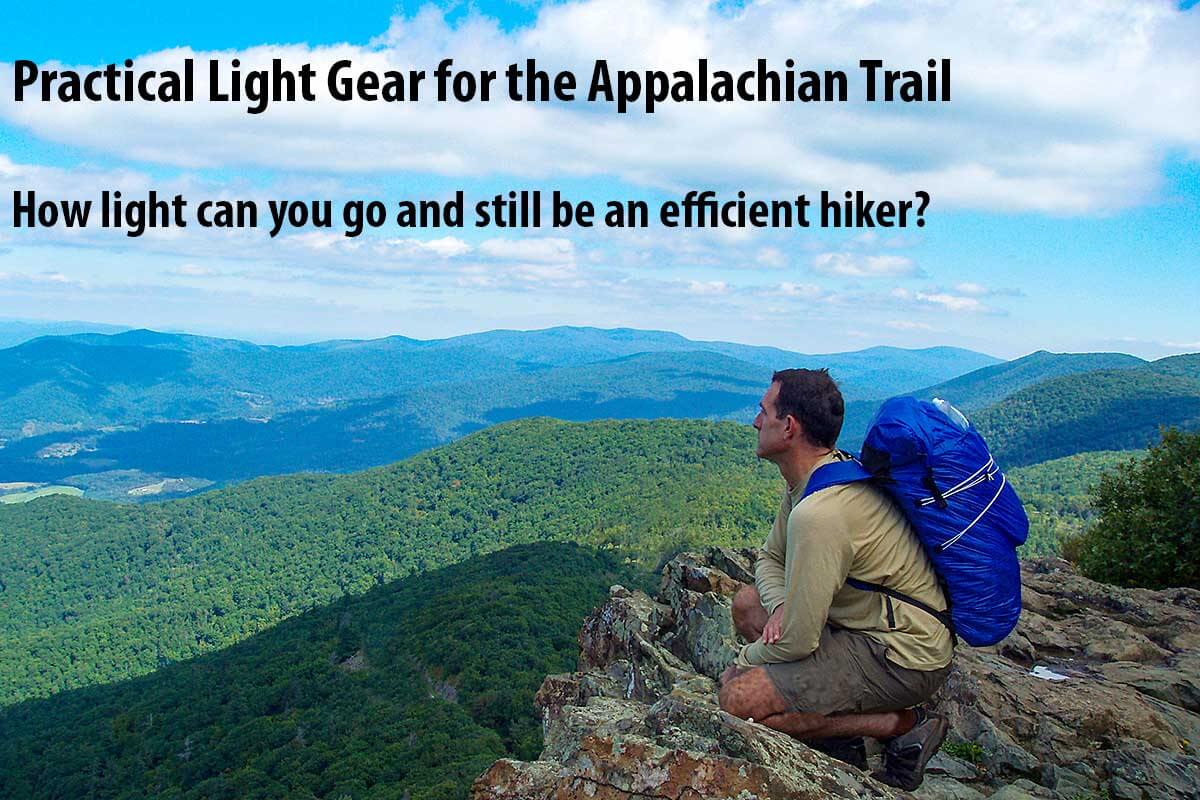
Practical Light Gear List Appalachian Trail
Just how light can you go on backpacking gear for the AT and still be an efficient hiker…
I believe this “5 Pound Practical Ultralight Backpacking Gear List” is very close to the lower weight limit of gear to efficiently walk long days on the AT (section hiking or through hiking) without sacrificing comfort, functionality or miles hiked per day. For me Practical Light is sub 12 pound total pack weight (gear, food, water & fuel) to do a ~100 mile section of the AT without resupply.
Overview of Practical Light Gear List Appalachian Trail
2016 Sequel to 2.4 Pound Extreme Ultralight Backpacking on the AT
This spring I am going test my “Practical Light Gear List Appalachian Trail” by re-hiking my 2.4 Pound Extreme Ultralight Backpacking on the AT in Shenandoah National Park. The objective in 2016 will be to answer the question, “*What is Practical Light on the Appalachian Trail?” Well, at least answer the question for me. I am already close to dialing-in this final kit. I tested a beta version of this new kit last Fall on an AT section hike from Harper’s Ferry WV to Pine Grove Furnace PA. I was very happy with the results. I was pulling 25 to 30 mile days without a lot of effort, and I was not lacking in either comfort or functional gear. Stay tuned for a a post hike trip report this Spring…
Summary of changes from ‘07 to 2016
- Pack under 12 pounds to hike 100 miles with food, water and fuel included. This should not compromise comfort or happiness. But also, my gear should maximize trail miles covered per day. That is, the lightest pack is not the only factor to efficiently hiking the most miles per day. For my other considerations see: *But what exactly is Practical Light on the Appalachian Trail?
- More durable pack – less time fiddling around trying not to rip pack. More pockets to minimize hiking time lost when diving into the main pack body for something in the middle of the day. Inherently near-waterproof = less time dealing with rainproofing pack and gear in iffy weather.
- Warmer quilt – to assure a good night’s sleep and full recovery from a long day of hiking. Trimmer dimensions, lighter fabrics keep weight similar to ‘07 quilt.
- Hammock Camping = more miles per day than ground sleeping. For my rationale on why hammock get you more miles per day see: Hammock Camping Part I: Advantages & disadvantages versus ground systems
- But! I realize that there is nothing wrong with ground sleeping—it’s a great and very light system. And I know that I am unlikely to convince many (most?) backpackers to depart from traditional camping on the ground. So I’ve included excellent, light ground sleeping gear on the list below.
- Upgrades to new lighter/better equipment not available in ‘07. Sprinkled in a few more (light!) creature comforts – to keep me sane and happy on the trail.
5 Pound Practical Light Gear List
Click here see it full page, as a Google Sheet
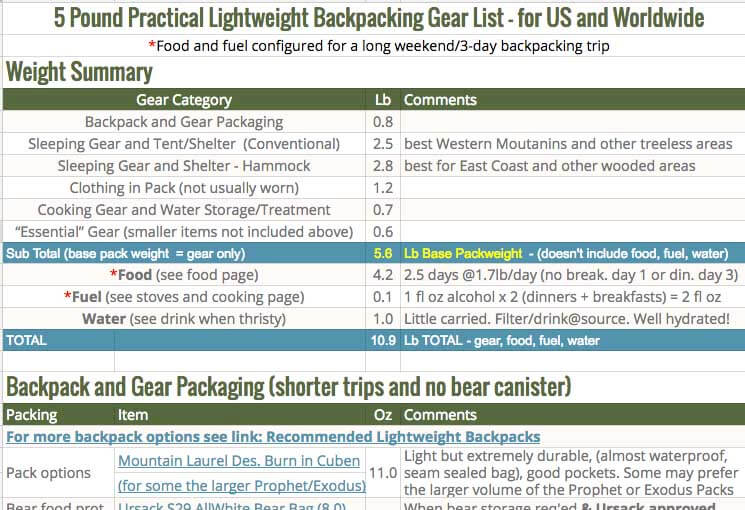
. Click on gear list table image to see full gear list sheet
![Why we hike the AT. Glorious sunset from MacAfee Knob. [Photo Karan Girdhani]](https://www.adventurealan.com/wp-content/uploads/2016/03/Sunset-AT-Karan-G-1000.jpg)
Why I hike the AT. To view glorious sunsets like this one from MacAfee Knob. My primary goal is not to cover the most miles per day. [Photo Karan Girdhani]
Discussion of Practical Light Gear for the Appalachian Trail
It’s been almost nine years since I wrote 2.4 Pound Extreme Ultralight Backpacking on the Appalachian Trail in ‘07. Now when I look to optimize my gear, my primary objective is to maximize trail miles with the minimum of effort—not to get the lowest possible pack weight. I call this “Practical Light.”
*But what exactly is Practical Light on the Appalachian Trail? Obviously the interpretation of “practical” is key. We’ve all heard the term “Stupid Light” bantered around but what is the opposite? Smart Light would work as an opposite but it implies a level of hubris some not want to take on. Practical seems a more humble word. Nobody is going to say you are arrogant for just being practical.
For me “Practical Light on the Appalachian Trail” is:
| Practical Light on the Appalachian Trail is the gear and food that will maximize trail miles (dawn to dusk hiking) with the minimum of effort for an AT section hike or through hike. (Emphasis on efficient.) |
Obviously a very light pack is still a significant contributor towards that goal, but it’s not the only one. Other factors that I consider for maximizing trail miles are:
- This is not a suffer fest! My first priority is to enjoy myself—that’s why I am out there—not just to cover trail miles. It just turns out that I really enjoy hiking dawn to dusk (as long as I am hiking at my own moderate pace).
- How well can I sleep and recover from a dawn to dusk day of hiking?
- Will my gear allow me to camp where I want when I reach the end of my optimal hiking day? I.e. I do not want to be being tied to camping at just AT shelters or the few other areas with flat campable ground.
- Carrying enough food and the right food to sustain dawn to dusk hiking. 1.7 lb per day of nutritions, high calorie food.
- Minimizing water carried (while still staying well hydrated). Key here is to filter and drink at the source.
- No “high-futz/fiddle factor gear” that would reduce my available hiking time
If I compromise any of these to lighten my pack, my gear is no longer practical. That is, I am likely to hike fewer miles per day by cutting weight in this manner.
While my 2.4 pounds of gear worked fine on ’07, I believe that a few more pounds of gear and food would have allowed me to hike even further and enjoy the trip more.
A change in perspective: In ‘07 I only covered gear but did not include the food and water I carried. In this iteration I will include considerations on food and water and include their weights—since this is what will actually be on my back . E.g. I will carry a 3 oz water filter. While that will increase my base pack weight over ’07, my total pack weight will be less since the filter allows me to drink immediately from water sources. I do not intend to carry a drop of water on the trail.
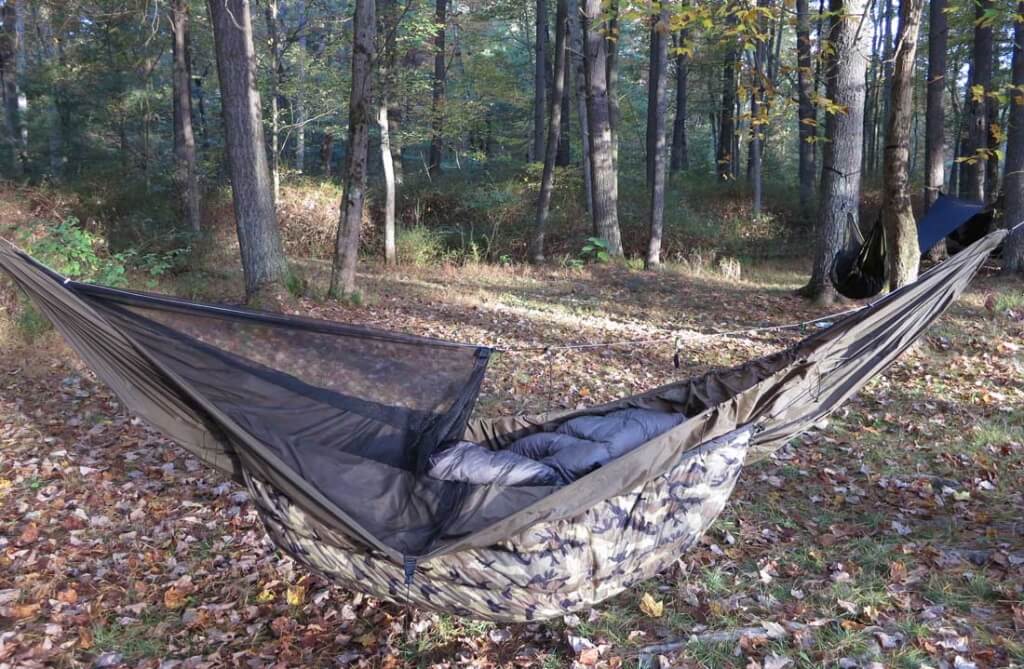
For my 2016 Hike I will be taking a hammock very similar to this Dutchware in 1.0 Hexon but less the bug netting. It’s incredibly comfortable, ensuring a good night’s sleep. The drab hammock colors, and camo Hammock Gear under-quilt keep me unobtrusive. If I am 100 feet off the trail, I am essentially invisible. [Photo: beta version of this my AT kit last Fall on an a section hike from Harper’s Ferry WV to Pine Grove Furnace PA]
Highlights of Gear Changes for 2016
Sleeping To: Hammock camping From: on the ground with a foam pad
| New | Old | Rationale |
| Dutchware 11 ft. Single Layer Hammock – Hexon 1.0 fabric | N/A | Hammock camping = more miles per day & more comfortable! See advantages of hammocks |
| Hammock Gear Phincubator Under-Quilt, (60″ no need for pad under feet) 800fp down, 0.67 oz fabric | GossamerGear Foam Sleeping Pad (Torso) | Underquilt serves same purpose for a hammock as pad for ground sleepers. More comfort than a full-sized NeoAir |
| Hammock Gear “+30” Burrow Top Quilt. Trimmed dimensions, 800fp down, 0.67 oz fabric | Jacks R Better Stealth (down quilt) | Jack’s is still a great quilt. HG is a bit lighter, and I can wrap it around me in camp. I also spec’ed the HG quilt to be warmer so I’d sleep well. |
| Hammock Gear Cuben Hex Tarp | Oware 1.5 cuben Cat Tarp | More coverage to keep gear dry in the rain and cut optimized for hammock use |
Bottom line: For me hammock camping equates to more miles hiked at the end of the day vs. sleeping on the ground. Why? Sleeping in a hammock dramatically increases suitable campsites on the AT. With a hammock all I need to camp is two trees—the ground below is largely irrelevant. That means I can hike until dusk without the risk of being in un-campable terrain. (Since much of the AT is sloped and rocky it’s not suitable for ground camping. So if I were ground sleeping I would likely need to stop hiking sooner than dusk to camp. I.e. I need to stop at the last shelter or campground that I could comfortably make before dark. Thus I might miss an hour or more of available daylight to hike.) There are many more advantages to hammock camping like a great sleep each night that allows me to more fully recover from a long day of hiking, and the option to avoid crowded, noisy, and heavily impacted campsites. Read more here: Hammock camping article. Hammock Camping Part I: Advantages & disadvantages versus ground systems
And there is nothing wrong with ground camping! If I were to ground camp, my sleeping system would remain quite similar to my ‘07 trip. Although I would use some model of NeoAir for a ground pad. Just getttin’ too old to get a great night’s sleep on a thin foamie! And as with the hammock camping, I would spec’ out a warmer quilt so that I would be guaranteed a good sleep. But with newer, lighter fabrics and trimmer dimensions that warmer quilt weighs less than my ‘07 one. Oh, and I would also take a down vest to wear around camp.
 Pack
Pack
To: 11 oz Mountain Laurel Designs Burn in Cuben. More durable, more pockets, inherently waterproof
From: 3.8 ounce spinnaker fabric pack: Gossamer Gear Whisper
While the Gossamer Gear Whisper Pack performed fine and I didn’t rip in ‘07, there were a few things that made me look for a similar pack but with more durable fabric and more pockets. 1) the Whisper’s pack fabric was so delicate that I was always looking out not to snag it on something; locating a soft, non-sharp place to put it down and sometimes resting it on the top of my feet when I couldn’t quickly find one. This fiddling takes away hiking time and distracts me from enjoying other things. 2a) while still light, the two quilts for hammock camping (top and bottom) takes a bit more volume in a pack than a single quit/sleeping bag–the Whisper is not quite up to that storage. 2b) even with sufficient volume, I would have my reservations that the seams will hold with such delicate fabric when I stuff two quilts into a pack. 3) the pack had no side pockets to store food and a water bottle, etc. in a more accessible location. Digging into the main pack added fiddle time that took away from hiking time. 4) the Cuben Fiber on the MLD Burn is inherently near-waterproof = less time dealing with rainproofing pack and gear in iffy weather.
NB. Gossamer gear now makes the 9 oz Murmur pack which addresses most of these issues except for pack volume. Altho the volume is fine for ground campers with a single quilt, it’s a bit small to store two quilts for hammock campers. And it is not as waterproof or durable as a cuben fiber pack.
 Warm Camp Clothing To: a down vest From: nothing! (or rather a quilt worn in camp as a poncho)
Since my quilts are now non-poncho versions (although I can still wrap it around me in camp like a blanket). I have have added a down vest for walking around/being more mobile in camp and for early starts on cold mornings.
Midway on the AT. From my section hike last fall where I evaluated a beta kit of Practical Light Gear for the AT. With a few exceptions, I will use most of that gear this Spring.
Sunrise from my hammock, Shenandoah National Park.
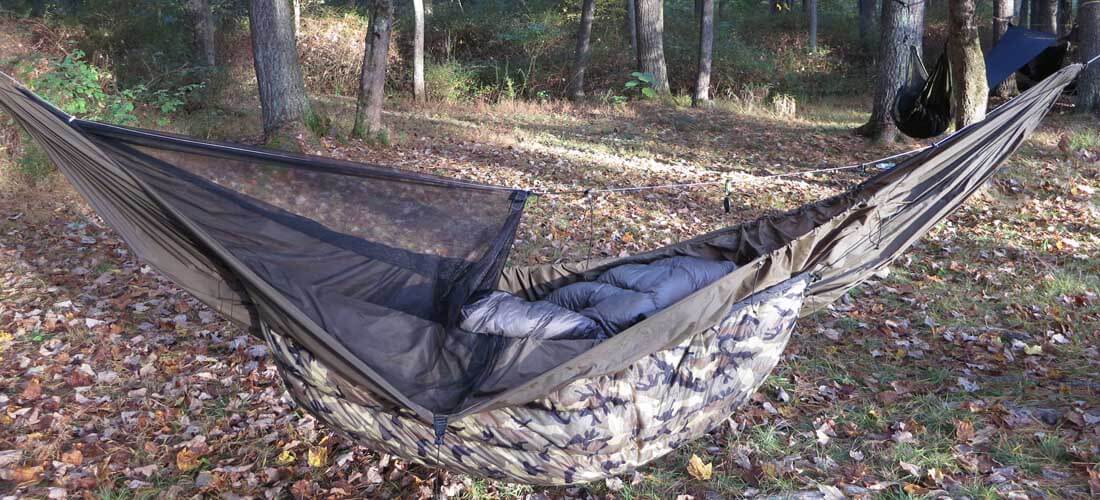
A 9 ounce hammock: This Gear List suggests using a hammock, which on the AT has significant comfort and performance advantages vs. a tent.
A three season (spring, summer, fall) Appalachian Trail Gear List
This gear list is fine tuned to the climate and terrain of the Appalachian trail rather than the more generic 9 Pound – Full Comfort – Lightweight Backpacking Gear List which is intended to cover most of the lower 48. For instance, the AT Gear List suggests using a hammock vs. a tent, since trees are plentiful along the AT, whereas flat, rock-free places to setup a tent and sleep on the ground are scarce. For more on hammocks see: Hammock Camping Series – Part 1 – Advantages of Hammock Camping.
If you aren’t interested in hammock camping, the list also includes and alternative options for traditional (ground) camping. Since most folks will be sleeping in AT shelters it doesn’t make much sense to carry a tent, which will go unused most nights. To save weight, just carry a light tarp in the low probability that there is both no room in the shelter and that it will rain. For more conventional tent & sleeping bag options see: 9 Pound – Full Comfort – Gear List.
This gear list is suitable for most backpackers on most 3-season trips (possibly 3+ season) along the Appalachian Trail (In some instances, you may wish to fine-tune this list to your particular trip needs and/or backpacking style by selecting suitable optional or alternate gear in this list.) I’ve also tried to list a number or items available from major retailers like REI, e.g. the excellent and reasonably priced Outdoor Research Helium II Rain Jacket at only 6.4 ounces!
Appalachian Trail Gear List – Summary with Weights
| SECTION | TOTALS | Lbs | |
|---|---|---|---|
| Clothing in Pack (not usually worn) | 2.3 | Rain jacket, warm jacket, gloves, etc. | |
| Backpack and Gear Packaging | 1.3 | Backpack, stuff sacks | |
| Sleeping Gear, Hammock, Tarp | 3.1 | This Gear List suggests using a hammock, which on the AT has significant advantages vs. a tent. See Advantages of Hammock Camping | |
| Alternate Sleeping Gear – Tarp Camping (alternate to hammock camping) |
3.3 | Since most folks will be sleeping in AT shelters it doesn’t make much sense to carry a tent, which will go unused most nights. | |
| Cooking Gear and Water Storage/Treatment | 0.8 | Stove, pot, cookware, water “bottles” & purification | |
| “Essential” Gear | 0.8 | Maps, SOS device, first aid kit, headlamp, knife sunscreen and small items not included in above | |
| BASE PACK WEIGHT (BPW) | 8.3 | BPW = all items in pack = all items above, less “consumables” (water, food and fuel) |
|
| 1 Pint of Water | 1.0 | Average amount carried when hiking (water plentiful) | |
| Food – for a long weekend – 3 days, 2 nights | 3.8 | See Backpacking Food “…reduce food weight” | |
| Fuel | 0.2 | 4 fl-oz alcohol = 3.2 oz wt | |
| Total of Consumables | 5.0 | Water, food, and fuel | |
| TRAIL PACK WEIGHT (BPW + consumables) | 13.3 | For a long weekend – 3 day trip | |
| Clothing Worn and Items Carried (not in pack) | 4.3 | Not included in pack weight: clothing worn on the trail, hat, shoes, trekking poles, stuff in pockets, etc. | |
| Camera Equipment Gear List (new page) | Details for Serious Lightweight Backpacking Cameras | ||
Detail of Gear List Items
Clothing in Pack (not usually worn)
| Clothing | Item | Oz | Comments |
|---|---|---|---|
| Rain Jacket | Outdoor Research Helium II (6.4) | 6.4 | From REI: less expensive than many at this weight |
| RainJacket (alt) | Patagonia Alpine HOUDINI (6.0) | Light! Minimal with tough fabric. Pricy | |
| RainJacket (alt) | Ultimate Direction, Ultra Jkt 5.9 | Light, great ventilation options, built-in mitts | |
| Rain Pants | Outdoor Research Helium | 6.0 | Light. Not insanely expensive |
| Rainpants (alt) | Rain chaps or rain kilt (2.0 oz) | For trips with low probability of rain, or warm rain | |
| Mid-layer top | North Face TKA 100 Glacier 1/4-Zip | 7.9 | For use as a mid-layer (and as a “windshirt”) |
| Windshell | Don’t bring anymore | If cold & windy, will layer rainjacket over my fleece | |
| Warm jacket | West. Mtn. Hooded Flash Jacket | 10.5 | Warmth Important for rest stops and in camp. |
| Warm pants | Western Mountain. Flash (6.5) CampSaver is one of the few places to get these great pants | For colder weather. Or folks that run cold in camp | |
| Warm hat | OR Option Balaclava | 1.8 | Warmer than hat – great for quilt w/o hood! |
| Warm hat | Mtn Hdw Power Stretch Balaclava | 1.2 | Warmer than hat – great for quilt w/o hood! |
| Liner gloves | DuraGlove ET Charcoal Wool (2.5) | Great liner glove – light, warm, durable! | |
| Camp gloves | Glacier Glove fingerless fleece (2.0) | 2.0 | Dexterity at camp chores or climbing in cold weather |
| Rain Mitts | ZPacks Challenger Rain Mitts (1.0) | 1.0 | For intermittent use. Expensive. |
| Rain Mitts (alt) | MLD eVENT Rain Mitts (1.2) | 1.2 | For intermittent use. |
| Rain Mitts (alt) | Outdoor Research Revel (3.5) | For constant use: waterproof, durable, grip palm | |
| Spare socks | DeFeet Wolleators or SmartWool PhD Light Mini |
1.8 | Will bring to wash & switch between pairs |
| Sleeping socks | DeFeet Woolie Boolie (3.0) | No day use; sleeping and dry camp only | |
| Sleeping top | Patagonia long sleeve Cap LW (3.5) | Dry/clean for camp. Only bring in very wet climates | |
| Sleeping bot. | Patagonia Capilene LW (3.4 oz) | Dry/clean for camp. Only bring in very wet climates | |
| Sleeping (alt) | Terramar Thermasilk top & bot | Inexpensive alternative to expensive base layers | |
| TOTAL | 2.3 | Lb |
Backpack and Gear Packaging
| Packing | Item | Oz | Comments |
|---|---|---|---|
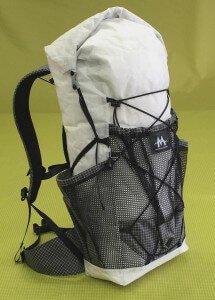
| Pack opt 1 | Mountain Laurel Designs 3500ci EXODUS (17 oz) | 17.0 | No frame. Almost all Dyneema. Very little mesh. Ideal for AT and shorter trips. [award winner] |
| Pack opt 1 | Hyperlite Mountain Gear 2400 Windrider (28 oz) | For those that want a frame. Light, super durable, seam sealed bag, good carrying capacity, good pockets. More $ [award winner] | |
| Pack (alt) | Gossamer Gear Gorilla 40 (26 oz) | Has frame. Durable. Right volume for AT. Record setting pack. | |
| Pack (alt) | Osprey Exos 38 Pack (34 oz) | Mainstream commercial pack, readily available | |
| Waterproofing for pack | 2x Gossamer Gear Pack Liner (1.8) (alternate: a trash compactor bag) | (1) liner for sleeping bag and insulating clothes (1) liner for everything else |
|
| Food storage | Quart-sized HD freezer bag | 0.5 | For storing organizing ‘todays’ snack food |
| Food storage | Aloksak OP Sak 12.5″ x 20″ (1.0) | control food scent – attract less animal attention | |
| Bear canister | Bear Vault BV500 (41) or Wild-Ideas Weekender (31) | (when reg’s require) Wild-Ideas is lighter but pricy. Bear Vault is a better value | |
| Stuff sacks | For sleeping bag, clothes, etc. | 2.0 | Silnylon: keep gear organized, clean, protected |
| Map sleeve | Gallon-sized freezer bag | 0.5 | Gallon: fewer map folds & shows more map area |
| Eyewear case | padded nylon sleeve + Ziplock bag | 0.4 | No need for a heavy rigid case |
| TOTAL | 1.3 | Lb |
Sleeping Gear and Hammock Camping Setup
| Sleep+Shelter | Item | Oz | Comments |
|---|---|---|---|
| Hammock Shelter Setup – For more on hammocks see: Hammock Camping Series (for conventional ground sleeping options see “Alternate Camping with a Tarp” below. |
|||
| Hammock | Dutchware Half-Wit (with Hexon 1.0 fabric ) |
12.5 | Light, all essential features & bug protection. Value! (weight includes kevlar/whoopie suspension) |
| Sleeping Quilt | Hammock Gear Burrow “+30” | 14.5 | (+40F + 2 oz over fill = “+30F”) Great value |
| Under Quilt | Hammock Gear Phoenix “+30” | 14.0 | 60″ long: (+40F + 2 oz over fill = “+30F”) Value |
| Tarp | Hammock Gear Cuben Hex Tarp | 7.0 | Hammock specific tarp (wt incl. ridgelines & guylines) |
| Tarp (value) | Hammock Bliss XL Rain Fly (18.0) | Inexpensive and serviceable hammock tarp | |
| Stakes | 8 MSR Groundhog Y-stakes .5oz ea | 4.0 | Hold better than skewer stakes. Red easier to find! |
| Guylines | 3mm MSR Reflective Utility Cord 2.4mm reflect cord (8×4-ft lines) | 1.0 | 2 to 3mm – all work well – diameter your preference |
| TOTAL | 3.1 | Lb | |
Alternate Camping with a Tarp (if not Hammock Camping)
Since most folks will be sleeping in AT shelters it doesn’t make much sense to carry a tent, which will go unused most nights. To save weight, just carry a light tarp in the low probability that there is both no room in the shelter and that it will rain. For more conventional tent & sleeping bag options see: 9 Pound – Full Comfort – Gear List.
| Sleep+Shelter | Item | Oz | Comments |
|---|---|---|---|
| Sleeping Bag | Hammock Gear Burrow Quilt “+30” | Pers fave. Great value! (with 2 oz over fill = “+30F”) | |
| Sleeping Bag (alternate) | Western Mountaineering SummerLite (19) | 19.0 | Conventional +32 sleeping bag. Light, warm, highest quality, long loft retention |
| Sleeping Pad | T-Rest NeoAir X-lite “Women’s” | 12.1 | Perfect size for most. Warm. Super comfortable! |
| For more shelter options see: Recommended Tents, Tarps, and other Shelters | |||
| Tent (alt) | TarpTent ProTrail – 1 pers (26oz) | Full rain & bug protection for one person (has floor) | |
| Tent (alt) | Big Agnes Fly Creek UL 1 (33 oz) | REI: Freestanding tent for those who feel they need it | |
| Tent/Shelter (alternate) | MLD Grace Duo Tarp Silnylon (15) Cuben (7.8) | 15.0 | Pers fave for many trips: Huge coverage. Low weight. Great ventilation and views. |
| Bivy | MLD Superlight Bivy (7.0) | Perfect with tarp. When bringing will cowboy camp under stars most nights | |
| Ground cloth | Gossamer Gear Polycryo M (1.6) | 1.6 | Not needed with a bivy or shelters with a floor |
| Stakes | 8 MSR Groundhog Y-stakes .5oz ea | 4.0 | Hold better than skewer stakes. Red easier to find! |
| Guylines | 3mm MSR Reflective Utility Cord 2.4mm reflect cord (8×4-ft lines) | 1.0 | 2 to 3mm – all work well – diameter your preference |
| TOTAL | 3.3 | Lb | |
Cooking Gear and Water Storage/Treatment
| Cook/Water | Item | Oz | Comments |
|---|---|---|---|
| Bottles | Sawyer 64 oz Squeezable Pouch | 1.5 | For collecting treating water in camp – dry camps |
| Bottles | Sawyer 32 oz Squeezable Pouch | 1.0 | Use during the day (note: Platypus doesn’t fit Sawyer) |
| Purification | Sawyer filter (3.0) | 3.0 | To drink on the spot – greatly reduces water cary |
| Purification | Chlorine Dioxide tablets | 0.5 | For treating 2L bladder in camp |
| Cookset | Trail Designs Toaks 900ml Pot, Sidewinder Ti-Tri, 4fl-oz fuel bottle | 5.3 | Lightest, most practical cookset on the market. Zelph StarLyte Burner stores unburned fuel. |
| Cookset (alt) | Jetboil Zip Cooking System, Jetpower 100 Fuel Canister (18.5) | EZ to use. Much heavier than the alcohol stove cookset. Not “green” with non-recyclable canisters. | |
| Pot (bargain) | Open Country 3 Cup Pot (3.8) | As good as a titanium pot but only $16 | |
| Cookset(cheap) | TD $40-$50 pot/cookset option | Stay tuned: Working on what this will be | |
| Fuel container | Boston Round Bottle 4 fl-oz (0.8) or TD Fuel Bottle Kit |
(5 fl-oz act. cap) use squirt spout top for and medicine cup accurate dispensing | |
| Ignition | Standard (not micro) BIC lighter | 0.2 | Larger is easier to use with cold hands |
| Mug | Snow Peak Ti Single 450 Cup (2.4) Fave: MLD 475 Ti mug (1.3oz) |
1.3 | Eat breakfast & have coffee at same time |
| Bowl/Mug (alt) | Ziplock 14 fl-oz bowl (0.6 oz) | Pers fave: “mug” and/or bowl. Cheap, light, available | |
| Mug (alt) | Starbucks “$1,” 16 fl-oz cup (1.6oz) | Readily available, inexpensive, reasonably durable | |
| Utensil | Plastic spoon with big shovel | 0.3 | spoon handle cut to fit in pot |
| Coffee brew | MSR MugMate Coffee Filter (1.0) | For using ground coffee (and not Starbuck’s VIA) | |
| TOTAL | 0.8 | Lb |
“Essential” Gear (smaller items not included in above)
| Essentials | Item | Oz | Comments |
|---|---|---|---|
| MAPS | 11X17 Custom Maps in ZipLock | 2.0 | Mapped with CalTopo and printed at Kinkos |
| Charging | 6000mAh Anker batt + cable (5.1) | for longer tips (~1.5 iPhone6 charges) | |
| SOS/Tracker | Preferred: inReach SE (6.9) | 2-way communication (a big deal!), visible GPS coordinates, and trip tracking+SOS | |
| SOS/Track (alt) | SPOT Gen3 (4.8) | Disadvantages: only 1-way com, no vis. GPS coord. | |
| GPS & Comm | Iridium 9555 SatPhone (9.7 oz) or Iridium GO! |
Make no mistake: voice communication is still the gold-standard for high risk trips | |
| Optics | ROXANT 7×18 monocular (2.0) | Light: scouting/route finding, decent, inexpensive | |
| Optics (alt) | MINOX BV II 8×25 binoc’s (10.8) | Scouting, much better wildlife observation, value | |
| Pen/pencil | Fisher Space Pen Stowaway | 0.2 | To mark up maps, take notes about trip |
| Toothbrush | GUM 411 Classic Toothbrush | 0.4 | Full head. minimal handle (but not cut in 1/2) |
| Toothpaste | Travel size 1/2 full | 0.7 | |
| Toilet paper | Whatever is on the roll at home | 1.0 | TP only for polish, use found materials first |
| Soap/sanitizer | Dr. Bronners | 0.5 | Dr. Bronner’s – repackaged into small bottle |
| Sunscreen | small plastic tube about 1/2 full | 0.5 | for face & hands: most of body covered—large hat |
| Lip balm | Bert’s Bees or similar | 0.2 | Minimal wt for dedicated lip balm |
| First Aid Kit | Meds, wound/injury, foot care | 3.0 | See detailed list at bottom |
| Headnet | Sea to Summit Head Net (1.2) | Mosquito netting – don’t take on most trips | |
| Insect repell. | Repel Pen Pump Insect Repellent Sawyer Maxi-DEET Spray (0.5) |
Convenient size; effective. Sawyer preferred. | |
| Foot care kit | Bonnie’s Balm in small balm jar | 0.5 | In case of wet feet. Never get blisters. |
| Compass | Suunto M-3D Compass (1.6) | 1.6 | Lightest compass with declination adjustment |
| Knife/scissors | Wescott blunt tip school scissors | 0.9 | More useful than knife – OK for plane carryon |
| Knife | Gerber L.S.T. Drop Point (1.2 oz) | Can cut bread and salami – very light for 2.6″ blade | |
| Knife (alt) | Spyderco Ladybug Knife (0.6) | 2″ blade – one of the lightest functional knives | |
| Firestarter | Bic Mini Lighter + trash | 0.2 | Energy bar wrappers are great fire starter |
| Light | BD Ion ii headlamp (45g) | 1.6 | 2 AAAs + headband. Bright, efficient dimmable LED (slide/touch operation a bit wonky, so not for all) |
| Light (alt) | Fenix LD02 w spare battery (1.0) | Best mini light available, attach to hat brim with clip | |
| Repair | Tenacious patch, duct tape, glue | 0.2 | Also consider NeoAir patch kit, and Aquaseal |
| Finance/ID | ID, CCs, and cash in snack ZipLock | 0.2 | More secure on me than left in car |
| TOTAL | 0.8 | Lb |
Clothing Worn and Items Carried (stuff not in pack)
| Worn/Carried | Item | Oz | Comments |
|---|---|---|---|
| Shirt | SmartWool Micro T Short-Sleeve | 4.5 | Light, comfortable. On trail, in shade. No need for sleeves. (put on fleece for cold/windy Wx) |
| Shirt (alt) | SmartWool NTS lightweight zip (8) | Shirt & baselayer: for colder weather | |
| Pants | RailRiders X-Treme Adventure (16) | Pers fave. Very durable, no velcro on pockets! (Use Code RRAAB21 to get 10% off your first RailRiders order) | |
| Pants (alt) | REI Sahara convertable pants (14) | 14.0 | On trail, in shade: will hike in shorts most days. Ex Officio and many others make similar pants |
| Underwear | Patagonia briefs | 2.0 | Dry fast, will rinse/wash most days |
| Bra | Lighter, quick drying spots bra | Not an expert on this one! | |
| Shoes | Inov-8 ROCLITE 295 (20oz) | 20.0 | Pers fave. Light, sticky rubber, durable, low heel rise |
| Shoes (alt) | Brooks Cascadia (25 oz) | Very popular trail shoe for LW backpackers | |
| Shoes (alt) | Lightweight trail running shoes | Most non-Goretex trail running shoes that fit well | |
| Socks | DeFeet Wolleators or SmartWool PhD Light Mini |
1.8 | Wolleators are pers fave. Light, thin, warm, simple, durable |
| Gaiters | Dirty Girl gaiters (1.2 oz) | I rarely find the need for gaiters | |
| Headwear | Nylon Ball Cap | 2.0 | Mostly shade on AT. No need for killer sun protection |
| Watch | Suunto Core with positive display | 2.2 | compass, altimeter, multifunction timepiece. No GPS |
| Watch/GPS | Garmin Fenix 3 Sapphire (3 oz) | Accurate trip track: GPS, compass, altimeter, time | |
| Sunglasses | Rx and non-Rx (polarized) | 1.0 | http://www.zennioptical.com/ for cheap Rx options |
| Glasses | Zenni clear Rx glasses (1.0 oz) | Great glasses! for $20 or so. But 2-3 week delivery | |
| Camera | Canon S120 + extra battery (8 oz) | Balance of wt, size, image qual; less $ than RX100 | |
| Camera (alt) | Sony RX100 or Sony a6000 | See Serious Lightweight Backpacking Cameras | |
| GPS/Comm | Iphone 6+ Ziplock baggie (7.5) | 7.5 | Primary GPS & map source (not leaving in car!) |
| Poles bargain | Cascade Mountain Tech Carbon | 15.2 | Pers fave. 1/3 price but equal to the best poles |
| Trek Poles | REI Carbon Power Lock (16 oz) BD Carbon Alpine (18 oz) |
Stiff, light, travel-friendly, won’t break off-trail/rough terrain (readily available) | |
| TOTAL | 4.3 | Lb |
First Aid Kit (detail)
| First Aid | Item | Oz | Comments |
|---|---|---|---|
| Pain, fever inflammation | Naprosyn (Aleve), Ibuprofen, or Tylenol (fever) | 0.4 | In ziplock pill bag available at pharmacies |
| Foot/blister | Gauze + Leukotape Tape | 0.3 | For taping over blisters, or pre-blister areas |
| Foot/blister | Tincture of benzoin in micro-bottle | 0.2 | For getting tape or Bandaids to REALLY stick! |
| Wound care | Bandaids + gel blister covers | 0.5 | Assorted sizes – your preference |
| Wound care | Antibact. packets + wound wipes | 0.4 | Wound cleansing, infection prevention |
| OTC meds | Benadryl, Sudafed, Nexium, Imodium, caffeine tablets | 0.4 | All in tablet/pill form |
| Rx meds | Personal Dr’s Rx meds | 0.4 | |
| Pain serious | Dr’s Rx Painkiller | 0.2 | For serious injury, tooth abscess, etc. |
| Storage/org | Bag Poly 5×8 to hold 1st Aid Kit | 0.2 | Keep size down. Can only put in what can fit in bag. |
| TOTAL | 3.0 | Oz (included in “Essential” Gear) |
2016 Update: I have redone this with a a new post “5 Pound Practical Ultralight Backpacking Gear List” which I believe is a far better approach to light on the AT. This new gear list is both light and practical. It can be used by many AT hikers to increase both their enjoyment and miles covered per day.
2007 version – 2.4 Pound Extreme Ultralight Backpacking on the Appalachian Trail
sub-5 pounds Full Skin Out Base Weight. That’s all of my pack and everything I am wearing. Overlooking the Shenandoah Valley

Detailed 2.4 lb Extreme Ultralight Gear List (pdf)
90+ mile Fall trip – AT in Shenandoah National Park – 3 days / 2 nights, Nighttime temps near 32 F with wind. One day/night of rain.
Some key gear for 4.8 pounds FSO-BW: Jacks R Better Stealth Quilt (worn in poncho mode), Oware Cattarp 1.5 (cuben fiber version), Trail Designs Caldera cook system, Gossamer Gear 2007 Lightrek Poles (supporting the Cattarp), Inov-8 F-Lite 300 shoes, Gossamer Gear Whisper pack (blue), Rain Shield O2 Rain Jacket (yellow behind pack), and Smartwool Microweight Shirt.
A Brief Summary of the Details
When I first thought of testing out a Sub-five-pound, Full Skin Out Base Weight (FSO-BW) gear kit I thought of early Fall in the Blue Ridge. To be a valid test, I’d need some good rain, some wind and cold nighttime temperatures. I’d need to watch the weather and be ready to quickly head out when the predicted forecast met these conditions. I’d also need to cover a lot of trail miles, at least 75 to 100 miles, to test out my gear. I chose the AT in the SNP because it is more mileage than I’d likely cover in three days and for its significance as a national trail. “AT trail miles” have become something of a national hiking standard.
My criteria for testing sub-five-pound FSO-BW*:
- Hike 75 or more miles in 3 days
- Must have solid rain
- One night with temperatures below 40 deg F
(possibly approaching 32 deg F) - Carry own shelter
- Full rain gear
- Cook food (There’s 3 oz or so to be saved here, and many who venture into pack weights this low will opt to go without cooking. I wanted to get under 5 pounds FSO-BW and still cook. It seemed a more elegant way to get there.)
- When possible, gear should be readily available, and reasonable in cost (reasonable for making a Sub-five-pound FSO-BW).
* Using different criteria: Staying in huts and without cooking it would be possible to achieve a 1.9 pound base packweight (see gear list for more details) and under four pounds FSO-BW.
Using the above criteria it was harder to get down to Sub-five-pound FSO-BW than I had anticipated. I quickly realized that my primary gear focus was on keeping warm and dry. To do that and stay under weight FSO-BW, I threw out many of the Ten “Essentials” and gear numerous people would consider essential. For instance: compass, knife, [sun hat, sunglasses, sunscreen]*, warm insulating jacket or vest, gloves, spare socks, long pants, TP, toothbrush/toothpaste, and no underwear. I even considered leaving my watch. On the trip I missed very little of this. The thing I wanted most was the down hood that mated with my JRB Stealth down quilt. (I would have traded my first aid kit and more for the hood.) I also missed dry camp socks at night.
* I had a good summer base tan, only my face and hands were exposed, the leaves were on the trees so the trail was mostly shaded.
Clothing and “gear carried” counts for a lot in FSO-BW. Usually, it is more than your BPW. To make sub 5 pounds, I selected the lightest garments I could get away with. Being a smaller person helps. Many times I went down a clothing size to reduce weight.
Key Gear
Jacks R Better Stealth Quilt
This was my most important piece of gear. The Stealth Quilt is a lighter, sewn-through version of the No Sniveler Quilt. At $200 for a sub-one-pound sleep system with 800 fill power down, it is an ultralight bargain. The Stealth Quilt has a slit in the middle so it can be worn as an insulting poncho. Like Francis Capon in his CDT Yoyo, this quilt was both my “sleeping bag” and my sole insulating garment (Francis used a warmer version). Jacks R Better offers a down hood that integrates with both the Stealth and No Sniveler.
The poncho/quilt system works quite well when you hike without stopping during the day. It eliminates about a pound to a half pound for an insulating garment like a down or synthetic high loft jacket. (In cold weather you hike fast enough to stay warm with a light wool shirt and a rain jacket.) In camp, you use the quilt briefly as a garment to stay warm while you cook and do chores morning and evening, otherwise you’re sleeping under it.
My 15 oz Stealth quilt had 2 inches of average loft (single layer), ½ inch over the manufacturer specified 1 ½ inches of loft. It is rated to +45 °F. The first night was in the low 50’s and I slept quite warm under the JRB Stealth Quilt and easily dried out clothes wet from hiking in the rain. The second night on the trip was around 30 F, or about 10 to 15 degrees below the quilt’s rating. Due to the Stealth’s generous loft (for sub 16 oz bag), I managed to stay warm enough to get reasonable sleep.
Note: One can use a conventional sleeping bag as an insulating garment. This involves wrapping the bag around your torso and neck and then covering it with an oversized shell jacket (e.g. a Rain Shield jacket a size larger than you normally wear) to hold it in place. It is the height of fall fashion and your buddies may laugh at you, but it works.
Gossamer Gear Whisper Uberlight Pack — overlooking the Shenandoah Valley
Gossamer Gear Whisper Uberlight Pack
At 3.8 oz and $60 the Whisper may be the best extreme ultralight deal on the market. I’ve used the Whisper since it was first introduced. In the beginning I had misgivings about the packs paper thin appearance but the pack is remarkably durable. I own two and both are doing fine with a many miles on them. For most UL and XUL trips the volume of the pack is about right. My only suggestion: I wish the pack had side pockets to store food and a water bottle, etc. in a more accessible location. (I hope that Gossamer Gear is developing a Whisper-based pack with side pockets.)
Oware Cuben Cattarp 1.5
This tarp, large enough for two-people in pinch, weighs 3.9 ounces! It uses a new lighter Cuben fabric. The large coverage has another weight savings. It allows a single hiker to use down bag without a bivy to protect it from rain that might blow under a smaller tarp. The Cuben Cattarp 1.5 while expensive for a tarp is still inexpensive compared to most UL tents. You get what you pay for. A tarp or shelter with the same coverage in Spinnaker fabric is almost double the weight. The Cattarp 1.5 measures 8.8 feet long x 7.1 feet wide at the front. It kept me dry with room to store gear and cook. I like the simplicity and ease of pitching a tarp.
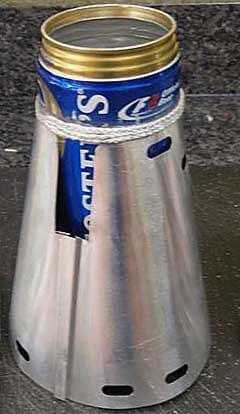
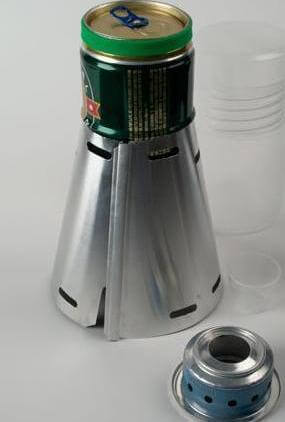
Trail Designs Caldera and Beer Can Cookpot
Most times I don’t cook on solo trips. But I thought that it would be more elegant to get under 5 pounds FSO-BW and still cook. In addition, I was doing a lot of trail miles and it is a big psychological boost to have hot food at the end of a 30+ mile day with thousands of feet of climbing. I like my hot cuppa (tea) in the morning and a warm meal and hot chocolate at night. The light weight and high fuel efficiency of the Caldera system is hard to beat. I took two ounces of alcohol fuel for the trip. Weight of the whole system including fuel bottle (less fuel) was well under 3 ounces. Image on the left is a lightened version of the TD stove system that I used (lower capacity and no priming ring stove, stripped down parts) that is not currently in production.
Note: A version of this stove (right image), the Trail Designs Caldera Keg Cooking System is now available to the general public.
Gossamer Gear Lightrek 3 Trekking Poles
New for 2007 is a stronger and stiffer tapered shaft that adds no weight to the poles. These are strong enough for anything trail hiking can dish out. They are also excellent tarp supports. At 2.4 ounces they are about ½ the weight of most aluminum and carbon trekking poles yet cost no more than many high quality poles. Another UL/XUL bargain.
Note: Some will argue to skip the poles and just string the tarp between trees or use sticks for shelter support. I believe, like many long distance hikers, that trekking poles increase hiking efficiency. While I could have reduced my FSO-BWweight by leaving the poles, I believe it would have also reduced my daily mileage. The poles had two other significant advantages on the trip. (1) They clearly prevented me from slipping and falling when I hiked at night in pouring rain and whiteout conditions. (2) They were a godsend for a quick setup of my tarp in the rain that night. I was not in the mood, nor did I have the time, to ferret about in the dark for the right sticks to erect my shelter. I wanted to be under the tarp, in my warm quilt, and cooking dinner.
Inov-8 F-Lite 300 Shoes and Smartwool Adrenaline Socks
Shoe weight matters. Even a conventional lightweight trail runner is too heavy for a sub 5 pound FSO-BW. The difficulty is finding a very light shoe that provides enough comfort and support to hike 30+ miles a day with no foot problems. The Inov-8 F-Lite 300’s are just over 10 ounces per shoe, provide excellent cushion (3 arrow mid-sole), and are easy on the feet. This summer alone, I’ve backpacked hundreds of miles in the magic combination of Inov-8 F-Lite 300 Shoes and Smartwool Adrenaline socks with no problems. This trip was no different. After 90+ miles in three days I had no blisters or serious foot discomfort.
Gossamer Gear Thinlight Sleeping Pad
Probably the highest R value (insulating) pad for its weight, the Thinlight is surprisingly comfortable for the portion of your body it supports. The Thinlight does take up a bit of pack volume. In this case, that was a good thing as my Whisper pack was a bit over-volume for the small amount of gear I carried. I used a 3/8 inch thick pad trimmed to approximately 30 inches long and 16 to 12 inches wide.
Gossamer Gear Spinn Chapps
These were a new piece of gear for me. I was surprised at how well they worked. I have always taken GoLite Reed pants when there’s a good chance of rain. On this trip, I had on and off rain starting about noon on the first day and hard rain from late afternoon to when I stopped hiking around 10 PM. The rain was fairly warm (60’s), with dreadfully high humidity and whiteout conditions for most of the evening. The Spinn Chapps kept my legs just damp and I easily dried out under my quilt that night.
Rain Shield O2 Rain Jacket
I hadn’t used this jacket for a while but it was perfect for the trip. It is less than 5 ounces. The Propore fabric is highly breathable—almost as breathable as eVENT with the same flat moisture curve of a true microporous membrane (as opposed PU based technology including Gore-Tex). Breathability mattered since the Jacket would also be my windshirt. In a day of hiking in the rain (see Spinn Chapps) I arrived at camp just damp and I easily dried out under my quilt that night. The next two days had cold mornings (near freezing) and evenings and I used the Jacket as windshirt over my wool baselayer to stay warm when I hiked. I also used the Rain Shield Jacket as a pillow by stuffing it into its hood. It was my only bulky item left to make a pillow.
Smartwool Microweight Shirt
Initially I considered taking a 3 oz GoLite C-Thru T-shirt. But with no insulating garment and no long pants, my shirt would be my sole warm piece of clothing when I hiked. From numerous years of experience with Smartwool shirts I know that in combination with a shell (in this case the Rain Shield Jacket) and a fleece balaclava, I can stay warm hiking down to the freezing (or even upper 20’s F if I keep moving fast).
Food and food storage: 6.5 lbs (5.2 lbs food, 1.3 lbs bear cans)
The biggest weight savings of the trip and nobody went hungry.
Again the greatest weight savings was in food. See below.
Clothing: 5.5 pounds
Less clothes, no Polarfleece, no camp shoes, lighter rainwear
Packs: 5.2 pounds
Heavy frame packs vs. ultralight frameless packs
Shelter: 2.4 pounds
Freestanding dome tent and Space Blankets vs. tarps and lightweight ground cloths
Sleeping: 2.2 pounds
Polarguard bags and Thermarests vs. ultralight down bags and foam pads
Stove and Fuel: 1.8 pounds.
MSR stove, full MSR XGK cook set and two bottles of fuel vs. Snowpeak Giga, one titanium pot and one Primus fuel canister.
Misc. Odd and Ends: 2.3 pounds
Including but not limited to: Leaving a 1.9 lb first aid kit & 14 oz of sunscreen, Platypus reservoirs instead of rigid Nalgene bottles, Photon micro lights instead of incandescent headlamps, fewer and lighter maps, etc. (see detailed list)
The Rest of the stuff: ? pounds
Including but not limited to weight reductions in: Additional food carried for other party members, fishing equipment, water treatment, repair kits, straps, soap, bug juice, dental stuff, TP, compasses, emergency Space Blankets, notepaper and pencils, ditty bags, etc., etc.
DETAILS ON FOOD AND FOOD STORAGE
Logistics (saved us one days food and started the trip right)
First we stayed locally the night before the trip. This put us at trailhead early the first day, feeling chipper and raring to go. This and lighter packs allowed us to easily travel in the fist day some difficult cross country that took us two days on the previous trip. We arrived in camp with plenty of time to fish the evening hatch. It saved us a day’s worth of food as well.
Every other trip I’ve taken has started at 4 AM with a long drive to the Sierras, getting a permit and bear cans, frantic packing of the food etc. Tired and cranky we’d be lucky to get to trail head with enough time to stagger down the trail a few miles before dusk. Starting like this puts a trip, quite literally, off on a bad foot. I don’t think I will do it again if I can help it. Nothing like starting fresh and positive with a big lodge breakfast in your belly!
Food per Person
We carried 1.6 lbs/per/day on this trip vs. 2.0+ lbs/per/day of the last trip. By going for one less day (but the same trip with the same number of layover days) we reduced our food even more — 9.6 pounds (7 days – 6 nights) vs. 15 pounds (8 days – 7 nights). We were never hungry and came back with extra food. In the final calculation we ate 1.47 lbs of food per person per day. In addition, we packed denser (calories per cu/in) food that would more easily fit into bear cans. Lots of good high calorie GORP is great for this.
3,100 vs. 3,700 calories per day
We packed food that was higher in calories, 130 cal/oz vs. 110 cal/oz of the previous trip. Even so, we consumed fewer calories per day than on the previous trip. One explanation is that with lighter packs and feeling less stressed you need less food.
Food Storage (Bear Cans saved 1.3 lb/person)
We rented 3 Bearikade Bear Cans from Wild Ideas. We used two Weekender cans and one Expedition for four people and 7 hiking days — a weight savings of 1.3 lb/person. But renting bear cans ahead of time did more than reduce weight. We were able to pack our bear cans at home before the trip. We could be sure that our food would fit and that we could start hiking as soon as we hit trail head. (Last trip we had a rude shock at trail head when all our food didn’t fit into the 3 Garcia Bear Cans. This was partially a problem of too much food and partially a problem of choosing bulky food that did not pack well into a bear can. We had to hang our freeze dried dinners for the first few days, figuring that they had no scent, had the highest volume and fewest calories, and that we could continue the trip if we lost them. There is also the question of backcountry regulations… Fortunately we were off trail in areas not frequented by bears on those first nights. I wasn’t happy about this and went to some effort not to repeat it on the this trip.)
Fish for Appetizer
Finally we did eat a fish twice during the trip. We didn’t eat all that much fish. It probably only qualified as an appetizer and didn’t add more than a few hundred calories per person for the trip. But it was delicious!
Down to the Canyons of Utah – Another year of the spiritual spaces and beauty of the canyons and mesa.
Photographs (except as noted) taken by Alan with an Olympus E-30 digital SLR (info on cameras) and Zuiko 14-42mm 1:3.5-5.6 lens. More on lightweight photograpy…
Backpacking Photography Gear Lists
- A short gear list for backpacking photography – Point and Shoot Cameras
- A gear list for backpacking photography – Larger Cameras for higher quality images
The Trip in Brief
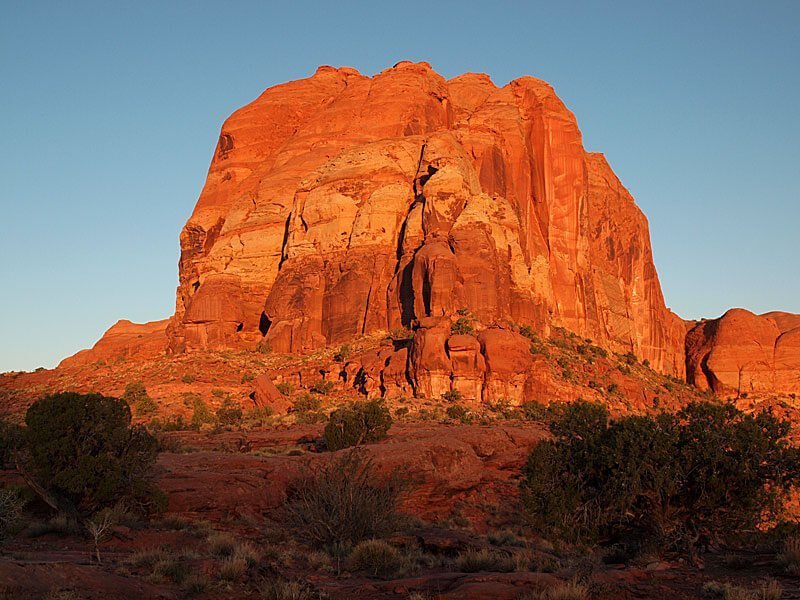
Dawn on a ledge 600 feet above the Escalante. Our last campsite.

Cottonwoods glowing in early morning light.
A wash in late afternoon sun.
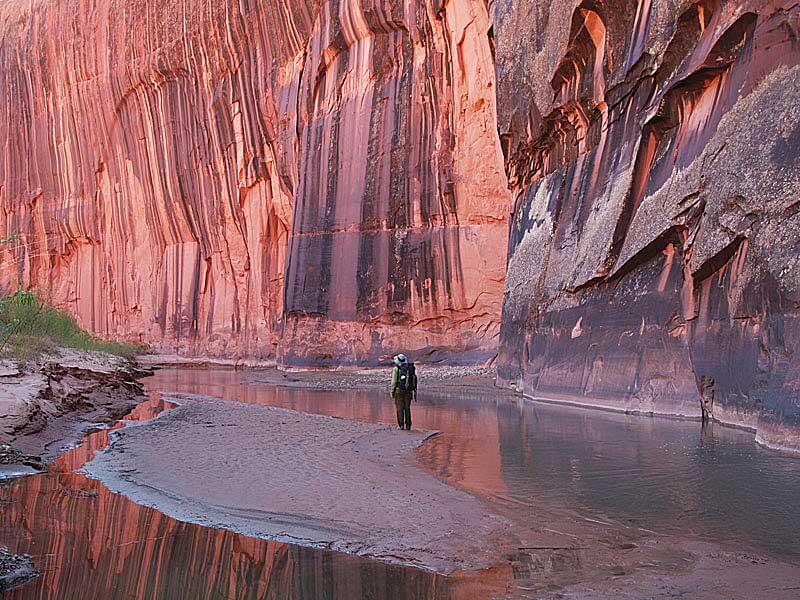
Finally working our way to the the mid-day shade of a deep Escalante canyon.
Trip Start – detailed report
Our trip began with the most exciting 4-wheeling either of us has ever done. Apparently, Kane County is not interested in grading roads to trail heads.
We arrived at trailhead at an earlybird 3:00pm (note low sun) and jumped in.
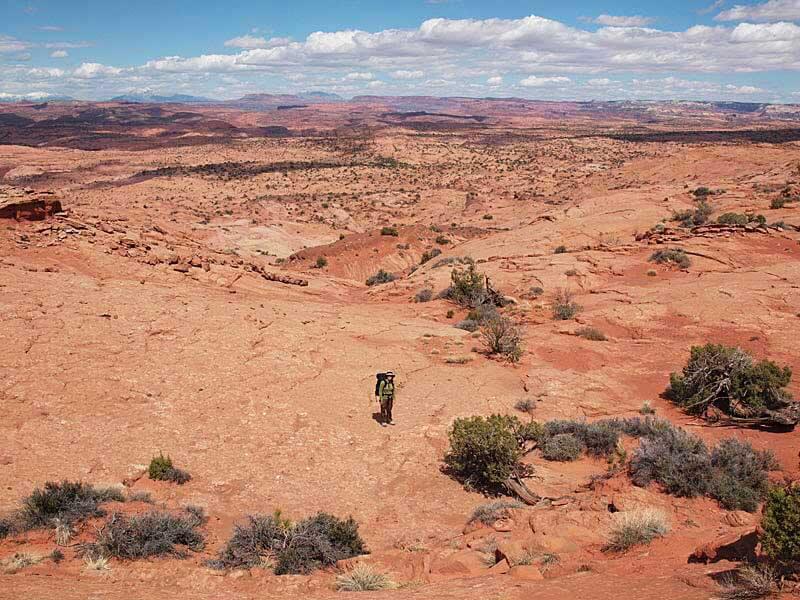
Starting off always requires a walk “into nowhere”. Somewhere in this vast expanse of slickrock we needed to drop into a deep canyon at a very specific place.
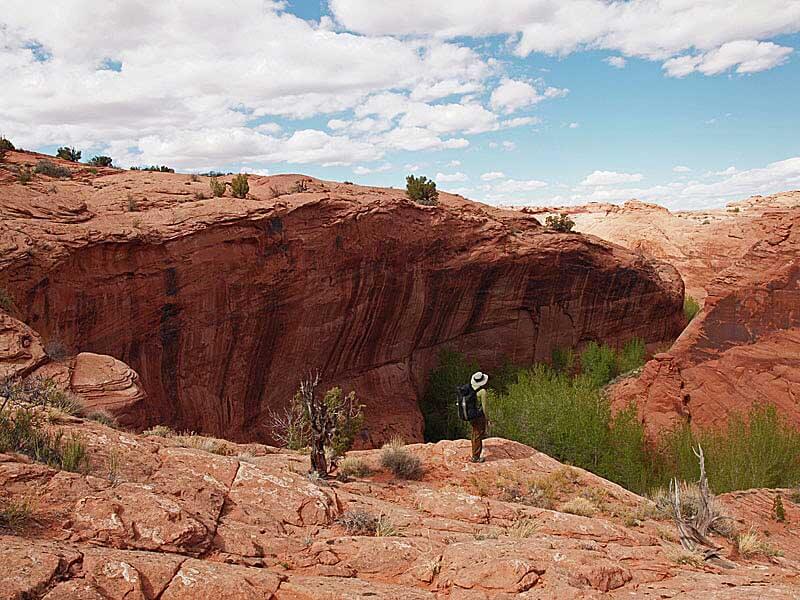
We’ve located the right spot and are preparing to downclimb into the canyon.
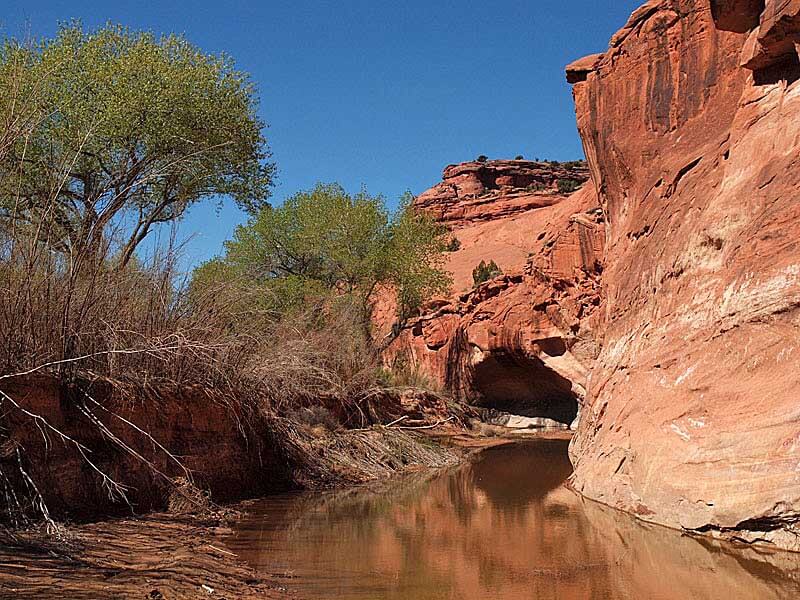
Into a sunlit wash that feeds into the Escalante River
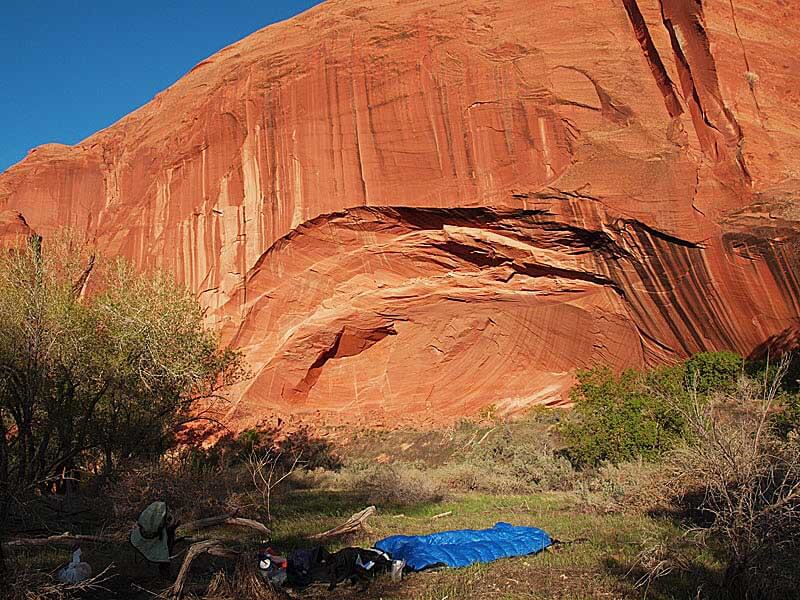
We walked for about five hours before dropping our stuff at this arch campsite surrounded with fragrant sage.

As we approach the Escalante, the canyon walls get higher and shade increases
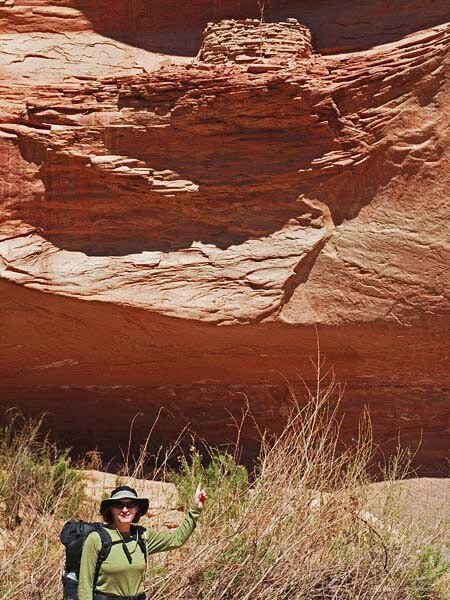
Al got to see her first real Indian ruins, a granary. How they got up there, is anybody’s guess.
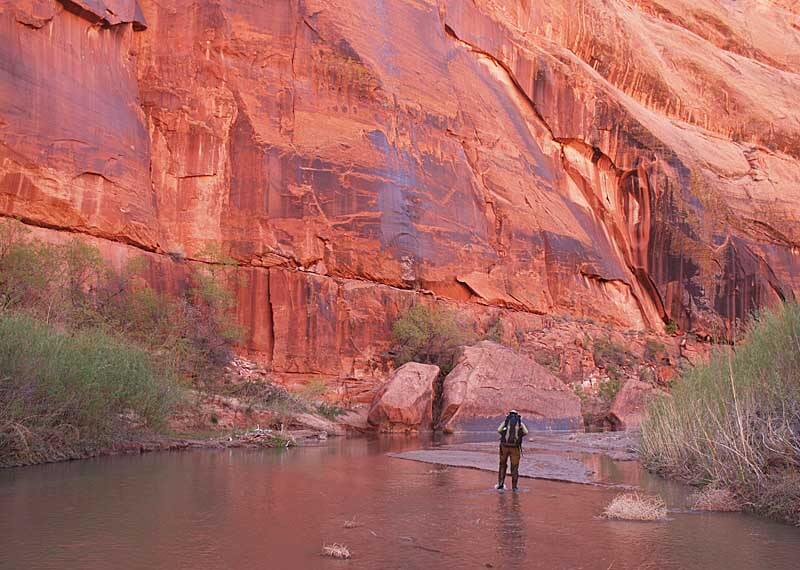
Finally, walking down the canyon of the Escalante with its orange-red mid-day light

With river levels at record lows (snow pack 40% of normal) crossing the Escalante was not difficult. We crossed or waded it often to get better footing and faster hiking on the benches on either side of the river. Frequent crossings left our feet wet all day. The next morning, we again got to put on our wet shoes.

It seemed every bend was an opportunity for a new photograph.

We entered a side canyon and headed for the rim. As we climbed past the Kayenta, we passed
this detached pillar of Navajo sandstone.
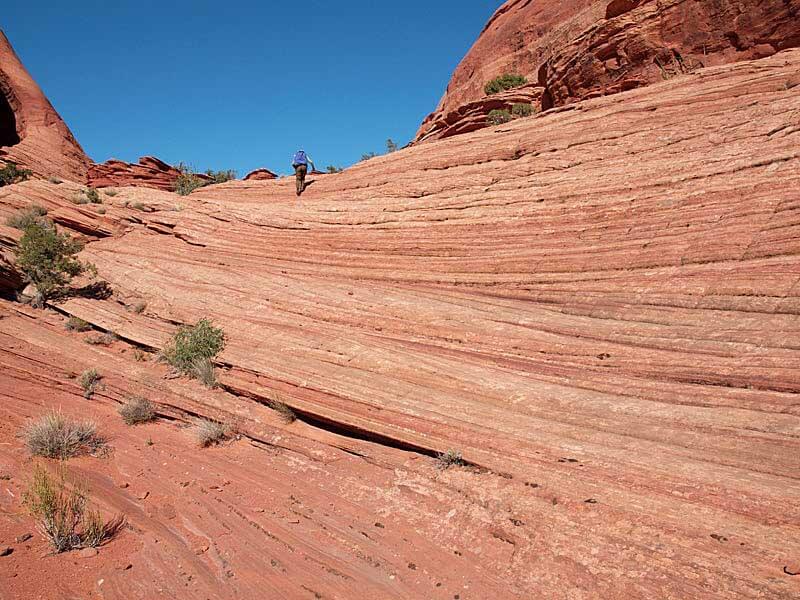
In early evening, we climbed up a striated sandstone ramp past old Indian caves.
![]()
Our first view. The gorge of the Escalante is below (behind the green bushes, not seen in this photo) and the white Navajo domes of Circle Cliffs in the distance. Al is standing below the arrow in the next picture
![]()
A breathtaking perch
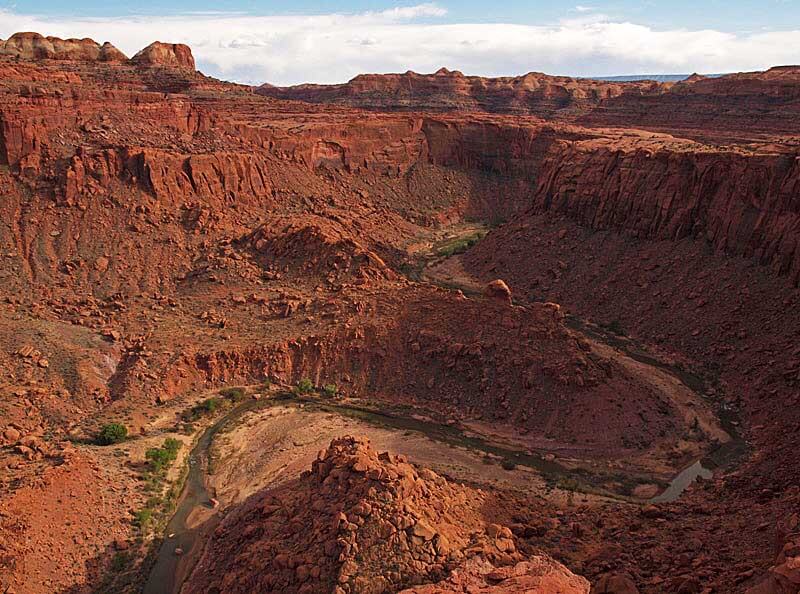
Nearly 1,000 feet above the Escalante, a superb view
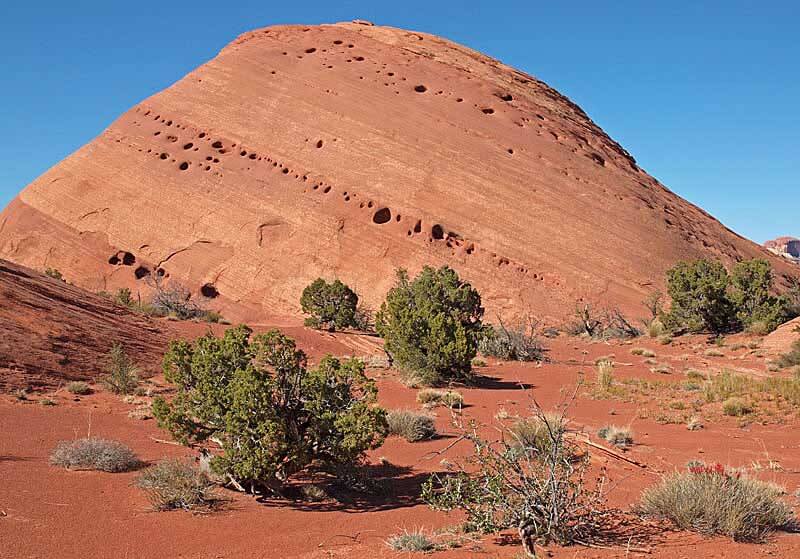
Alan climbed a few dicey slabs to get a bit higher. A Navajo dome at the top of our world.
A close-up of the flowers in the lower right corner of the previous picture.
We climbed back down to a dream campsite at a spring-fed desert oasis. A waterfall sits right next to our sleeping bags. We slept to the frogs singing (croaking) to us all night… ALL NIGHT.
Sleeping-bag-view the next morning.

Moving down the Escalante again. This tower marks an abandoned meander where the Escalante used to run.
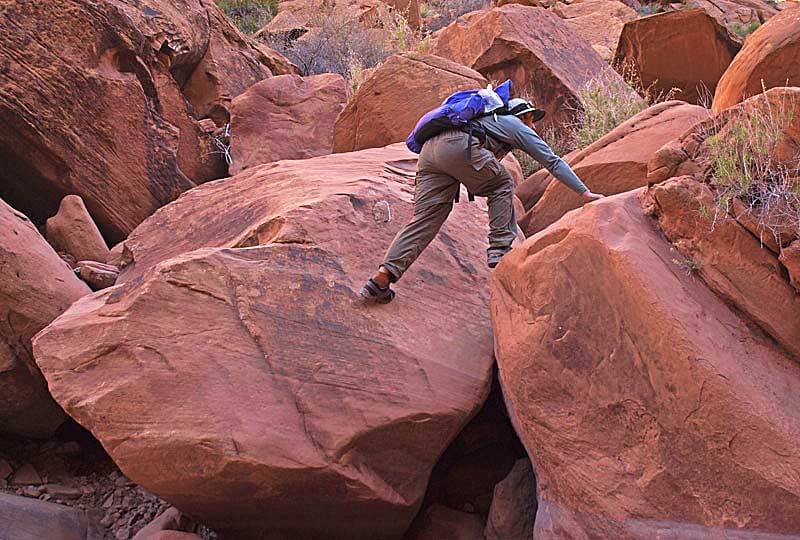
We did more bouldering up clogged streambeds and bushwhacking thru willows and tamarisk than we wanted.
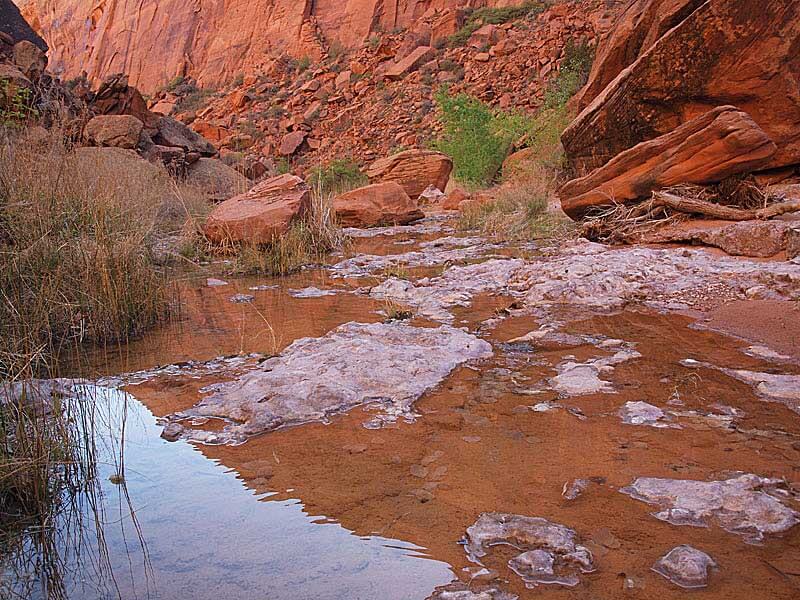
Spring pools not shown on any map….a surprising find given the severe drought.
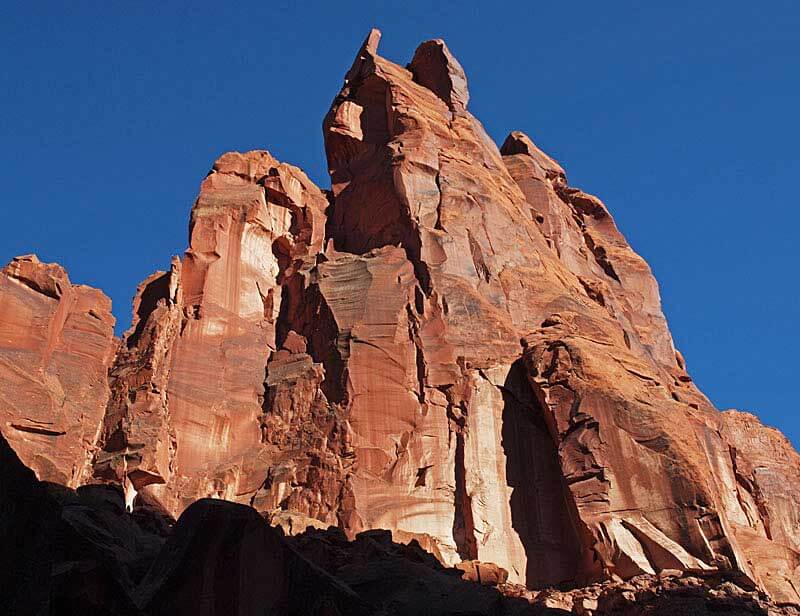
A jagged wingate tower above the pools.
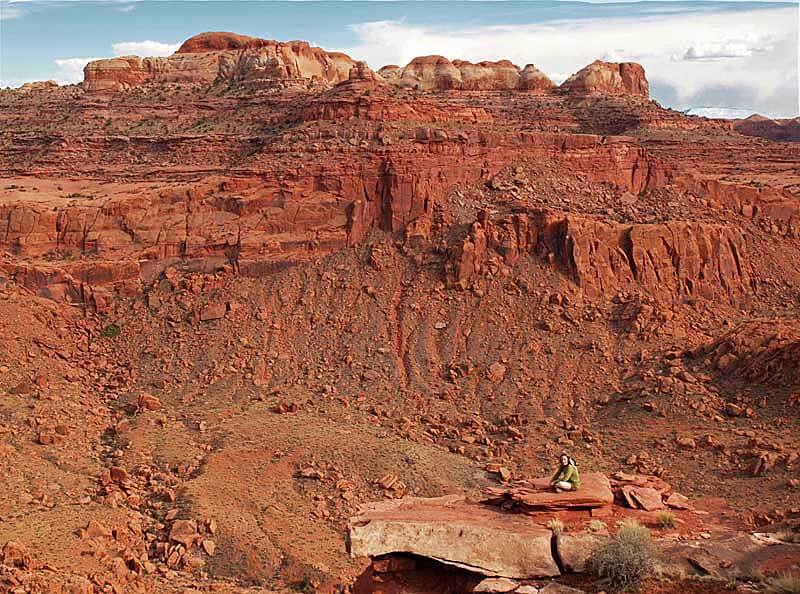
On our last night, we climbed 600 feet above the Escalante River to camp on this ledge.
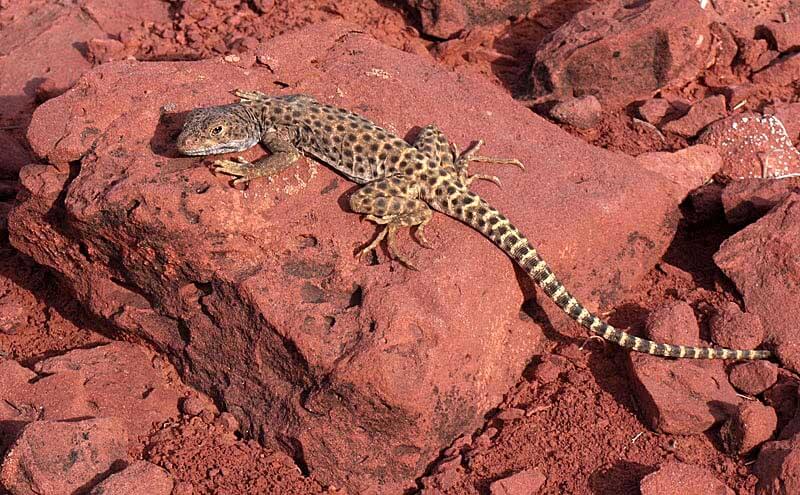
A Long-nosed Leopard Lizard kept us company on the ledge.
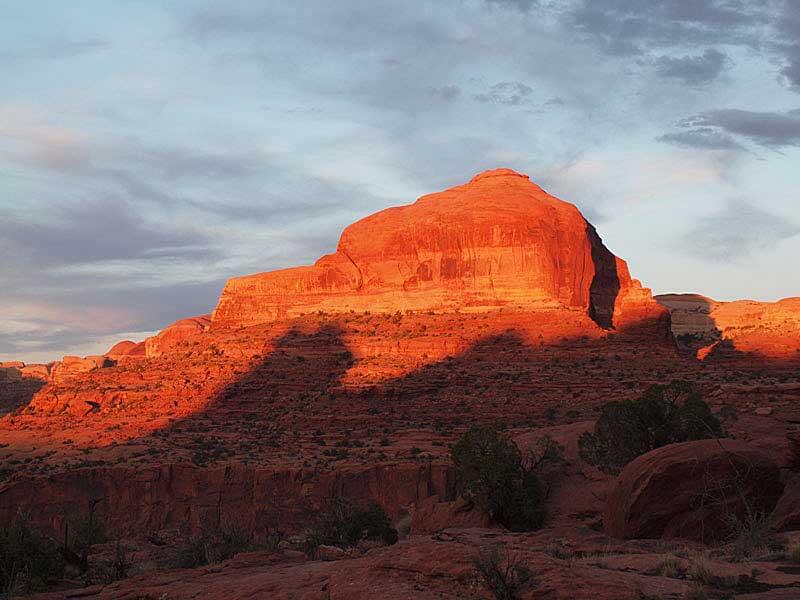
Sunset view from our camp.
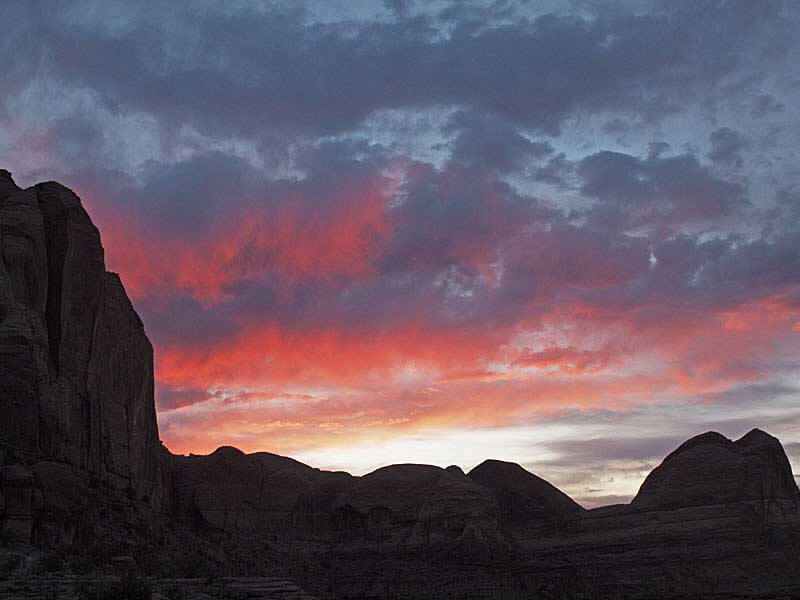
A bit later in the evening — the other direction.
And a stunning dawn view from our campsite the next morning.
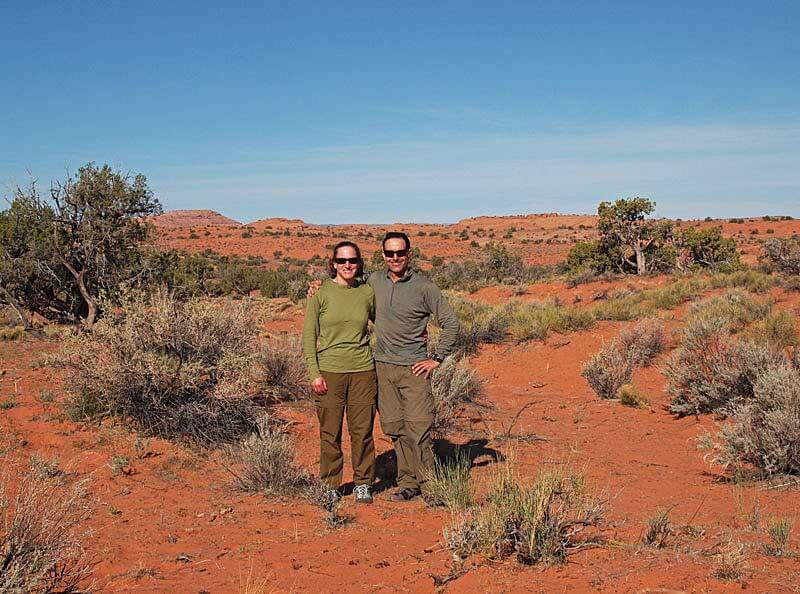
After taking photos. We left camp and walked along ledges on the canyon wall (described as “the finest ledge walk in the Escalante”). After we were over the canyon rim it was a very long march without stopping through sand and Navajo domes. Difficult overland navigation and blazing desert sun. We were though all 4 L of water each by the time we reached the car at 3:00 pm. Zero food and zero water after 7 days is excellent planning on our part.
Parting Shot
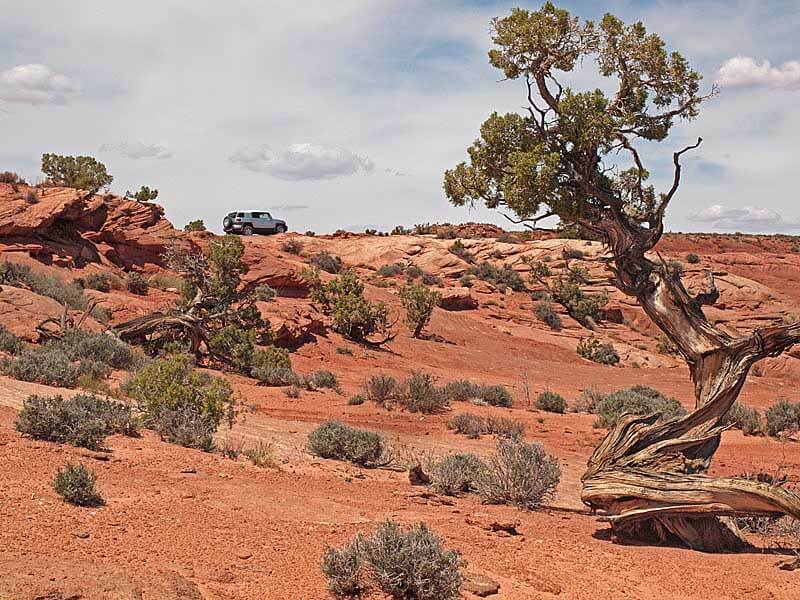
Trail head and our car which blessedly has a spare gallon of water in the back.