This post will get you taking great wildlife photos in no time. We give you the 7 basic tips for wildlife photography as well as some pitfalls and beginner mistakes to avoid. And of course, we’ll also advise you on the best photo gear for wildlife pics.
A shakedown hike is critical to the success of your big backpacking trip for the year. Learn how to plan and execute a shakedown to avoid costly mistakes. Think of it as “Spring Training” for backpacking.
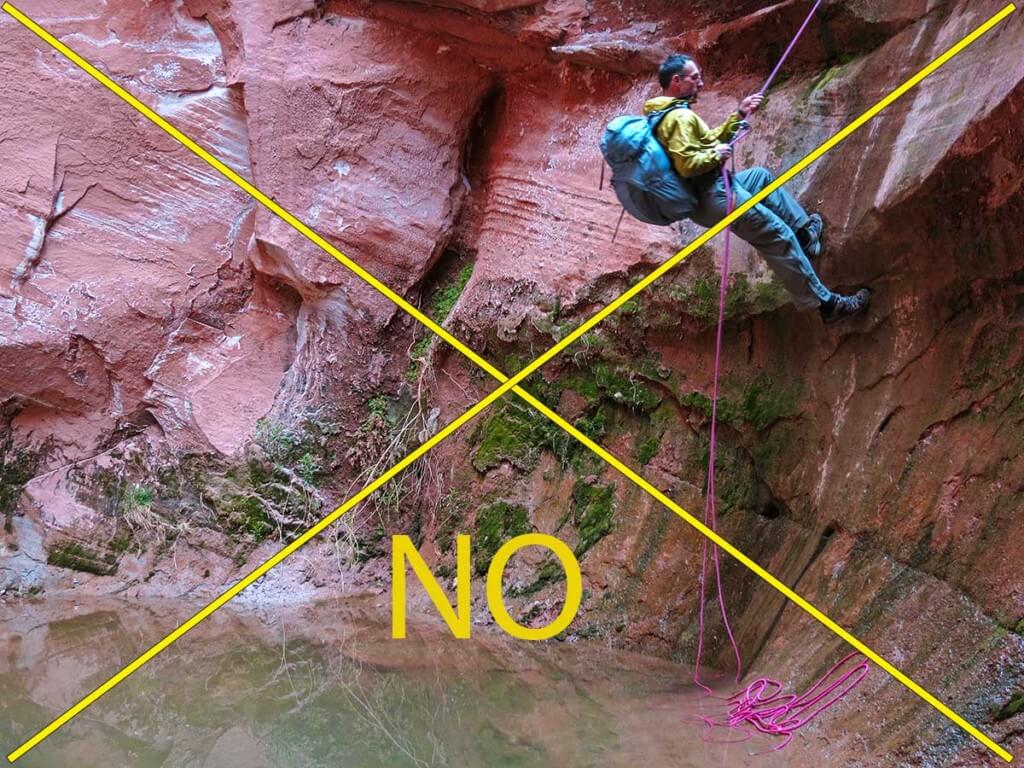
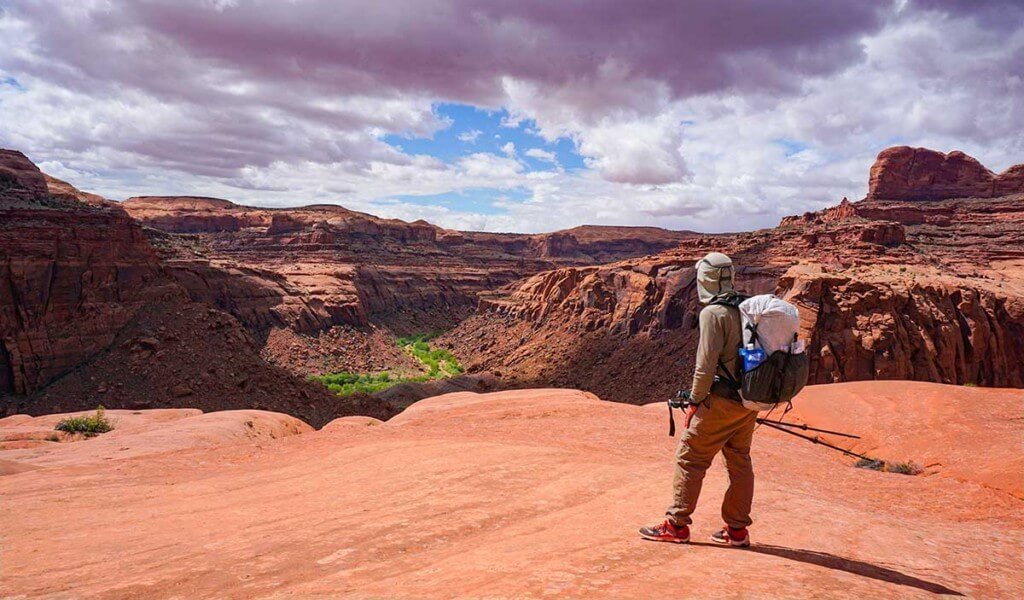
Desert canyons are some of the most stunning places on earth. And contrary to the hype of high adventure and disaster in technical slot canyons, with flash floods & amputating arms—many beautiful canyons are low risk and perfect for backpacking and hiking. No rock climbing or rope needed. As such, you should seriously consider non-technical canyon backpacking in Utah.
- Best time to go: mid-March to May | mid-September to October (or even November)
- Special skills needed: This post covers much of what you need to know. It includes tips on how to purify and best manage your water in a dry desert environment (don’t stress it’s not that bad!).
- Navigation: Explains how canyon navigation is different from regular hiking/backpacking and what you’ll need to know.
- Special gear needed: While there is no need for ropes or climbing equipment, our section on the Right Gear will make canyon travel easier and safer. And there’s a section on desert canyon clothing tips, including sand resistant shoes that are also good for wading.
Canyon travel or canyoneering is mountain climbing in reverse. Rather than striving for the highest point to look down, you are in the bottom of a canyon with the world above you. It is a more intimate and enfolding way of viewing your surroundings.
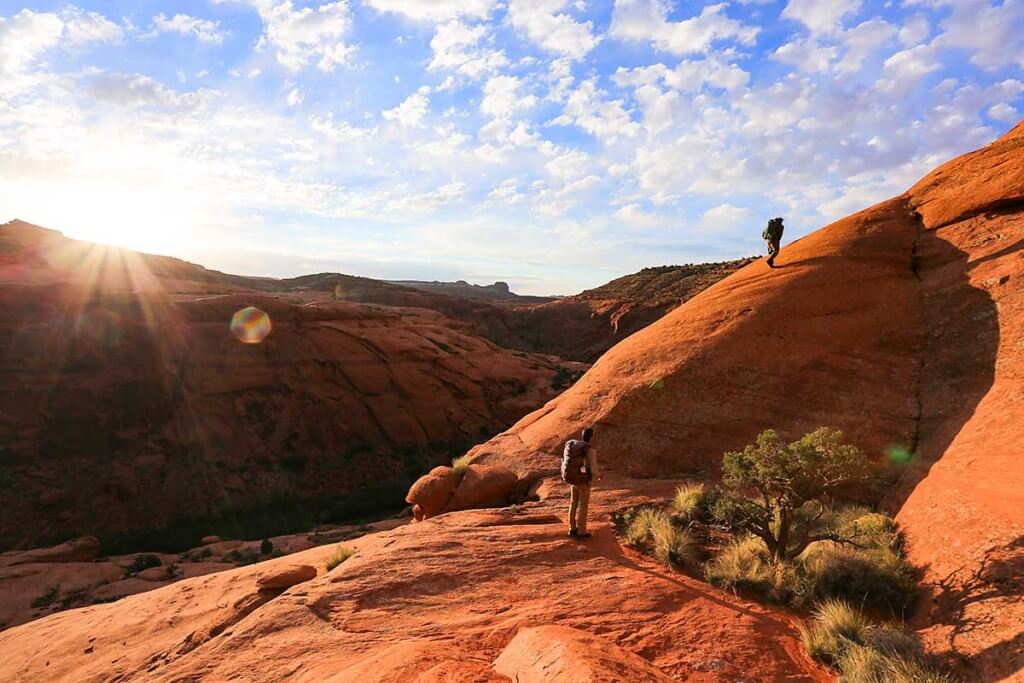
Utah Canyons offer some of the best hiking & backpacking in the world
These canyons are stunningly beautiful and except for a few, lightly traveled. I can think of few places that offer as much solitude. Alison and I find the sparse beauty and solitude of desert canyons a deeply spiritual place. One that draws us back year after year for their peace and serenity.
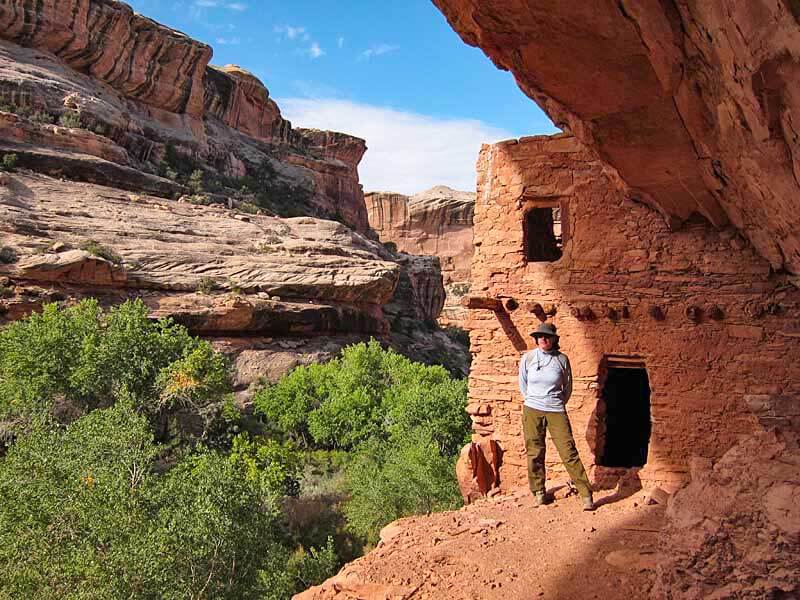
Gems like Paria Canyon, Buckskin Gulch, the Zion Narrows, Coyote Gulch or Grand Gulch are just few of the big name canyons that are easily accessible to anyone with basic hiking skills. But the list of equally superb but lesser known canyons that await you in the Southwest US goes on and on. The Escalante Grand Staircase National Monument may alone have a lifetime’s worth of superb canyons and side-canyons to explore. Many may have only a few visitors every 10 years.
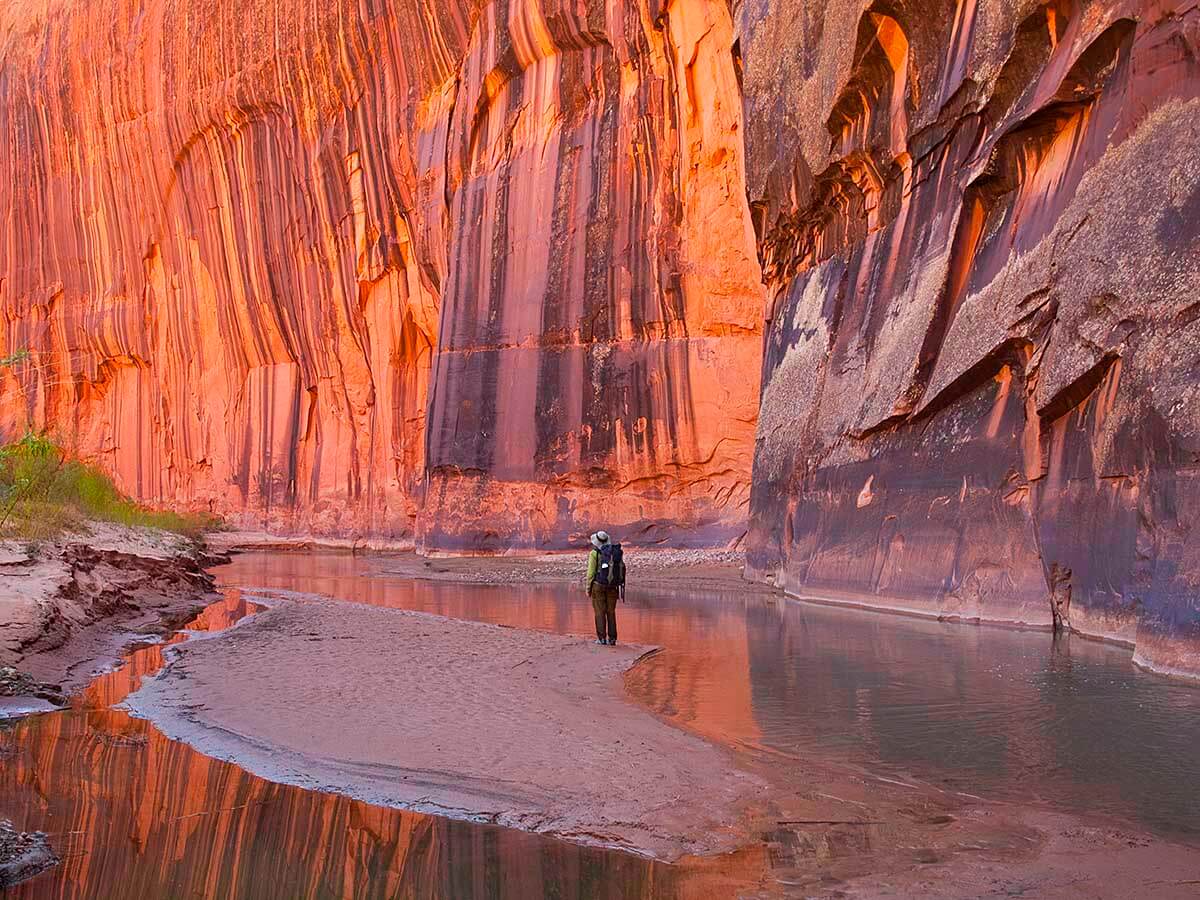
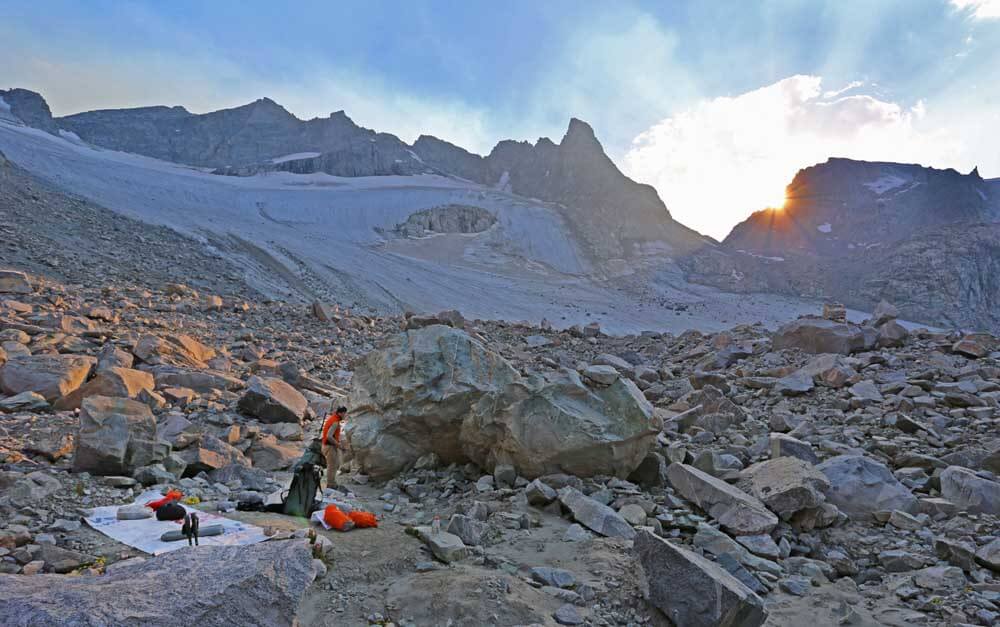
High above the Escalante River: Dawn reflection in a slickrock pool in a remote side canyon. This canyon sees fewer than 10 people per year.
Tips for Non-technical Canyon Backpacking in Utah
The good news is that many of your backpacking skills will work for canyoneering. But there are some things that will be new and different. Here are a few to consider:
- Canyon travel can be technical and non-technical – This article is only about “Non-technical Canyon Backpacking in Utah.” This non-technical canyon travel, or what I call “canyon backpacking” is low risk and similar in difficulty to regular backpacking. You don’t need a climbing rope. In some canyons you might need to do occasional calf-deep wading, a fun but safe scramble, or some bushwhacking. But nothing to get excited about. Technical canyoneering with ropes and rock climbing will not be discussed in this article.But at the end of this post I have included a section on tips for the more adventurous canyon traveler.

What this guide is NOT ABOUT. There’s no need to do this to see many spectacular canyons!
- When to go – Most of the year it is too cold or too hot to backpack in the canyons. Most canyons in Utah have a short season, the middle of spring (mid-March to mid-May) and middle of fall (October-November).
-
Gear for Non-technical Canyon Backpacking in Utah – Having the right gear makes canyon travel easier and more fun. Here’s a link to the Gear List that we use. It’s excellent for non-technical Canyon Backpacking or hiking in Utah. A section dedicated to clothing is below.

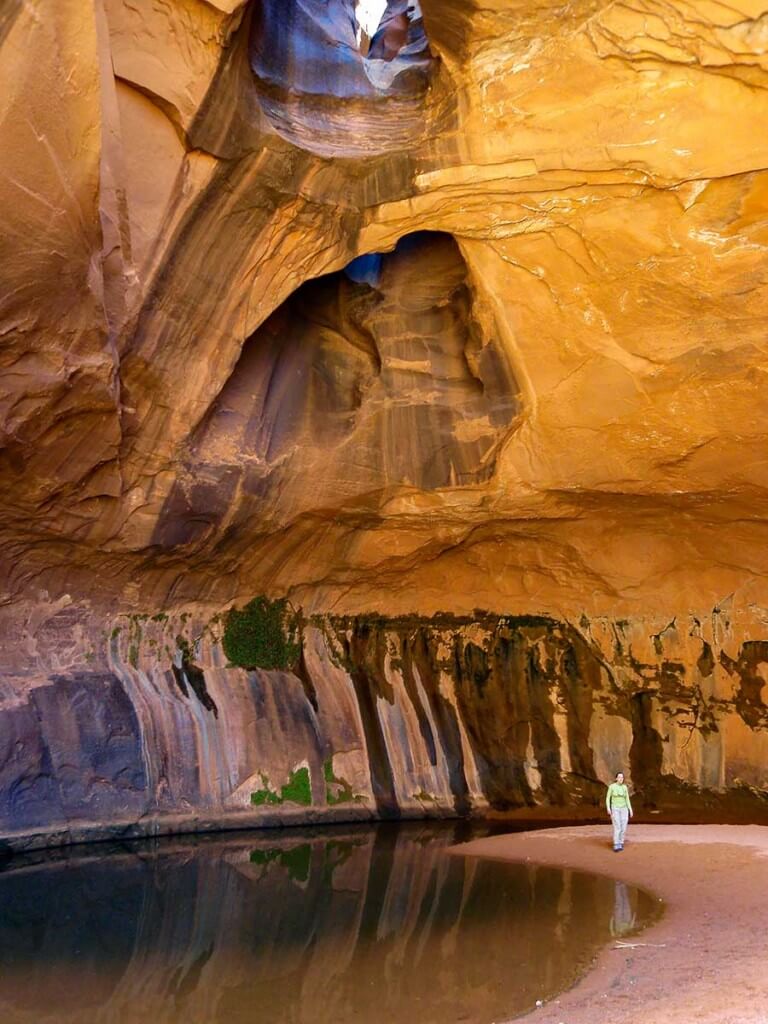
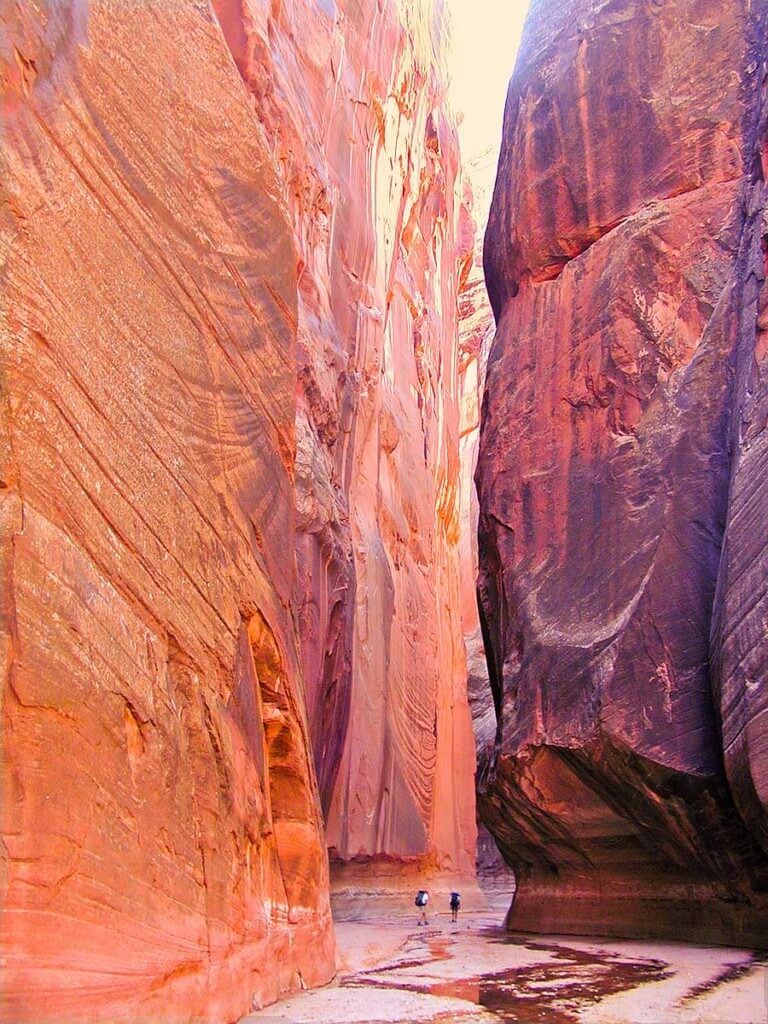
Paria Canyon
- Don’t stress too much about drinking water – Water, or lack of it, is not the big a deal most “knowledgeable professionals” make it out to be. See: “The Best Hydration – Drink When Thirsty.” Many of the better known canyons have well documented water sources so you’ll know how far it will be to your next good water. As such, you won’t be humping a ton of water or in dire risk of dehydration. My wife and I over the last 15 years have routinely carried far, far less than the recommended gallon of water. We have yet to go dry or thirsty. Note: Most canyon river/stream water, if it’s running at all, is too silty and hard with minerals to make good drinking. You’ll get most of your water from springs and from the few clear-drinkable sources of canyon river/streams. For treatment, I prefer the Sawyer Squeeze Water Filter System.

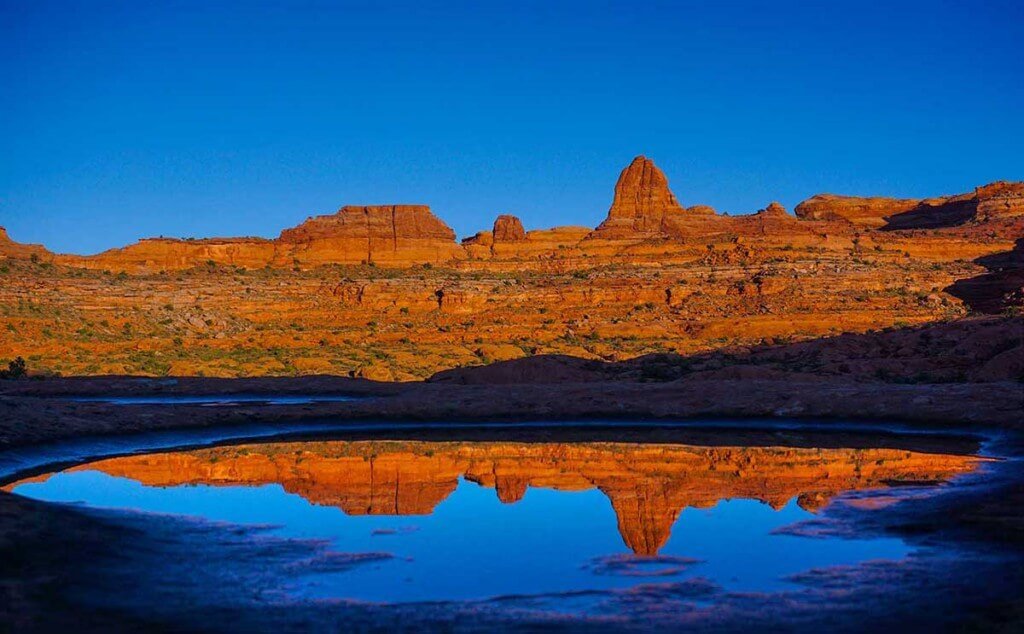
Neon Canyon, Escalante Grand Staircase National Monument
- There is a low risk of flash floods in most “backpacking” canyons – most of the better known “backpacking” canyons are not slot canyons. As such, they are less prone (but not immune) to sudden and devastating flash floods. A slight risk of a flash flood (or far more likely, just high water) still exists in almost any canyon. So you still need to be aware of the weather. During the rare big storm, water levels may rise considerably but not so fast or so high that you won’t have time to find suitable high ground. They will also recede quickly. (Buckskin Gulch is the exception big name canyon with a significant flash flood risk, but the Ranger’s won’t give you a permit for Buckskin if there is the slightest chance of a flash flood. And many hundreds of people hike it safely every year.)
- Start small and build – Take some canyon day-trips and expand your skills—locating canyon entrances and exits, finding and managing drinking water, walking through sand, river wading, bushwhacking—generally learning how to make intelligent and efficient progress in a desert environment. Even two or three canyon day-trips will give you great insight to prepare for and execute your first multi-day canyoneering trip. Oh, and day-tripping in canyons is great fun!

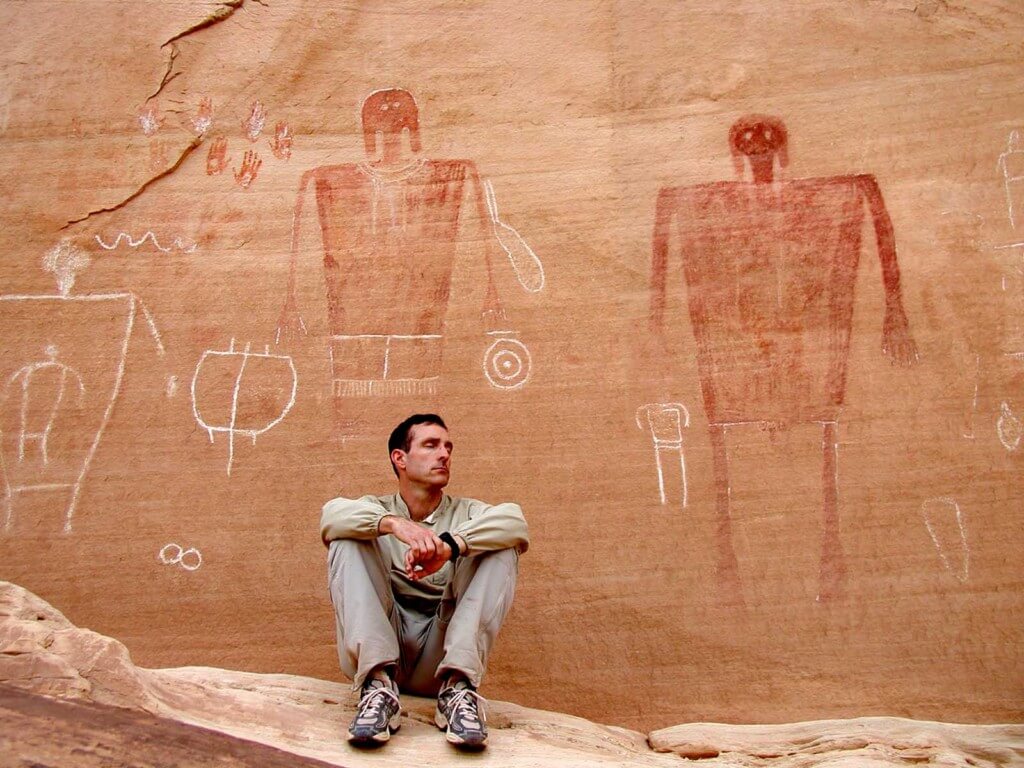
Grand Gulch, an open air cultural museum of Anasazi pictographs/petroglyphs and ancient dwellings. Note: If you find any artifacts; pottery fragments, arrowheads, etc. please leave them where you find them. The same goes with structures and dwellings. Do not enter them, walk on walls, etc. General rule is don’t touch, don’t move. Leave it as you found it.

- Guidebooks to get you started – Steve Allen has the best and most respected series of guidebooks on canyoneering in Utah. While some of his trips are technical, there are plenty of non-technical trips. And his general advice about canyoneering is among the best for both the non-technical and technical traveler. I have used the Falcon Guide “Hiking Grand Staircase-Escalante & the Glen Canyon Region” for canyons that Steve Allen doesn’t cover like Buckskin Gulch, Paria Canyon, and Grand Gulch. The guide’s specific information on the canyons is adequate but I would defer to Allen for general information on Utah and canyoneering.

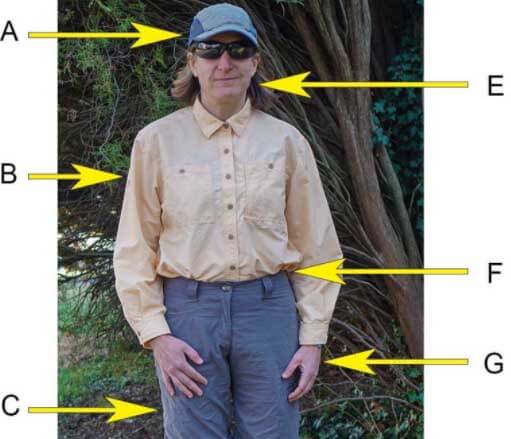
Hiking in shorts, short sleeves and hatless is a terrible idea! Complete clothing coverage is better.
- Clothing for Non-technical Canyon Backpacking in Utah – The desert can be a hot, scratchy, prickly place with intense sun. Wear long desert/travel pants like these , long-sleeve desert/travel shirts like these or a Rail Riders Adventure (or EccoMesh) Top, and a hat with complete sun coverage including neck and ears (e.g. Outdoor Research Sun Runner Hat). Light smooth fabrics (like thin nylon) slide easily through brush, absorb little sweat/water and dry quickly. Apply strong sunscreen to unprotected areas like hands or wear sun gloves like these OR ones. For more info See a detailed list of clothing we normally wear.
Footwear – Boots are not needed or even desirable. Take light trail running shoe like Altra Lone Peaks or Altra Superiors. Fine mesh outer fabric is best (our favorite shoes are the Altra Superior Trail Running Shoes which have a very fine mesh that slows sand entry but lets water drain quickly after wading. And beware, the large-weave mesh popular on many trail runners lets too much sand in. Gore-Tex shoes do poorly. They are too hot, do not breathe well and don’t drain water after wading. (But they do have the advantage of being sand-proof!) - Navigation in Canyons is different than other backpacking areas
Navigating Canyon Bottoms takes a bit of getting used to. (Don’t worry, you’ll get better at it over time.) There are no signs, no blazes and almost no trails. One might think it’s simply a matter of following the canyon bottom like a train on its tracks. But for those new to it, walking in the bottom of a many branched canyon system can seem more like navigating a hedge maze. At the bottom of a canyon you have limited visibility and to the uninitiated the main canyon can be almost indistinguishable from its many side canyons. It’s much easier than you think to walk by and completely miss your exit ramp or exit side canyon. Over time you’ll get more observant, and pay better attention to small details. Travel in many canyon bottoms is a combination of river walking/wading, bushwhacking through willows (easier) and tamarisk (harder), and sandy bench walking. There is no “right” route: you just figure out what works for you.Navigating Benches Above the Canyon should likely wait until you are a more seasoned canyon traveler. It is usually more challenging than traveling the canyon bottom—with more difficult route-finding, hard to find entrances and exits, potentially technical sections and a likelihood of impassible side canyons and slots blocking forward travel.Note: Contrary to common belief GPS can work in canyons! So with some caveats, the section below explains how to best use your GPS in many canyons — just don’t rely on it!!
Paria Canyon
- Emergency contact. Much of Utah is remote like few other place in the lower 48. Hikers are hard to see or locate in the canyons, and there may be few or no other hikers to happen by if you are in trouble. Make sure you have your trip itinerary filed with an emergency contact monitoring your trip. I strongly recommend you consider a device like a Garmin inReach (preferred) or a SPOT Satellite Messenger. And here’s a link to a good template for your “Trip Plan” (a trip-tracking/emergency info document). It’s a great idea to have some version of one, even for a day hike!

Tips for those feeling more adventurous
Author on a dawn climb out of the Escalante Canyon. Andrew Skurka waits to go next. photo: Don Wilson
- Proceed with caution! Make sure you can reverse your route. Even small, seemingly insignificant up-climbs or down-climbs of just 8-10 feet might be irreversible, forcing you to move on without a retreat.
- If you do decide to do more adventurous scrambling, a 40-50’, 6-7 mm rope can be a huge help to raise or lower backpacks. Without a backpack on, members of your party can more easily balance and safely climb short sections that would be otherwise impassible. This can greatly expand where you can go in canyons. [Again, use caution and always err on the side of safety when “climbing” in the canyons.]

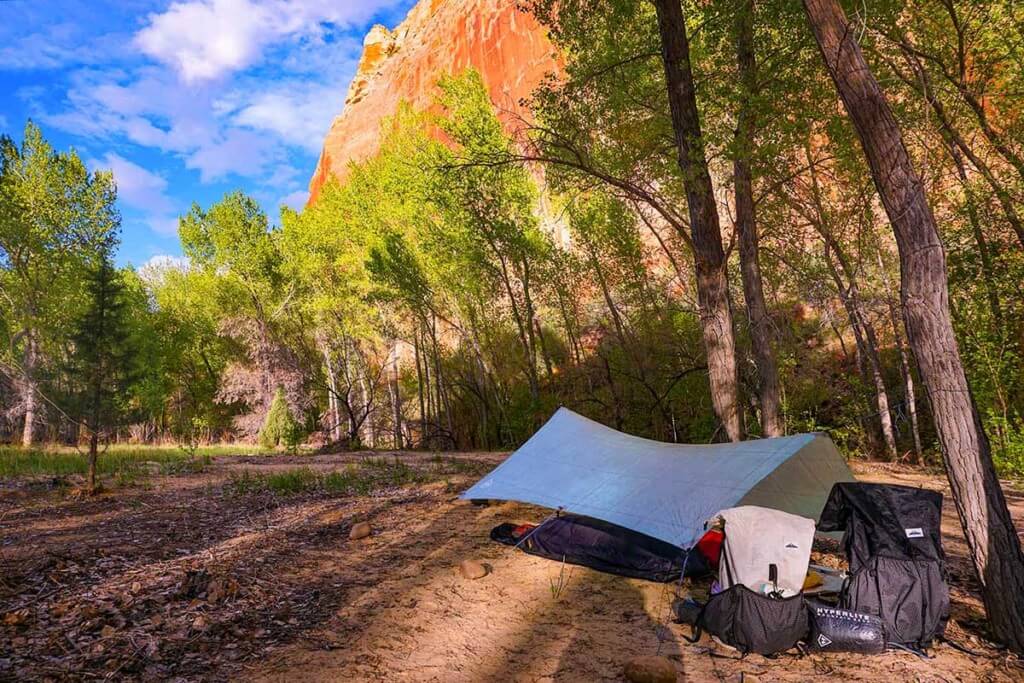
Tarps are perfect for the desert with its low chance of rain. They are a great way to save weight. I only set mine up when there is a chance of rain, otherwise it stays in my pack. See: Recommended Tents, Tarps and other Shelters
- Flash Flood risk for less well traveled canyons: some moderately narrow “backpacking” canyons off the beaten path, may be more at risk for serious flash floods. These are not usually the big name canyons with lots of travelers. Choprock Canyon in the Escalante Grand Staircase is an example of moderately narrow “backpacking” canyon more at risk for flash floods.
- GPS use – See: How to use the iPhone as the Best Backpacking GPS. Contrary to the common statement “GPS doesn’t work in canyons,” I’ve had good success using my iPhone as a GPS when canyoneering. Obviously the deeper and narrower the canyon, the harder it is to get a position fix. But with a little smarts one can use it with reasonable success by opportunistically getting fixes in wider canyon sections or other areas with a better sky view. [And, do not rely on your GPS to navigate the canyons. It’s a convenience, not a substitute for navigation by map an compass and/or a crutch for poor navigation skills. This may be truer in canyons (with their iffy GPS reception) than almost anywhere.]
- Be safe out there!
Parting Photos
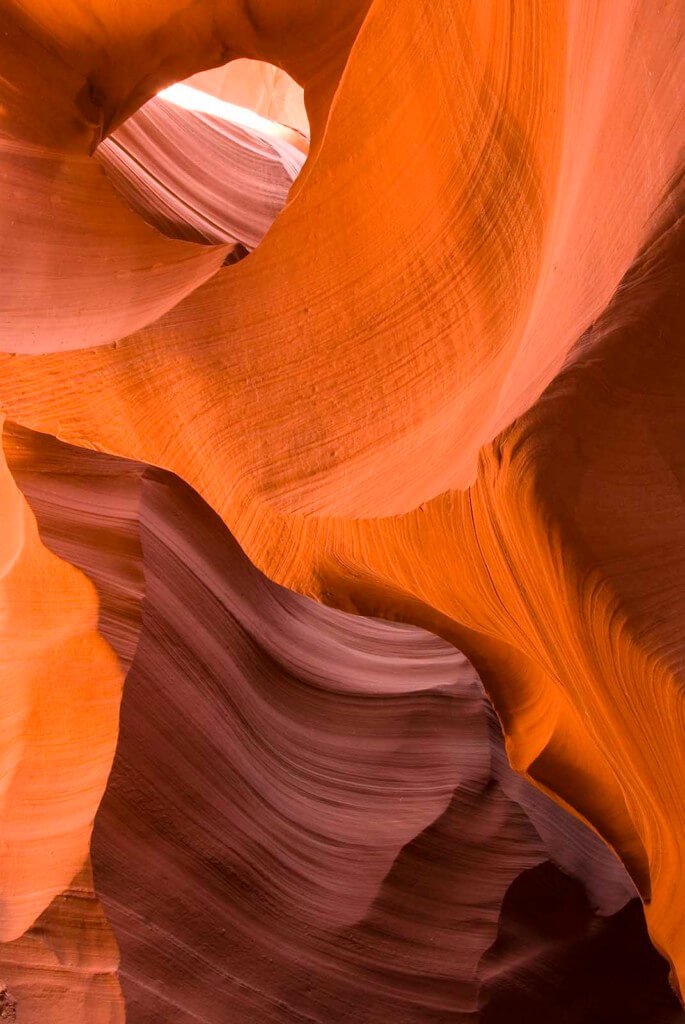
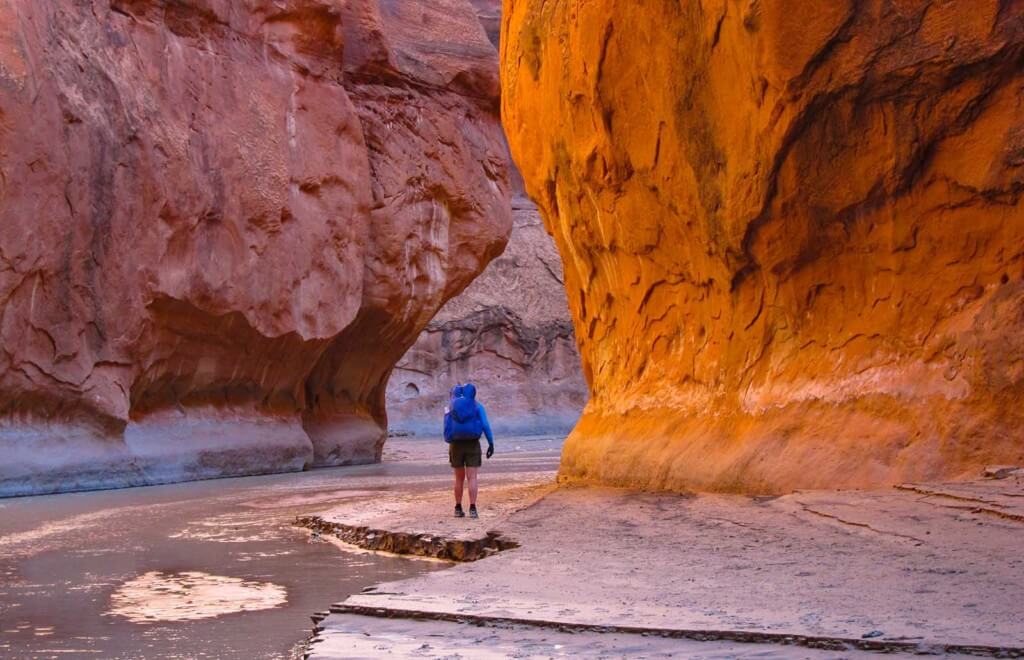
Perfect light: Brilliant oranges and reds from sunlight filtering into a canyon. For narrower canyons the “magic hour” for photography is not early morning or late evening. Usually it’s close to high noon with the sun directly over the canyon. Only then does the light penetrate, causing the sandstone to come alive and glow.
Buckskin Gulch. One of the longest, deepest and most spectacular slot canyons in the world. Hundreds of backpackers safely hike through this canyon every year.
Related Content
- What a technical canyoneering trip looks like: A Very Different High Route | Escalante Overland Route
Disclaimer
This post contains affilate links. If you make a purchase after clicking on the these links, a portion of the sale helps support this site at no additional cost to you. I do not receive compensation from the companies whose products are listed. For product reviews: unless otherwise noted, products are purchased with my own funds. I am never under an obligation to write a review about any product. Finally, this post expresses my own independent opinion.
When you haven’t backpacked in months & months, getting your systems dialed back in can be overwhelming and challenging. Between gear, food and logistics, it’s easy to lose track of things. But with these 12 tips for your first backpacking trip of the year you’ll quickly find your stride and confidence. A successful first trip of the season awaits you!
Related content | tips for your first backpacking trip of the year
- 9 Pound Full Comfort Lightweight Backpacking Gear Checklist
- Best Backpacking Food | simple and nutritious
- Quick and Efficient Training for Backpacking and Hiking
- Benefits of Early Spring Backpacking
12 tips for your first backpacking trip of the year – make it easy – have fun!
Getting ready for a backpacking trip is not rocket science or brain surgery. Use the following tips to make it a lot easier to pack and get out on that first backpacking trip of the year. And this is supposed to be fun — even the pre-trip preparation!
1. Pack to a Gear List!
There are any number of good checklists for bringing the right gear. Print one out and use a pencil to check off each item. If you have a spare room (or even the living room) lay things out clearly in groups; sleeping gear (tent, sleeping bag, sleeping pad) in one area, clothing in another, cooking gear in another, etc. When it’s laid out like this I find it substantially easier to make sure I have exactly what I need.
Related content
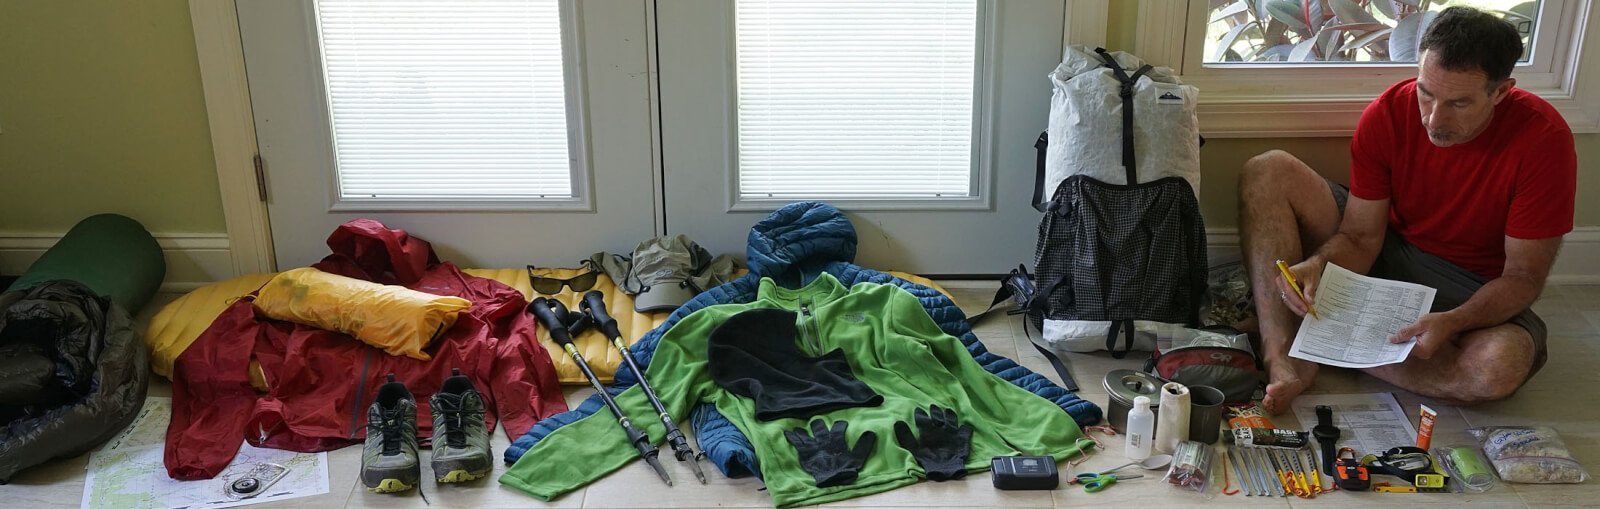
Make it fast and easy to pack all the right stuff and forget nothing: Use a gear checklist and lay things out clearly in groups in a room dedicated to the task. I usually leave stuff laid out until I leave for my trip.
2. Don’t go crazy spending money on a bunch of new Gear
I suggest that you only buy a new piece of gear if you really need it and know exactly what you want. Otherwise, borrow from friends or rent gear until you have enough information to make a good decision. Early season trips are a great way to gather information about what gear works best for you — and what doesn’t work and needs to be replaced. That being said, if you know what you want, early season sales are a great place to look for stuff on closeout or steep discount. For instance:
- Cheap Lightweight Backpacking Gear
- REI Member Rewards Event: Members save 20% on one full-price item and one REI Garage item
- Campsaver.com: Huge Spring 20/20 Sale. Save 20% Around The Site Coupon Code 4UTWNTY
- or full time discounters like Sierra Trading Post
3. Keep Your Food Simple
Almost all the food you need for a backpacking trip is at your local supermarket or in your kitchen cabinets at home. Nuts, PB&Js, Chocolate, Dried Fruit, Energy bars etc. And for a three day trip you don’t need to vary food all that much. Alison and I usually eat most of the same food each day for short trips which keeps things easy and simple. Again packing to a Food List helps. Many meals can be made at home with commonplace ingredients. We have a number of simple and easy to make meal recipes here. For those who don’t want to make their own meals, there are some simple and healthy freeze dried meals that work great like this Black Beans & Rice. We doctor it up into one of our favorite dinners by adding grated cheddar cheese, corn chips and possibly some hot sauce. The recipe is here.
Bonus tip: As a reality check, weigh all your food before the trip. It should add up to 1.5 to around 1.8 pounds/person/day. If it’s outside these limits, something is likely wrong.
Related content
- Best Backpacking Food | simple and nutritious – great food ideas as well as nutrition guidelines
- Backpacking Food List for 7 days – easily adjusted to a 2 or 3 day early season trip
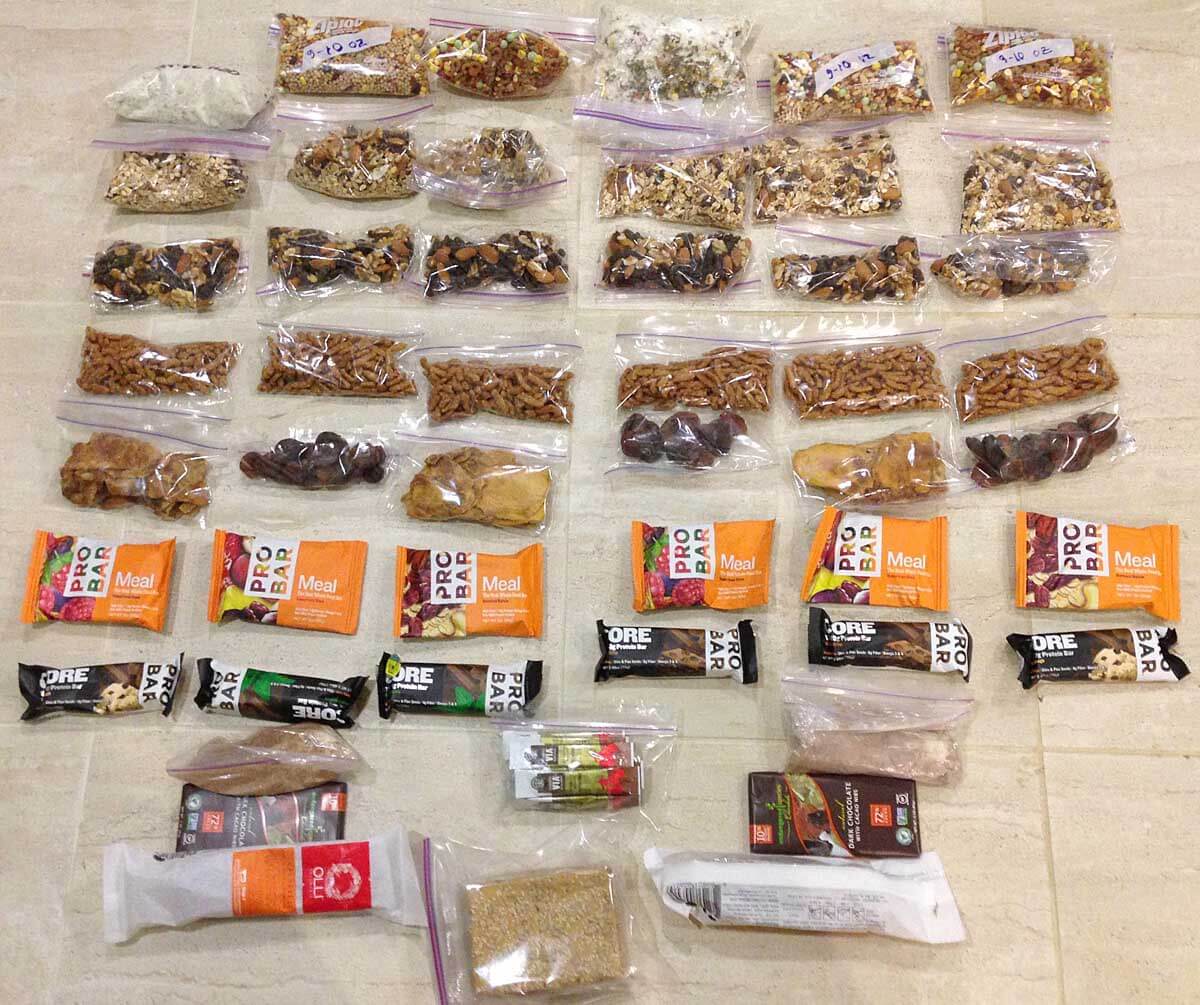
A simple and quickly assembled set of food for a 6 to 7 day trip. Aligning food in rows per/day helps to organize and provides a useful check that you’ve packed correctly. Almost all the food was purchased at Whole Foods and our Local Supermarket.
4. Don’t wait until the last minute to assemble gear and food!
Have all your gear sorted at least three days before your trip start. That way if you can’t find an important item you’ll still have time to go to a local store or order it from Amazon Prime. (It’s always something small and essential you can’t find like a headlamp, compass, pot, or fuel bottle…) And this will also allow you to make sure everything fits in your pack. Note: If you might order gear from cottage manufacture’s (I do), you’ll need to order 6 -8 weeks in advance.
5. Do some pre-tip hikes | Use the socks and shoes you intend to wear on the trip
Related content
If you buy new shoes and socks do it weeks before your trip so you can have some time to use them—at least walking around the neighborhood. This is the #1 way to prevent blisters! Note: Get trail runners! They’re light, easy on you feet and will make your trip a more fun. Don’t forget to use your trekking poles on your hikes. Our favorite trekking poles are the $40 Cascade Mountain Tech Carbon Trekking Poles. They are as good but 1/3 the price of the best trekking poles.

Altra Lone Peak shoes
Altra Lone Peak Trail Shoes, M’s & W’s @REI: These are Alison’s and my favorite backpacking and hiking shoes. These are the most comfortable shoe after a 30+ mile day on the trail. One key is the massive toe room that is so kind to trail-swollen feet at the end of the day. They are light and have a zero drop heel for a more natural stride. These come in both Men’s and Women’s models. Some of our favorite socks are SmartWool PhD Light Mini, Darn Tough 1/4 UL w cushion or DeFeet Wolleators.
6. Get a Weather Report
This will give you some peace of mind that you will be warm safe and dry. That is, the weather report will let you pack a tent, clothing, and sleeping bag, etc. appropriate for actual weather conditions. (Note: For most trips of 3 days or less, this weather report should be fairly accurate. But, If you are going to the mountains make sure you get a mountain forecast as mountains tend to be cooler and wetter than lower areas.)
Related content
- For weather weenies: the NOAA hourly weather graph is among the most informative & accurate
- Weather Underground has one of the best & easiest to understand 10-day forecasts.
7. Bring a book, some tunes (with earbuds!), podcasts or other nighttime diversions
It’s human nature not to sleep the best your first night out and early season nights can be long . Having something to entertain, distract and relax you can be a big help to getting to sleep early.
Related content
Fun fact: when sleeping in a new place the human brain alternately sleeps one side of the brain less than the other. This keeps you more alert while you sleep—presumably to keep you safer in a strange place. But this makes it harder to get to sleep and a lighter sleep once you are asleep.
- How to use your Smartphone as the Best Backpacking GPS
- 10 hacks and accessories for better smartphone hiking photography
- Best Satellite Messenger inReach vs SPOT?
- Best Lightweight Backpacking Electronics Gear
- Best Backpacking Cameras 2018
Always Bring a Backup Battery!
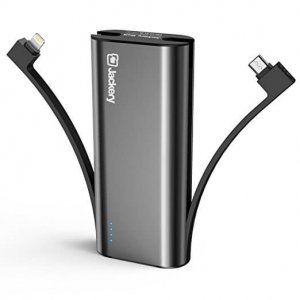
With its built-in cables the Jackery Bolt can charge a lightening device and micro-USB device at the same time.
Yeah, it seems like just about everything needs some juice these days. And many people are using their smartphones as their primary navigation device. As such, it’s a huge bummer if you drain the battery all the way down. (always bring a set of paper maps and real compass tho!) My three favorite lightweight and high capacity USB backup batteries are:
- Jackery Bolt 6000 mAh USB Battery (pictured right)- With two built in cables (lightening & micro-USB) it will charge just about any backcountry electronics. It has a faster charging rate than the EasyAcc below but has slightly less overall capacity.
- EasyAcc 6000mAh USB Battery This has slightly more capacity (tested) than the Jackery battery but has a slower charging rate & only a built micro-USB cable (altho you can attach your own lightening cable to charge an iPhone). It can charge a large phone like a Galaxy S7 about 1.4x and a smaller phone like an iPhone 7 2.3x.
- Anker PowerCore 10000 (only 6.4 oz) this is the lightest option if you need to recharge your electronics a lot. It can charge a large phone like a Galaxy S7 ~2.5x and a smaller phone like an iPhone 7 ~3.5x. Its limitation is that it only has one USB port for a cable.
- And of course for a SPOT messenger and many headlamps a spare set of lithium AAA batteries.
8. Evaluate the following before your trip
- Prior to the trip, setup your tent*, sleeping bag, and sleeping pad in the backyard or a local park. Preferably with your hiking partner. This makes sure you have all the parts and pieces and everybody knows what they are supposed to do. Inspect the tent, rain fly and floor for any damage. Get into the tent and lie down side by side and make sure everything is copacetic, air pads don’t leak etc. Do you feel comfortable enough to get a good night’s sleep? Is the tent too small and claustrophobic? Early season has longer nights and the possibility of spring rains so you might be in the tent for a while. As such it’s nice to have enough room. [*Note: it really helps to have the tent setup instructions. If you don’t have them you can usually download them online for your tent or one close to it.]
- Fire up your backpacking stove and heat some water. Make sure your fuel canister is full.
- Check that your water filter pumps water easily and/or that your water treatment chemicals are in date.
- Try on your clothing and make sure it still fits, doesn’t have rips and tears and doesn’t smell funny. [yeah, occasionally I put away unwashed clothing!]
9. Keep your Trip Short
A 2 to 3 day weekend trip is likely the best option for your first trip of the season. And don’t overreach on distance. Most of us haven’t reached our peak conditioning early season. Keeping the miles reasonably short will make walking fun and prevent temper flare-ups from exhausted trip members. In addition, since it’s the first trip for the year — you’ll want to be in camp with plenty of time to set up the tent, collect water, cook dinner. An added benefit of the shorter hiking days is that you’ll likely have time to savor a sunset over a cup of hot chocolate.
10. Keep your trip local
There are far less logistic issues with arranging a local trip. And shorter travel time to and from trip trailheads leaves you more time to enjoy the backcountry. Also, it’s likely a local area you are familiar with, making many things easier. And while early season has fewer backpackers, you may still have other campers at the most desirable campsites. My suggestion is to embrace the company and make friends with your fellow outdoor enthusiasts — enjoy the evening. [There will be plenty of time for longer more aggressive trips later in the year where you can have your solitude.]
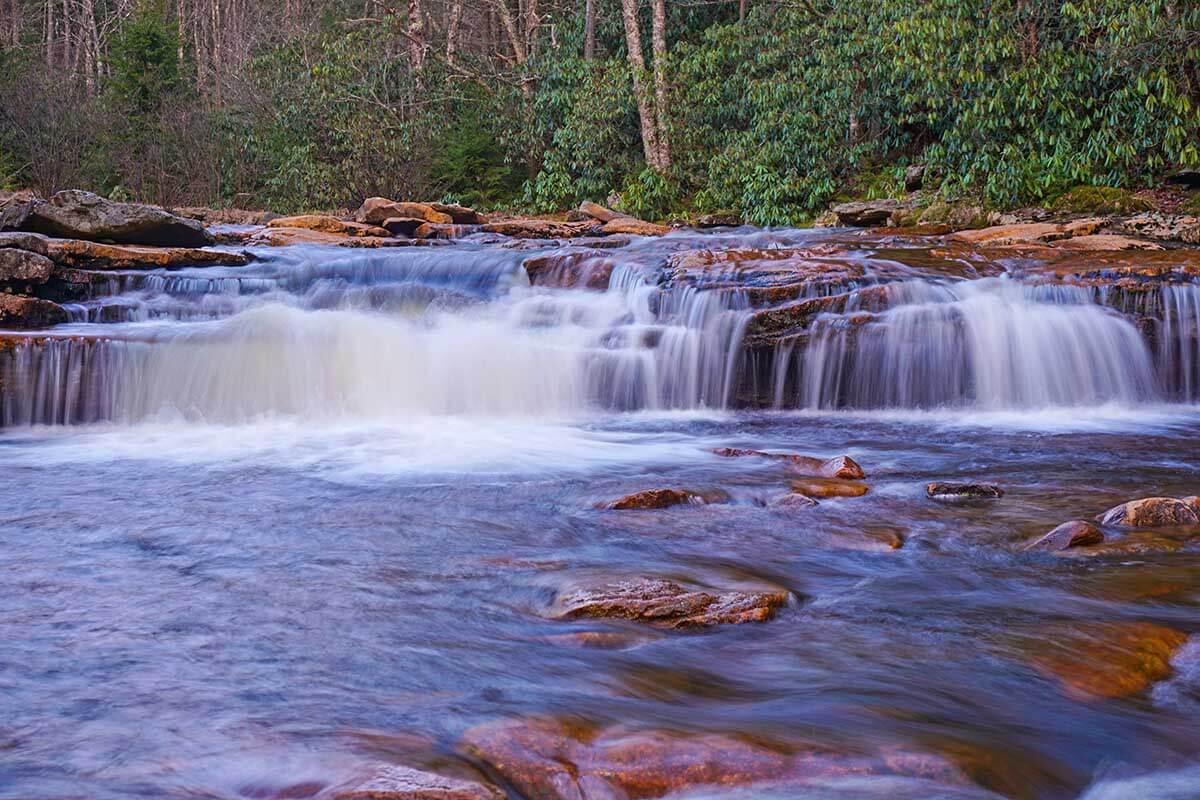
There are many local options for lovely areas to backpack and camp. This beautiful waterfall in Dolly Sods is by an extremely popular backcountry campsite easily accessable to people from the Washington DC Area. Even in early spring, you may have company. My suggestion is to embrace the company and make friends with your fellow, like minded outdoor enthusiasts.
11. Don’t Worry So Much About Wet and Cold
If you have the right gear (see gear list below) you’ll do fine. And a local trip in a more controlled area is the perfect place to practice and get good experience in these conditions. Finally, if for some reason things do get intolerable, it’s likely not all that far to hike out to the car.
Related content
- Top Mistakes Using the Layering System – How to Stay Warmer and Drier
- Rain Jacket Durability | How to Select the Best Durable Rain Jacket
- Guide to Lightweight Down Jackets and Pants for Backpacking
- The Art of Sleeping Warm | A Guide to Sleeping Bags and Quilts
- Why You Won’t Freeze or Starve Backpacking
12. Take notes on what worked and what didn’t work
After the trip, change out gear and modify your technique as required. If you do need new gear, don’t wait until the last minute to buy it before your next trip. Clean and wash your gear after the trip and then properly store it in a dry area.
Closing Thought – Embrace Your Mistakes!
One of the main purposes of an early season trip is to shake-out your gear and technique. As such, it’s OK, even desirable to make mistakes. Better to make your small blunders in a safe, controlled local place than on your big destination trip of the year. That way you can start that trip on the John Muir Trail ready to roll, with your kit and technique dialed in.
Bonus Tip – Keep your Trip Fun
The overarching principle for this post is to keep your trip and trip planning as enjoyable as possible. Alison and I have one rule for every trip: If either of us is NOT having fun it’s time to stop and make a NEW plan. That is, a plan that puts FUN back into the trip.
Wishing you a great start to the backpacking season, -Adventure Alan
Disclaimer
This post contains affilate links. If you make a purchase after clicking on the these links, a small portion of the sale helps support this site at no additional cost to you. I do not receive compensation from the companies whose products are listed. For product reviews: unless otherwise noted, products are purchased with my own funds. I am never under an obligation to write a review about any product. Finally, this post expresses my own independent opinion.
This article proposes a more realistic 13 Essentials that will better keep the modern hiker safe. This is because the Classic 10 Essentials (first proposed in the 1930’s) need an update for the 21st Century given the realities of a modern day hiker.
- First, a major conceptual trap of the traditional 10 Essentials is that they are all gear. I would counter that the two most important “essentials” are actually skill and knowledge items: 1) good trip planning and 2) the skill of staying found.
- Second, why should there be only 10?
- Third, why do none of the 10 Essentials take advantage of 21st century technology?
- And finally, some 10 Essentials are a bit arcane & don’t match the skills & habits of the modern hiker.
Lead photo: A “freak” summer blizzard in the Wind River Range. I was super grateful to have all my warm clothing, a bivy sack and 1/2 lb tarp. And even more appreciative I had the skills and knowledge to use them.
The 13 Essentials for the Modern HikerMy revised “essentials” are to help people be prepared for emergency situations outdoors. As such, it’s a good idea to bring them whenever you are in the backcountry—whether it’s just a long day hike, or a multi-day off-trail backpacking trip. The following 13 Essentials favors a pragmatic approach to bringing the right gear. First and foremost, it relies on your best piece of gear, what’s between your ears.
|
1 Trip Plan
Use what’s between your ears. More problems arise from poor planning and lack of information about a hike than from not bringing the right gear. So, whether you’re day-hiking or backpacking you should:
- Do your research on hiking distances, trail conditions, campsites and water ability. Good examples of this type of research are: Map kiosks/Information Centers at major trailheads or park publications like the excellent Zion Park Map and Guide, or guide books. Much of this info is now online.
- Then make an honest/realistic estimate of how far you’ll hike each day. Be conservative. You don’t want to end up stranded somewhere because you only hiked ¾ of the distance you expected. And in case you end up short, have a backup camp area with a water source.
- Get a weather report for your trip and then plan and pack gear for those conditions! Since 90% of hikers or backpackers take 90% their trips for 3 days or or less, this weather report should be quite accurate. My favorite weather app for both smartphone and desktop is Weather Underground.
- And once on your trip, you also need to watch the weather and be prepared to deal with “freak” weather. This is especially true in high western mountains where a summer blizzard is always possible. Even the lower elevation Appalachian Mountains can have some cold and severe weather in the warmer months. Usually park info sites will let you know what sorts of extreme weather might be possible. [Note: This does not necessarily mean going overboard with gear—just taking the right gear.]
- Leave a copy of your trip intineary with someone. See: How to make and use a Trip Itinerary.
2 Staying Found
Staying Found is the key navigation skill that experienced navigators always use but never mention.
| The highly effective, “Staying Found” approach to navigation is within the capability of all hikers. |
Good navigators rarely get lost because they have a good idea (Trip Plan) in their head of where they are going and what to expect. That is, they are vigilant and observant while they hike—always comparing what they see on the trail against the plan in their head. They continually monitor their progress and check for upcoming trail junctions, lakes, stream crossings, a steep climb, a section of bog & other features to confirm that they are on the right track. If they stray, they quickly identify & correct it. You should do likewise. It’s your first and best navigation “tool.”
3 Navigation Tools (not always paper map and compass)

(left) 21st century navigation tool: Gaia GPS App running on an iPhone. (right) Traditional nav tools: A fully featured compass with declination adjustment and paper USGS topographic map underneath. Both have pros and cons.
Important Note: I respectfully suggest that people read the Navigation Tools & Electronics Appendix carefully before commenting on this important topic. In particular, it covers the strengths and weaknesses of navigational tools, their proper use and the ways they can fail (yes, map & compass can “fail” too).
For Navigation – Take the tools you can actually use!
The first question that requires an honest answer is, “what navigational tools can I actually use?” Like having a bicycle but not knowing how to ride it, navigational tools (like a compass or USGS topographic map) without the knowledge to use them properly are not tremendously useful. It might even be dangerous if your are relying on them to navigate and keep you safe, but under false assumptions about your skills.
Topographic Map and Compass
If you are skilled with a map and compass, then take them. They are reliable, light, effective, inexpensive and don’t require batteries, or cell phone signal [I bring them on every trip.]
Alternatives to Topographic Map and Compass
But if you aren’t confident using a topographic map and compass there are alternatives. You might consider using tools that you are more familiar with and easier to operate— ones that you can reliably use in the field. Two options are:
- A Simple Hiking Map like the Zion Park Map and Guide and using Staying Found Navigation as described above. This is your first and best strategy even when you bring other navigational tools!
or - A Smartphone GPS App with dowloaded, Off-line Maps that does not need cell signal! (A quick test with your phone in airplane mode can determine if your App & maps work offline.)
A Smartphone GPS App Might be a Better Navigation Tool for Some Modern HikersMany traditionalists insist that a paper topographic map & compass are mandatory. But frankly, many modern recreational hikers may not have the map and compass skills to be able to rescue themselves using them. But they do have a lot of practice and skill navigating with their smartphones. And practice and familiarity are the key for successful use of a navigational tool! Therefore, properly used* a Smartphone GPS App might be a better option for some. [*Please see: Navigation Tools & Electronics Appendix for a caution and advice about using electronics in the backcountry, especially battery life management, backup batteries, and not relying on cell coverage.] |
Start of the JMT in Yosemite. Screen shot of NG Trails Illustrated Map using Gaia GPS on an iPhone. The beauty of a smartphone GPS App like Gaia GPS is that you have many map sources at your finger tips at no additional cost and weight. E.g. NG Trials Illustrated, full USGS 7.5′ TOPO maps, Satellite Imagery, and other specialized maps. [click to enlarge and see full map detail]
4 – Protection from Sun and Bug Transmitted Diseases, Like Lyme
Full-coverage clothing is best for both sun and bug/disease prevention.
In addition to sun protection, I am adding bug protection to your basic trail needs. 2017 is forecast to be the worst year for tick/Lyme disease, and it’s only going to get worse in other parts of the US. Other diseases like Zika are also on the rise.
Your first and best option for sun and bug protection is appropriate full-coverage clothing like this. While chemical/skin applied sunscreen and bug repellants work (Picaradin Lotion is the most effective and long lasting without the problems associated with DEET) they are not nearly as long lasting or effective as sun & insect protective clothing and a good sunhat. And yes, wear those sunglasses. For more reading, see my piece on the Best Clothing & Repellants to Protect Yourself from Lyme and Zika.
5 – Insulation (extra clothing)
My warm clothing gets used on almost every trip. A good Down Jacket has saved my ass on numerous occasions such as a freak snowstorm on a summit, where I needed to stay warm enough to hike down to shelter and warmth. It’s also essential to keep an injured person warm until help arrives. Other invaluable pieces of warm clothing are a light rain jacket, warm hat and gloves like these.
While backup clothing is good, it’s usually best to first make the most of the clothes you are actually wearing. Towards that end, here’s a good piece on how best to use the clothes you are wearing: Top Mistakes Using the Layering System – How to Stay Warmer and Drier.
6 – Headlamp – A Good One!
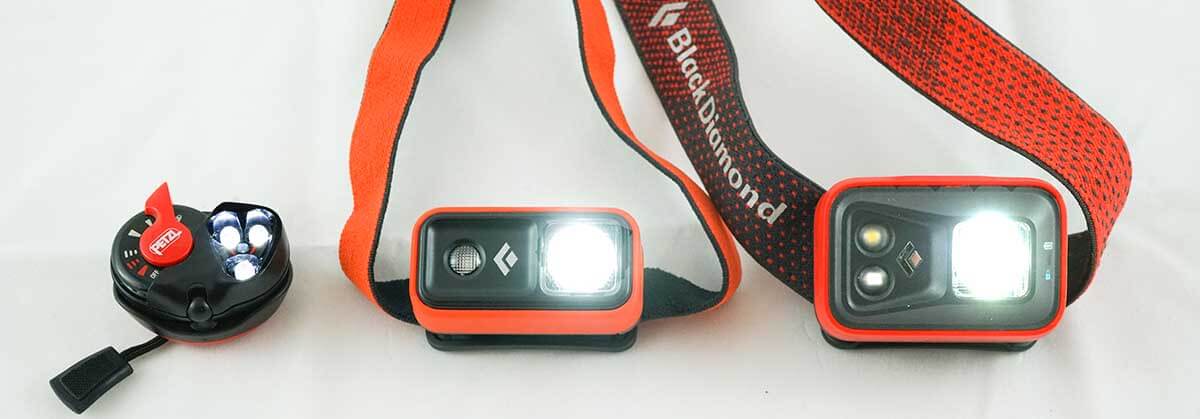
You need a seriously bright and long lasting headlamp to make an emergency retreat or exit. An example of a good one is the Black Diamond Spot Headlamp (right). The Black Diamond Ion (center) is marginally OK but would be better for following behind someone with a brighter light. On the left, the Petzl e+LITE Headlamp while low-weight and great for camp, is not bright enough for hiking.
If an emergency retreat or exit is necessary, your headlamp should be bright enough and last long enough that you can safely hike and navigate all night. To do that, you need a seriously bright and long lasting headlamp— putting out a beam of 50-60+ meters for ~12+ hours. A headlamp like this is likely in the range of 3 to 4 ounces. Examples: Black Diamond Spot Headlamp (Note: you only need one this strong for a party of hikers. The others following behind the leader can use smaller lighter headlamps, e.g. Black Diamond Ion.) And a spare set of batteries is always an excellent idea.
7 – Emergency Shelter
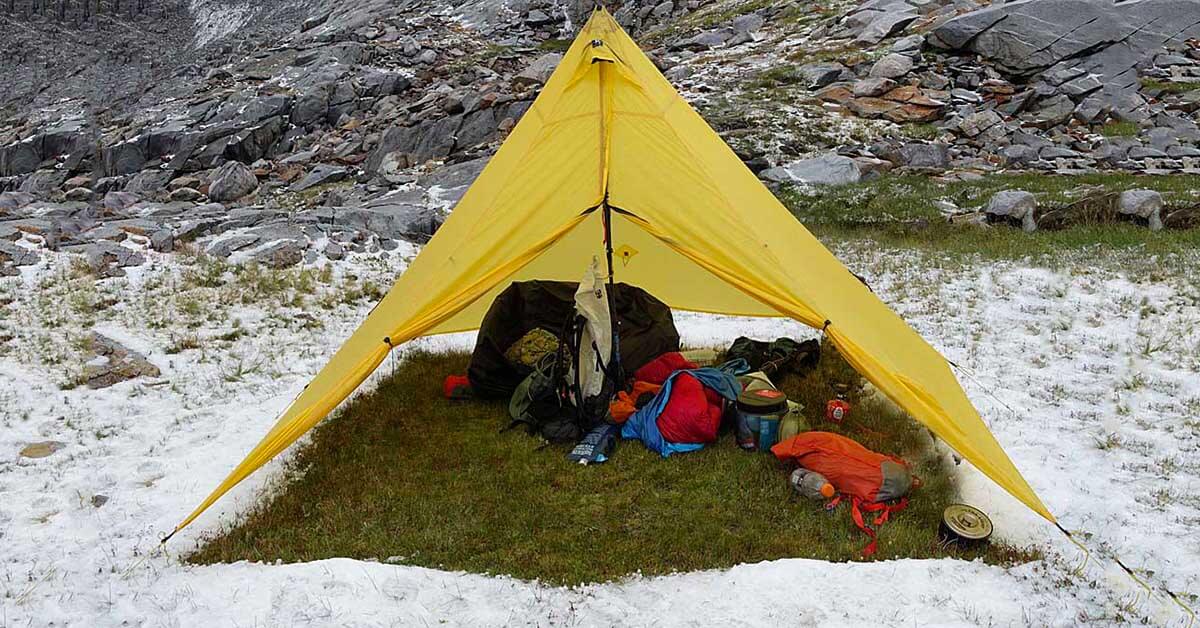
Tarps & pyramid tarps provide tremendous shelter at a fraction of the weight & cost of a traditional tent. As such, they are light enough to be used as both a primary and/or emergency shelter. [Yes, another summer storm. This time the High Sierras.]
True bivy sacks like these also make good emergency shelters and even the light emergency bivy sacs are OK. I am not a big fan of the paper thin, mylar emergency blankets as they can’t really be staked out to provide a true shelter like a tarp. That being said, they are certainly better than nothing.
8 – First Aid Kit
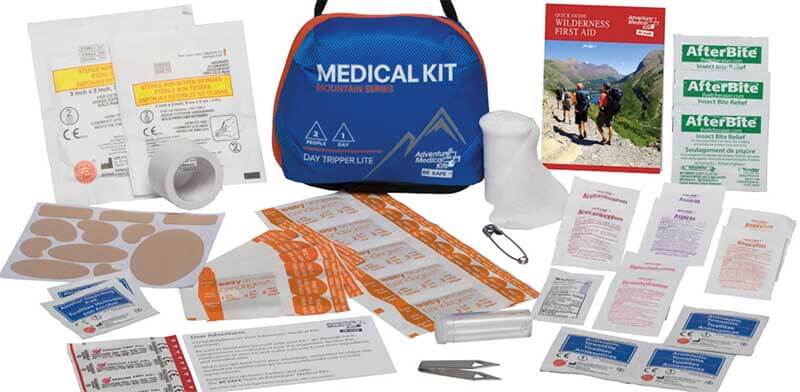
I prefer to assemble my own 3 oz First Aid Kit (see detailed list below) as I can do a better job for less weight than pre-packaged ones. My kit includes bandages, tape, gauze, wound wipes, antibacterial lotion, and OTC med’s like Tylenol, Benadryl, Sudafed, Nexium, Imodium. I also carry some Rx meds like antibiotics. But you can also buy a pre-packaged First Kid Kit like one of these.
Most of the injuries I have treated have been scrapes and cuts (abrasions and lacerations) and all I had to do was stop the bleeding (direct pressure, always) and clean it up and dress the wound. I rarely get blisters since I train in the same shoes and socks that I backpack in. Even so, I carry Leukotape Tape and tincture of benzoin to treat hot spots and mild/early blisters.
A small first aid guide/booklet (often included in kits) is a good idea. Or even better, take a Wilderness First Aid Course at REI, or from NOLS or Landmark Learning.
First Aid Kit | Detailed List
- Pain, fever inflammation | Naprosyn (Aleve), Ibuprofen, or Tylenol (fever) In ziplock pill bag available at pharmacies | 0.4 oz
- Foot/blister | Gauze + Leukotape Tape For taping over blisters, or pre-blister areas | 0.3 oz
- Foot/blister | Tincture of benzoin in micro-bottle. For getting tape or Bandaids to REALLY stick! | 0.2 oz
- Wound care | Bandaids + gel blister covers Assorted sizes – your preference | 0.5 oz
- Wound care | Antibact. packets + wound wipes. Wound cleansing, infection prevention | 0.4 oz
- Wound care | (12) 4×4″ gauze pads + 1 roll gauze Use duct tape to hold in place (from above – Repair Items)
- OTC meds | Benadryl, Sudafed, Nexium, Imodium, caffeine tablets. All in tablet/pill form | 0.4 oz
- Rx meds | Personal Dr’s Rx meds | 0.4 oz
- Pain serious | Dr’s Rx Painkiller. For serious injury, tooth abscess, etc. | 0.2 oz
- Storage/org | Bag Poly 5×8 to hold 1st Aid Kit 0.2 Keep size down. Can only put in what can fit in bag.
9 – Hydration (prudent amount of extra water)
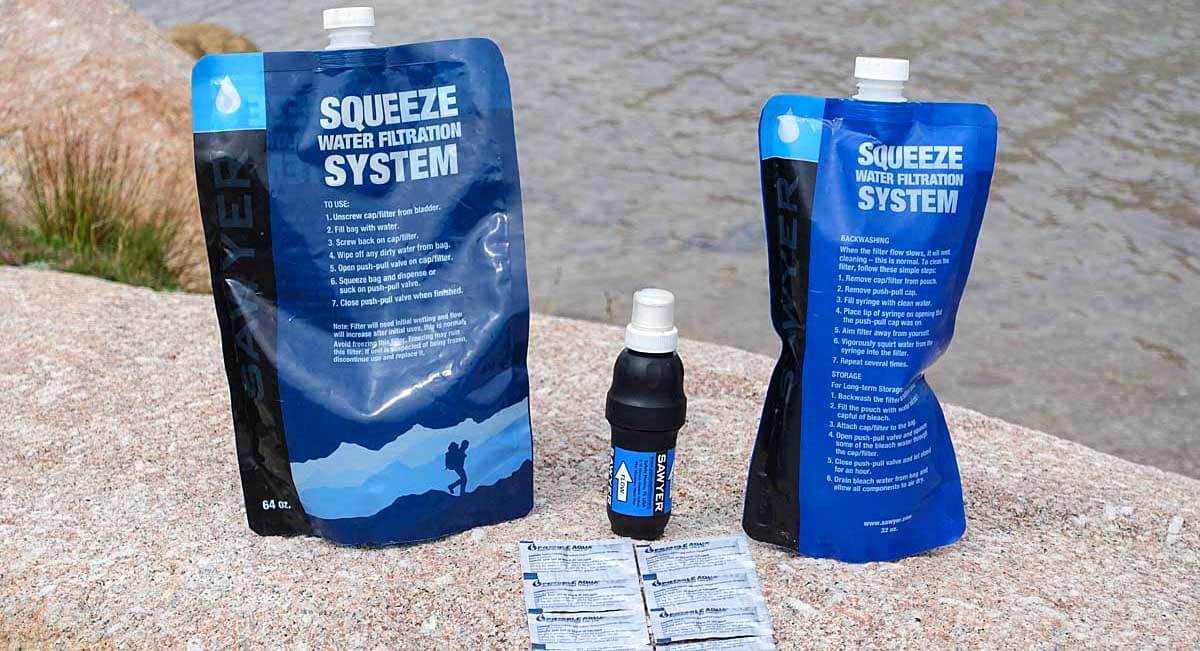
A light, inexpensive, fast and effective water purification and hydration system: Sawyer Squeeze Filter and Water Treatment Tablets
Yes, bring a prudent amount of extra water because human beings don’t do well without it. For hiking in the desert, extra water would likely be right after Navigation Tools on the essentials list. But for most hiking and backpacking in the US, water is usually available every few hours. With a filter like the Sawyer Squeeze you can drink immediately at water sources. This means both quick, effective hydration/purification and less water to carry. An even lighter alternative (and backup system for a filter) are Water Treatment Tablets.
You may be drinking more water than you need: The healthiest hydration strategy is to drink when thirsty. The saying “If you are thirsty, it’s already too late” and “If your urine is yellow, you are dehydrated” are myths. In fact, over hydration (hyponatremia) is becoming more of a risk than dehydration. I’ve extensively researched this topic with experts in sports hydration here: “The Best Hydration – Drink When Thirsty.”
In cooler temps and/or where water is plentiful you may not need to carry as much extra water. Drink from the source, & you’ll likely not be thirsty by the time you reach the next water source. [But do know where your next water sources are.]
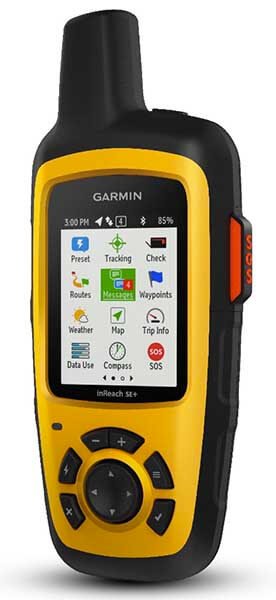
10 – SOS Device (satellite based, like inReach or SPOT)
This is #10 because as noted earlier, prevention (having a plan, intelligently executing it), & having the right stuff (items 3 through 9) is your first & best way to stay out of trouble.
But even with the best planning and execution, stuff like a serious fall, an on-trail appendicitis, serious concussion, or a heart attack can happen. A SOS Tracking Device is the best and most reliable way to summon help in such an emergency. Two-way devices like a Garmin inReach allow you to get medical advice to care for and treat the injured party before help arrives. And they are a big help to arrange/coordinate a helicopter rescue potentially saving a life. For one thing, the EMTs know the exact nature of the emergency and come fully prepared. Read more on selecting SOS/Tracking Devices and their use.
Note: Another benefit of two-way devices like a Garmin inReach is to get in-the-field weather reports.
As of 2023, we recommend ZOLEO Satellite Communicator is our SOS device of choice.
11 – Nutrition

[Note: for a long day hike, 1 to 1.5 pounds of this nutritious food should work for most people]
It makes sense to bring an appropriate daily amount of food that is high in nutritional value and low in weight. (See: “How much daily food should I take?“) But unlike water, your body can go without food for much longer. Therefore, going overboard on too much extra food vs. a prudent amount is a trade off. Think of what other more useful gear for your safety you could bring for that same weight. For example, more warm clothes, a better shelter or an SOS device might contribute more to your safety. That being said, my favorite (extra/backup) foods are usually a high calorie energy bar, and homemade mix of dried fruit, nuts, and a few dark chocolate M&Ms. They are simple, fast, and don’t require cooking.
12 Repair Kit and Tools

While a repair kit is nice to have, I’m not sure it is a true essential. But it’s light so no big deal. I maintain my gear, inspect it before each trip and then treat it with care on the trail. Therefore, while I do carry a small repair kit, I rarely use it. And when I do it’s not for what I would consider an “essential” repair.
I carry a small pair of school scissors (technically part of my first aid kit) which are far more useful than a knife and they can be transported on an airplane. I also have duct tape, needle and dental floss, a few cable ties and a small tube of krazy glue and one of Aquaseal, along with a some Gear Aid Tenacious Tape. All together they weigh less than 3 ounces. For non-do-it-yourself folks, Gear Aid also has a nice pre-packed Repair Kit altho I wouldn’t take all of the items. And if you own a NeoAir sleeping pad, consider NeoAir patch kit.
13 – Fire (lighter/matches/fire-starters)
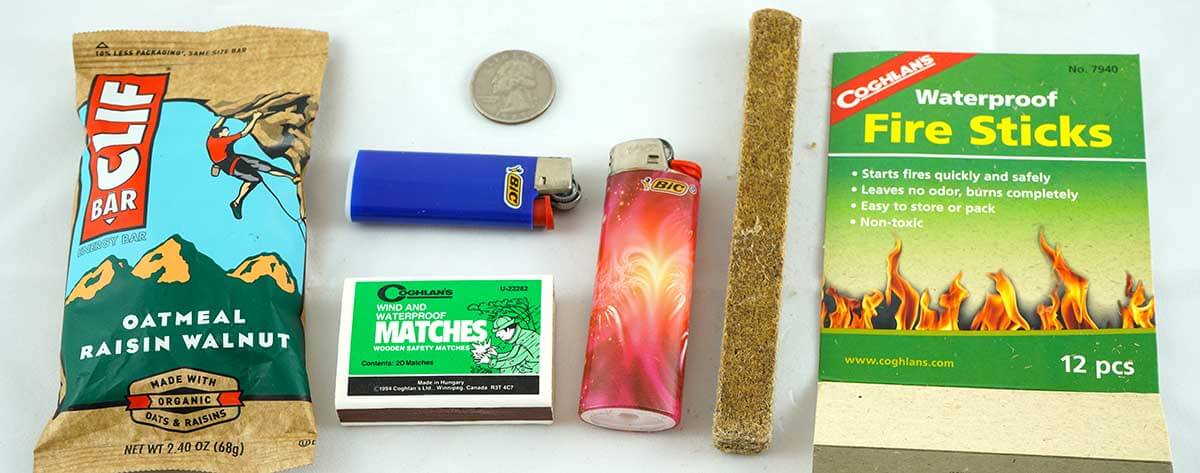
(right) Coghlans Fire Sticks are one of the easiest and safest fire starters to use. (center) A standard lighter is a first choice but Storm Matches are a good backup. (left) Most energy bar wrappers (mylar) also make great fire starters. And best of all I usually have a number of them in my trash bag.
While I do carry these fire starting items, they are last on this list. To this point, in over 40 years of hiking I have yet to use them in a dire emergency situation. Yes, I have started a fire a few times (where legal) to warm up and dry out a lot faster than getting into my sleeping bag in dry clothes—but this was more a comfort and convenience than an emergency. In contrast I’ve used my warm down jacket and my tarp a number of times for what I would consider to be an emergency or close to it. But my favorite fire starters, a lighter and energy bar wrapper (mylar), are already packed every trip so I have them by default.
Appendix – Navigation Tools & Electronics
A Critical Caution for Electronic ItemsNeither an electronic GPS App with maps, or a paper TOPO map will figure out the best off-trail route for you. In both cases you’ll need to understand what they show you. That is, you’ll need to be able to tell where things like impassible cliffs are, etc. And you still need to make in-field assessments of the best route while you hike off-trail.
Taking all this into account, electronic items are still serious tools that can do things that non-electronic tools cannot. |
Pick the Right Navigation Tools for YOU!
I’ve used USGS 7.5′ Topo maps and a traditional compass to navigate for over 40 years. Much of this off-trail, in difficult to navigate areas. They worked then and they still work now. BUT that doesn’t mean a traditional compass is the best navigational tool for all people.
I suggest that there is no perfect navigation tool. All have strengths and weaknesses. In the end its a personal choice. Select the right tools for you—tools that you have the skills to use and meet the navigational requirements for your trip. And whatever tools you decide on, you do need to know how to use them AND you’ll certainly want to bring a backup.
Paper Maps & Compass
a) Can I “use” a map and compass?
This is the first thing you should consider when deciding on the right navigation system for you. For example, can you can orient your map and compass to true north (taking into account declination), always find your location on the map, take a bearing to a point you want to navigate to, and then use the compass to sight and follow that bearing, taking into account elevation contours (reading Topo lines) and other physical features depicted on the map to make an informed decision on the best route. If not, you might want to 1) learn how to really use a map and compass and/or 2) consider a smartphone GPS App (or even a traditional GPS unit if you already have one).
b) What if you want to learn how use a map and compass?
If you want to learn map and compass skills, great. But to keep your newly learned map & compass skills sharp and effective, you’ll need to use them on a frequent basis. [Note: after teaching many people map and compass navigation, I’ve noticed a low retention rate for those that don’t regularly practice their map & compass skills each year.]
c) All types of navigation tools can fail – even maps
Contrary to what most say, paper maps and traditional compasses can “fail.” First, as stated earlier, many people are not proficient with them. This is a failure of sorts since the map and compass won’t deliver their intended function—and there are no backups to fix this. In addition, maps are accidentally left on a rock, they easily blow away in the wind, they mysteriously creep out of pack and pants pockets, and they can get ruined by water. A couple of times a year I pick up somebody’s full map-set that I found in the middle of the trail. Finally, compasses can be lost, misplaced or damaged (yes, I’ve had clients break a compass).
Smartphone GPS Apps
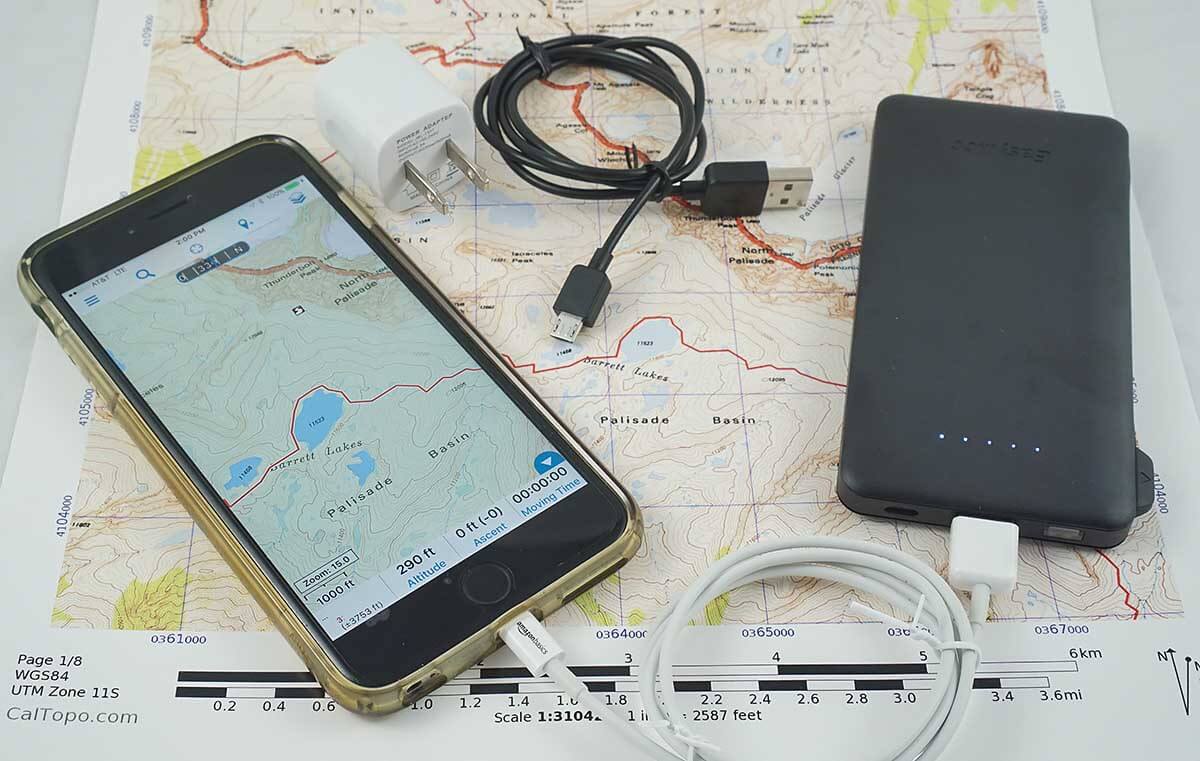
The EasyAcc battery on the right will recharge the iPhone 6 Plus two times. (The wall charger and micro-USB cable [top center] are only needed if you’ll have access to electricity mid-trip). See more in Best Lightweight Backpacking Electronics Gear.
Smartphone GPS apps (and traditional GPS units) work far better in low visibility conditions like white out and in the dark. I have navigated off of more than a few complex summits in complete whiteout with a GPS.
Finally, a big advantage of the smartphone GPS App is the maps are free and instantly downloadable. You can get superbly detailed maps for your hike in a matter of minutes. I’ve downloaded them from my motel room. In contrast, getting and/or printing paper maps is far more costly, time consuming and cumbersome (USGS 7.5 min Topo map are harder and harder to get).
Electronic Navigation Tools are not as unreliable as “experts” claim
- In five years of intense backcountry use my close hiking partners and I have never broken an iPhone or the GPS App. We’ve taken our iPhones on numerous packrafting trips in Alaska, winter rafting down the Grand Canyon, technical Canyoneering in Utah, climbing in the Wind Rivers and the Sierras, long hikes in the U.S.A, Turkey, Australia, Europe, and a canoe trip down the length of the Mighty Mississippi River. All without incident. No failures. No dead batteries.
- But as a backup, at least one hiking partner carries another smartphone with GPS App & offline maps. (sometimes even an alternate App and mapset).
- We do not need cell signal to use our GPS App.
- We get around 7 days of use before we need to recharge it—see more about iPhone/smartphone battery management.
- And a light USB battery gets us a couple more charges if we need them. The same USB battery charges all our other electronics like headlamps, cameras, and Garmin inReach. See more about field batteries for recharging electronics.
Always Bring a Backup Battery!It’s critical safety precaution to make sure your electronics are always available for use. My three favorite lightweight and high capacity USB backup batteries are:
|
Any hiker can use these Efficient Backpacking Tips to get more time to do what they love best outdoors. Whether it’s covering more miles, extra time to enjoy the views, take photographs, fish, get some extra swimming in a lake or even (gasp!) a mid-afternoon nap.
Lead photo: 15,000 ft afternoon nap and photo time—Peruvian Andes, Cordillera Huayhuash
Efficient Backpacking Tips – Thru hiker tested
While some of these Efficient Backpacking Tips are my own habits, most are common sense tips that accomplished thru hikers have been using for years. Many thanks to my world-class thru hiker friends Andrew Skurka and Flyin’ Brian Robinson for insights on how they achieve the most miles every day.
Help to Better Hike Your Own Hike
Luckily, these tips work for all hikers—even mere mortal hikers (myself included) who are not focused on making 40 mile days. All of us can can use these Efficient Backpacking Tips to spend less time on mundane tasks and get more time each day to do what matters most. To Better Hike Our Own Hike—whatever that means to each of us.
This post is in the following sections
- On Trail – Efficient Backpacking Tips
- In Camp – Efficient Camping Tips
- Efficient Clothing Adjustments
1) On Trail – Efficient Backpacking Tips
Author hammering out some long miles on the Southern Sierra High Route, a superb alternative to the John Muir Trail. Efficiency (minimize stopping) is just as important as hiking speed to get enough miles before dark each day. [photo Don Wilson]
Spend less time on mundane tasks and more time having fun
You likely spend far more time than you realize on trail stops for mundane tasks—making clothing adjustments, collecting and treating water, putting on sunscreen, accessing maps/trail guides, etc. By doing necessary tasks most efficiently and eliminating unnecessary ones, you might get most of that time back to do the things you love be it hiking a few more miles before dusk to reach your favorite campsite, or stopping midday to meditate on the glorious view from the rim of a canyon.
Why “short” stops rob you of time for fun
Perceptually, the time spent on “short” stops to do mundane tasks seems inconsequential. But it isn’t! When you tally up all those stops at the end of the day (say, with a GPS), you’ll likely find that you’ve spent at least 1 to 2+ hours stopped for various reasons. I have also done some observations of hiking with clients, and an average stop to take a pack off, find something, fiddle with it, put it in the pack again and start walking is around 4-6 minutes. And many people stop 2 to 3 x per hour.
If you do the math over an 8 hour hiking day, that’s 1.1 to 2.4 hours of stopped time—and that’s likely a conservative estimate. I don’t know about you, but I’d rather spend the time taking photos or getting a few more miles down the trail, than fiddling around with mundane tasks.
Organized Pockets. The more the better.
Well organized pockets are your best timesaving friend. The goal is to access everything you need during the day from your pack or pants pockets. This minimizes stopped/fiddle-with-gear time for mundane tasks and maximizes fun time. To do this, keep all the gear you need during a normal hiking day organized in pants and pack pockets where you can quickly find and access it.
Where I store my gear to save time
My goal is to access most of my essential gear while I walk—and if possible, even do tasks while I walk. For example, accessing food and eating it while I walk is pretty simple. Here’s my strategy for storing gear I may use during the day:
Backpack Pockets
I like BACKPACKS like these with lots of pockets.
| PACK | *Gear Stored |
|---|---|
| L shoulder strap | Camera on a quick release bracket. I can take the camera off, shoot a photo and put it back in less than 10 seconds. Not only do I save time, I find that I get more photos and better photos vs. other camera storage methods. See my Best Backpacking Cameras and in particular the video of the bracket in action. |
| R shoulder strap | (when taken) Tracking Device, Garmin inReach or SPOT, in a shoulder strap pocket. This keeps the antennas free of my body for good reception and I can use it without stopping. |
| Rear lg. pocket | TP and hand-sanitizer, headlamp, rainwear, North Face 100 Glacier 1/4-Zip light fleece shirt, gloves, warm hat, larger 2 liter water bottle (full if I need additional storage), sunglasses case, spare maps and guidebook pages, stored flat in a gallon Ziplock freezer bag. Sometimes a small ditty bag with 1st aid, foot repair stuff, camera battery, etc. |
| R side pocket | 1 Liter Platypus (or Sawyer) water bottle. I can grab it, drink & put it back while walking. |
| L side pocket | Day’s food in a quart Ziplock freezer bag, my Sawyer Squeeze water filter, alcohol stove fuel in this great Twin Neck Fuel Bottle (I don’t like to keep fuel inside my pack!). |
| R hip belt pocket | Some snack food like a bar and a small bag of gorp. See my: Best Backpacking Food – simple and nutritious for more info on backpacking food and recipies. |
| L hip belt pocket | Sunscreen, bug spray in pocketable 0.5 oz bottle, water treatment tablets along with a knife or scissors. (I can collect and treat water in a matter of seconds without taking my pack off. 20 to 30 minutes later it’s ready to drink.) |
*Note: Gear in this post is excerpted from my 9 Pound – Full Comfort – Lightweight Backpacking Gear List

Getting some High Sierra Fishing in a remote lake. [photo Alison Simon]
Cargo Pants Pockets
I like CARGO PANTS like these with lots of pockets:
Of particular note is that this is shaping up to be a big tick season. For those that are worried about Lyme, Zika and other tick/mosquito transmitted diseases, insect repellent cargo pants like ExOfficio BugsAway Ziwa Pants, might be an attractive option. These when combined with gaiters or tucking your socks into your pants legs, should provide a good below-the-belt deterrent against ticks and mosquitoes. This is per the US CDC’s (Centers for Disease Control) section on “Maximizing protection from mosquitoes and ticks.”
And, while applied insect repellents only last 8-14 hours at best, factory treated clothing has near-permanent effectiveness (clothing treated before purchase is labeled for efficacy through 70 launderings). Finally I’ve listed a shirt since it adds two pockets for gear storage, and gives the option to have top to bottom insect protective clothing. (Tuck your shirt into your pants.)
| Item | Description | Comments |
|---|---|---|
| Pants std | REI Sahara convertible pants (14) | Great pants, good pockets, readily available. Ex Officio and many others make similar pants |
| Pants bug repellent | ExOfficio BugsAway Ziwa Pants Men’s and Women’s | For ticks. Continuous insect repellent. Avail in both M’s and W’s. Light, cool, sun protection. Great pockets. Also available at REI |
| Shirt bug repellent | Exofficio Bugs Away Halo Long Sleeve Shirt Men’s and Women’s | Completes insect repellent clothing. Light, cool & widely available via Amazon, and REI. |
| Gaiters | Dirty Girl gaiters (1.2 oz) REI Co-op Activator Gaiters |
Optional, but does seal ankles against tick entry. Tucking pants into socks also works. |
What I put in my cargo pants pockets
| PANTS | Gear Stored |
|---|---|
| L hip pocket | iPhone 6 Plus in a pint Ziplock freezer bag (great!). I access it for a multitude of uses. |
| R hip pocket | Day’s map, guide pages, milage sheet, and Fisher Space Pen in a quart Ziplock freezer bag. Possibly my gloves, if I’ve taken them off (they stay warmest in hip pockets if it’s cold). |
| Front cargo pockets | If my pack doesn’t have hip belt pockets, I store that gear here. Otherwise these pockets are free for “as-needed” storage for gear that needs quick access. |
| Rear pockets | During colder weather hikes these hold my gloves and hat when not in use – e.g. hiking uphill and getting hot. Otherwise they are free for “as-needed” gear storage. But these are usually the smallest and least useful of pants pockets. |
| Zippered pants pocket of choice | My ID, cash and credit cards in a plastic bag. Especially on trips where I might need to take it out to buy stuff, like a small store along the AT. (And in general I like to have my iPhone, ID, cash and credit cards on my person at all times.) |
| A shirt pocket | Compass if I am using it frequently. (or on lanyard around neck) |
Efficiency gains for two hikers
- Obviously, pocket access becomes faster and easier if you can get some help accessing pack pockets
- In addition, you can share items like sunscreen, bug spray, and water treatment. E.g. your pack holds the water filter, while your partner’s pack has the bug spray and sunscreen.
- This makes even more pockets available for gear storage. And it should be fairly simple to get everything needed during the day into an easily accessible pack pocket.
Case Study – “A place for everything, and everything in its place”
Hiking one spring morning in a cold rain I had a fairly pressing bio-urge. I stopped, took my pack off and looked for my TP and hand-sanitizer in the usual place. Not there! After nearly 10 minutes of rifling through my pack, the bio-urge far greater and with damp gear strewn around me, I finally found the TP in one of my cargo pants pockets. (I had moved it there before leaving camp because I had expected to use it soon.)
Moral of the story: even with good intentions, it’s best to keep putting the same stuff in the same place every time! Deviate from this and suffer the consequences. While the above story is amusing (at least in the retelling) not being able to locate your wind-shell, warm gloves and hat when on a windy ridge, late in the day with temperatures dropping to near freezing, is a lot less fun and possibly more serious.
2) In Camp – Efficient Camping Tips
Camp on the Wind River High Route, mile for mile, the finest non-technical Alpine route in North America
Evening Camp Routine – ideally 20 to 30 minutes
Having a well thought-out routine to set up camp and cook dinner saves time. It also makes for a far more relaxing evening, leaving enough time to enjoy sunset across the lake while sipping your hot chocolate.
Before making camp
- My evening camp routine starts with opportunistically collecting enough water to cook dinner about 30-60 minutes before arriving in camp (unless I know that good water will be quickly available in camp).
- Usually I prefer to cook with treated water as I don’t have to worry as much about a complete boil or boil time. And evening hot drinks only require 140° to 160° F water.
- If it’s late in the day, I locate my headlamp and hang it around my neck so I don’t have search around for it as evening turns to dark.
Arriving at camp – first tasks
- If cold: I immediately put on warm clothes and especially get on dry socks and warm footwear. (my hands and feet run cold). Down Booties are fantastic!
- Then my first task when arriving in camp is to get my cook set out and start the right amount water boiling for both meal and hot drink. (For maximum efficiency your stove/pot combo should be able to boil all dinner water at one time.)
- Tip: Avoid stove/cooksets combos that are tippy, non-wind resistant and need tending. You want to put water in a pot, light your stove and leave it mostly unattended to boil water while you perform camp chores. The two best systems the Jetboil, and the Trail Designs Sidewinder Ti-Tri bundle. I discuss these in detail in my post, The Best Backpacking Stove Systems.

An airy dinner on a ledge high above a remote canyon in Southern UT.
While waiting for the pot to boil I start my other camp chores:
- I collect additional water in both my 2 L and 1 L squeeze bags.
- Put Chlorine Dioxide water treatment tablets in my 1 and 2 L squeeze bags—it’s faster and easier than squeeze filtering. This gives me enough water until mid-morning the following day.
(Then I am done with this chore—no hand numbing collection and treating of freezing water is needed the next morning.) - I setup my shelter and unstuff my down. This allows plenty of time for the down to fluff up and hopefully dry out if needed.
- Tip: Down fluffs up faster in the evening when it’s not super-compressed. And in the morning, with cold fingers and frost on your sleeping bag, it’s a lot easier and faster to stuff it back into a larger stuff sack. If necessary, I size up in backpack volume to accommodate my preference for larger down stuff sacks.
Once the water boils:
- I pour some water into my dinner in a Ziplock bag and set it aside to re-hydrate for at least 10 minutes.
- I pour the rest into my mug for my hot drink (usually homemade hot chocolate mix).
See my: Best Backpacking Food – simple and nutritious – veggie and omnivore friendly for more info on backpacking food and recipies. - I consume my hot drink while my meal rehydrates, possibly doing more camp chores as necessary.
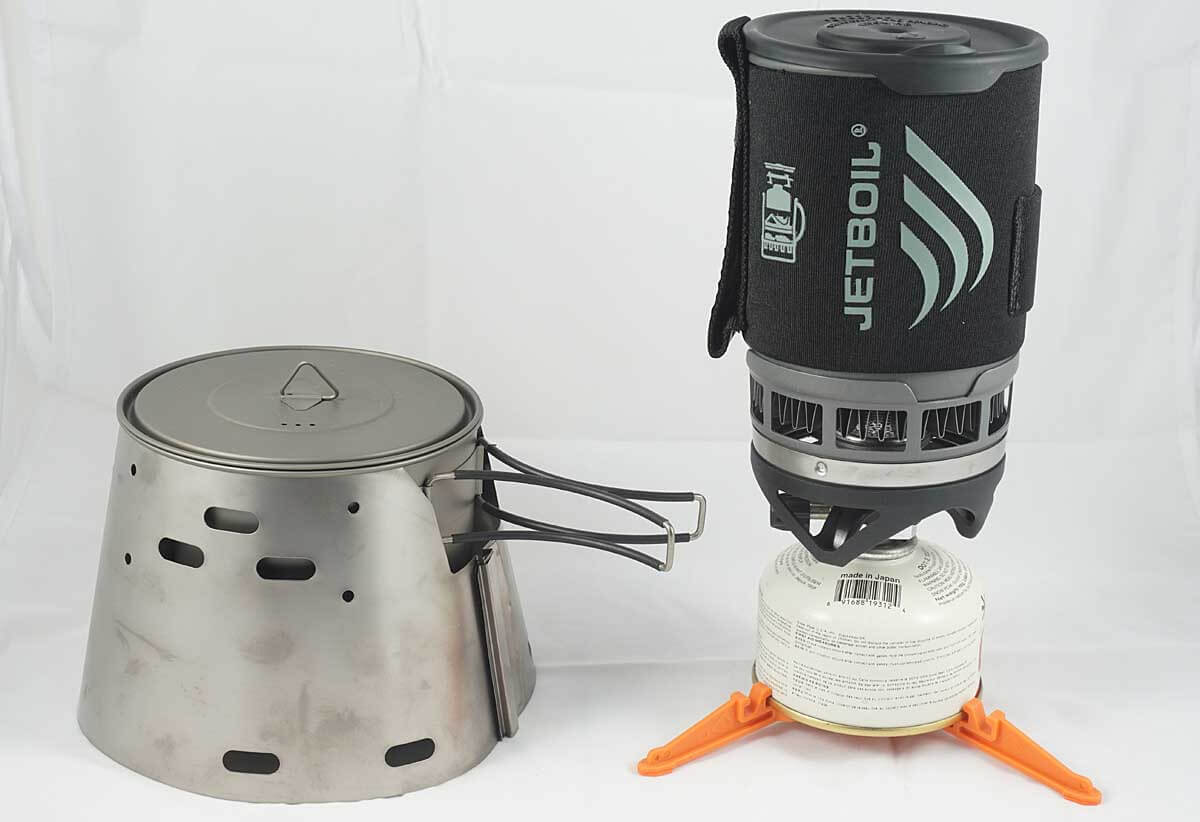
Two of the Best Backpacking Stove Systems – Trail Designs Caldera and JetBoil. Both are stable, fuel efficient, wind resistant, and don’t need a lot of tending. This is a plus for doing camp chores while you boil water for dinner and a hot drink.
Prep for the next day’s hiking
It’s a lot easier to do next-day prep the evening before when it’s warmer and you are more awake. With your camp and gear in order, you can break camp quickly and efficiently the next morning.
- I organize food for the next day in a Ziplock baggie and locate breakfast food and coffee at the top of food sack. Last, I appropriately store food per park reg’s.
- I organize maps and guide pages, etc. for the next day.
- I look at maps and guide book pages, and mileage charts, and figure out my goals for the next hiking day. Miles, water sources, navigational difficulties, stores along they way, etc.
- I make notes on what went well today and what I could do better in the future.
- Constantly assessing, learning and making adjustments is a key to efficiency and meeting your goals.
Morning Camp Routine
- Like dinner, in the morning the first thing I do is light the stove to boil water for coffee.
- While I wait for the water to boil, I start my morning camp chores.
- Sometimes I leave the most hand-numbing tasks until I have a warm cup of coffee to wrap my hands around.
- I usually do a light wipe-down of cookware in the morning. It’s faster and doesn’t freeze hands. (I do a more thorough cookware cleaning in the evening).
- Last thing before leaving camp is to strip down into your hiking clothes. You’ll likely need to set out at a brisk pace to get warm. But if you’ve got your clothing right you’ll be warm in 5 – 10 minutes and can settle into your normal hiking pace.
For those that have cold hands (like me)
Mornings can be tough if you have cold hands. Temperatures are the coldest, your metabolism is still in sleep mode, and you’re handling a lot of cold gear. Here are a few tips to keep your paws warm.
- In cold weather, fingerless gloves (Glacier Glove fingerless fleece) are great for manual dexterity and speeding up camp chores. They save time from taking gloves on and off, and keep your hands warmer.
- I usually put my gloves on inside my sleeping bag and warm them up a bit before getting out. That way I get out of my bag with super warm hands and gloves. I find this gives me the best chance to keep my hands warm while handling cold gear.
- If it’s cold, wrapping my hands around a hot mug helps me warm them between spells of handing cold gear. Stuff sleeping bag. Warm hands around mug. Put away shelter. Warm hands around mug…
- Per above, I avoid collecting, treating and handling water in the morning. This is best done the evening before.
3) Clothing Adjustments
In colder weather, you can spend a lot of time adjusting clothing especially if you are consistently getting sweaty and hot going uphill, and freezing on ridges and downhills, all conditions common on the trail.
The layering system sounds attractive, but it takes a a lot of time to stop, take your pack off, put-on or take-off a layer, put your pack back on and start hiking again. In addition, stopping inevitably makes you colder! Moderate but consistent movement (it needn’t be at all tiring or strenuous) is the key to keeping warm when it’s cold.
Late winter conditions, windy and in the 20s on the Appalachian trail: I’m warm and comfortable hiking at my own pace for almost the entire day, wearing just a 6 oz base layer, a 7 oz fleece shirt (mid-layer) , a 2 oz fleece hat, and 2 oz gloves. I can hike in this outfit from the mid-20s to around 50; up and down hill without needing to stop for a clothing change.
Here’s how I keep warm with a single set of clothing, without stopping
- I put on just enough clothing to keep me warm when moving. Overdressing, getting hot and then sweating out is a great way to get wet and then really cold. It’s very easy to get clothing wet, but it takes a long time to dry it out in cold and damp weather. Wet clothing is cold clothing and unhappiness.
- I only add warmer clothing when I can no longer stay warm walking at a comfortable pace.
- Of special note: I find that for the same weight of a windshirt, a light fleece shirt (like the North Face TKA 100 Glacier 1/4-Zip) has far greater temperature range for comfort. It’s far warmer than a windshirt, does an OK job in wind, and is far less clammy and more breathable than a windshirt. (By the time it’s cold enough and windy enough to warrant a fully windproof barrier, my rain jacket does a fine job—and it’s cold enough that condensation is not a huge issue.)
Here is my go to clothing system for hiking in the cold (excerpted from my 9 Pound – Full Comfort – Lightweight Backpacking Gear List )
| Clothing | Item | Oz | Comments |
|---|---|---|---|
| Shirt | Ibex Indie Hoodie 1/4-Zip (8.8) Patagonia Capilene Zip-Neck T |
8.0 | Neck zipper key to warmth management |
| Mid-layer top | North Face TKA 100 Glacier 1/4-Zip | 7.9 | For use as a mid-layer (and as a “windshirt”) |
| RainJacket | Outdoor Research Helium II | 6.4 | Use as “windshirt” only when very cold |
| Pants | REI Sahara convertible pants (14) | Ex Officio and many others make similar pants | |
| Underwear | Patagonia briefs Mens or W’s | 2.0 | Dry fast, will rinse/wash most days |
| Shoes | Altra Superior Trail-Running Brooks Cascadia Trail-Runners |
18.0 | Altra: Light, huge toe room, super comfortable! Brooks: tried and tru trail favorite. |
| Socks | DeFeet Wolleators or SmartWool PhD Light Mini or Darn Tough 1/4 UL w cushion |
1.8 | Key to keeping feet warm is to keep moving. |
| Warm hat | OR Option Balaclava (1.8) | 1.8 | Warmer than a hat |
| Gloves | DuraGlove ET Charcoal Wool (2.5) | 2.5 | Great liner glove – light, warm, durable! |
| Rain Mitts | REI Minimalist Mitts MLD eVENT Rain Mitts (1.2) |
1.2 | Wind protection and warmth |
| Warm jacket | Feathered Friends Eos Down Jacket (hooded) | 10.5 | For rare rest stops. Moderate/consistent movement is key to keeping warm when it’s cold |
How I use my clothing system
- I regulate my temperature by making clothing adjustments without stopping. Too hot: take off hat and gloves (put in rear pants pockets), also can unzip fleece shirt and base layer, and possibly push sleeves up. Too cold: reverse the procedure.
- If it’s extremely cold and windy, I will use my rain jacket as a windshell. (unzipping your rain jacket all the way is a major cooling force.)
- Finally, if I really do need to stop, my warm down jacket comes out mighty fast! I store the jacket as the topmost item in the main bag of my backpack.
Enjoy Your Hike!
MLD Prophet Pack with pockets jammed full of gear.
Take the train to the AT—low carbon, low stress. No car, no complicated shuttles. Just great hiking! This AT section hike has it all—an ideal blend of natural beauty, history, small towns, great local parks, and meeting interesting people. It’s a perfect example of what makes hiking on the AT a unique and special experience—why people come from all over the world to hike the trail.
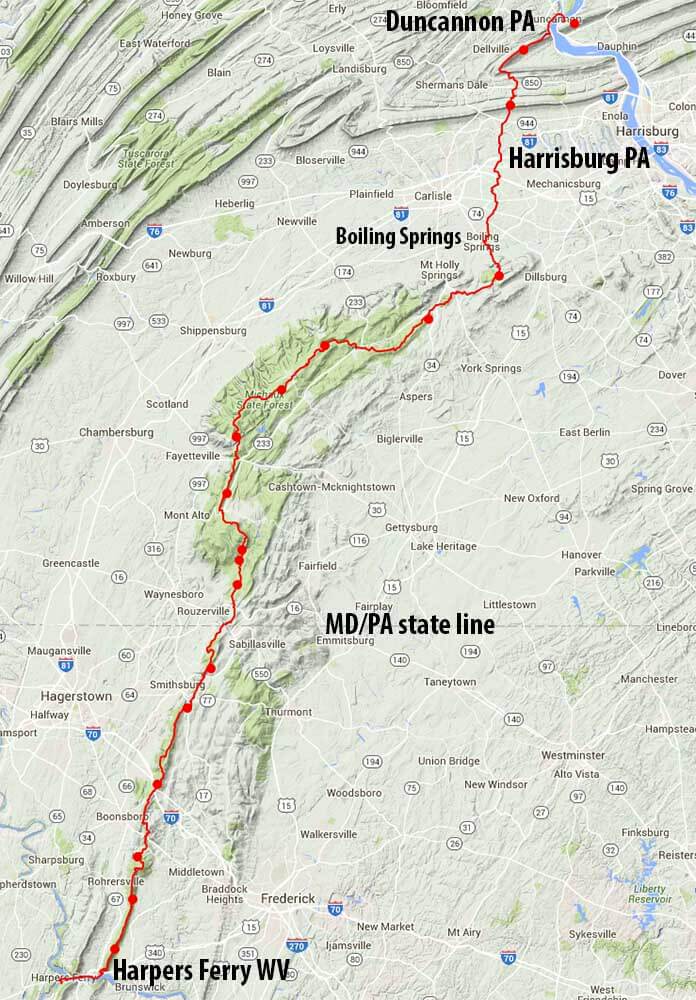
Route Overview Map: click image for larger view
Top 5 Highlights of this Section of the AT
- The variety of hiking: A mix of everything — high, rocky ridges; deep, cool woods; lush stream valleys, rolling farm fields and wildflowers. And in the summer it’s cool & shaded; 90% of the time no hats /sunglasses needed.
- Lots of History: Harpers Ferry (historic town & national park), the C&O Canal, Mason Dixon Line, Galthand, Washington Monument, Pine Grove Furnace, the Cumberland Valley and the historic towns of Boiling Springs and Duncannon PA on the shore of the Susquehanna River.
- Hike in 4 of the 13 original states
- Some of the nicest shelters on the AT: Well-maintained, many with nice camping options around them. E.g. the new, two-story Raven Rock Shelter, Quarry Gap Shelters, & Tumbling Run Shelters.
- Pennsylvania State Parks: Pennsylvania spent the time and money to do their state parks right. In picturesque settings with lovely shaded picnic areas, good camping, (food in season), lakes to swim in, nice bathrooms, and even some free showers. Pine Grove Furnace and Caledonia State Parks are standouts among a number of great parks.
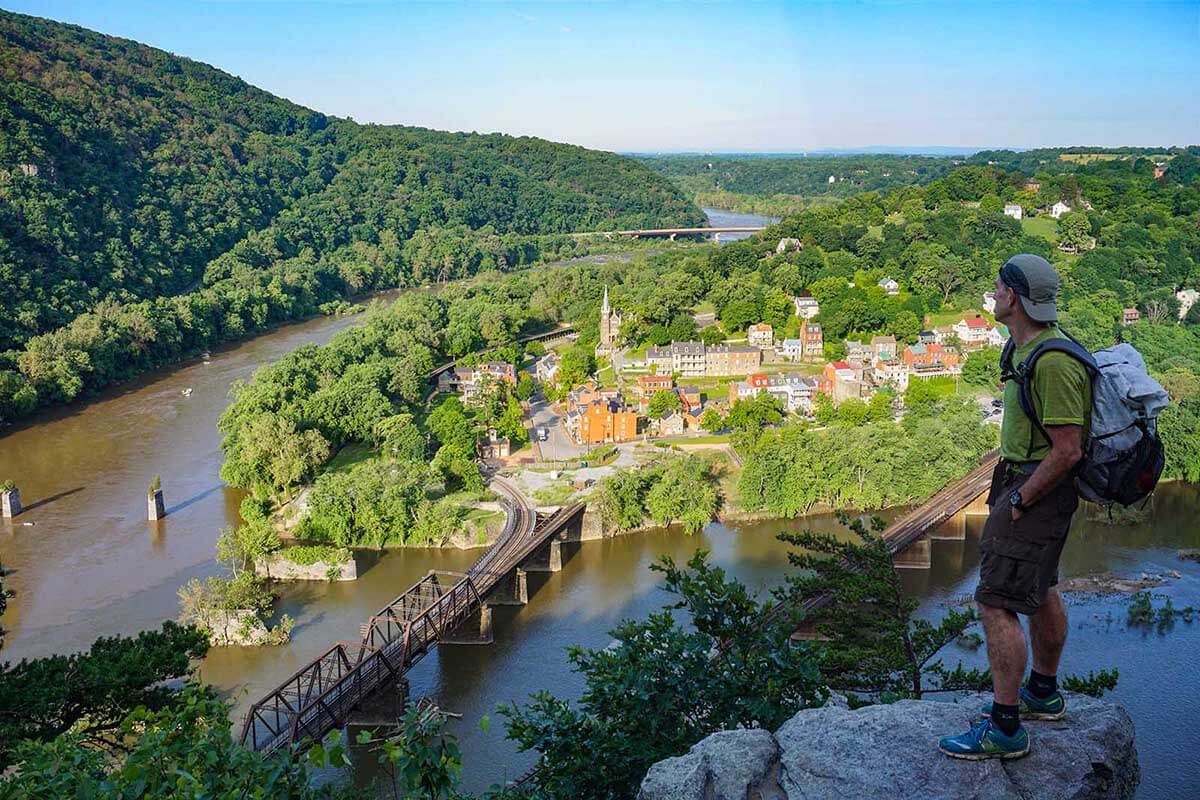
The hike starts in historic Harpers Ferry, WV and it’s well worth an overnight stay and exploration before hiking. “Harpers Ferry National Historical Park is considered one of the best walking parks in America. The views are sublime, the history compelling, the restored town a work of historical art.” (from the National Park Service Website)
Note this is installment one of a series of Low Carbon Section Hikes
- Installment 1: This post – Harpers Ferry WV to Harrisburg PA, 124 miles
- Installment 2: Low Carbon AT Section Hike – Shenandoah to Harpers Ferry, 54 miles
- Installment 3: Low Carbon AT Section Hike – Roanoke to Shenandoah National Park, 134 miles
Stay tuned as we add more Low Carbon Section Hikes on the Appalachian Trail…
Reduce the Carbon – Take the Train
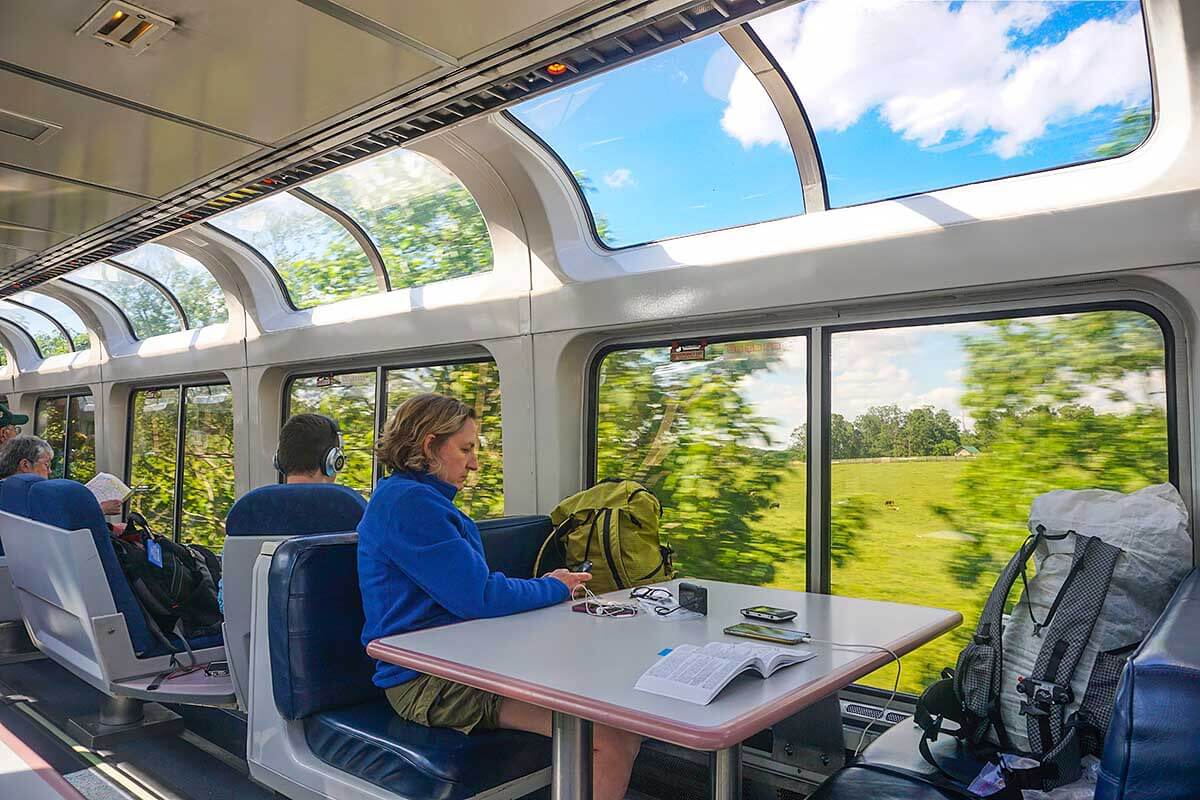
$13 Train: This hike is quickly accessible via train (Amtrak) from most major Mid-Atlantic and Northeast cities. For us, it only took $13 and 2 hours on public transportation from our front door to hiking on the AT! And that was on Memorial Day weekend! We missed all the heinous holiday traffic, serenely traveling on the train.
Overview
This guide is meant to supplement the many excellent general guides to the Appalachian Trail (AT). As such,
- Our guide gives more detail to this specific section of the AT, and in particular how to access it by train from much of the Northeast US.
- Lighten your load: The gear (link) and food (link) for the light packs we used to efficiently and comfortably hike the AT. We believe this will make the hike more pleasant for others.
- And finally, we discuss the places we most enjoyed on the hike in both text and photos.
Make your trip even more enjoyable…Our 9 Pound – Full Comfort – Lightweight Backpacking Gear List will lighten your load and put a spring in your step. So if you want a light pack but retain all the convenience and comfort of “traditional” backpacking, look no further. You’ll be safe, warm and comfortable. This list has served Alison and I admirably on most 3-season trips in the lower 48 and on our trips world-wide. It works!
|
What’s in this Trip Guide
- Logistics: link on how to use trains and other transportation to and from the start and end of the hike
(including a bit of info on lodging in Harpers Ferrry, WV) - Some of our favorite places: link to Photo Essay & Trip Description
- Gear: a link to list of gear that we took that kept our packs around 12 pounds
- Food: a link to list of the food we took to save food weight but still eat healthy
- Waypoint and Mileage Table: link to Waypoint and Mileage Table
- GPS Track: link to download GPX track and waypoint file suitable for loading into your iPhone or GPS
(if you want more info on this see: How to use your Smartphone as the Best Backpacking GPS) - Maps: link to our recommendations for maps and guidebooks
- Harpers Ferry: link to ideas about where to stay and what to do in historic Harpers Ferry
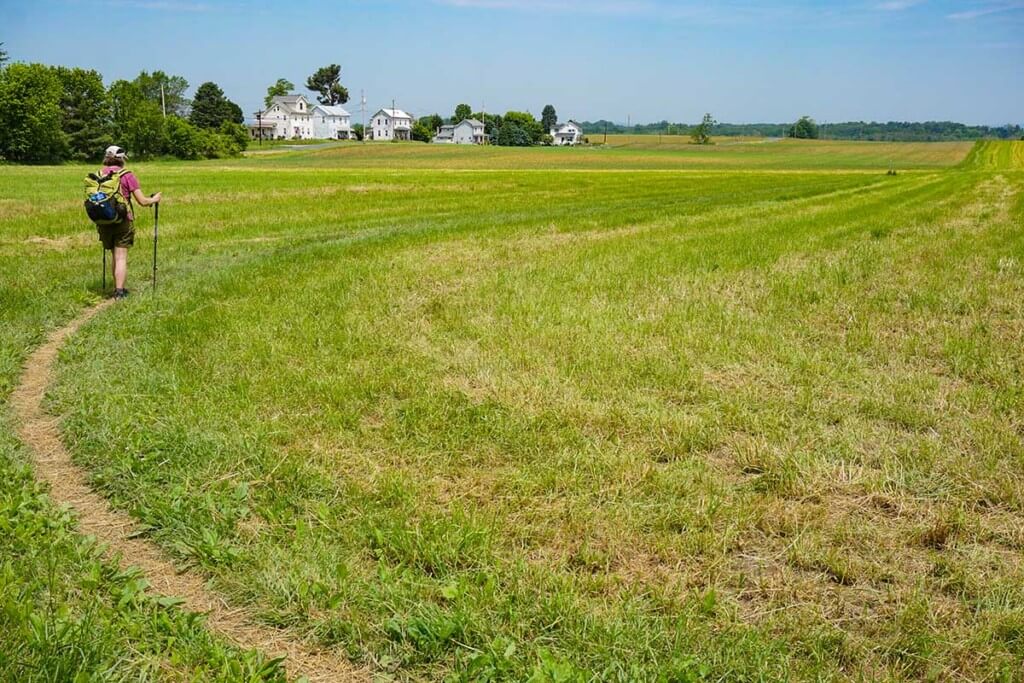
After many miles hiking along ridges and through woods you break out into the idyllic farmlands of the Cumberland Valley. Alison is carrying less than 10 pounds on her back. Using this Gear our light packs made hiking a breeze.
Low Carbon Appalachian Trail Section Hike via Train

Mountain laurels along the trail near Raven Rock, the highest point of the AT in Maryland.
Guide Resources
Stats – Low Carbon Appalachian Trail Section Hike via Train
The trip takes between 5 to 9 days
- 0 mile – trip start in historic Harpers Ferry, WV
- 98 miles to first logical exit, historic mill town of Boiling Springs, PA
- 124 miles to trip end in Duncannon, PA, near Harrisburg PA
Transportation Time
- 1.5 hrs from Washington Union Station to start in historic Harper’s Ferry VA (via train)
- 4-5 hrs from trip end in Duncannon PA back to Washington Union Station (via Uber/Taxi and train)
and shorter if you are just heading to Philadelphia, PA – Amtrak 30th Street Station (PHL)
Waypoint and Mileage Table
The table below is in scrollable window or you can see the table full page here, as a Google Sheet
Maps and Guides
The Appalachian Trail is possibly the most documented trail in the world. There are many excellent guides. Our favorite guide is David Miller’s (AT trail-name, AWOL) “The A.T. Guide Northbound.”
We supplement it with the following Appalachian Trail Pocket Profile Maps

Trip Start: The recently renovated main hall of Union Station in Washington DC. It’s a one hour train ride from here to Harpers Ferry WV. [We just walked on to the train in our hiking clothes and with our backpacks on.]
Options for Trip Start in Harpers Ferry WV
- You can walk right off the train and hike to the Ed Garvey Shelter and camp for the night (6.5 miles, some of it steeply uphill).
- Or, you can stay overnight in a B&B, get a nice dinner and enjoy Harpers Ferry for the evening. Then you can get up bright and early the next morning for breakfast and start your hike.
- If you have the time, consider spending a day or 1/2 day exploring the historic town and Harpers Ferry National Historical Park. For a stunning view we highly recommend the hike to Maryland Heights. (The lead picture for this article was taken from Maryland Heights.)
- If you want to make this a 4 state trip by adding a short side trip to Virginia see Brief Route Description and Trip Highlights for more detail.
- For those wanting a very early start and coffee/breakfast the veteran owned Guide Shack Cafe opens at 5:00 am and has the best coffee in town.
Brief Route Description and Trip Highlights – a Photo Essay
This section hike has it all—high, rocky ridges; deep, cool woods; lush stream valleys, historic towns and parks, and rolling farmlands. Between Harpers Ferry WV and Harrisburg PA, it follows the Appalachian Ridge for over 100 miles going through over dozen parks, vast forests, and other public lands. In all, it travels through four states (if you take a short side trip to Virginia).
The trip starts in Harpers Ferry, WV where it crosses over the Potomac River to Maryland and covers all 41 miles of the Appalachian Trail (AT) in MD. In Pennsylvania it continues another 83 miles on the AT, much of it in the vast Michaux Forest. It ends at the mighty Susquehanna River near Harrisburg, PA.
On a historic note, the hike crosses the Mason Dixon Line, two historic and one actual midpoint markers of the Appalachian Trail, and a number of historic places like Washington Monument PA, Pine Grove Furnace, the old mill town of Boiling Springs, the rolling farmlands of the Cumberland Valley, and the historic river town of Duncannon PA on the banks of the Susquehanna.
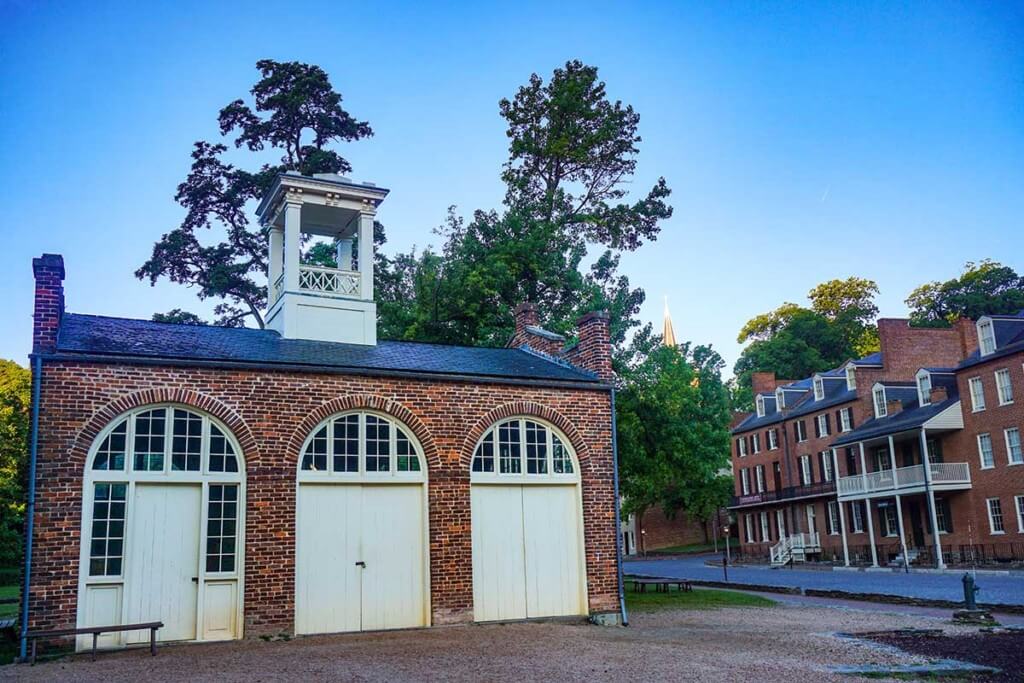
John Brown’s Fort in Harpers Ferry National Historical Park. “Harpers Ferry National Historical Park (NHP) is considered one of the best walking parks in America. The views are sublime, the history compelling, the restored town a work of historical art.” (from the National Park Service Website)
The trip starts as you pass by John Brown’s Fort (click for precise map) to pickup the Appalachian Trail at the WV side of the footbridge crossing the Potomac River into Maryland. Once in Maryland the AT turns right and heads east along the towpath of the Chesapeake & Ohio Canal (National Historic Park).
Note: You can walk right off the early evening train and hike to the Ed Garvey Shelter and camp for the night (6.5 miles, some of it steeply uphill). Or, and the option many will choose, is to stay overnight and enjoy Harpers Ferry. If you start early the next morning you can make it to Crampton Gap (10 miles) or Rocky Run Shelters (16 miles)
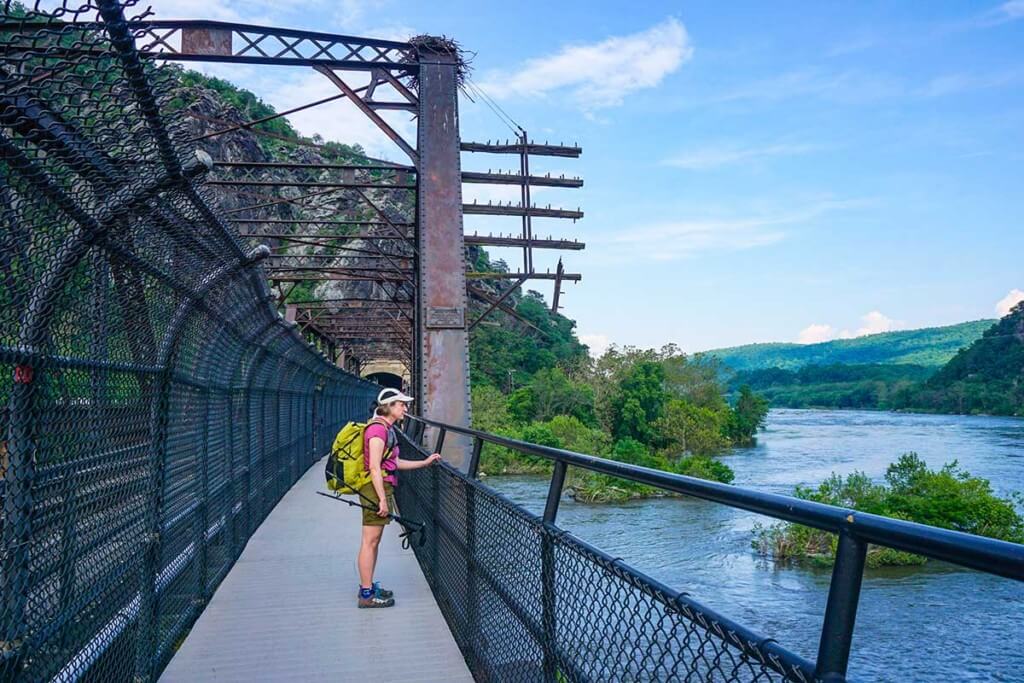
Footpath along the railroad bridge that crosses the Potomac River from Harpers Ferry WV into Maryland and to the towpath on the Chesapeake & Ohio Canal (National Historic Park)
Make it a 4 state trip!
Note: If you want to make this a four state trip (fun!), you’ll want to make a brief side-trip into Virginia. Hike west on the AT to the 340 bridge and follow the AT across the bridge south onto the Virginia bank of the Shenandoah River. Link to Map showing both trip start across the Potomac River into Maryland to the C&O Canal towpath, and the side trip into Virginia across the Rt. 340 bridge.

Turtles in the historic Chesapeake & Ohio Canal. The canal goes 184 miles from Washington DC to Cumberland Maryland.
After about 3 miles of fast and level walking on the C&O Canal Towpath, the AT turns left, crosses the train tracks and heads steeply uphill to the Junction with the side trail to the Ed Garvey Shelter.

Ferns along the AT in a lush stream valley.
Crampton Gap Shelter and Gathland State Park
Gathland State Park is a good place to collect some spigot water and use a restroom. The spring at Crampton Gap shelter is intermittent (worst mid-summer).
Crampton Gap and Gathland State Park are worth at least a brief look. Built in the late 1800’s, Gathland was the mountain home of George Alfred Townsend, a Civil War journalist. A few of this unique collection buildings and structures, designed and constructed by Townsend, were partially restored in the 1950’s.
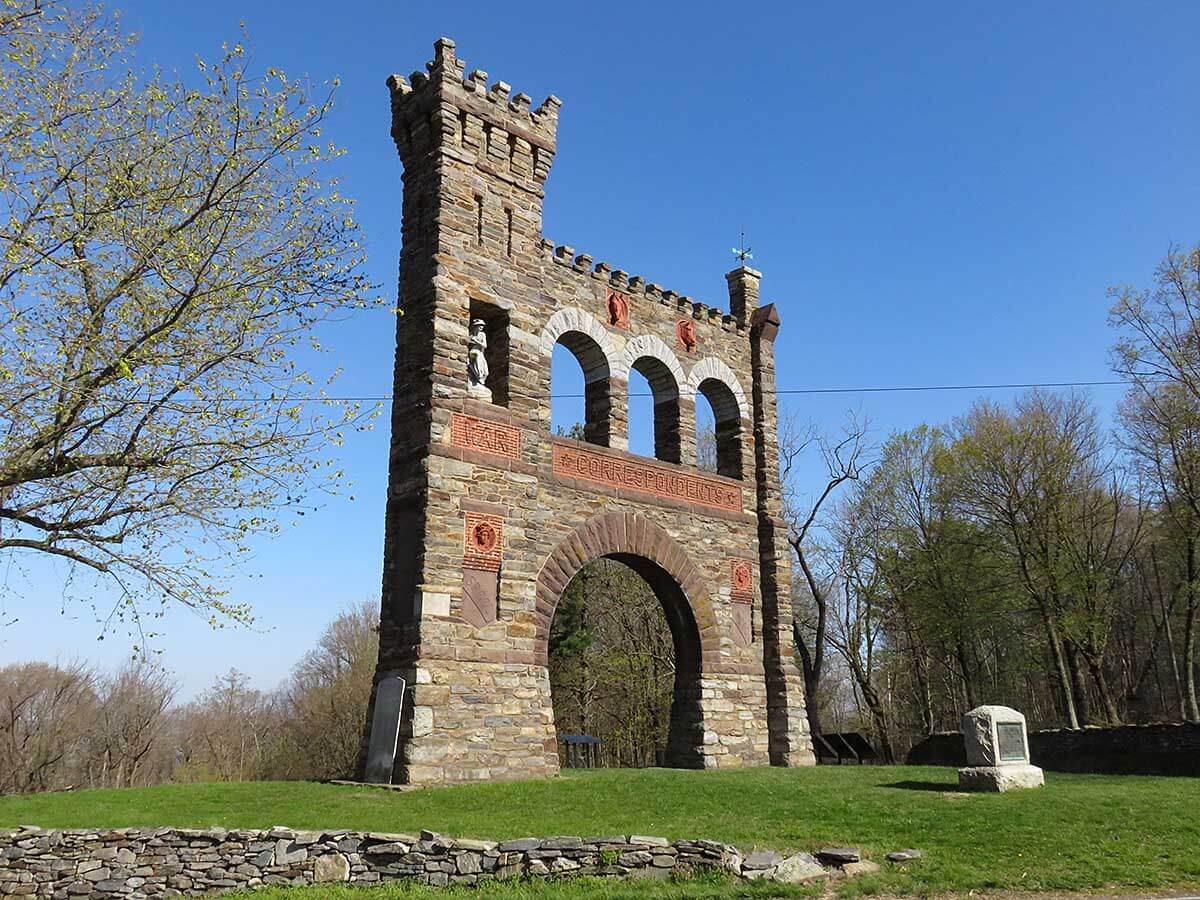
Crampton Gap and Gathland State Park: The War Correspondents Memorial Arch, constructed in 1896, is a National historic monument. Photo by By Antony-22 – Own work, CC BY-SA 4.0
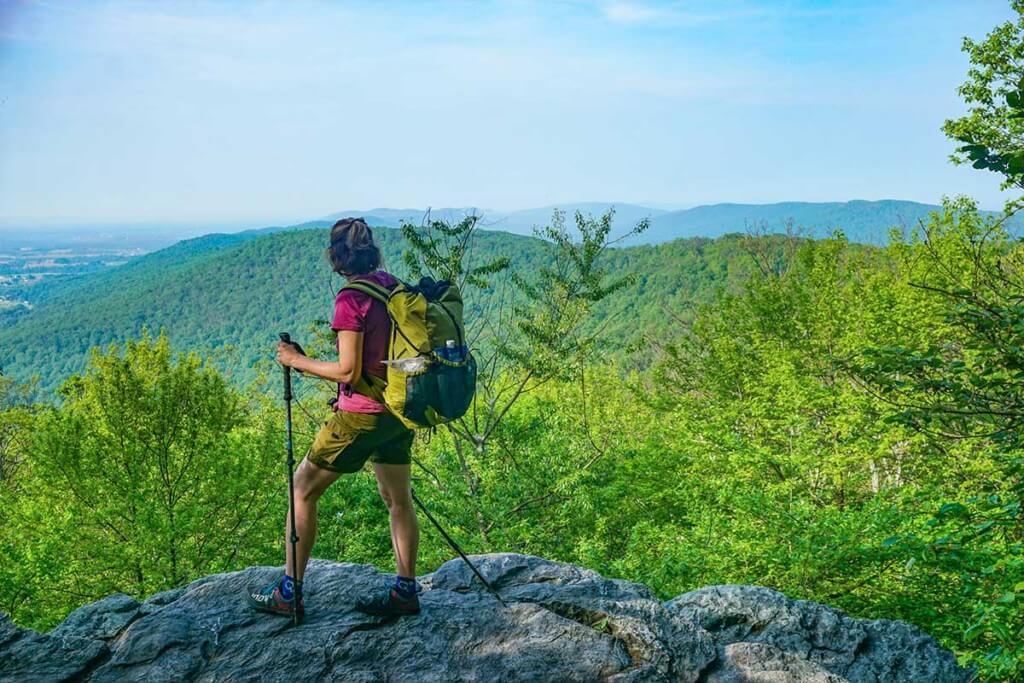
View from the White Rock Cliffs of South Mountain – mile 11 – between Crampton Gap and Rock Run Shelters.
Washington Monument State Park
Washington Monument State Park is a good place to get spigot water, have a snack at a shaded picnic table and use a restroom. The Monument is worth visiting both for its history and for a great view of the Cumberland Valley.
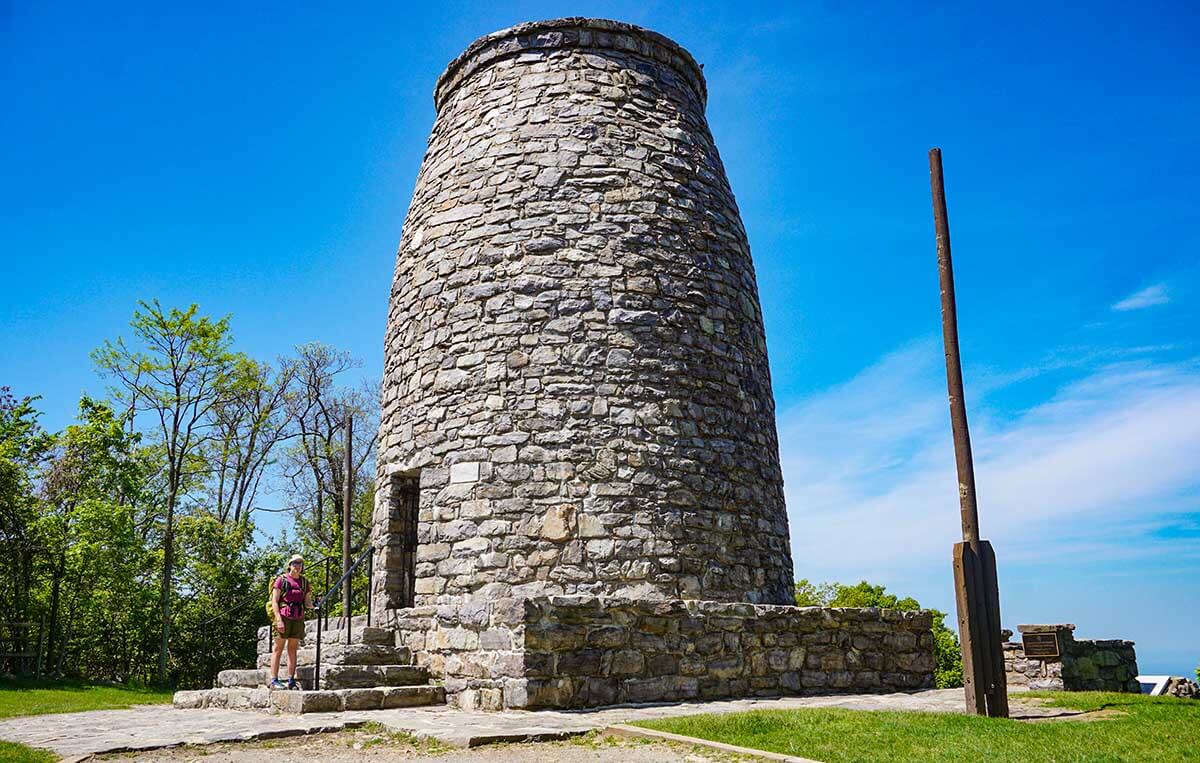
Washington Monument State Park: The original 1827 tower was the first monument dedicated to George Washington. The more famous Washington Monument in the District of Columbia was not completed until 1885, over 50 years later!

View from the top of the Washington Monument, looking west across the Cumberland Valley and the Potomac River.
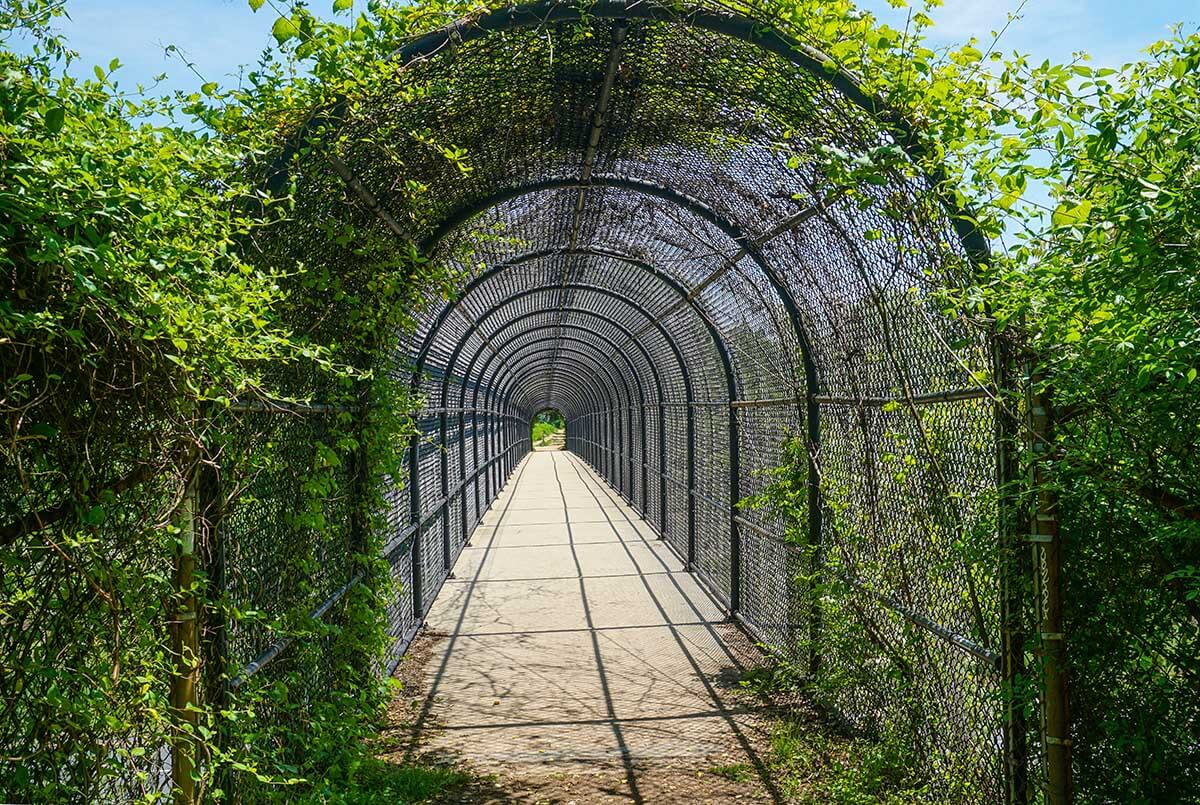
The impressive and functional, if not aesthetic footbridge across I-70. It gets the job done!
Pine Knob and Ensign Crowell Shelters
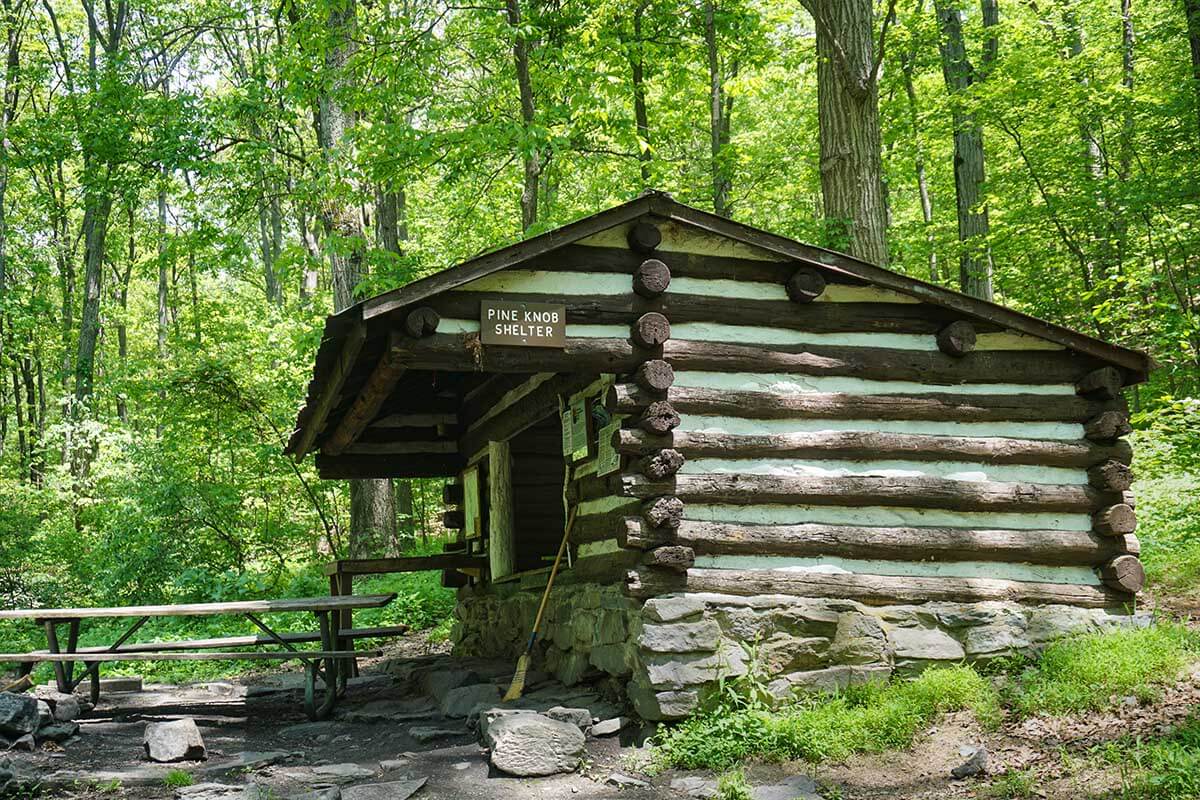
The unremarkable Pine Knob shelter is worth a stop for the nice piped spring behind it.
The unremarkable Pine Knob shelter is worth a stop for the nice piped spring behind it. There are some large campsites near the shelter. To regain the AT northbound take the shortcut (rather than retracing your steps).
Good water source between Pine Knob and Ensign Crowell shelters:
There’s a nice piped spring a few 100 yds west of the AT (downhill) from Pogo Memorial Campsite.
If possible, avoid camping at Ensign Crowell Shelter. It’s not the nicest shelter. It’s very near a road, often crowded, and has an iffy water source mid-summer.
“The Rocks of Pennsylvania”
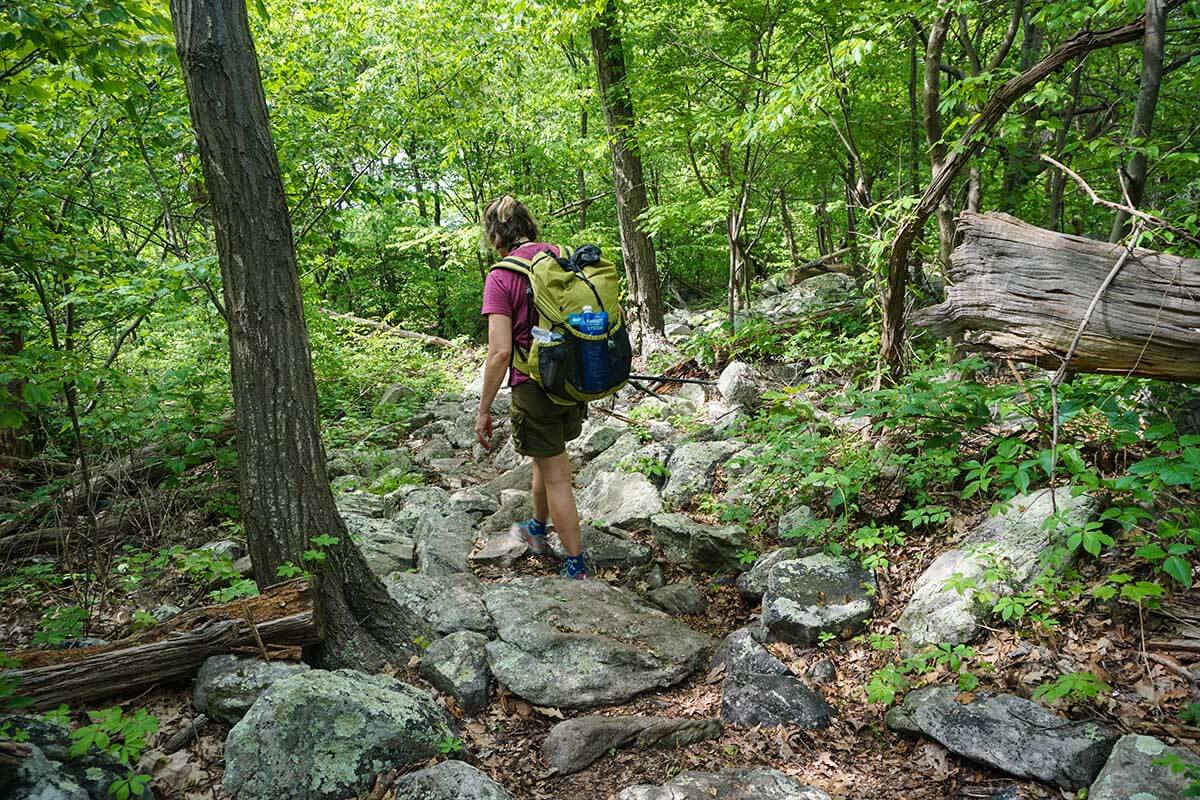
The rocky trails of PA, while not a huge safety issue, will definitely slow your walking pace in sections.
This section of intermittently rocky trail actually starts in Maryland about 5-10 miles before you enter Pennsylvania. “The Rocks of Pennsylvania” are not as bad their reputation. Care and patience will get the job safely done. The hardest and rockiest section of trail is on the descent off the ridge down to Pen Mar County Park near the MD/PA border.
Raven Rock Shelter
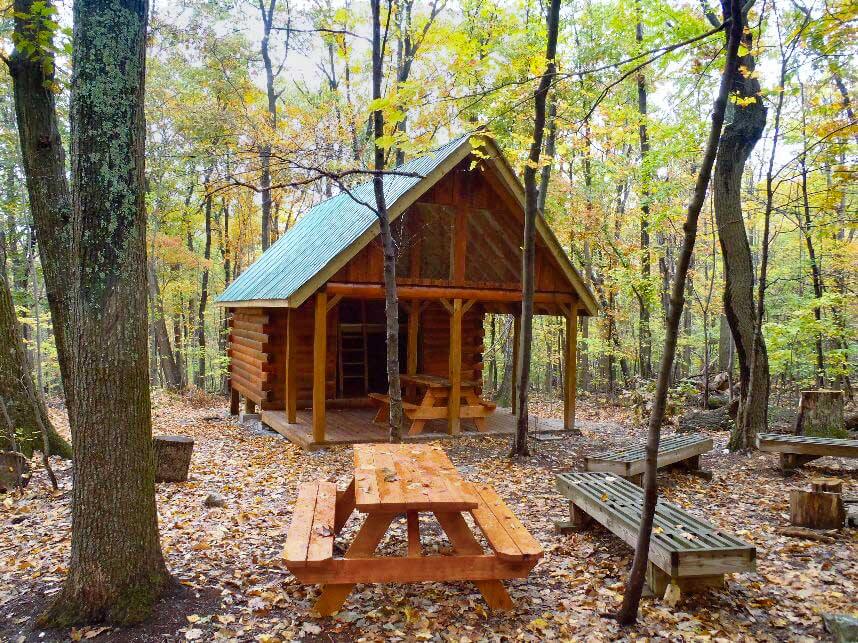
The new 2-story Raven Rock shelter replaces the old Devil’s Racecourse shelter (many guides still refer to the older shelter). The flat expanse around the shelter has lots of great camping areas, many with their own picnic tables. Photo: HIKERS OF TWC
Raven Rock Shelter (mile 36) is one of the nicer shelters of the trip. In addition, the flat expanse around the shelter has lots of great camping areas, many with their own picnic tables. The only downside is that there’s no water at Raven Rock Shelter. It’s a fairly long round trip downhill get water. (Alternatively you can collect water from the stream at MD 491/Raven Rock Hollow, before hiking about 1 mile uphill to the shelter).
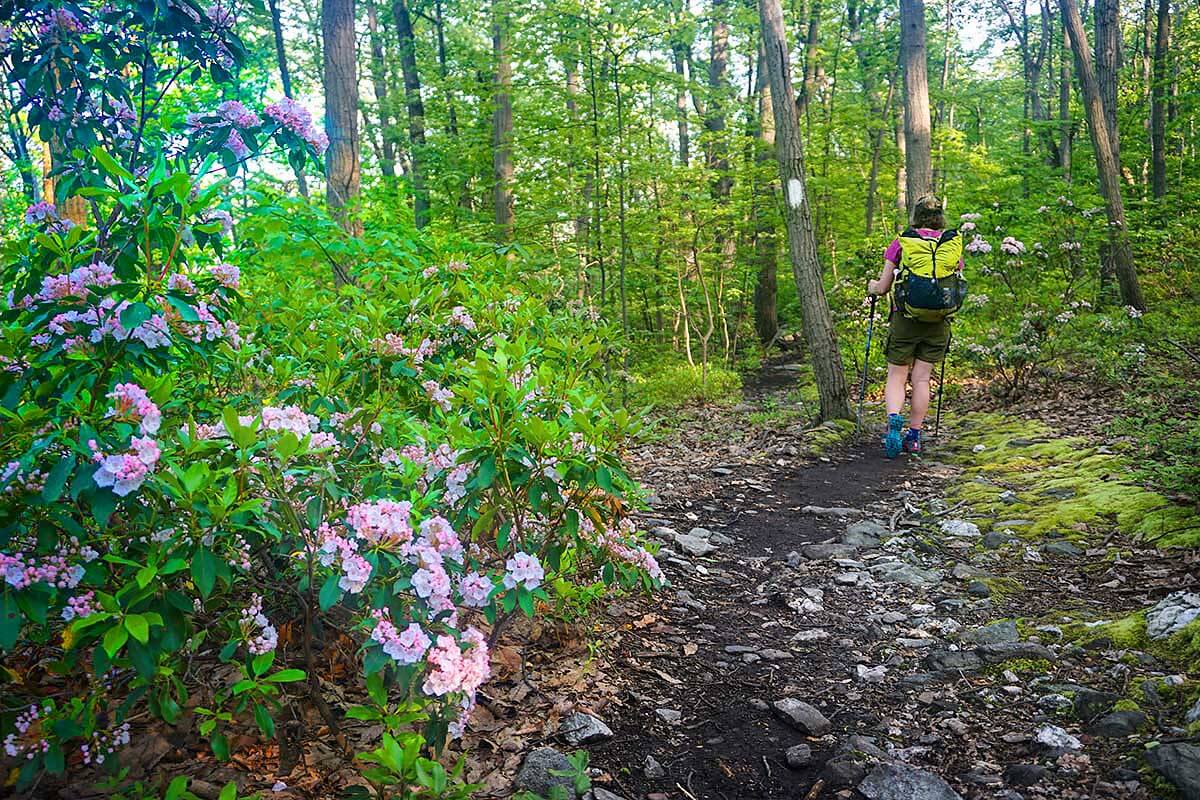
Pen Mar County Park and Mason Dixon Line
Pen Mar County Park has nice views. It’s a good place to get spigot water, have a snack at a shaded picnic table/pavilion and use a restroom. There are vending services in season. Just a few minutes past the park is marker for where the AT crosses the historic Mason Dixon Line.

The AT where it crossed the Mason Dixon line.
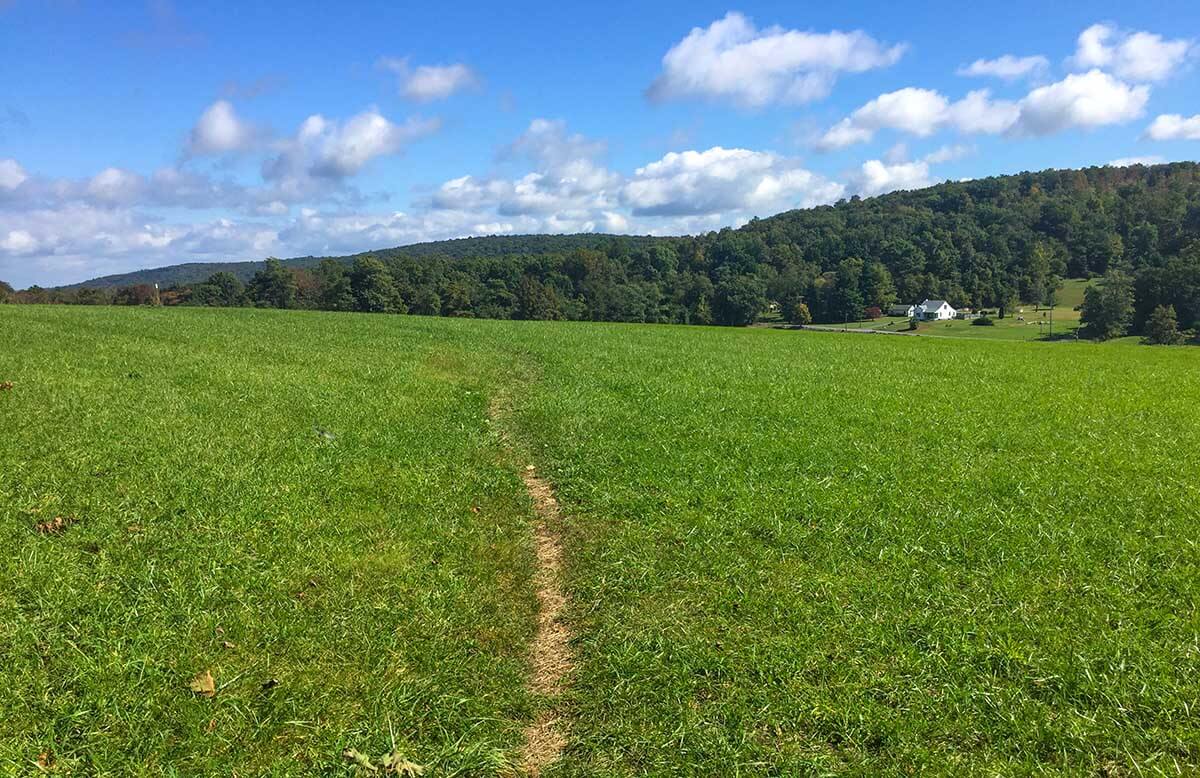
The AT crosses a few farm fields before ascending back up to the Appalachian ridge in the distance.
Deerlick Shelters are nothing to get excited about. But there’s a a really nice spring about 0.2 miles walk from the shelters. And there are some nice campsites along the trail to the spring (and at a comfortable/quit distance from the shelters).
Tumbling Run Shelter to Caledonia State Park
This is one of the nicer portions of the hike. But it is rocky and has a fair amount of elevation change. At 10 miles long it is also a dry and long section. Best to fill up on water from the nice piped spring across the creek from the Tumbling Run shelters. And the shelters have nice shaded picnic tables.
The only water mid-route is at Rocky Mountain shelters. Unfortunately, they are a 1 mile round trip downhill from the ridge. Unless you are camping there, you might not want to walk all the way down just for water.
Caledonia State Park is an unqualified delight. We arrived at the Park in the late afternoon, overheated, grimy and sweaty from a very long day hiking on an unusually hot and humid spring day. We had an ice cream sandwich and a large cold drink from the snack bar, then followed that with a sublime dip in the vast and cold outdoor swimming pool. We emerged an hour later, freshly showered and blessedly cool and comfortable. Needless to say, it was one of highlights of the trip. In addition to the snack bar and pool, the park has a beautiful stream running through it, large shaded picnic areas with many pavilions, and excellent bathrooms.
From Caledonia State Park, it’s only a 30-45 minute walk uphill to Quarry Gap Shelters. These shelters are new and carefully tended and maintained. The picnic shelter had flower pots hanging from the eaves. There was a camp host to guide hikers to camping areas and otherwise help out and make things run smoothly.
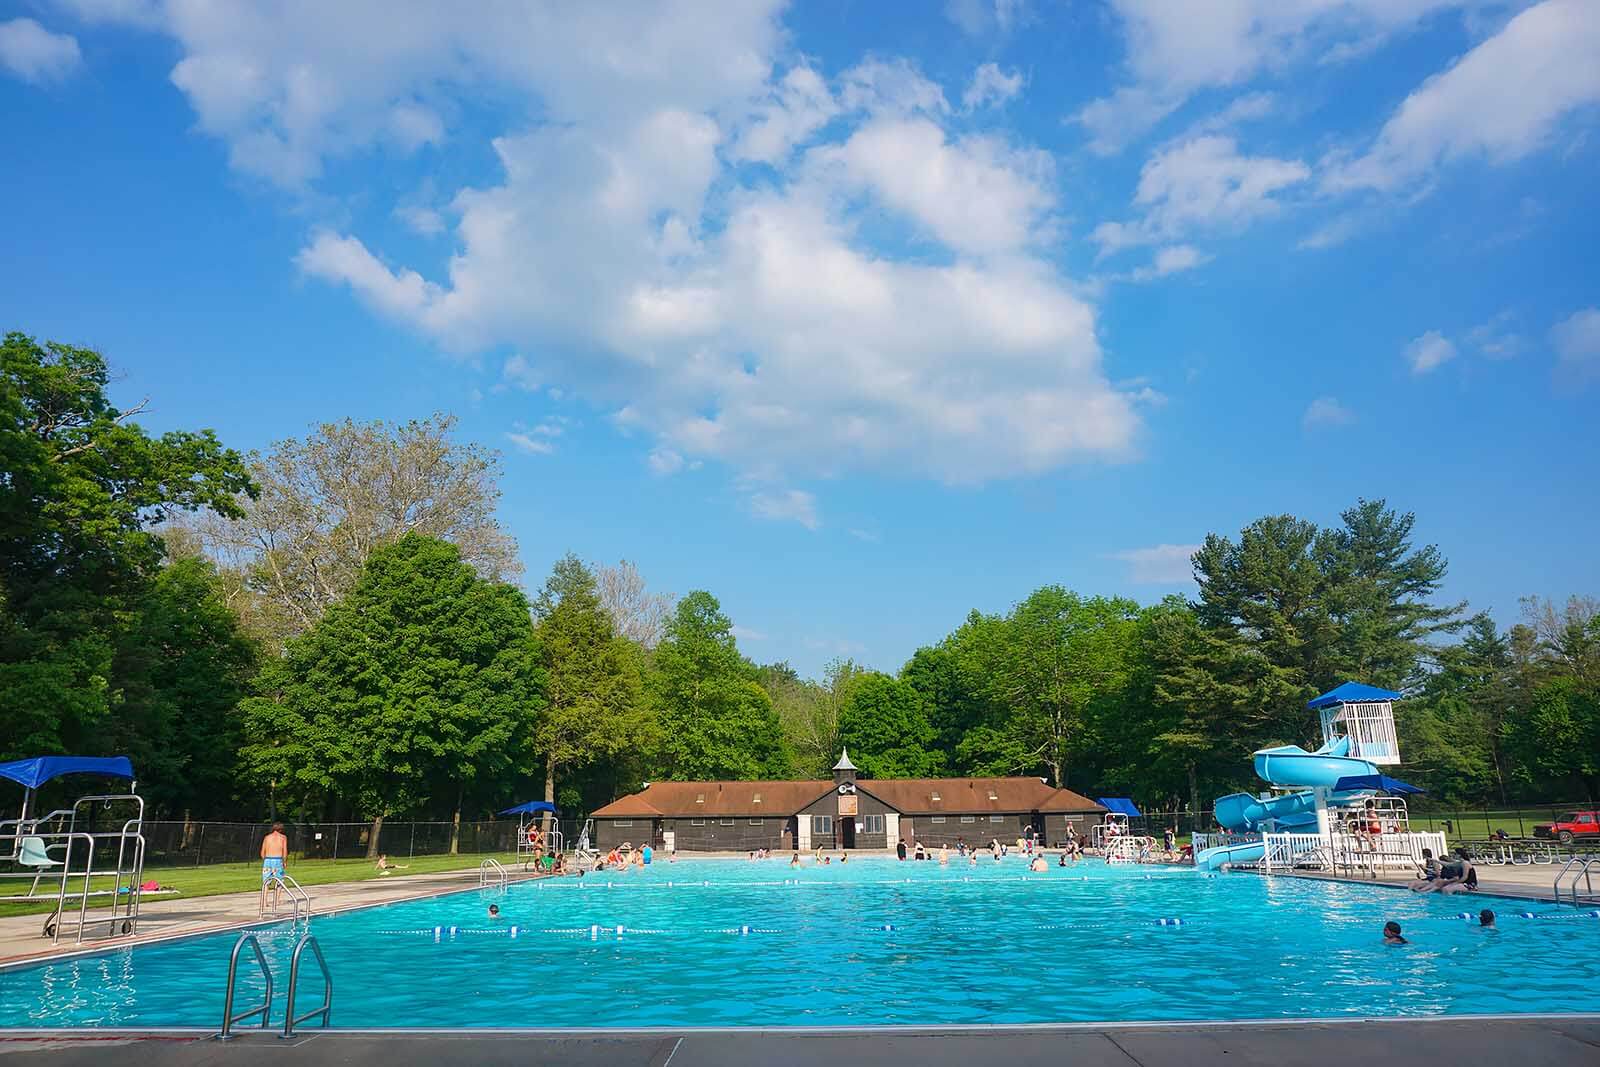
In season, make sure you take a sublimely cooling dip in the vast outdoor public pool at Caledonia State Park. [also in season, there’s food and ice cream at the pool’s concession]
Quarry Run Shelters
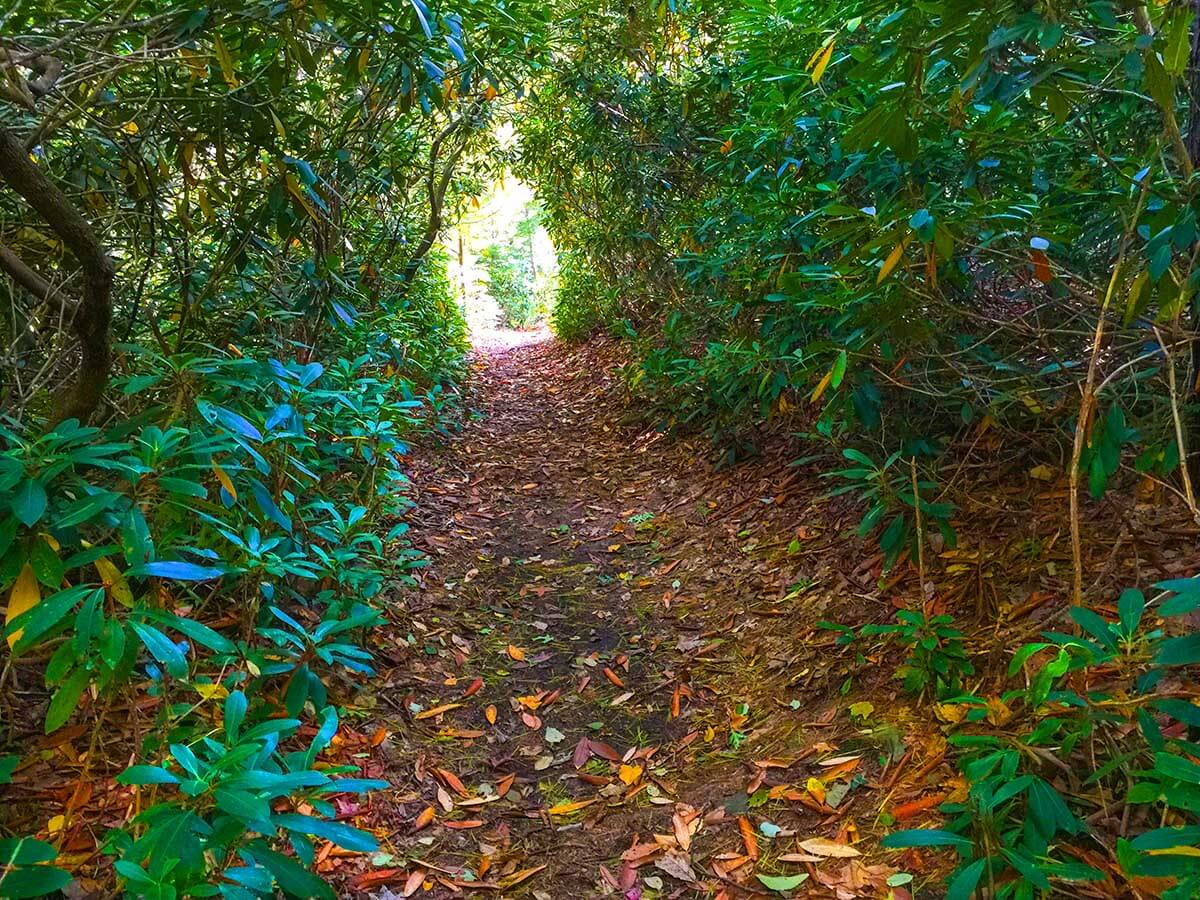
Rhododendron tunnel on the way to Quarry Run Shelters.
Birch Run Shelter
Birch Run is a nice shelter with grassy camping around it. There is small stream in front of the shelter and the larger stream, Birch Run itself, is only a few hundred feet further down trail. There is also a nice camp on the other side of Birch Run.
Appalachian Trail Midpoint(s)
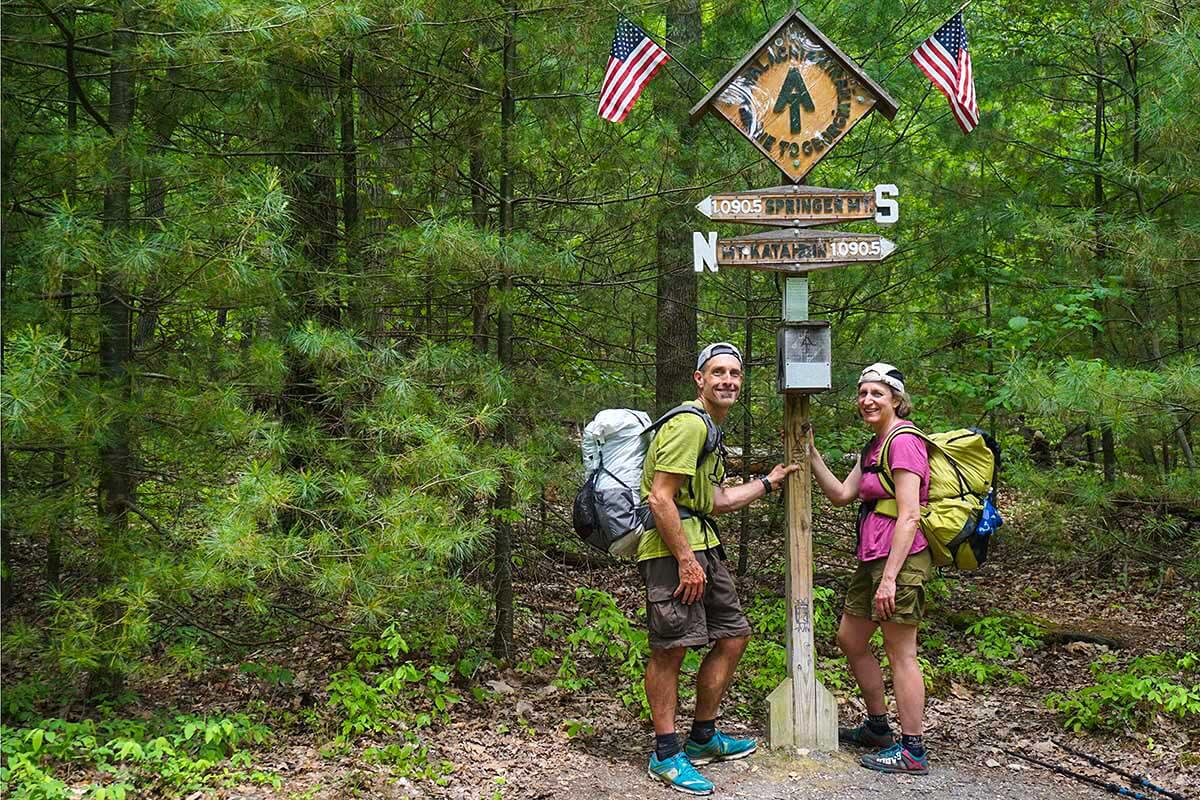
The historic or traditional mid-point on the AT is just a few miles before you enter Pine Grove Furnace.
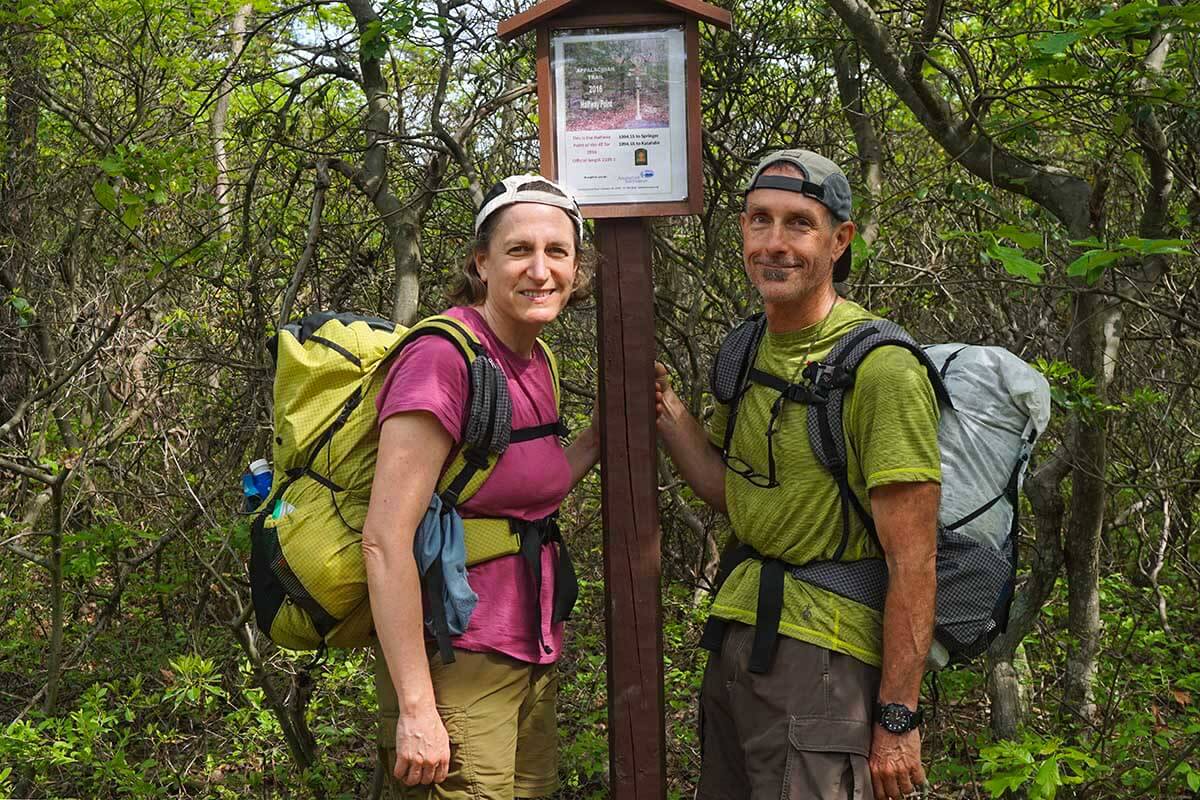
The exact mid-point of the AT varies from year to year due to re-routing and other trail changes. You need to pay attention to not miss this much smaller sign. (It’s generally south of the historic marker in the photo above.)
Pine Grove Furnace
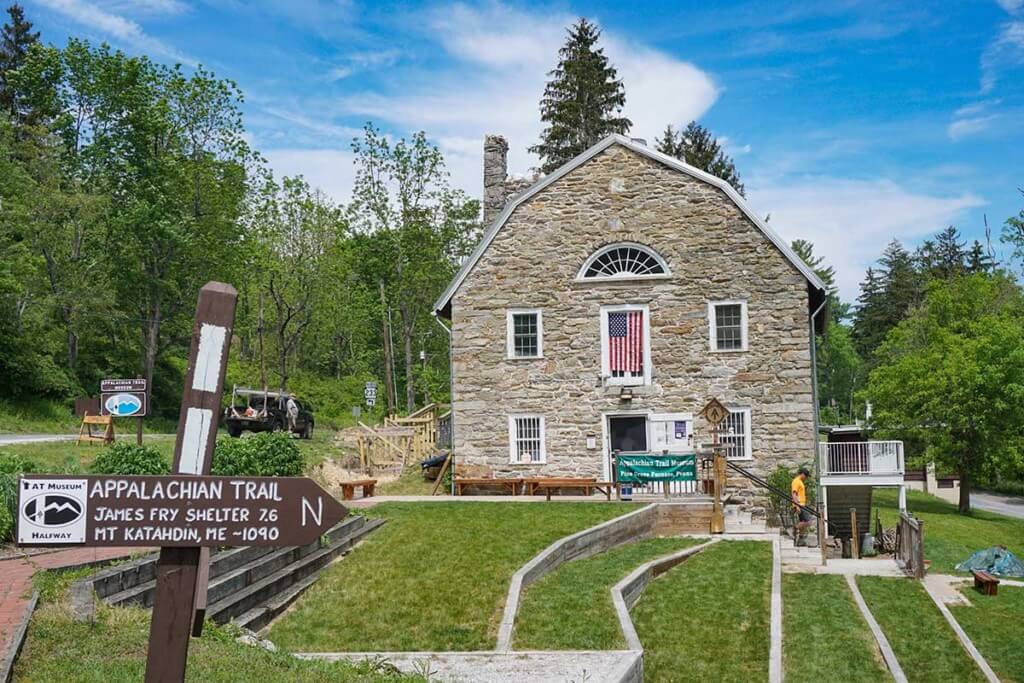
The Appalachian Trail Museum in Pine Grove Furnace State Park. It’s in a 200 year old grist mill.
Pine Grove Furnace is an excellent stopping point on the AT. It has:
- The Pine Grove Furnace General Store, which has limited food, groceries & camping supplies; and a short-order counter serving hamburgers, sandwiches, ice-cream, shakes, etc.
- The store is where thru-hikers traditionally celebrate “1/2 and 1/2,” reaching the halfway point on the AT and by attempting to eat a half gallon of ice cream.
- Lodging at the Ironmasters Mansion Hostel
- A pleasant campground (fee) with excellent facilities
- A public swimming lake (in season) with free showers.
- Historic site/remains of the Pine Grove Iron Works/Pine Grove Furnace. In operation 1764 to 1895.
- The Appalachian Trail Museum housed in a 200 year old grist mill.
James Fry Shelter
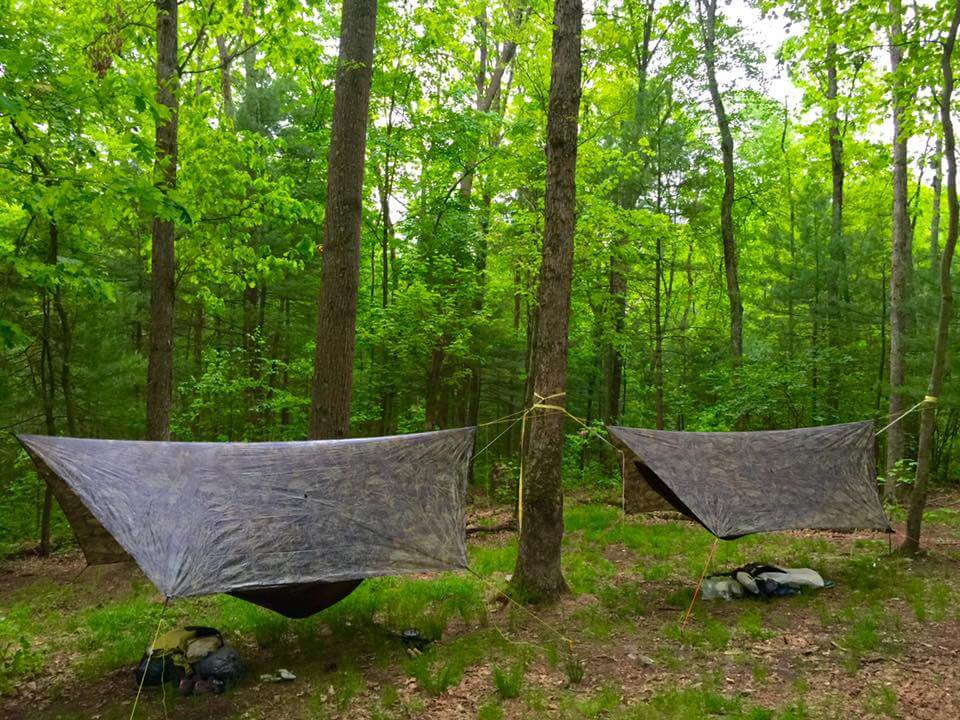
The James Fry Shelter located between Pine Grove Furnace and the Cumberland Valley: Cozily hanging out in our hammocks with light rain pattering on our huge hex tarps. The full force of tropical storm Bonnie would hit sometime overnight. We woke up happy and dry the next morning
The start of two fun “rock mazes” along the ridges just before you drop into the Cumberland Valley.
Entering the Cumberland Valley
Note: After the Alec Kennedy Shelter there are no official AT Shelters until the Darlington Shelter 18 miles down the trail.
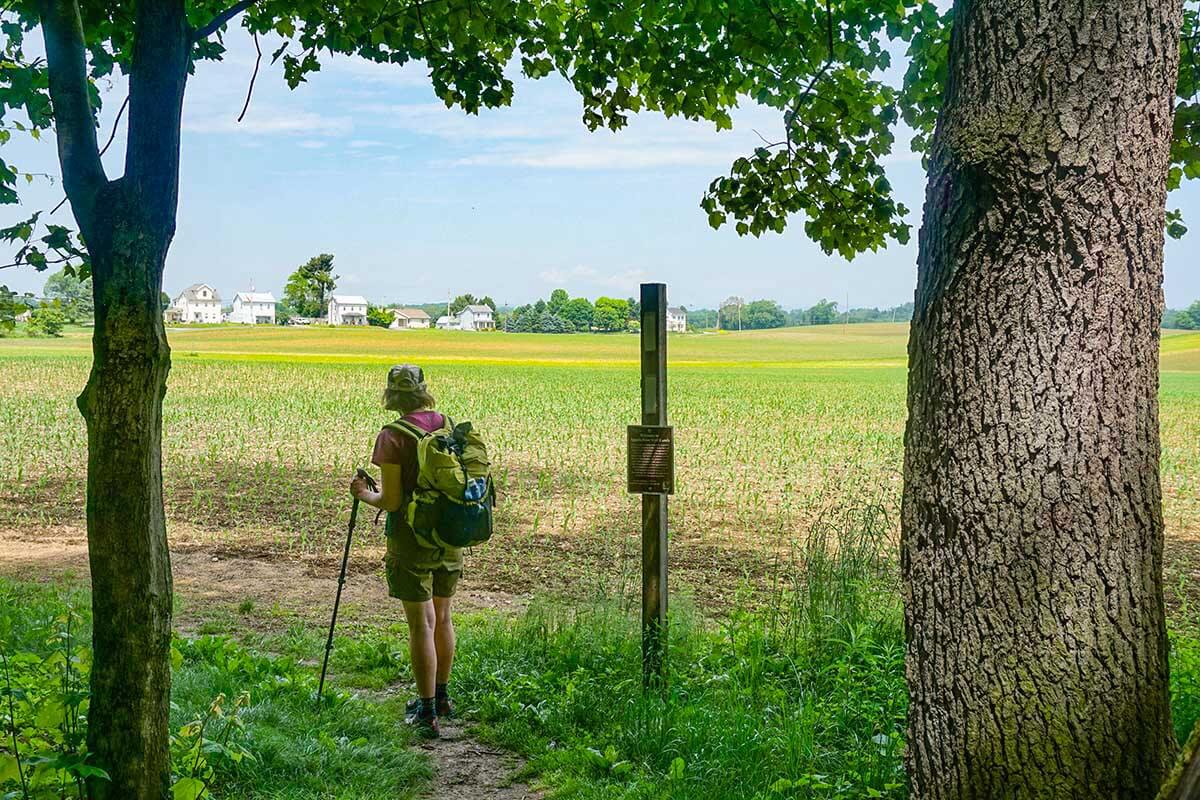
After after almost 100 miles hiking along ridges and through woods you break out into the idyllic farmlands of the Cumberland Valley.
Boiling Springs PA – 1st option to uber to train
Boiling Springs is a lovely, historic mill town surrounding a large mill pond (now “Children’s Lake”). At mile 98 it is the first obvious opportunity to take an Uber to the Amtrak Station in Harrisburg PA. Cost of ride is approx. $25 to $35 and around 30 minutes.
There are a number of lodgings, a couple of food stores and a few restaurants in Boiling Springs. There is also a free campground. There’s a nice public pool in town with showers (get $3 off admission at the ATC HQ Office).
The Appalachian Trail Club Mid-Atlantic Regional Office is along the shore of the lake. It’s definitely worth a visit—it has a lovely porch for sitting in the shade, trail needs, maps, and fuel.

The AT crosses over this bridge into the historic mill town of Boiling Springs.
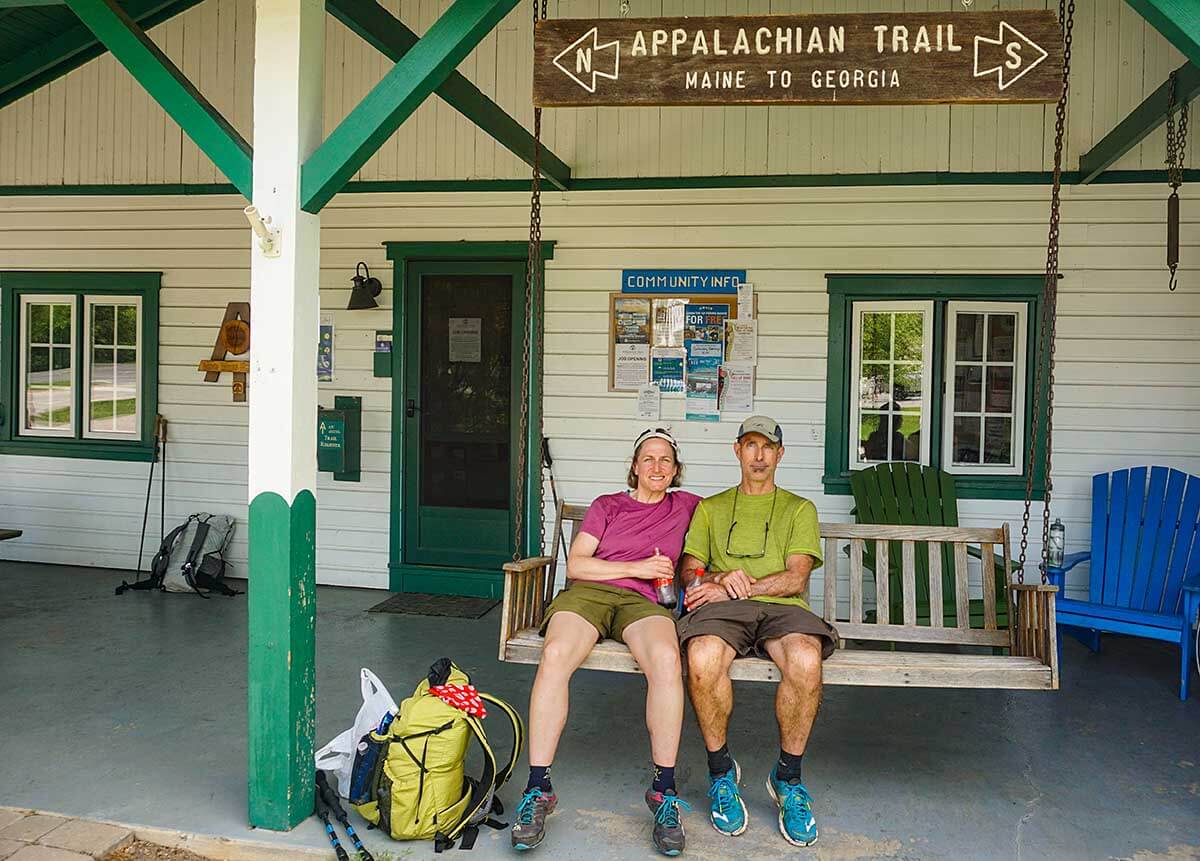
The Appalachian Trail Club Mid-Atlantic Regional Office is a great place to stop and rest on their shaded porch. There’s water and a nice store inside.
Crossing the Cumberland Valley
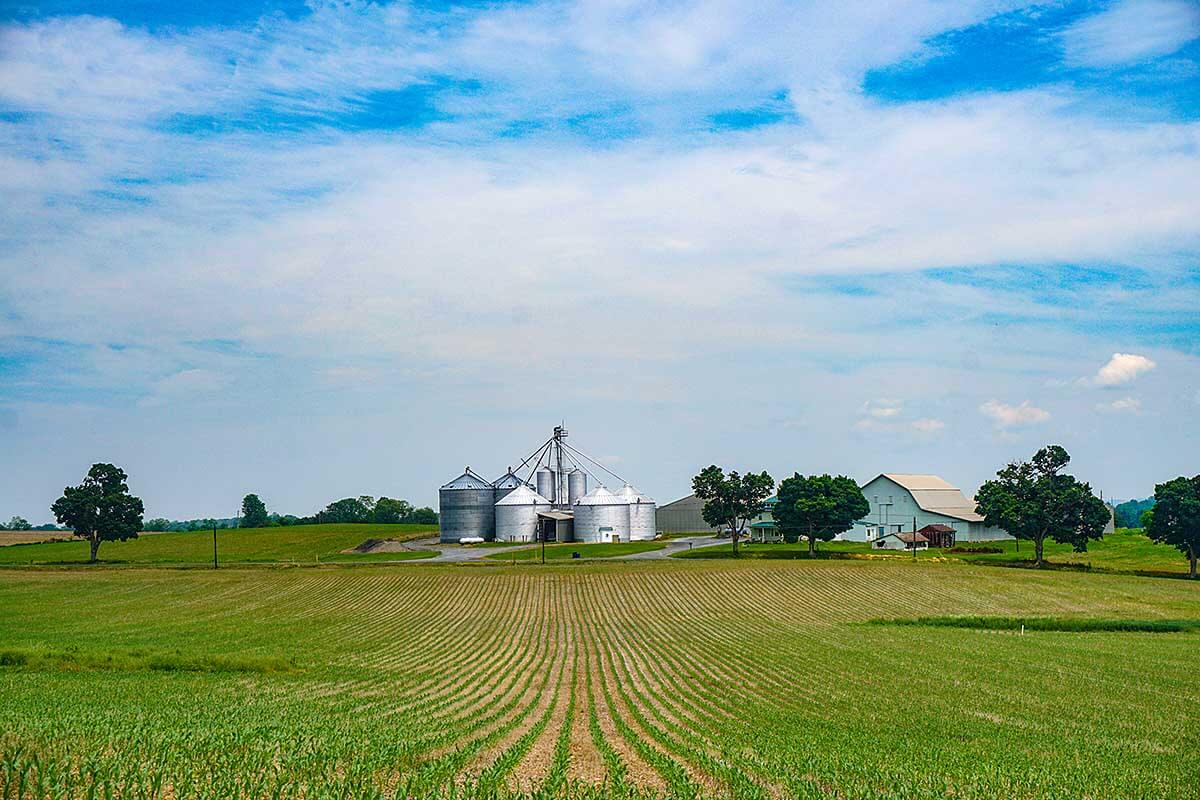
The fertile farmlands of the Cumberland Valley run along both sides of the AT.
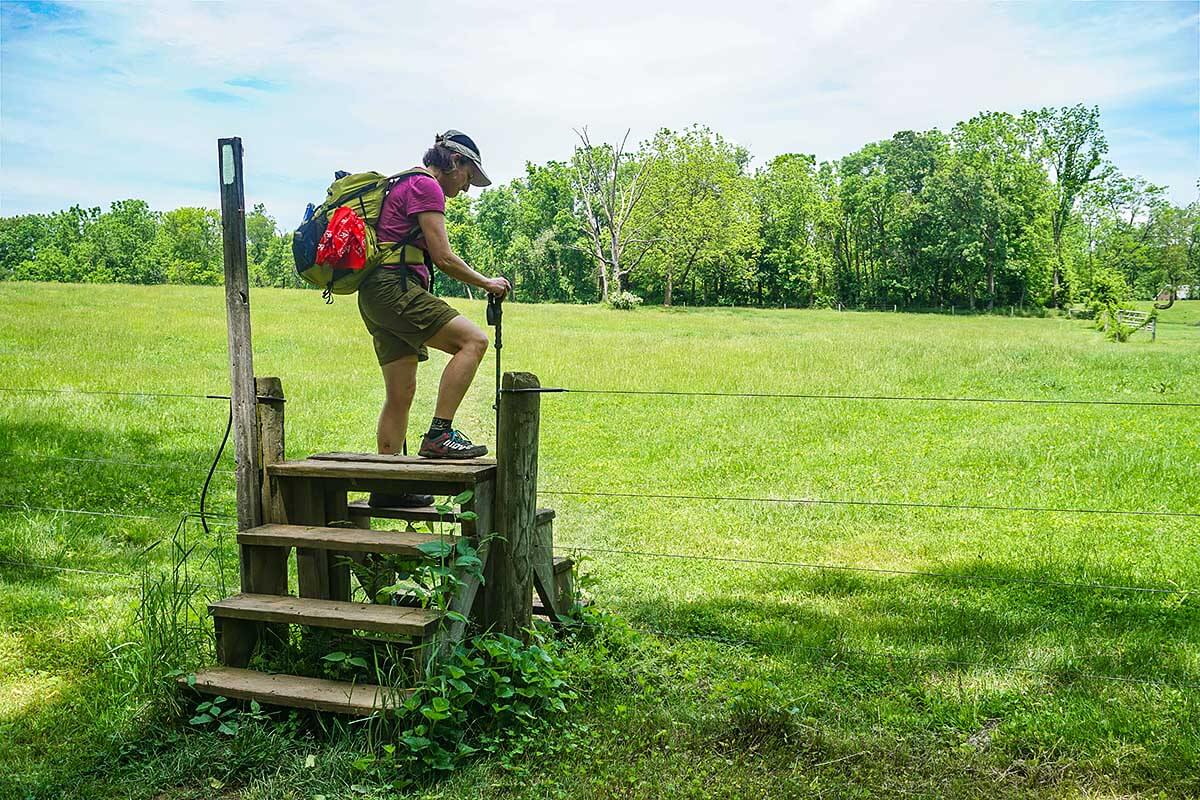
There are a number of fun fence stiles like this in the Cumberland Valley.

Pre-civil war graveyard alongside the AT in the Cumberland Valley. Many where buried 20-30 years before the Gettysburg campaign.
Leaving the Cumberland Valley to Trip End in Duncannon PA
This section Starts with lots of walking through bucolic farm fields and hedge rows. Then you exit the valley by climbing the two ridges of Blue Mountain and Cove Mountain before dropping into Duncannon PA.
- From Boilings Springs to Duncannon PA, pretty much every crossing of a major road is a potential place to Uber to the Amtrak Station in Harrisburg PA. See trip logistics section.
- There is no camping along the AT for this section.
- Spring water is much harder to find. And we were less happy about getting water from streams running through farmland and moderately populated areas. Altho there are some options to get spigot water along the way.
- Darlington and Cove Mountain Shelters are the last two AT Shelters of the trip: These shelters are respectively at the top of the last two ridges of the trip, Blue and Cove Mountains.
Hawk Rock
This rocky promontory offers superb views of the Duncannon area. It’s a stop on the Audubon’s Susquehanna River Birding and Wildlife Trail, and a famous rest stop for hikers on the Appalachian Trail.
Duncannon PA – the end of the trip
Uber to the Harrisburg Train Station is approx. $20-$30 and about 20 minutes. Duncannon PA is a very hiker friendly town. Their is a riverfront campground in Duncannon for a modest cost. There are also number of lodging options, food stores, restaurants and even an ice cream store.
Note: Duncannon is a historic river town on the Banks of the Susquehanna River just outside the Harrisburg metropolitan area. Duncannon is just downstream from the Juniatta-Susquehanna River confluence at Clarks Ferry and sits below the impressive the Kittatinny Ridge. The town had historic impact as a trading crossroads in Pennsylvania’s colonial era. From Conestoga freight wagons to canals, railroads, and highways, the Duncannon was a major influence on the region’s transportation.
Logistics – getting to and from trip start and trip end
Trip Start: getting to Harpers Ferry, WV from Washington, DC
Harpers Ferry is easily accessed from Union Station in Washington DC. The first train of the day arrives in Harpers Ferry just after 5:00 pm. The $13 Amtrak 29 Capitol Limited: 4:05 pm “Washington – Union Station, DC (WAS)” to 5:16 pm “Harpers Ferry, WV (HFY).” Other options are the MARC Brunswick Line commuter trains arriving at 6:05pm, 7:18pm, and 7:54pm, and 9:00pm (weekdays only), see MARC train schedule.
Need to Start from another city in the North East or Mid-Atlantic?
Amtrak’s DC Union Stations is accessible by train from most of the East Coast. See Amtrak trip planner.
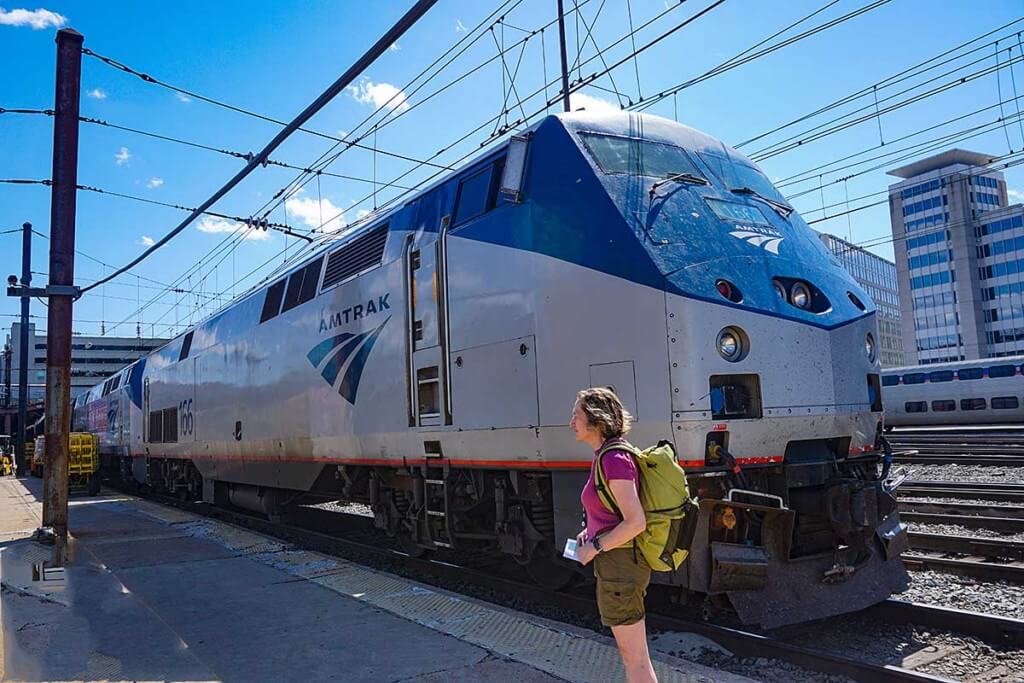
Rail yard at Washington DC Union Station
Trip End: from Boiling Springs, PA or Duncannon, PA back to Washington DC
Trip end to the Harrisburg, PA Amtrak Train Station (HAR)
- Uber – We took Uber from our trip end to the Harrisburg Train Station. It took ten minutes for our car to arrive and 20 minutes to the train station, costing around $30. This works equally well from Boiling Springs or Duncannon, PA.
- Bus from Duncannon, PA – Although we didn’t take it, there appears to be a once daily, morning CAT commuter bus Route 23 from the Clarks Ferry Bridge Park and Ride – CAT and Carpool (it’s essentially on the AT, south shore of the Susquehanna River – here’s its location on Google Maps). It’s a 10 minute walk from the N 6th St & Boas St bus stop to the Harrisburg train station.
To Washington – Union Station, DC (WAS)
- From the Harrisburg Train Station there are number of daily trains back to DC. We took the Amtrak Keystone Service to Philadelphia, PA 30th Street Station (PHL) and transferred to the Northeast Regional to Washington – Union Station, DC (WAS). Approximately 4-5 hours and $80 to $120.
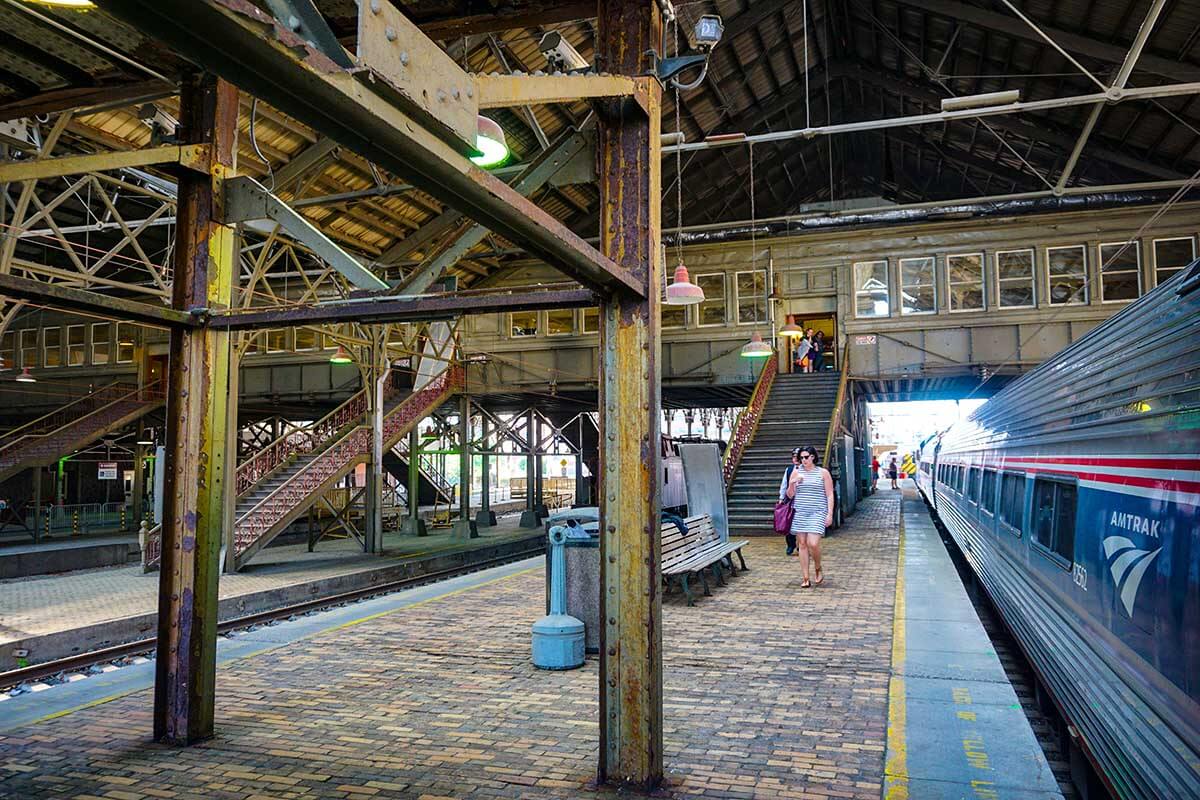
Bording the train in Harrisburg PA. It’s a short 1.5 hour ride to the Northeast train hub of Philadelphia’s 30th Street Station.
Lodging in Harpers Ferry
If you decide to stay overnight in Harpers Ferry, it’s best to book well ahead. Trip Advisor is a good place find a room. The historic town and National Historical Park are popular destinations. Even for mid-week reservations many B&Bs are booked weeks, even a month or more in advance (many with 2 night minimums on weekends).

The lower, historic section of Harpers Ferry. The upper portion of the town is up and to the right of the train station (lower right of the photo at the end of the train trestle). This view is from Maryland Heights. The hike up here is highly recommended.
The Lower and Upper Sections of Harpers Ferry
The town of Harpers Ferry is in two sections. 1) The small lower historic section by the river and the National Historical Park and 2) the larger upper section, about 10-20 minutes walk uphill. In the lower section, lodging is limited and competitive. There are a just few nice B&Bs in the lower section and they tend to be fully booked weeks or even month’s in advance. The Town’s Inn is a traditional place for Appalachian Trail hikers to stay. In addition to rooms, it has a small hostel, a cafe, a bistro and a small store with a good selection of trail food and supplies. Be forewarned, it was recently featured in the reality TV series, Hotel Hell (an amusing watch).
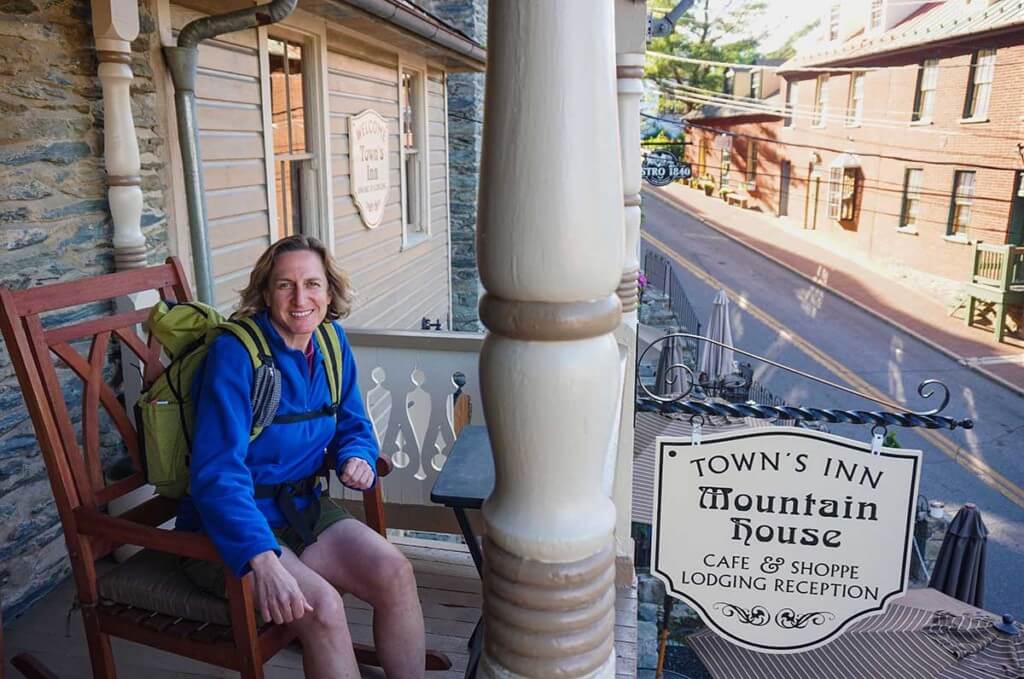
Rocking chair on the porch of the Town’s Inn, in the historic lower section of Harpers Ferry.
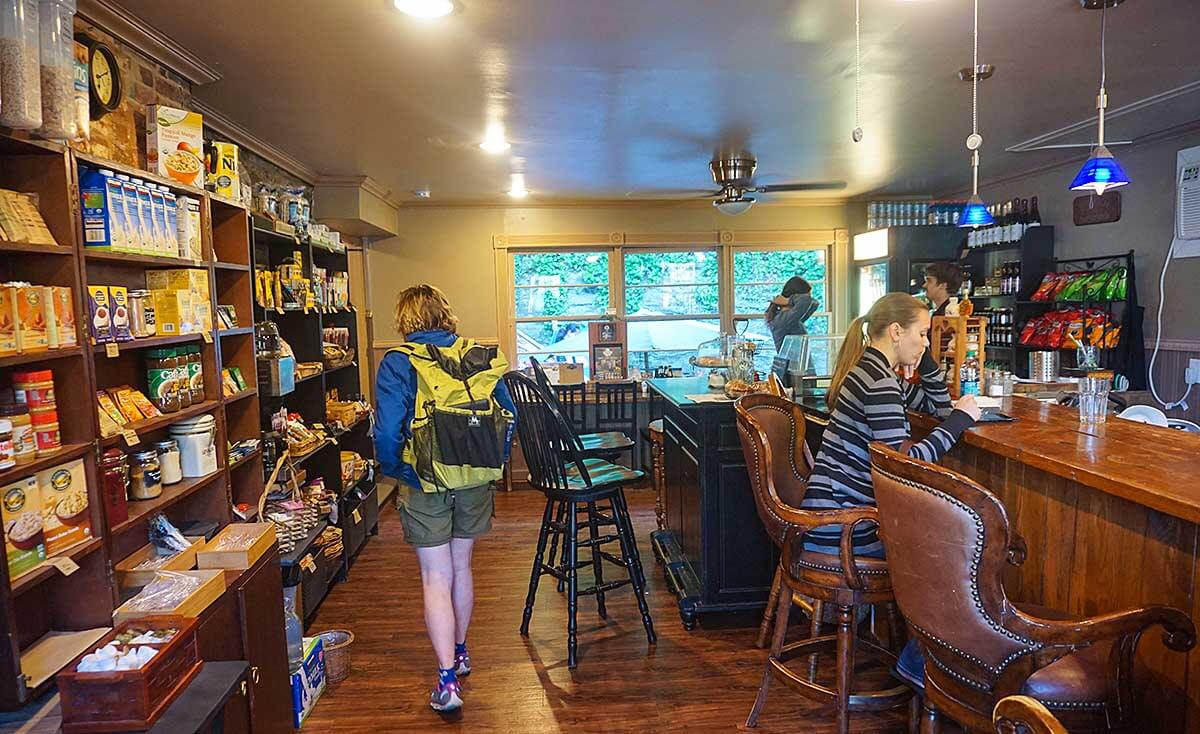
The Town’s Inn (featured on Hotel Hell) in Harpers Ferry has a good supply of food for hiker re-supply, a few camping supplies, and a cafe.
Lodging options are more plentiful in the upper section of the town, but there are fewer attractions and restaurants—altho the Appalachian Trail Conservancy Headquarters are here and also the best coffee shop in town, the Guide Shack Cafe which opens at 5:00 am for those wanting a very early start with coffee/breakfast. Many lodgings in the upper section provide free shuttle to and from the lower section. Some will even meet your train. We stayed at the Jackson Rose Bed & Breakfast and enjoyed it.

The Jackson Rose B&B is one of many nice lodging options in the upper section of town.
Fun things to do in Harpers Ferry besides the National Park
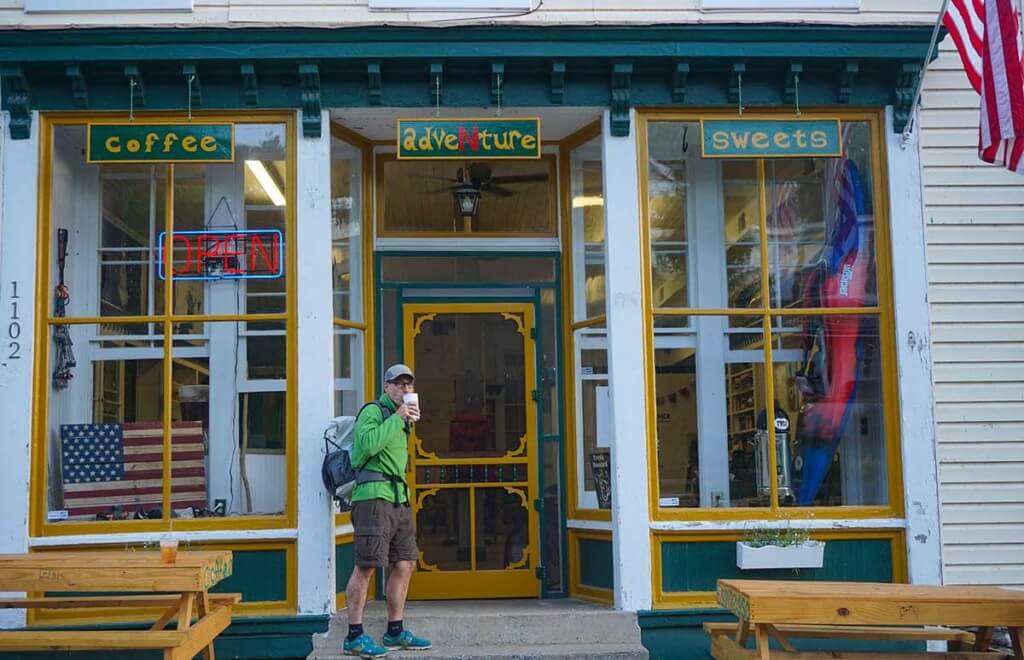
Adventure Alan under the sign for Adventure and as always finding the best coffee in town! The Guide Shack Cafe is veteran owned, veteran operated and sources it’s coffee and food from veteran owned Co’s! It opens at 5:00 am for those wanting a very early start and coffee/breakfast.
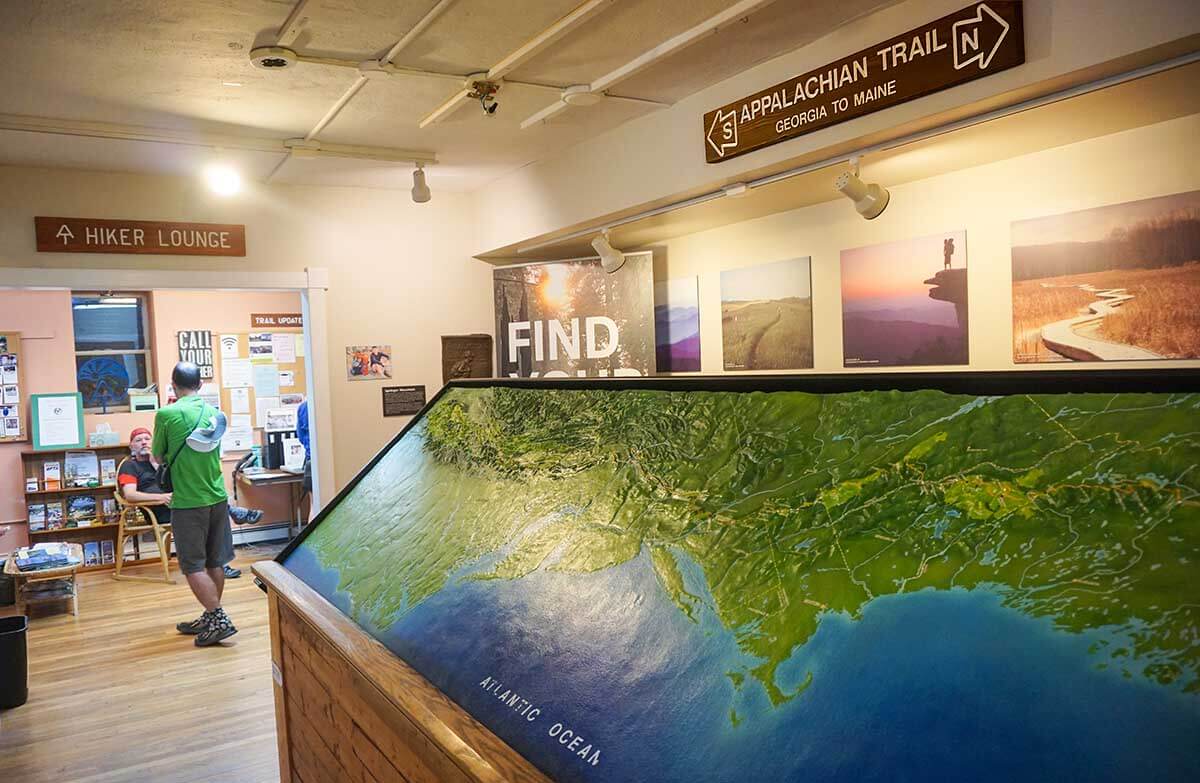
Appalachian Trail Conservancy Headquarters is a fun place to stop. There’s a great relief map of the entire AT, a well stocked bookstore, some camping supplies, an AT hiker lounge where you can check Web/email. There’s friendly and helpful staff and of course, AT hikers milling around.
Most people know about Aron Ralston of “127 hours,” who cut his arm off to save his life. A major take-away from this was that he should have left a Trip Plan with a friend. Something as simple as a short note saying where he was going and what to do if he wasn’t back on time would have gotten him help far sooner than 127 hours. This is why you should make a Trip Plan (even a very short one) and leave it with someone for every backpacking trip. [Picture above is the author about 12 miles from where Aron Ralston’s arm was pinned by a loose rock.]
You think disaster won’t happen on your trip – but you might be wrong
No matter how incredibly competent you are and how meticulously you’ve prepared for your trip, an accident or emergency can happen to just about anybody, at any time. It happened to Aron Ralston with a random loose rock. And similarly random things have happened and will happen to many others. A fluke accident, a flare up of a pre-existing medical condition, or even the odd event like an appendicitis, or acute altitude sickness, etc. can change your trip from fun to damage-control-mode in an instant.
The Life you Save Might be your Own! or Why you Should Make a Trip Plan
If you make a Trip plan you stand a much better chance of getting help or a rescue.
And stuff can happen. Personally in the last 5 years:
- I’ve participated in an immediate, life-threatening helicopter evacuation (not my bad).
- Received in-field medical instruction on how to lance an abscessed tooth though the gum with a pocket knife (yes, my tooth!).
- And locally we had a backpacker die, due in part to not having a Trip Plan and therefore, not getting rescued in time.
Finally, even if you don’t do it for yourself (or your loved ones!), make a Trip Plan as a courtesy to the Search and Rescue Personnel that may need to come look for you. These folks are mostly volunteer and it’s not respectful to have them spend countless days and hours searching for a missing person with little or no information.
What’s in this Article
The main purpose of this article is to make it fast and easy to make an effective Trip Plan. That way you’ll always do it!
- Templates to make your own Trip Plans. Instructions on how to create & use your own Trip Plans
- Who you should leave your trip plan with.
- Limitations of your Trip Plan (and SOS devices like DeLorme inReach and SPOT Satellite Messenger)
or What they can’t do for you…
What’s not in this Article
- A treatise on medical treatment for an emergency (Consider a Wilderness First Aid, or Wilderness First Responder course if you are interested)
- Advice on when you should (or should not) activate your SOS device. Always a topic of lively discussion!
The 3 Most Important Elements for a Trip Plan
It’s far better you make short Trip Plan than to not make one at all. In that vein, a Trip Plan needn’t be a lengthy or complicated.
Here are the 3 Most Important Elements for any Trip Plan:
|
For Aron Ralson, communicating this minimal amount of information via an email, text or phone call to a friend (in all of 1-2 minutes) would have likely had him rescued within 24 hours.
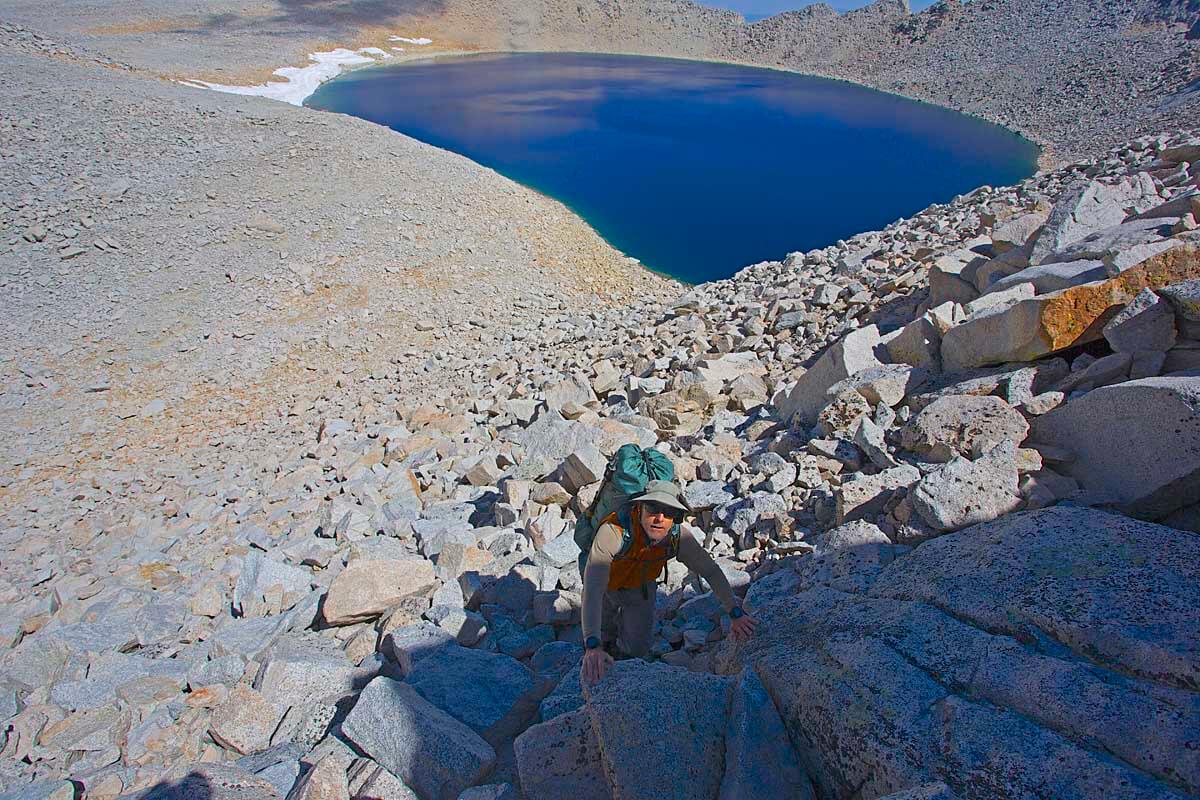
When you’re traveling off-trail in terrain like this it’s good to have a Full Trip Plan Document. On the Southern Sierra High Route. [photo Don Wilson]
Example Trip Plans – for you to fill out and use
Below is how to create your own Trip Plan from a Simple Trip Plan (“low risk” trips. e.g. hiking on the Appalachian Trail) to a Full Trip Plan (“high(er)” risk trips, e.g. dropped into Alaska by bush plane a zillion miles from anywhere). Note: Everybody has their own take on what is a risky trip. A low risk trip to one person may seem crazy risky to another person. As such, “Low Risk,” “Moderate Risk” and “High Risk” are in parenthesis for the rest of this article.
A Simple Trip Plan
When might you use a Simple Trip Plan?As stated previously, it’s far better you make short Trip Plan than to not make one at all. But here are some instances where a Simple Trip Plan might work well:
Example Trip: Section hike of the Appalachian trail with a friend (not solo) in seasonable weather |
Example of a Simple Trip PlanThe following is an example of a Simple Trip Plan. It takes the form of a short email to your trip-tracking-emergency-contacts. Obviously, if you want to include more information you can certainly use the more detailed template document, Full Trip Plan Document for Moderate to High Risk Trips (next box below), and fill it out with the information you feel is necessary and important for your trip. To: Trip-tracking-emergency-contacts
[Note that this quickly covers all of the “3 most important elements for a Trip Plan” in an email format] |
A Full Trip Plan for “Moderate Risk” and “High Risk” Trips
A Full Trip Plan is a lot more work! It includes things like the gear you are bringing including pictures of your shoe tread & tent; detailed information about each party member including wilderness experience, skills (including medical), personal medical history, etc.; extensive information about the communications electronics you are brining (including communication protocols between hikers and the emergency contacts), URLs for a map of the route, etc., etc. As such, you might not want to include all this information for a basic trip.
When might you use a Full Trip Plan?The following are some things to contemplate when you decide how “risky” your trip is and how much information you want to include in your Trip Plan:
“Moderate Risk” Trip Example: Week-long hike in the Sierra Nevada with a mixture of some on-trail travel and some off-trail side trips with sections of up to class 3 travel (scrambling on rocks using hands as well as feet—no rope needed). “High Risk” Trip Example: 1) A week-long technical canyoneering trip (class 5 rock climbing) in a remote and mostly untraveled desert canyon system. 2) Getting dropped in by float plane to white water pack-raft and climb in Alaska above the Arctic Circle. In these cases there will be more detailed trip information and likely use of a Sat. Phone. |
Full Trip Plan Document for Moderate to High Risk Trips – a template to fill out and useTemplate document – Full Trip Plan for Moderate to High Risk Trips. This is a link. Click to open Template.
|
Selecting an Emergency Contact to Give Your Trip Plan to
Here are some important factors to consider when selecting an emergency contact (trip-tracking-emergency-contact):
- Level headed and reliable. For me this is usually a close family member or one of my trusted hiking/climbing partners. I trust them to seriously monitor my trips and in an emergency do the right thing without drama.
- Familiarity with the area. If I am pack-rafting in Alaska I want someone that is familiar with the terrain and challenges of white water packrafting and land travel above the Arctic Circle. If I am on a Technical Canyoneering trip in Utah, I want someone experienced in canyon travel to be my emergency contact. With less specialized and technical terrain, there are far more people eligible to be emergency contacts.
- Responsiveness. In this day and age, especially for higher risk trips we might be communicating indirectly or directly with our emergency contact. This could be indirectly via location-check-ins or tracks from devices like a SPOT or inReach. Or it can be directly like text messages from an iReach or a call form a Sat. Phone. I want my contact to closely monitor these communications and quickly respond to things like an emergency, or if my trip track hasn’t moved in 24 hours and I haven’t notified them as to why. Or just to reply to my request for a weather update before climbing, etc.
The limitations of a Trip Plan and SOS Devices
Sometimes a timely rescue is not possible. A Trip Plan and/or a SOS Device like the DeLorme inReach and the SPOT Satellite Messenger is not the solution to everything. I have been in some extremely bad situations where rescue was not feasible even if I had sent out an SOS. As they say, the best rescue is self-rescue. And to state the obvious, Goal One is not needing rescue in the first place. So be sensible and safe out there.
Finally, a SOS device should never be considered a license to do silly things or take unnecessary risks.
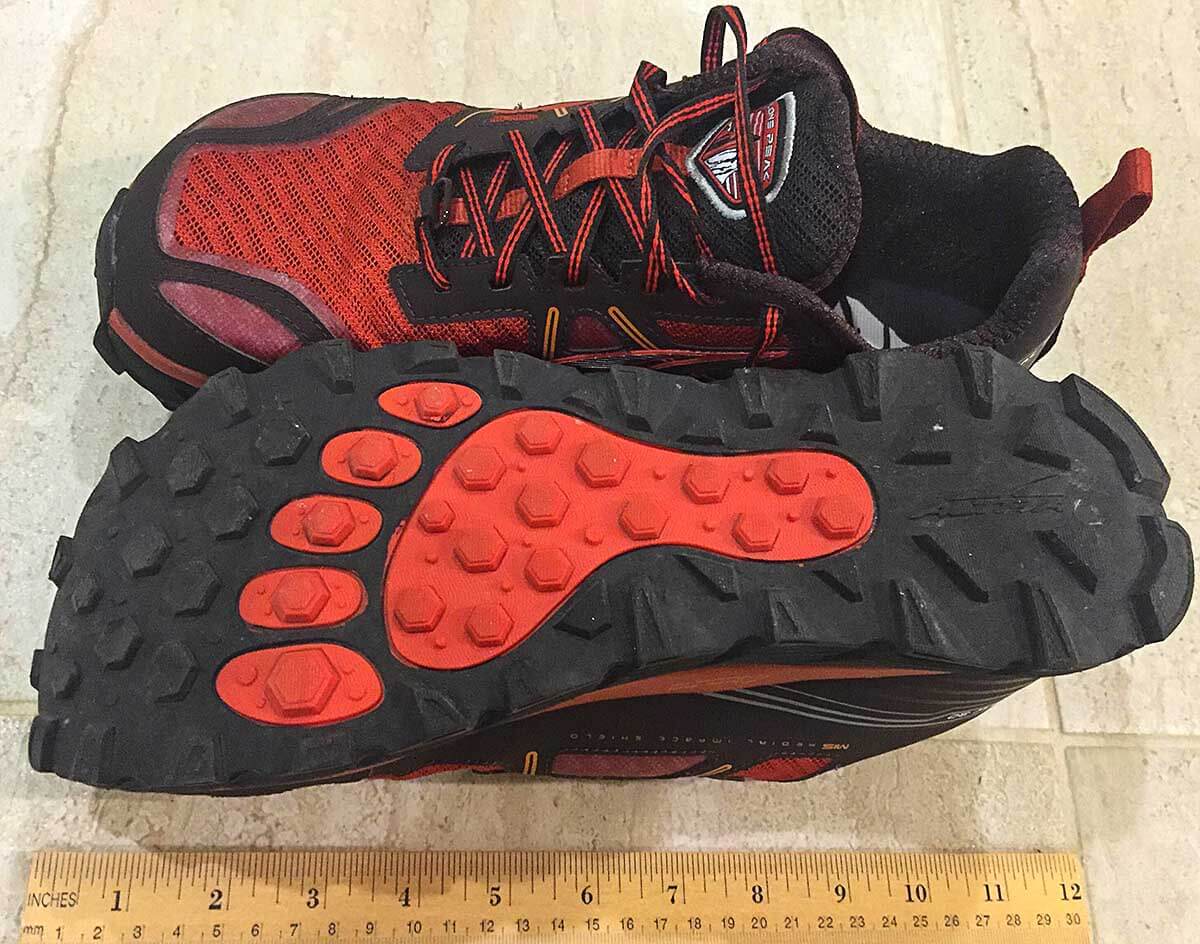
A shoe tread picture for a Trip Plan Document. My Altra Lone Peak 3.0 trail running shoes.
It’s a myth that ultralight backpacking makes you cold, wet and hungry. It doesn’t. In fact, I’ll wager that with my 5 to 9 pounds of ultralight gear I’m more comfortable, sleep better, and eat better than many campers carrying 20 to 30 pounds of conventional/heavier backpacking gear. So, here are 3 Reasons why You Won’t Freeze or Starve UltraLight Backpacking.
Picture above: A 1.5 pound pyramid shelter is an excellent choice for protection from wind, rain and snow. Weighing a fraction of a conventional tent, it also has far more room to relax and spread out.
If 5 pounds sounds a little too light…Our 9 Pound – Full Comfort – Lightweight Backpacking Gear List is likely the best fit for most backpackers. So, if you want to lower your pack weight but retain all the convenience and comfort of “traditional” backpacking, look no further. You’ll be safe, warm and comfortable. This list has served Alison and I admirably on most 3-season trips in the lower 48 and on our trips world-wide. It works!
|
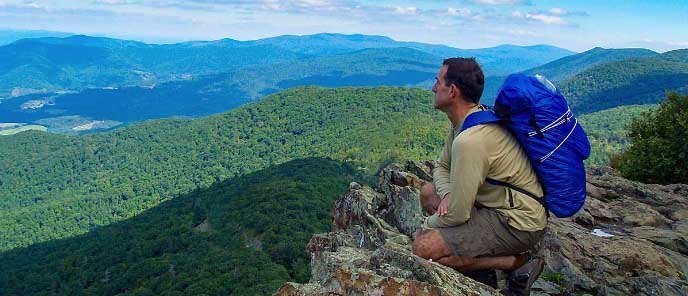
3 Reasons why You Won’t Freeze or Starve Ultralight Backpacking.
- Have good camping skills: Good camping skills rule! They are far more important than the weight of your gear for keeping safe, warm and dry. And by camping skills, I don’t mean the questionable survival “skills” of reality TV—I mean the basic, garden-variety skills that every backpacker knows—like putting on rainwear or a warm jacket when needed, selecting a good campsite, and doing a decent job of pitching a Good UL Tent or Tarp/Pyramid Shelter.
- Take light gear, appropriate for the conditions: I pick the lightest, fully-functional gear appropriate for the actual conditions I backpack in. Light gear like:
- UL Backpack
- UL Sleeping Bag or UL Down Quilt (my favorite!)
- Warm UL Down Jacket, and a light 6-8 oz Rain Jacket
All of these work as well as conventional (heavy) gear at 3 times the weight. - Appropriate for the conditions: I take gear for actual conditions for the time of year and location I am backpacking. E.g. I don’t take 4-pound, 4-season dome tent, a +20F sleeping bag, and a down jacket for a warm May trip on the Appalachian Trail with expected lows in the 60s—you’d be surprised how many people do!
- Pack nutritious high-calorie food: Intelligent selection of food is key:
- My food gives me 3,000 nutritious and filling calories of complex carbs, protein and healthy fats for around 1.5 pound/day.
- This is the same number of calories provided by 2 pounds of average backpacking food.
- Over a 3 day weekend backpacking trip I get as many calories and nutrition, possibly more than someone carrying twice the food weight.
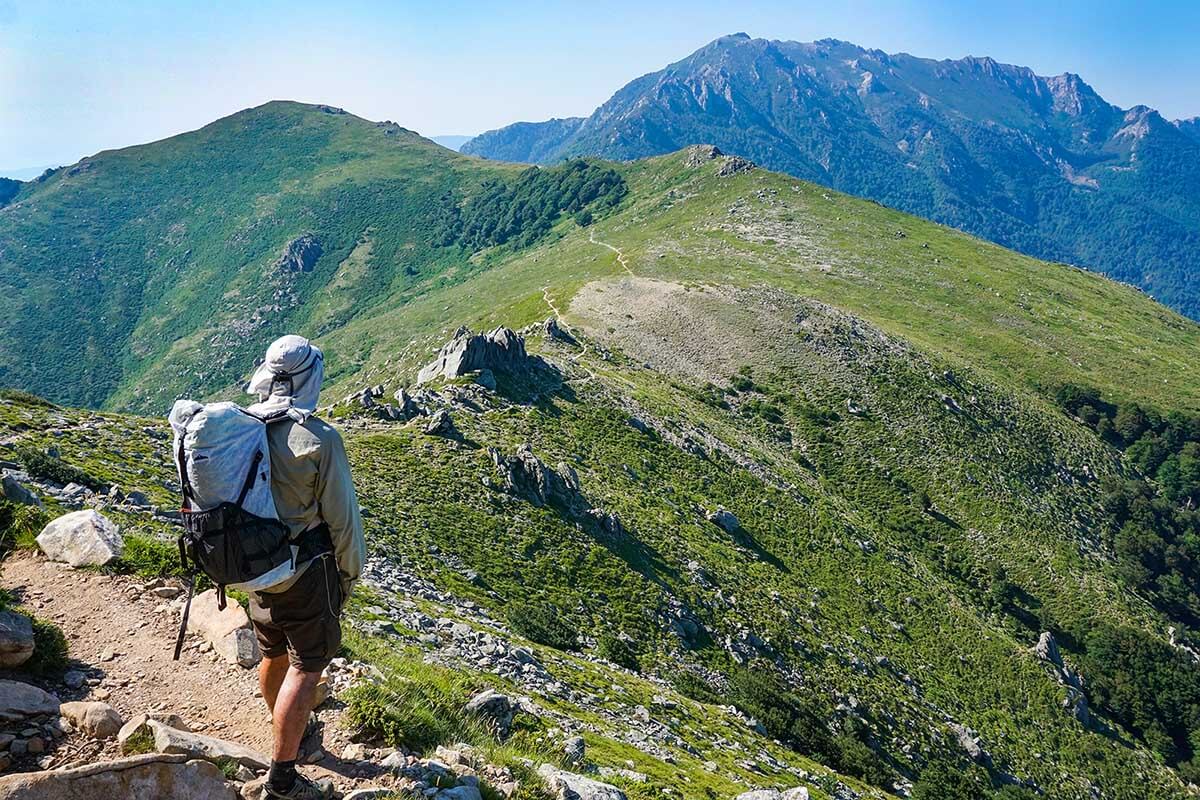
Ultralight done right: warm, dry, well-fed and lovin’ life on the trail!
In Summary
It’s not the weight of your gear but 1) rusty camping skills, 2) poor gear choices and 3) uniformed food selection that will make any backpacker more prone to being cold, wet and hungry. This is just as true for conventional (heavy) backpackers, as it is for lightweight or ultralight backpackers.
Reason 1 – Have Good Camping Skills
Good camping skills are the main reason why you won’t freeze or starve ultralight backpacking. Having confidence in your camping skills, means that you won’t compensate by packing a bunch of heavy, over-kill gear and backup gear. Here are some of what I believe are the most important camping skills:
camping skill 1 – Campsite Selection
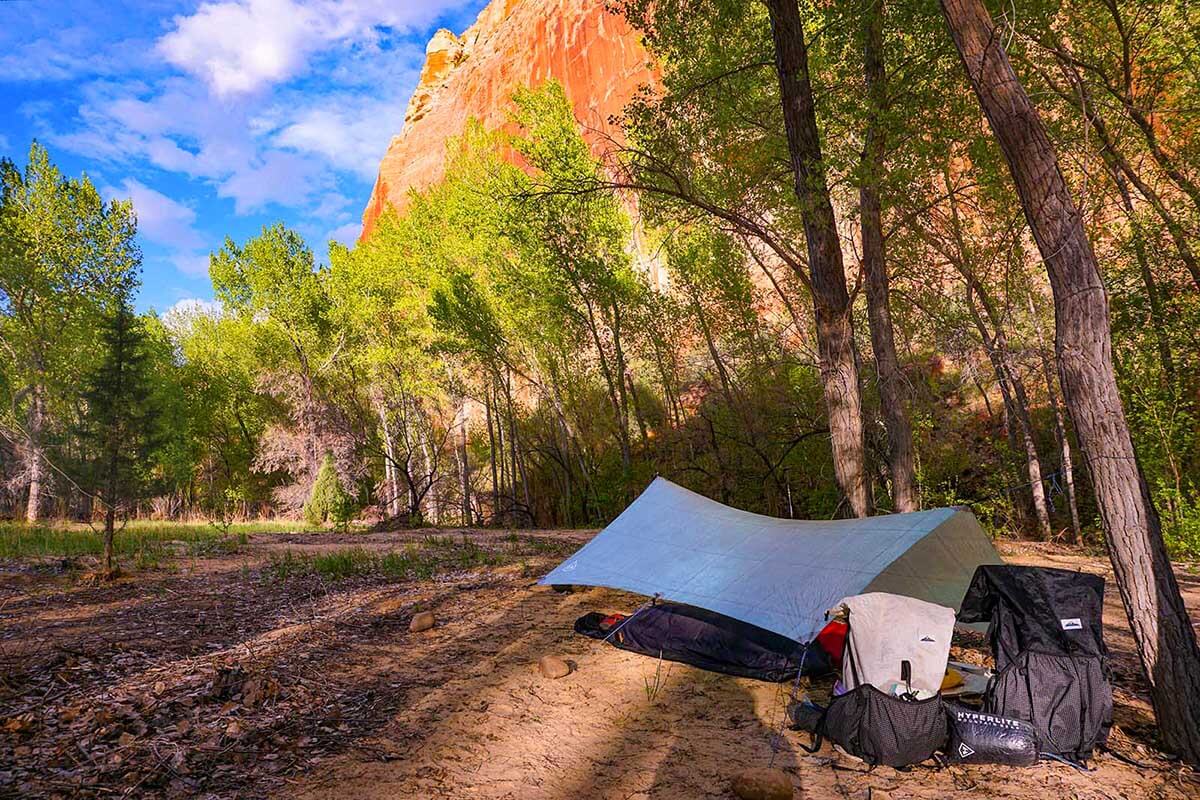
Good campsite selection: While I could have pitched this lovely HMG UL Tarp higher up on the canyon wall on a shelf with great views, I chose to camp in a warmer & more protected place in the trees. And discreetly camping out of sight, away from the trail & in the trees is a favor to others sharing the canyon with me. [Note that one tarp ridgeline is solidly anchored to a cottonwood]
Pitch your shelter in a protected area, preferably in trees.
First, discreetly camping out of sight in the trees, is a favor to others sharing the area with you—rather than advertising your presence to everybody for miles around. Second, trees do a number of lovely things for you:
- Trees provide shelter anchors: for tarps, shelter tie-outs, and hammocks. Far more secure than stakes in the ground.
- Trees block the wind: which keeps you a lot warmer (reduces convective heat loss). It also lowers wind load and stresses on your shelter and tent stakes.
- Trees keep you warmer: Trees prevent radiant heat loss. They reflect the day’s heat back to the ground at night in the same way that a cloudy sky makes it warmer overnight.
- Trees keep you drier: Camping in the trees is also less prone to the heavy dew and condensation of exposed campsites.The worst place for dew is in a treeless meadow at the bottom of a canyon. The best place to be is in the woods on a flat area a few hundred feet above the canyon bottom (or surrounding lower area).
Finally, make sure that your tent is not in an area where water will pool-up or stream through.
camping skill 2 – Know How to Pitch your Shelter
Be solid on this before your trip. It’s not rocket science. Anybody can pitch a tarp or pyramid shelter with just a bit of effort.
- Read and follow the manufacturer’s instructions. They are likely excellent.
- Setup your shelter in the backyard, or nearby park/playing field a few times before you go. If you are backpacking with a partner do this together. You should be able to easily pitch a tarp or pyramid shelter in 3 to 5 minutes.
- For a basic tarp, there’s no need to get fancy. An A-frame pitch between two trekking poles (or better, two trees) will work fine 95% of the time. In strong winds, pitch it lower to the ground and flatter.
- Orient your shelter to the expected wind direction. Orient tarps with the narrower/rear end low and into the wind, pyramid shelters/tents with the door facing away from the wind.
- In very strong winds, use the the additional tie-out points on your shelter.
- Use sturdy Y-stakes. They have great holding power, and you can pound them into rocky ground. Always carry 1-2 spare stakes and a few hanks of spare cord.
- Shelter cord adjusters can slip. Know a few basic knots and guyline management—a figure 8 loop at the end of a line; a girth hitch and a trucker’s hitch for guyline tension adjustment.

Safe, well protected, warm and dry at 11,000 feet in a 1.5 pound pyramid shelter: We are above tree-line so it was really important to properly pitch our shelter and use lots of sturdy Y-stakes. In this case we used 8 stakes. (And had the option to put in 4 more if needed.)
camping skill 3 – Keep Hiking When It’s Cold
Moderate but consistent movement (it needn’t be at all tiring or strenuous) is the key to keeping warm when it’s really cold.
- Even walking 1 to 1.5 miles per hour should keep your internal, metabolic heater going, and keep your hands and feet warm. If you are getting tired you are going too fast!
- Minimize stops to essential needs, and don’t make them longer than necessary. You get cold quickly, and it takes a long time to warm up again. If you’re starting to chill it’s time to move.
- If you really need to stop for a longer time (over 5 minutes), try to do it in a warmer, more protected area and put on warm clothing (e.g. down jacket) as soon as you stop. Take your warm clothing off just before you start hiking again. Or even after you been walking for a few minutes.
Late winter conditions, windy and in the 20s on the Appalachian trail: I’m warm and comfortable hiking at my own pace, wearing just a 6 oz base layer, a 7 oz fleece shirt (mid-layer) , a 2 oz fleece hat, and 2 oz gloves. My entire pack for 100 miles including food and water is only 10 pounds.
camping skill 4 – Clothing Adjustments
- Put on just enough clothing to keep you warm when moving. Overdressing, getting hot and then sweating out is a great way to get wet and then really cold. It’s very easy to get clothing wet, but it takes a long time to dry it out in cold and damp weather. Wet clothing is cold clothing and unhappiness.
- Only add warmer clothing when you can no longer stay warm walking at a comfortable pace.
Note: I have a lot of experience staying warm and comfortable into the 20’s F when hiking at my own pace, wearing just a 6 oz base layer, a 7 oz fleece shirt (mid-layer), a 2 oz fleece hat, and 2 oz gloves. [Although my warm down jacket comes out mightily fast at stops!]
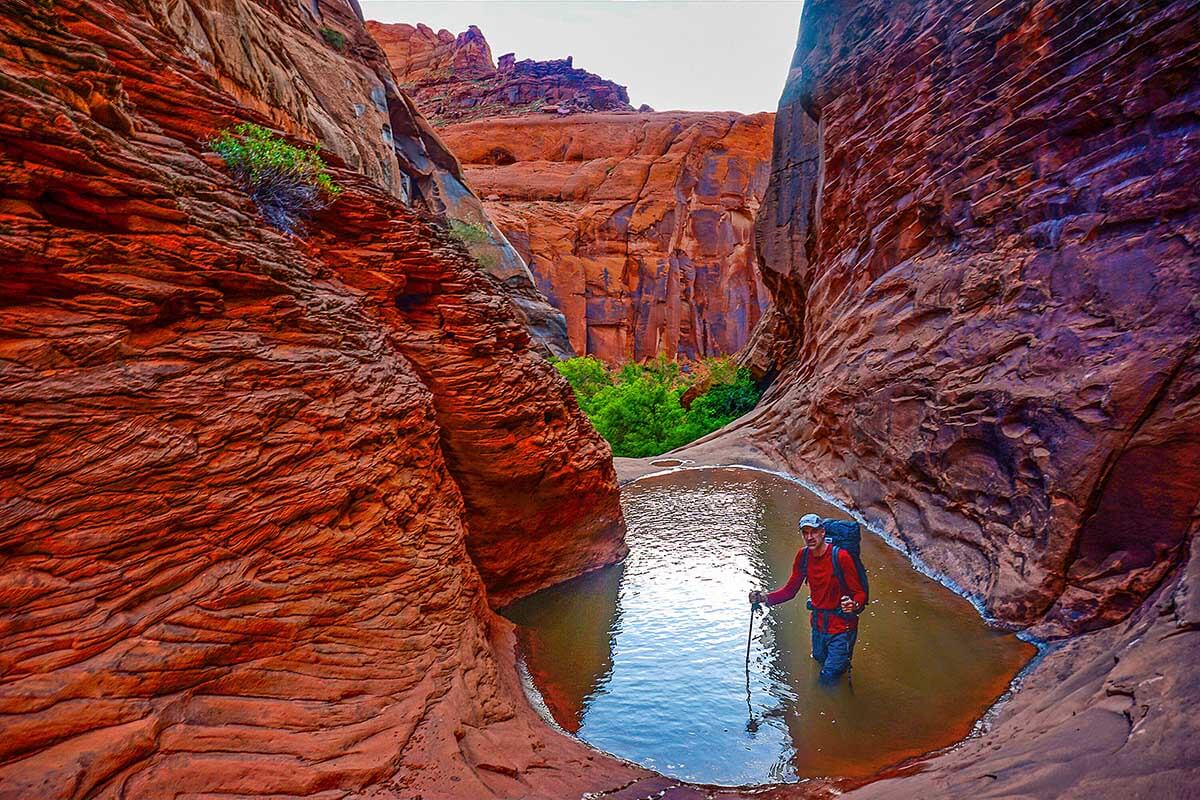
Keep your gear dry: The best way to keep your gear dry is not to get it wet in the first place. Good stuff sacks for your down sleeping bag and jacket are important, along with a waterproof pack liner, or better yet a waterproof pack.
camping skill 5 – Keep your Gear Dry
The best way to keep your gear dry is not to get it wet in the first place. This means putting on your rainwear before you get wet. Not sweating out your clothes with perspiration while hiking. And keeping the gear in your pack dry (especially your down bag, and down jacket).
- Pack contents dry: A trash compactor bag inside your pack is lighter and works considerably better than a pack rain-cover. Inside that, put your down bag, and down jacket in their own waterproof or highly-water-resistant stuff sacks. Even better but more expensive, get a Cuben fiber backpack, with a roll top closure and sealed seams along with stowing your sleeping bag/quilt and down jacket in Cuben Fiber stuff sacks. This is a great way to keep your gear truly dry and is less complicated and time consuming that pack rain-covers or liners.
- You and your clothing dry: And finally, even tho it seems obvious, put on your rainwear before you get wet. Have your rainwear readily available on the outside of your pack (I like the large rear pocket) so you can put it on quickly and without opening your main pack bag and exposing your pack contents to rain.
- Don’t sweat out in your rainwear: Adjust and ventilate your clothing and/or slow your hiking pace as necessary. As above, It’s very easy to get clothing wet, but it takes a long time to dry it out in cold and damp weather.
Reason 2 – Take Light Gear Appropriate for the Conditions
I am going to be blunt. Some gear is outright better than other gear. My ultralight gear, by almost every measure, outperforms the similar conventional (heavy) gear recommended by “trusted experts.” Look through my 5 Pound Ultralight Gear List and 9 Pound Light weight Gear List (full comfort) for what I think is the best lightweight and ultralight gear on the market.
light gear 1 – Use a weather report to help you select the right gear
- Since 90% of backpackers take 90% their trips for 3 days or less, a good weather report should be quite accurate for the short time you are out.
- This will let you pack a shelter, clothing, and sleeping bag appropriate for actual conditions.
- It will also deter you from taking fear-based, “what-if-the-worst-happens!” gear, e.g. 6 pound tent, a +10F sleeping bag, and a down jacket for a warm weather trip on the Appalachian Trail.
- For short term forecasts, the NOAA hourly weather graph is among the most informative and accurate. The best weather app for your smartphone is Weather Underground: Custom Forecast & Local Radar App.
- For longer term gear planning there is historical average weather Data on Accuweather which will help you intelligently select gear months before your trip.
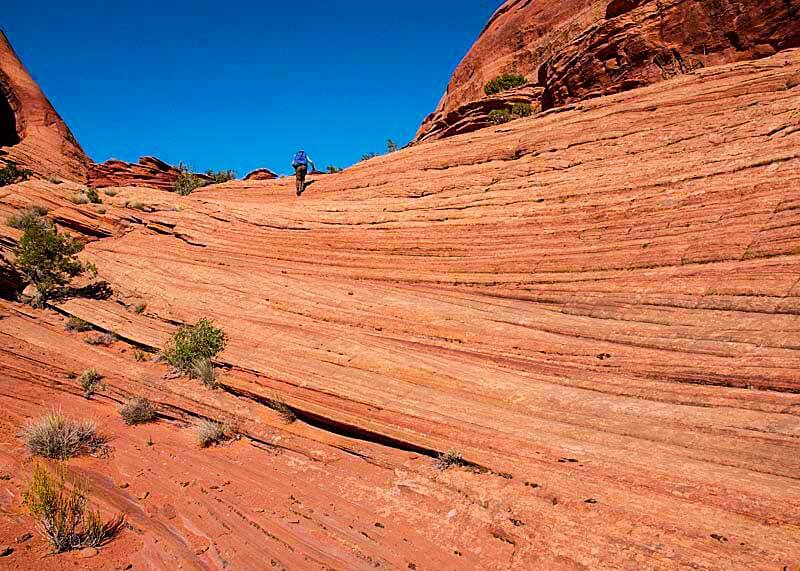
light gear 2 – Your tent doesn’t keep you warm
- The hard reality is that the temperature inside your tent, at best, will only be a few degrees warmer than the outside temperature.
- Your tent just keeps the wind and rain off (very important!)—but so will a tarp or pyramid shelter.
- What does keep you warm is a puffy down sleeping bag and jacket. So…
light gear 3 – Get a good down jacket and a down quilt (or sleeping bag)
- Down is the best and most weight efficient way to stay warm. At a minimum get a good down quilt (or sleeping bag and a down jacket.
- Don’t believe the dire warnings about getting down wet—it’s hard to do. In over 40 years of backpacking all over the world in all sorts of conditions, I have yet to get my down so wet that it didn’t do a good job of keeping me warm. New water resistant shell fabrics and water resistant down only improve upon this.
- The only advantage to synthetics is price, and then only in the short term. In the long term I find they usually lose loft after less than a season of use. This makes them a poor long term value. A good down bag will easily last 5 to 10 years.
- And make no mistake, a wet synthetic sleeping bag or jacket is no joy! Keeping your gear dry is a better strategy for both down and synthetic gear.
- Bring a sleeping bag for the average temp: I bring a sleeping bag (or quilt) rated for the average expected low temperature for the area and time of year I am backpacking. If I get a period of unexpectedly cold weather (it happens), I supplement my sleeping bag with my fleece mid-layer, down jacket, warm hat (and down pants and booties if I have them).
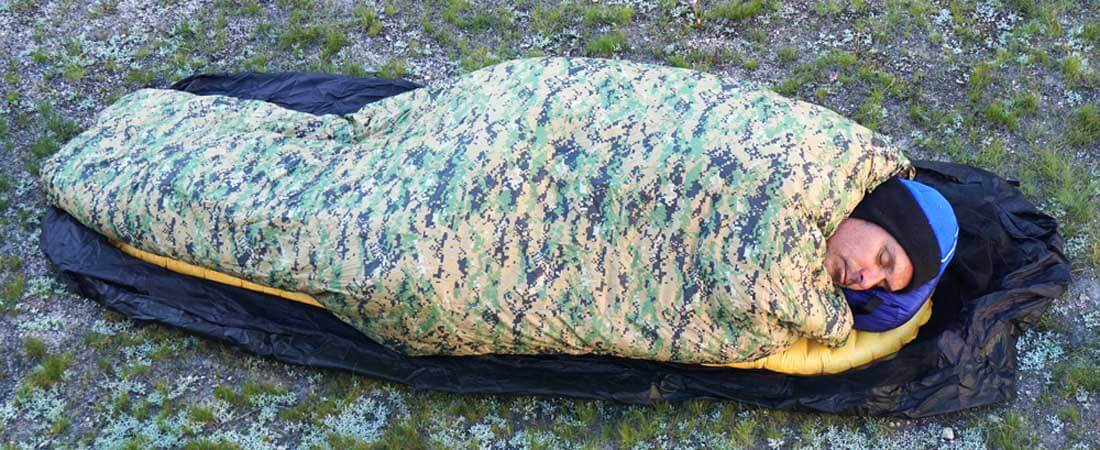
This luxuriously puffy, one-pound, +20F down quilt is warmer and almost 1/3 the weight of a +32 synthetic “conventional” sleeping bag. And make no mistake: a wet synthetic sleeping bag is not warm or fun! Plan A should always be to keep your quilt/bag dry in the first place.
light gear 4 – Extra shirts, pants and base-layers are a poor choice to stay warm
- Your money and gear weight is better spent on buying a warmer down bag and jacket. Or even down pants, down hat and down booties. All of these are far warmer per ounce than extra shirts, pants, and base-layers.
- And you only need one 6-10 oz fleece/wool mid layer garment.

light gear 5 – A tarp or pyramid shelter may be drier than a tent
- The small, confined, and less ventilated area inside a tent can be wetter than a larger (and much lighter) pyramid shelter or tarp. This is also a recommendation to buy the larger tarp or pyramid shelter. For just a little more weight you get a lot more living space!
- Condensation is a big problem in small tents. It’s very easy to get your gear wet from the high humidity inside. In tight quarters it’s almost impossible not to brush your sleeping bag or down jacket against condensing tent walls. And if you happen to get into the tent with wet gear it is unlikely to dry in the humid climate.
- In contrast, a tarp or pyramid shelter might have twice the room & be better ventilated & less humid.
- And if you’re stuck in the shelter for an extended period of time, you’ll welcome the larger and less constricted living area of a large tarp or pyramid shelter. During long rains, small backpacking tents become more like coffins than dwellings!
light gear 6 – Finally, resist the temptation to take extra/backup gear
- This is the time to trust yourself, your gear and your camping skills!
- If you’ve carefully selected the right gear, and researched trail conditions and the weather… then there should be little reason to bring “backup clothes or equipment.”
- Not bringing unneeded gear, is the easiest way to save weight and money.
Reason 3 – Pack Nutritious High-calorie Food
food 1 – Take high calorie food and save food weight
You can save a lot of weight and even money by selecting the right backpacking food. My nutritious and high calorie Backpacking Food gives me 3,000 tasty, healthful and filling calories of complex carbs, protein and healthy fats for around 1.5 pound/day. Over a 3 day weekend backpacking trip I get as many calories and as much nutrition, possibly more than someone carrying almost double the food weight. See: Best Backpacking Food – simple and nutritious – veggie and omnivore friendly
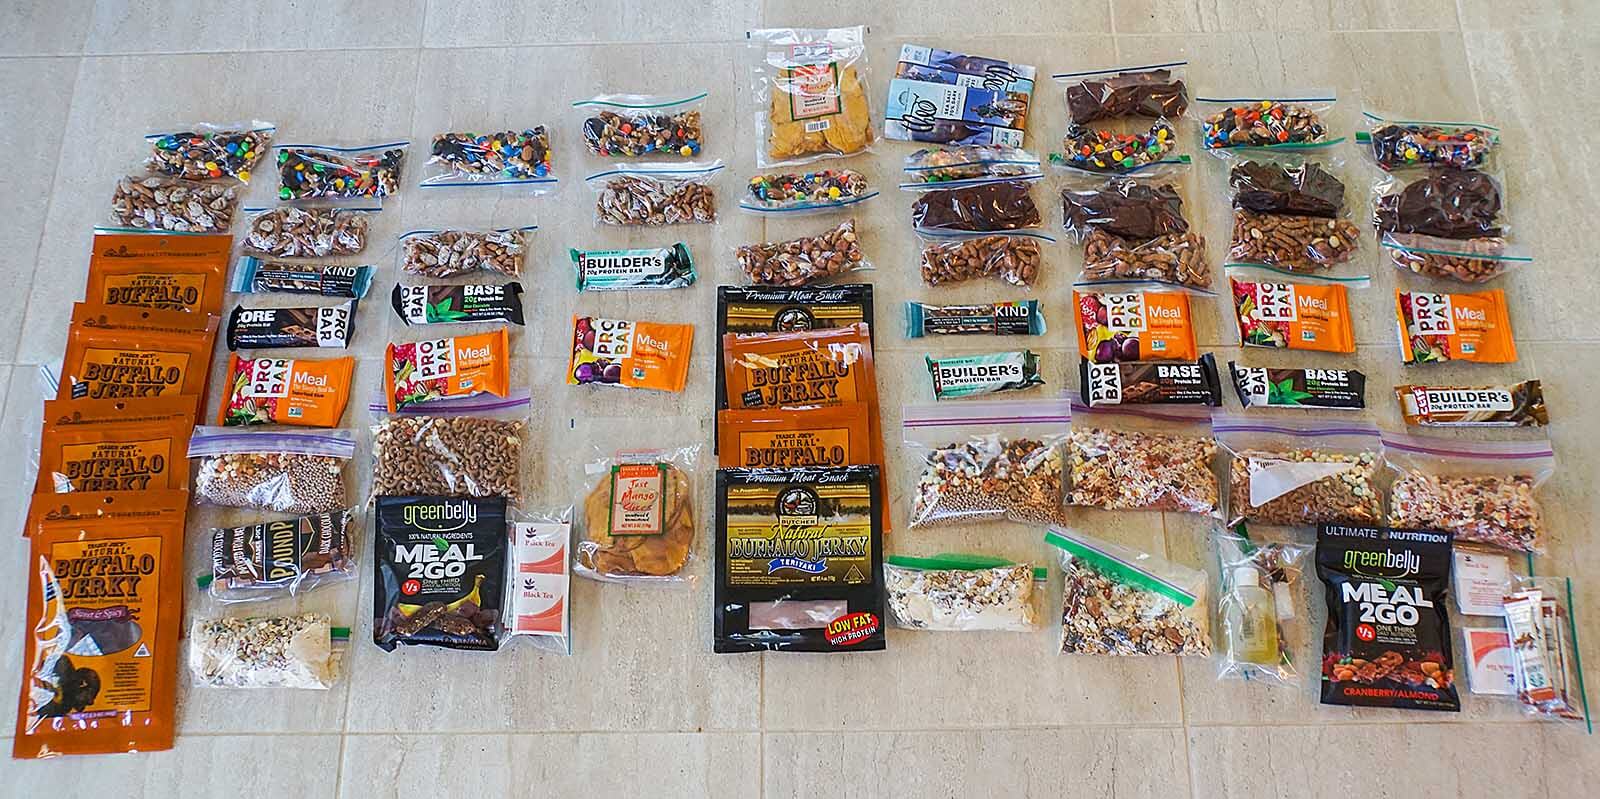
The right food will keep you well-fed and save you 5 pounds or more of food on a trip vs. a typical backpacker’s food.
food 2 – Maintain nutrition
Try to get the most calories per unit weight in your food but not at the expense of a poor diet. You want a balanced diet with good protein, carbohydrates, healthy fats, fiber, vitamins and other nutrients.
- I take healthy homemade meals, unsweetened, unsulfured dried fruit, freeze dried vegetables, nuts, homemade gorp, whole grain crackers, whole grain pasta, healthier-higher-calorie trail bars, and lean jerky and powdered milk and powdered soy for my protein.
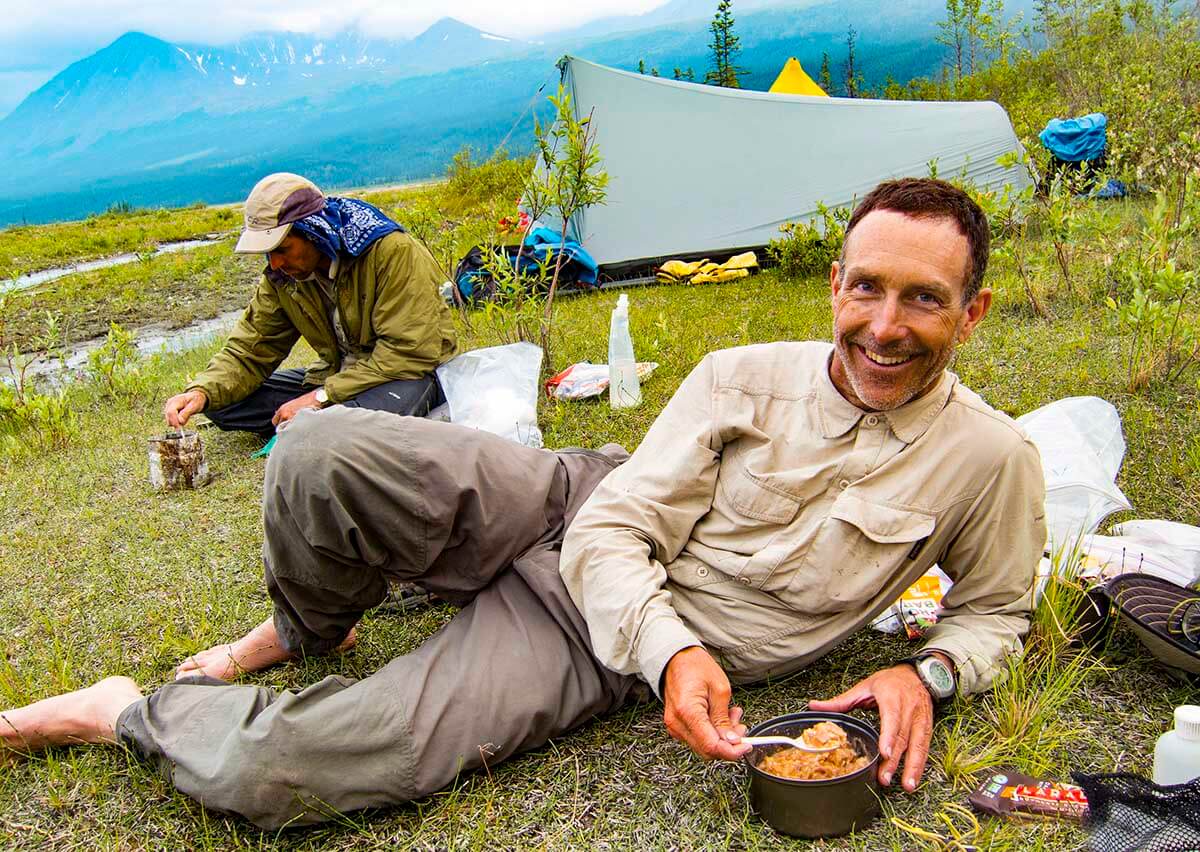
A nutritious dinner in the Alaska Range near Denali.
food 3 – Don’t carry extra food
The standard advice to carry an extra day of food is hooey. I figure I can make it at least 3 days without any food. Of course, I am not recommending going without food, just saying that you can live if you end up short on food. You’ll have to make your own decision on extra food. Maybe you will just bring a bit less extra food next trip.
food 4 – “Skip” one day of food
I eat a big breakfast or lunch before I start hiking the first day and I eat a big meal when I get out. By boosting my off-trail calories on the first and last day I eliminate carrying a whole day’s worth of food in my pack.
food 5 – Drink when thirsty and carry less water
- Drink to Thirst: I carry only the water I need to meet my thirst. When I drink to thirst I rarely carry more than a liter, and usually a lot less.
- “If you are thirsty, it’s already too late” and “If your urine is yellow, you are dehydrated,” are myths. My article The Best Hydration – Drink When Thirsty is based on the current best science (from experts in the field of sports hydration not beholden to sports drink and bottled water companies). It suggests that “drinking to thirst” is the safest and healthiest strategy for hydration during exercise.
Conclusion
People pack heavy, because they pack for their fears—for their wildly imagined “what if the worst happens scenarios.” Rather than relying on their camping skills (which should be more than adequate) and the predicted weather and conditions for their hike, they choose to overcompensate for their fears by packing heavy, over-kill gear, extra clothes, extra food etc. But heavy packing doesn’t make you all that much safer, warmer, well fed or comfortable. It just makes your pack heavy and walking slow and unpleasant.
Put a little faith in yourself and your gear and go lighter!
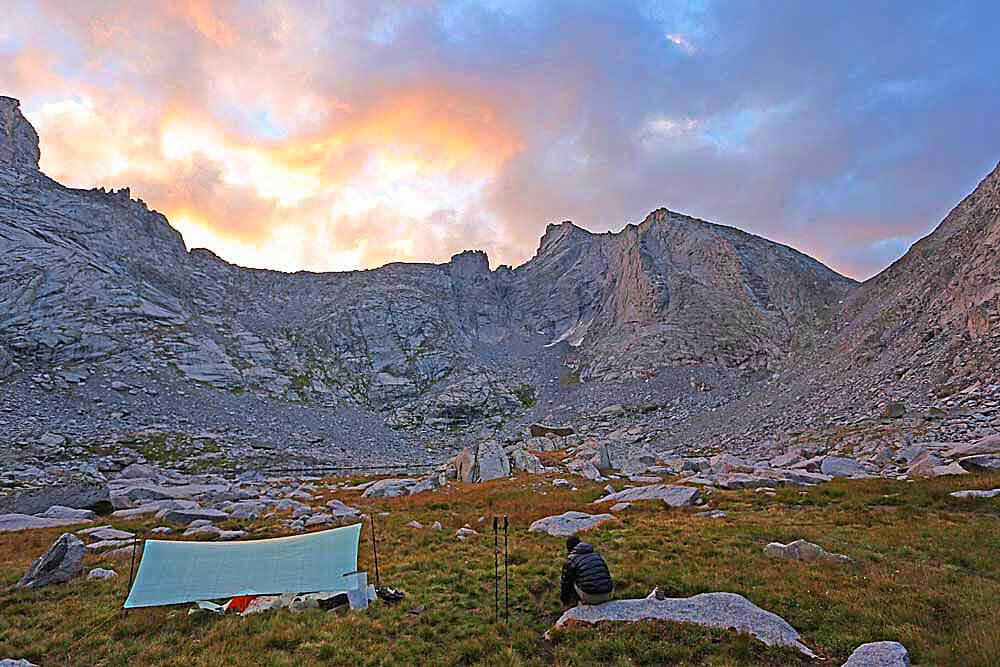
These tasty and nutritious backpacking meal recipes are healthier, have more calories and cost less than commercial, freeze dried backpacking meals. Keep it simple — there are enough nutritious backpacking meal recipes here to provide sufficient daily variety to keep meals fun and interesting. But there aren’t so many recipes that I spend too much time buying ingredients and assembling a large inventory of gourmet meals. I’d rather spend my time hiking than fussing with food.
Note: This is a companion piece to my top rated post, Best Backpacking Food – simple and nutritious – veggie and omnivore friendly which has more detailed info on nutrition and backpacking food choices.
Photo: Author eating dinner in the Alaska Range – credit: Andrew Skurka
You make Adventure Alan & Co possible. When purchasing through links on our site, we may earn an affiliate commission at no additional cost to you. Here’s why you can trust us.
| Quick Links to Recipes | ||
|---|---|---|
| Link to Breakfast Recipes | Link to Dinner Recipes | Link to Desserts/Hot Drinks |
Meal Rotation Planner — Nutritious Backpacking Meal Recipes
Keep it simple — I rotate 2 to 3 meal options for each trip. This provides enough food variety on the trail. By limiting meals to 2 to 3 nutritious backpacking meal recipes, I simplify food purchasing and meal prep.
| Backpacking Meal Planner – example of a 3-day rotation | |||
|---|---|---|---|
| Day | Breakfast | Lunch | Dinner |
| 1 | None: eat large one off-trail | #1 Wrap+cheese & mustard (fruit #1) | #1 Rice+beans w chips+cheese |
| 2 | #1 Muesli | #2 Bison+sesame stix (dried fruit #2) | #2 Couscous curry |
| 3 | #2 Hot oatmeal/cream-o-wheat | #3 Crackers+almond butter (fruit #3) | #3 Chili mac |
| 4 | #3 Grape-Nuts + strawberries | #1 Wrap+cheese & mustard (fruit #1) | #1 Rice+beans w chips+cheese |
| 5 | #1 Muesli | #2 Bison+sesame stix (dried fruit #2) | #2 Couscous curry |
| 6 | #4 Quick breakfast meal bar | #3 Crackers+almond butter (fruit #3) | None: eat large one off-trail |
If you don’t already have one get an inexpensive kitchen scale that weighs up to 11 pounds (5 Kg). Almost all the ingredients are measured by weight for these recipes.

If you don’t already have one get an inexpensive kitchen scale that weighs up to 11 pounds (5 Kg). Almost all the ingredients are measured by weight for these recipes.
Breakfast Recipes
The following are nutritious and filling breakfasts that should keep a spring in your step until lunch! They have healthy fats and a good amount of protein. Note that the table below is in scrollable window. Please scroll down to see all the recipes Or you can see ALL THE RECIPES full page here, as a Google Sheet
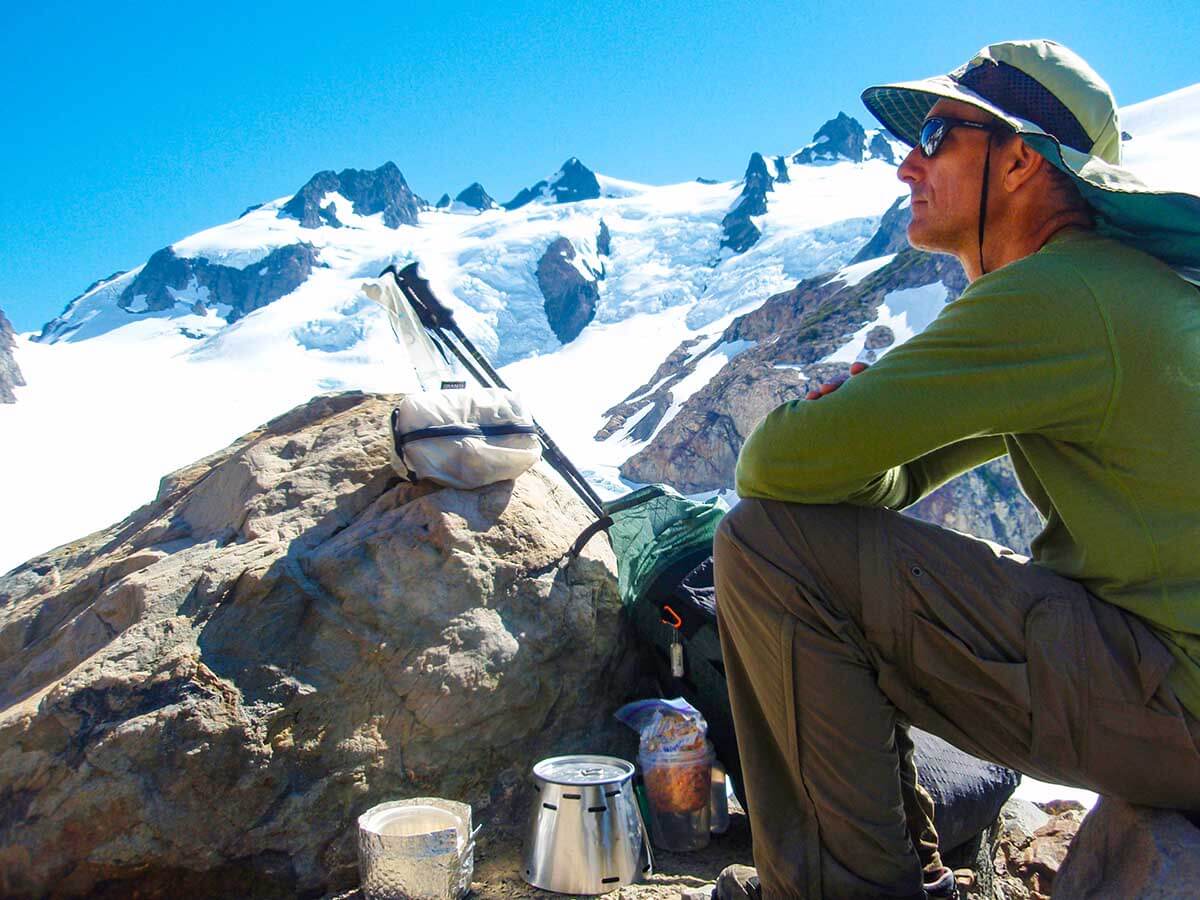
Dinner mid-way up Mt. Olympus, Olympic Peninsula, Washington State.
Dinner Recipes
The following are nutritious backpacking dinner recipes. These are filling meals at around 700-800 calories per serving! They have healthy fats and a good amount of protein. Note that the table below is in scrollable window. Please scroll down to see all the recipes Or you can see ALL THE DINNER RECIPES on a full page here, as a Google Sheet
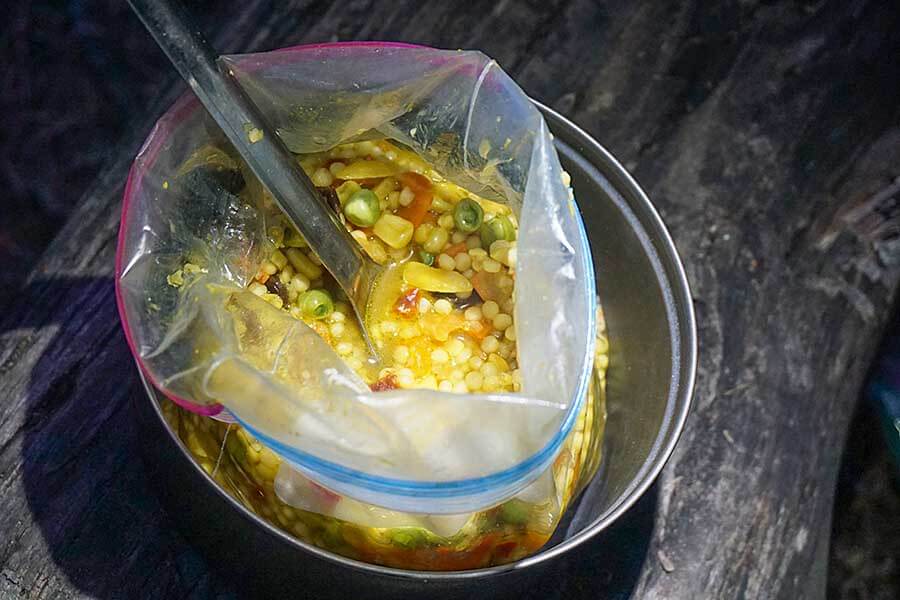
Rehydrating in a Ziplock bag makes cleanup much easier. Especially nice in “dry” camps. You usually use less fuel as you kill your stove as soon as the water boils. Downside is that the meal does not rehydrate as well as when it’s cooked in the pot, and rehydration can take longer. A long handled spoon pictured here helps reach into deep baggies without getting your fingers covered in food.
Dessert and Hot Drink Recipes
The following are just few ideas for desserts and after dinner drinks. Note that the table below is in scrollable window. Please scroll down to see all the recipes Or you can see ALL THE DINNER RECIPES full page here, as a Google Sheet
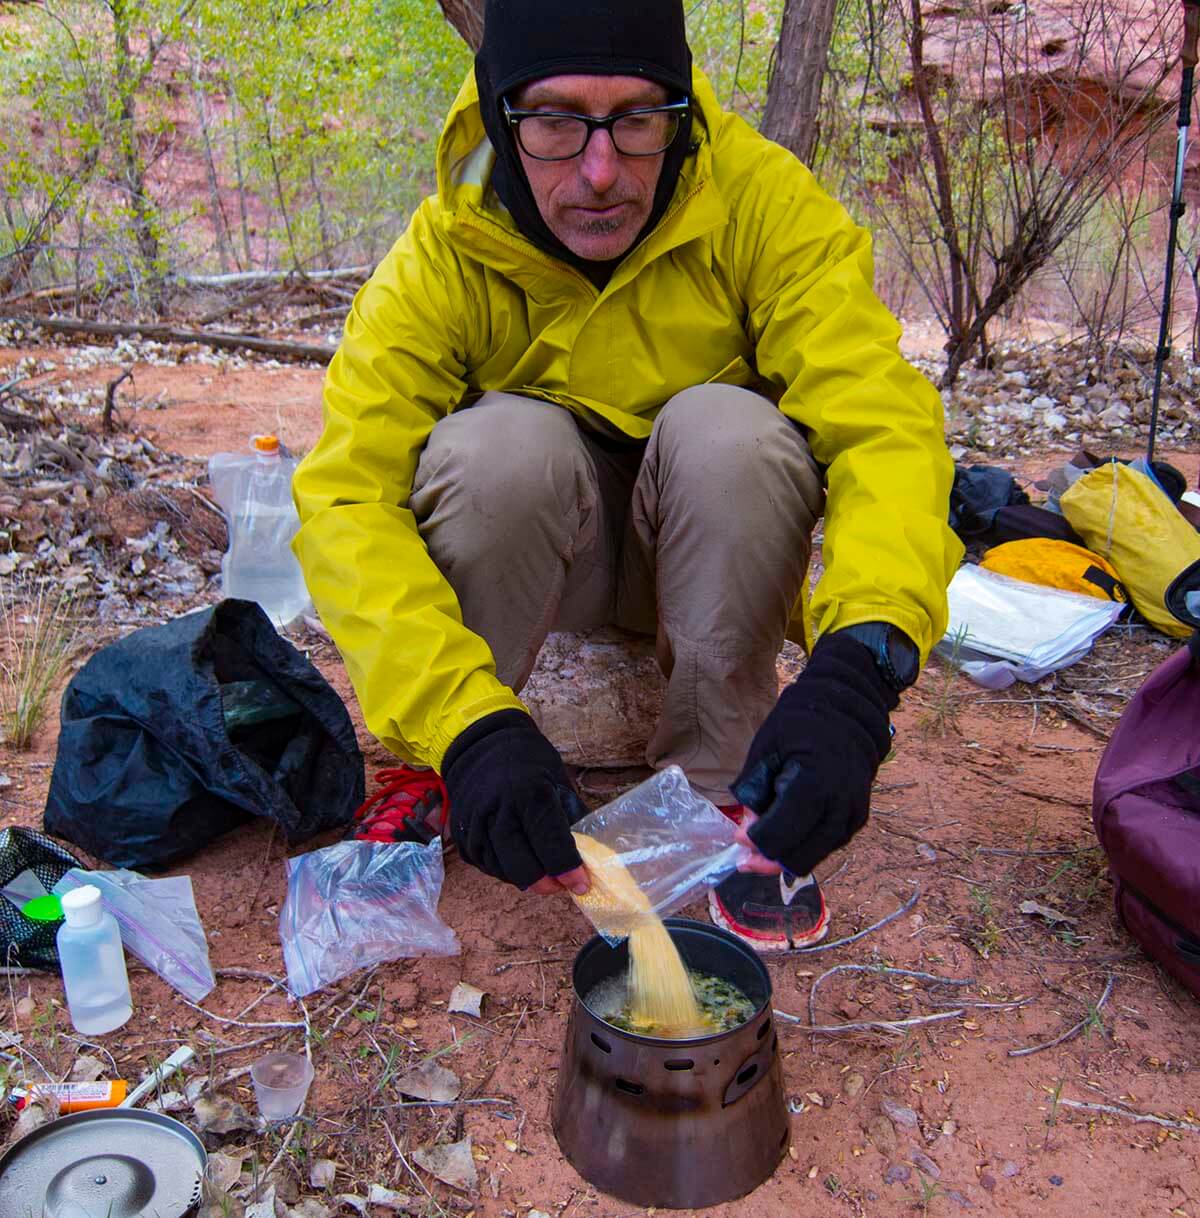
Cooking a meal in the pot does a better job of rehydrating a meal. Especially if you let it simmer for a few minutes after a boil. Downside is that the pot is harder to clean, especially with cheese. And food can burn to the pot bottom if you aren’t careful. (photo: Andrew Skurka)
Rice And Beans With Cheese And Tortilla Chips
Use these healthy freeze dried Black Beans & Rice (available at REI) or at Amazon. Open the meal bag and add 2 oz of Just Hot Veggies or any of Just Tomatoes FD veggies.
Then separately package in ziplock snack baggies:
- 3-4 oz cheddar cheese (cubed or shredded)
- 2 oz of lightly salted tortilla chips of your choice (lightly crushed)
Place both the cheese and chip baggies back in the meal bag and reseal it.
Meal Prep Directions
- pour 17 to 18 oz hot water into the meal packet and set aside to re-hydrate
- after about 5 minutes, stir in cheese
- when full hydrated (about 10 min), crumble tortilla chips over the top and enjoy!
Note: eat in packet with long spoons unless you want to be scraping cheese out of your pot and/or bowls for some time.
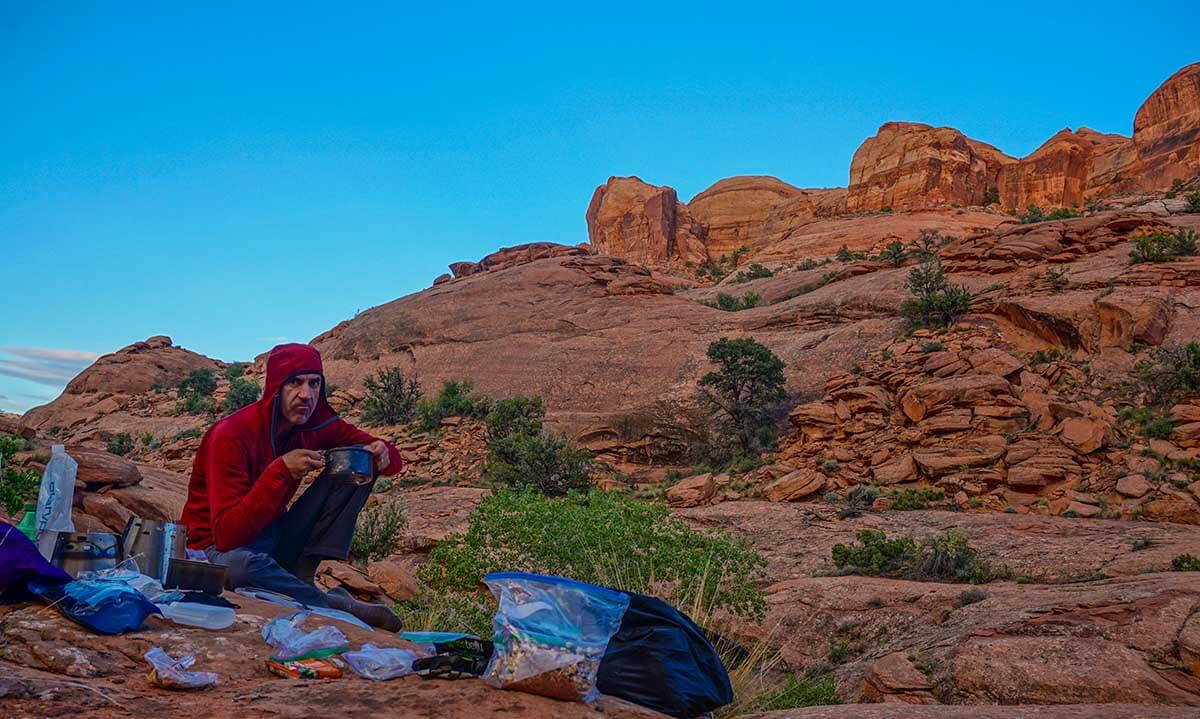
Dinner in a remote canyon in the Escalante Grand Staircase.