This post will get you taking great wildlife photos in no time. We give you the 7 basic tips for wildlife photography as well as some pitfalls and beginner mistakes to avoid. And of course, we’ll also advise you on the best photo gear for wildlife pics.
The Sony a7R III and a7R II are the perfect pro cameras for hiking and ultralight backpacking. They give you pro quality photos but without the weight. That is, this Sony camera gear is capable of the highest image quality but still light enough to be easily carried into the backcountry for a long day hike or a multi-day backpacking trip.
Lead photo above: Author working in Iceland with light Pro camera gear. Sony α7R II camera with Sony FE Carl Zeiss T* 24-70mm F4 ZA OSS lens on a Sirui T-024X Traveler Light Carbon Fiber Tripod. [Photo credit – Peyton Hale]
Why Take a Pro Camera Hiking?
If you want the maximum image quality but the least weight, your best option is a light full frame (FF), mirrorless camera like the Sony A7R II or A7R III. The following summarizes the ways a full frame camera is better than crop format (CF) camera like the Sony α6000 or α6500.
- A full frame (FF) camera like the Sony A7R II or A7R III can have up to 4x more resolution than a crop format (CF) camera like the Sony a6x000 series (37 pMP vs 8 pMp)
- A FF camera is more weight efficient for resolution. That is, you get more resolution (megapixels) per ounce than a CF camera.
- A FF camera also has more dynamic range (ability to capture a large range of lights and darks), color depth, and better low light performance.
Looking at the chart above you can see that 1) a full frame camera is capable of 4 times the resolution of a crop format camera, 37 pMP1 vs 8 pMP1 (left chart column cluster), and 2) that a full frame camera is more weight efficient, giving you almost 2x more megapixels of resolution per ounce of camera weight (right chart column cluster). 1 See more about pMP (perceptual megapixels)
What is a Full Frame Camera and How is it “Better”
Larger Full Frame sensor = better image quality: A full frame camera has a sensor* twice the size of a crop format camera (APS-C). And a larger sensor means better image quality. That is, the larger the sensor of a full frame camera gives more resolution (megapixels). But possibly more important, the larger sensor of a full frame cameras captures more light. And more light translates to better dynamic range (ability to capture a large range of lights and darks, many times critical for landscape photos), more color depth, and better low light performance/high ISO (also critical for photos in the “golden light” of dawn and dusk).
Better Lenses: Not a hard and fast rule, but the “better” lenses for full frame cameras tend to be superior to the best lenses for crop format cameras (but admittedly heavier and more expensive). E.g. the best Sony full frame wide angle zoom can resolve up to 35 pMP (on the 42 MP Sony α7R II) vs. the best Sony wide angle crop format zoom can resolve only 8 pMP (on the 24 MP Sony α6000). Taking into account sensor sizes, the full frame lens resolves 83% of the full frame sensor but the crop format lens only resolves 33% of its sensor’s capability.
- 860 mm² sensor area Full-Frame digital camera format, (36×24 mm)
- 370 mm² sensor area APS-C (crop format) standard format from Nikon, Sony… (23.6×15.7 mm)
* The sensor is the electronic hardware in a camera that captures light from the lens and converts it to an image/photo. Read more here.
A Caution – It’s not all about Megapixels
Just to put things in perspective: Getting good focus, correct exposure, eliminating camera shake (and of course, being in the right place at the right time!) are all more important than the megapixels of your camera. That is, you need to nail all of these to get the most of out a high-end camera. Blow any one of them and the resulting photo will likely be worse than one properly taken on a far less expensive camera or even a smartphone. [See more on how to get the best photos from your smartphone.]
Recommended – Light Pro Cameras for Hiking and Ultralight Backpacking
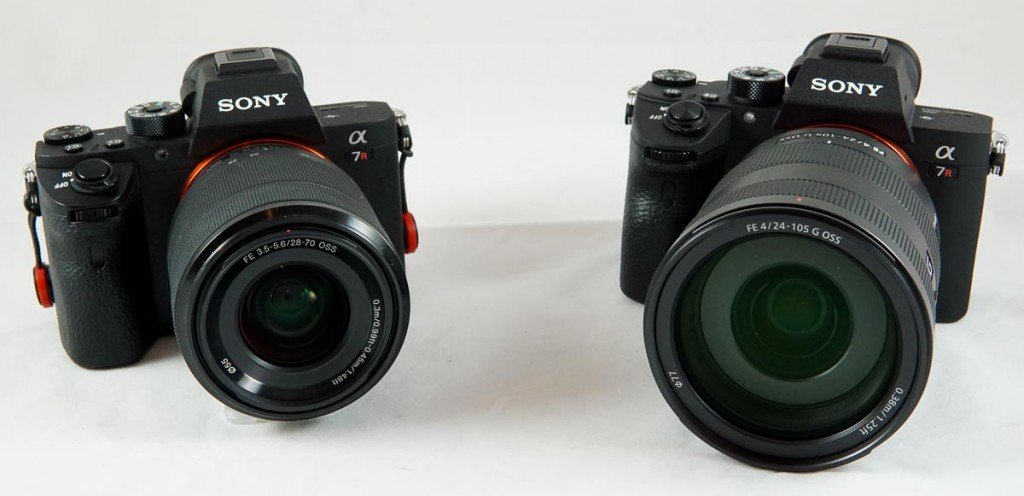
On the left is the Sony α7R II with the “general purpose” Sony 28-70mm F3.5-5.6 FE OSS Lens. It’s a light, economical, high resolution camera appropriate for almost all situations encountered hiking and backpacking. And it’s $1,800 and 13 oz less than the Sony α7R III with a FE 24-105mm f/4 G OSS Lens on the right. That being said, the α7R III with 24-105 has a significant advantage in image quality.
Standard Camera (on left above)
Sony α7R II 22.0 oz (625 g): This is the best value in a high quality FF mirrorless camera. It has the same 42 MP resolution as the newer and more expensive Sony α7R III. The Sony α7R II has nearly 14 stops of dynamic range (ability to capture a large range of light to dark without losing detail) and excellent autofocusing. When paired with the “general purpose” Sony 28-70mm F3.5-5.6 FE OSS Lens you have a light, economical, high resolution camera appropriate for almost all situations encountered hiking and backpacking. And it’s $1,800 and 13 oz less than the Sony α7R III with a FE 24-105mm f/4 G OSS Lens.
The Upgrade Camera (on right above)
Sony α7R III – 23.2oz (657g): This is the best light FF camera on the market! It outperforms the best from Nikon and Canon but weighs ¾ of a pound less! The Nikon D850 is 35.5oz (1005g) and the Canon EOS 5DS R is 35.6oz (1010g).
This camera has the same 42 MP resolution as its predecessor the α7R II, but improves upon it in many ways. Key features for hikers and backpackers are: 1) With 15 stops of dynamic range it bests the the α7R II by a full stop. 2) Battery life has doubled with the new Sony NP-FZ100 2280mAh battery. 3) Autofocus is more sophisticated, faster and more accurate. 4) Its 5-axis in-body image stabilization claims a full 5.5 stops.
Pair the Sony α7R III with the insanely sharp Sony FE 16-35mm f/2.8 GM Lens and you have a light, backcountry camera with image quality second to none. An added bonus, it’s so sharp that at 16mm and f/2.8, it can double as a good astro lens (making its weight and cost seem more reasonable). Or pair it with the new and moderately priced Sony FE 24-105mm f/4 G OSS, possibly the best midrange zoom lens in on the market
Note: All Sony gear was purchased with my own funds and this post reflects my own personal opinions. I am not a “Sony ambassador,” nor obligated to write content, or receive compensation from Sony.
Decide if Full Frame Image Quaintly Makes Sense for You
The increased image quality of Full frame is not cheap. That is, a full frame camera costs and weighs more than a crop format camera. Each hiker will need to decide if a potential 4x increase in megapixels (and other benefits like increased dynamic range, color depth, & low light performance) are worth it:
|
Recommended Lenses
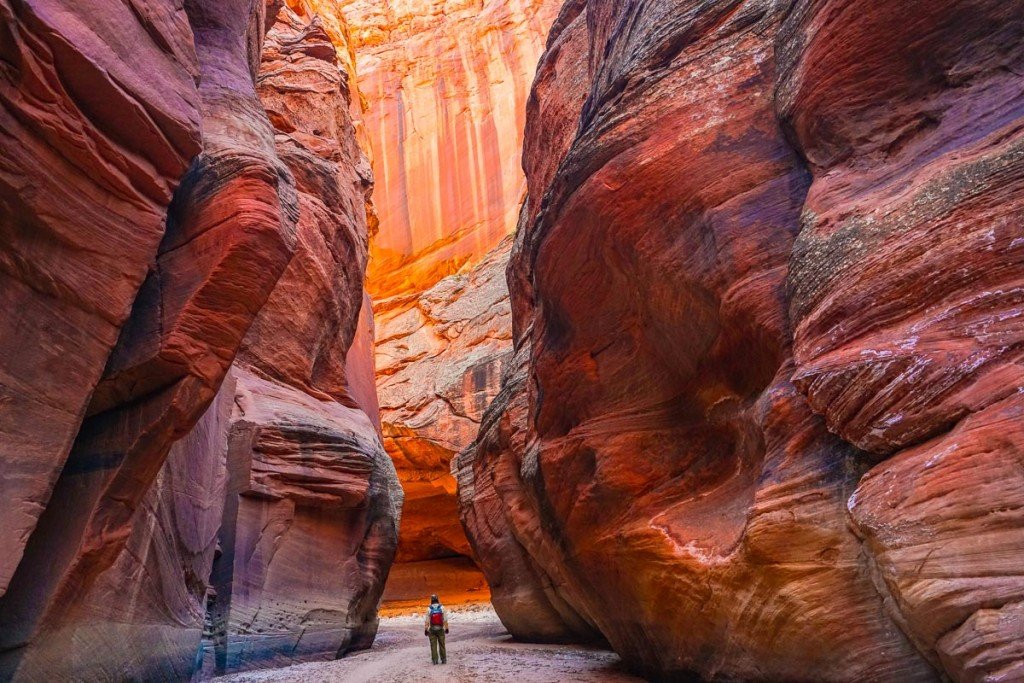
Buckskin Gulch Utah: Hand held with a Sony α7R II with Sony Vario-Tessar T* FE 16-35mm f/4 ZA OSS lens.
The following lenses were carefully selected to provide an optimal balance of sharpness, low weight, and reasonable cost (for a full frame lens). An effort was made to provide a few price and weight options for each lens type.
General Purpose (midrange) Zoom Lenses
If you are bringing only one lens, a General Purpose (midrange) Zoom is likely the one you want. These are workhorse lenses going from a decent wide angle to a moderate zoom. They come in two flavors, ~24mm-70mm and ~24-105mm. The 24-70s are lighter and more compact. But the 24-105 range is especially useful. 24mm is plenty wide enough for most landscape work. And 105mm is good for picking out landscape details. And in a pinch, at 105mm it works as a wildlife zoom since with 42 MP you can crop down to the sharp center area of the lens and still have a serviceable photo. (another advantage of FF)
Bargain Lens
♦Sony 28-70mm F3.5-5.6 FE OSS Lens 10.4 oz: This “starter” lens for the Sony FF (FE) cameras is a great value and a perfect fit for hikers and ultralight backpackers. It far exceeds expectations, and the international version can be had for $285! This lens is very light and nearly as sharp as the next lens “up,” the far more expensive and heavier 24-70mm F4 ZA OSS. The 28-70 F3.5-5.6 is weather resistant while the 24-70mm F4 is not. The 28-70 gives up some edge sharpness at wider apertures vs. the 24-70mm F4. And its narrower 28mm vs. 24mm makes more of a difference for landscape work than the “slight” 4mm difference might infer. Nonetheless, you are unlikely to find a better low cost full frame lens suited to rugged backcountry use*.
*Its light weight and low cost make this a great lens to take into harsh environments with higher risk of damage, theft, etc. The lens is the most likely thing to be damaged. And if that happens, you are only out a few hundred vs. a few thousand dollars. E.g. this is the lens I took to remote mountain regions in Cuba, and the one I would take for a long trip to the desert with all its fine windblown sand.
Upgrade Lenses
♦Sony FE 24-105mm f/4 G OSS 23.4 oz: This new and exciting lens is likely the the best midrange zoom lens on the market. It’s only been out for a few months but my initial impressions (and those of many others) is that it’s extremely sharp edge to edge–coming close to the performance of far more expensive lenses. It’s about 1/2 the price of most of the competition but it’s smaller, lighter, image stabilized and weather resistant. In summary, a great pro-quality lens at a bargain price [In fact, it takes much of the market away from the heavier and more costly Sony 24-70 f/2.8 and Sony 24-70 f/4].
Sony FE Carl Zeiss Vario-Tessar T* 24-70mm F4 ZA OSS 15 oz: Prior to the 24-105mm f/4 G OSS, this would have been the light general purpose zoom of choice. It is sharper edge to edge vs. the less expensive 28-70mm F3.5-5.6 OSS. And even now, if you need a lens in this focal range for under 16 oz, choose this one (the 24-105mm f/4 G OSS is a full 10 oz heavier).
Wide Angle Zooms
A wide angle zoom in the range of 16mm-35mm is on my camera most of the time (I use this focal range for over 2/3 of my backcountry photos). The 16 to 24 mm range is especially useful for capturing broad swaths of landscape or creating stunning perspectives that give snap to your photos.
Standard Lens (no budget lenses here)
Sony Vario-Tessar T* FE 16-35mm f/4 ZA OSS 18.3 oz: If you need a small and light wide angle zoom this is it. The lens is sharper in the corners than the 28-70 f/3.5-5.6, image stabilized, and it doesn’t cost an arm and a leg. But it’s not as sharp as the new, non-image stabilized 16-35mm f/2.8 GM (below). Even so, I’ve carried this lens on many, many trips. And I will continue to take it when weight is critical.
Upgrade Lens
Sony FE 16-35mm f/2.8 GM Lens 24 oz: This Sony G-Master lens one of the best wide angle zooms on the market. It’s so sharp edge to edge that its sharper than most prime lenses in its focal range. It’s ¼ pound lighter than Canon’s 16-35 f/2.8 lens (and some, but not all, reviewers have tested it sharper than the Canon). And Nikon has nothing that can touch it. An added bonus, it’s sharp enough at 16mm and f/2.8 that it can double as a decent astro lens (and make its weight seem more reasonable). Its major downside is cost — but you get what you pay for.
Prime (fixed focal length) Lenses
These lenses are lighter and usually sharper than zoom lenses. Price varies over a wide range from inexpensive to quite expensive.
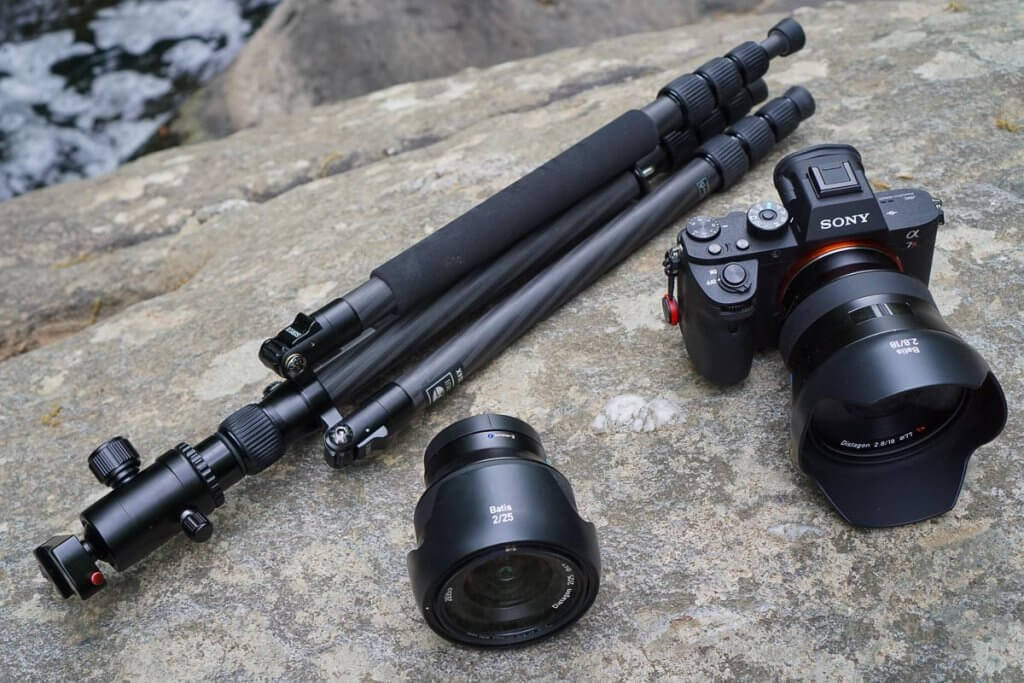
Two light, fast and exceptionally sharp prime lenses: (r) one of my favorite lenses the ZEISS Batis 18mm f/2.8 Sony FE, 11.64 oz; (l) Carl Zeiss Batis 25mm F2 Sony FE 11.82 oz. In the backgroud is the Sirui T-024X Traveler Light Carbon Fiber Tripod with C-10S Ball Head, a light, economical and capable backcountry tripod.
Normal Prime Lenses
♦ Sony FE 50mm F2.8 MACRO 8.3 (236 g): This is the VALUE winner in Sony’s FE lens lineup. Almost as sharp as 55mm f/1.8 below but 1/2 the cost, and 1.5 ounces lighter, and dust and moisture resistant. Oh, and it goes 1:1 for macro photography.
Sony Sonnar T* FE 55mm f/1.8 ZA 9.9 (281 g): The lightweight star of Sony’s FE lens lineup. The 55 f/1.8 FE is light, small and insane sharp (resolving to 40 pMP!). Perfect for shooting handheld in low light situations. Not really cheap, but likely still a bargain given its performance.
Wide Angle Prime Lenses
These are mostly listed in order of focal length. And I have tried to keep cost down (within reason) on most of these selections.
♦ Rokinon 14mm f/2.8 ED AS IF UMC Lens for Sony E-Mount 20.11 oz (570 g) – A great value for an excellent and sharp astro (and landscape lens). Downside is that it is fully manual. But then that’s desirable for astro photography and just fine when you are shooting landscapes off a tripod.
Laowa 12mm f/2.8 1.34 lb (609 g) – Amazingly wide and sharp. It has zero distortion which is nothing short of magic for a lens this wide. Great mechanical build. It also makes a decent astro lens. Downside is that everything is manual, so it’s not as handheld friendly as lenses that electronically couple with your camera. Oh, and it’s not light!
ZEISS Batis 18mm f/2.8 Sony FE 11.64 oz (330 g) – A personal favorite. Super sharp, light and compact. A standout landscape and astro lens. A “native” Sony FE lens, it couples electronically with the camera. Only downside is cost.
♦ Sony FE 28mm F2 – Inexpensive, fast, light and crazy sharp. A solid focal length for many landscape shots. And if you can live with 28mm, it makes a good astro lens. It’s also a fantastic deal. (not quite as sharp at f/2 as the more expensive competition)
Carl Zeiss Batis 25mm F2 Sony FE 11.82 oz (335 g) – A bread n’ butter landscape lens. Light and fast with outstanding sharpness edge to edge — even wide open. Only downside is cost.
♦ Sony FE Carl Zeiss Sonnar T* 35mm F2.8 ZA 4.2 oz 120 – Crazy light and small for a great utility wide angle lens. Moderate cost given its high performance and dust and moisture resistance.
Telephotos Lenses
I rarely use these on backpacking trips where carrying a bulky and heavy lens for days seems like a bad idea. Even light telephotos lenses are heavy, expensive and infrequently used (unless your goal is photographing wildlife or climbers, etc.). As mentioned earlier if I need a long lens on backcountry trip, I make due with cropping an image from the 24-105mm f/4 G OSS.
Tripods
My choice for a backcountry tripod is the light and low cost Sirui T-024X Traveler Light Carbon Fiber Tripod with C-10S Ball Head. In many (but not all) situations it will work for a Sony α7R II camera with a lighter lens like the Sony 28-70mm F3.5-5.6 FE OSS Lens or 16/35 f/4. It will hold the camera quite stable (using a remote shutter or 2 sec delay) given the wind is not too strong or tripod legs aren’t a few feet deep in rushing water. (And you can hang weight off the center column if you need more stability.) That being said, for heavier lenses like a 70-200 zoom or the 16-35 f/2.8, while the legs are fine, you’ll likely need to use a larger ball head.
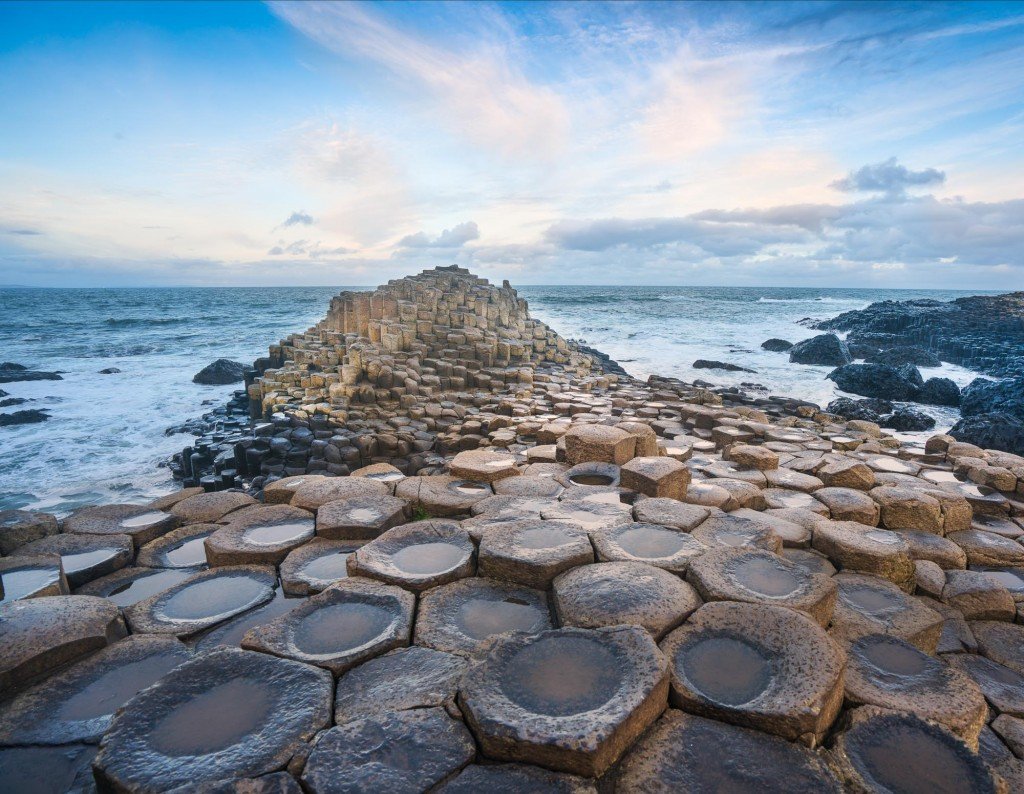
Dawn at the Giant’s Causeway on the Northern Coast of Ireland: Sony α7R II with Sony Vario-Tessar T* FE 16-35mm f/4 ZA OSS lens on a Sirui T-024X Traveler Light Carbon Fiber Tripod.
Why Not Canon or Nikon Full Frame Cameras?
Canon and Nikon owners will likely wonder why their cameras and lenses aren’t in this post. The quick answer is that their full format gear is heavier (mostly due to not being mirrorless like the Sony). So for the same image resolution (pMP) you are likely carrying approximately 1 to 2 pounds more weight for a Canon or Nikon camera/lens combination vs. the Sony camera/lens combination.
From the chart above you can see that mirrorless Sony a7R III (blue) is lighter (has more resolution per ounce of camera+lens weight) than Canon or Nikon full frame cameras. For the comparison I used three basic lens types common for backcountry use (below)—picking the most appropriate/similar camera and lens combination for each manufacturer. For all types of lenses listed, the Sony system is significantly lighter than Canon or Nikon.
- Utility Zoom = moderate cost ~24-70mm zoom. e.g. Sony 28-70mm F3.5-5.6 FE OSS Lens
- High-end Landscape Zoom = 16-35 quality zoom, e.g. Sony FE 16-35mm f/2.8 GM Lens
- Prime Wide Angle = a light 24 to 28mm lens f/2 or better, e.g. Sony FE 28mm F2
And just to be clear, both Nikon and Canon make great full frame cameras and lenses. Many professionals for years have been getting stunning photos in extreme locations with these cameras (e.g. Jimmy Chin, a personal hero of mine). But in the end, Nikon and Canon cameras are heaver than their Sony counterparts for similar resolution and image quality. To some that may not matter all that much. Finally, the camera and lens are only part of what makes a great picture. So to beat a dead horse, the photographer, good technique and above all being in the right place at the right time matter far more.
Footnotes
1 pMP (perceptual megapixels): Sharp as I use it in this post is the “perceptual megapixels” of the final image. This is a combination of both lens and camera—not simply the native resolution of the camera sensor! Thus a 45 MP camera, with an OK-but-not-great lens might only achieve a final photo with an resolution of 20 MP. That is, the pMP of the camera/lens combo is 20 pMP. Read more here on “What is sharp?”
Disclaimer
This post contains affilate links. If you make a purchase after clicking on the these links, a portion of the sale helps support this site at no additional cost to you. I do not receive compensation from the companies whose products are listed. For product reviews: unless otherwise noted, products are purchased with my own funds. I am never under an obligation to write a review about any product. Finally, this post expresses my own independent opinion.
Many stunning outdoor photos are shot with smartphones. BUT most are no accident. The photographer used good basic techniques & inexpensive gear to get that great photo. The good news is that you too can do this with the 10 following hacks and accessories for better smartphone hiking photography.
The Newest Smartphone Cameras Kick Ass!
The new iPhones (and other high-end smartphones like the Google Pixel) are intensely applying “computational photography” (sophisticated software image processing) to significantly improve photos. This includes dynamic range (ability to handle large differences from the lightest to darkest parts of the photo), color, contrast, texture, and even focus to their photos.
The improvements can be dramatic. So much so, that many times the photos from the new smartphones often look better than photos from much larger “traditional” DSLR cameras. It may take a lot of editing of photos from a traditional camera to clearly see the benefits of a larger sensor. That being said, this article will help you get the very best out your smartphone camera.
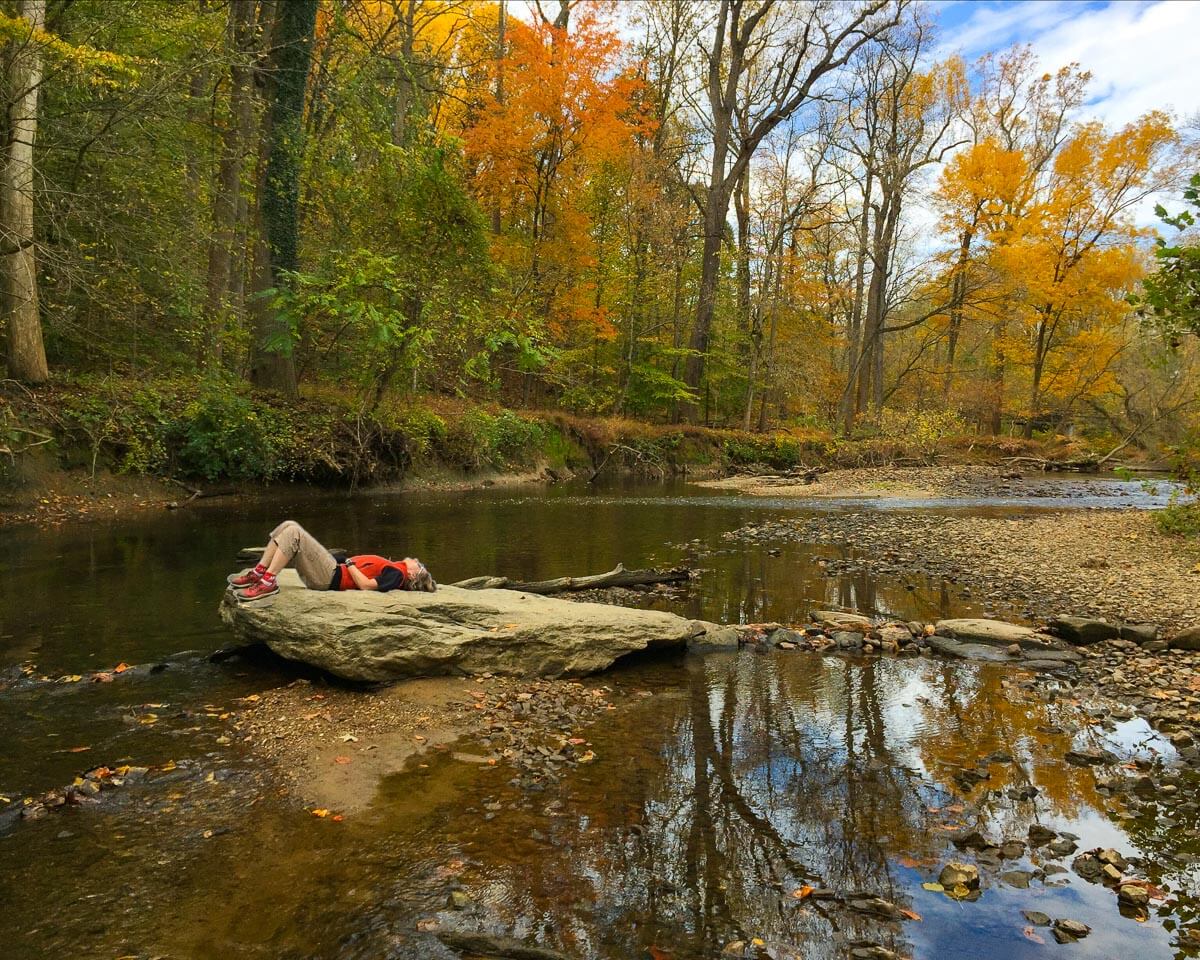
The best hiking camera is the one you have with you. For me, that most often is my iPhone. I used my iPhone 6+ to quickly grab a spur of the moment shot of my wife cat napping on warm November afternoon. [And my new iPhone X would have taken an even better photo!]
10 Hacks and Accessories for better smartphone hiking photography
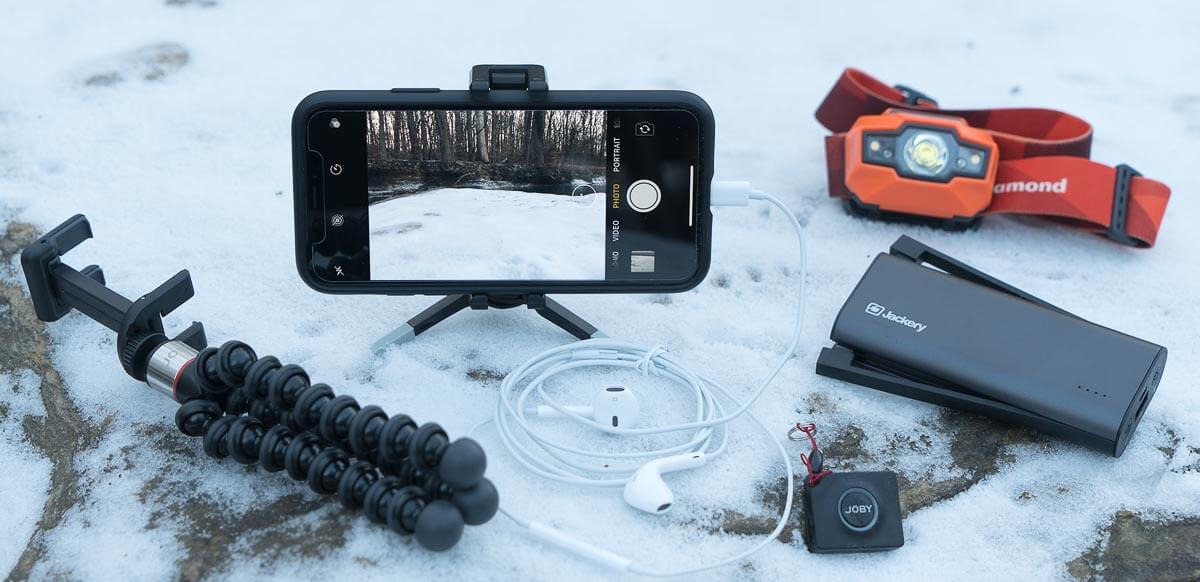 Basic Smartphone Photography Accessories L to R: [Joby GripTight Tripod at (REI) or new JOBY GripTight ONE GP Stand] both better for larger phones & are more adjustable), iPhone X on a JOBY GripTight ONE Micro Stand (smaller & lighter), Apple headset used as a remote shutter release, a Bluetooth Smartphone Camera Remote Shutter (Joby), Jackery Bolt 6000 mAh USB Battery (keeps phone charged for days of use), Black Diamond Headlamp (gets you safely to and from the magic light of dawn & dusk for superior photos).
10 Hacks and Accessories for better smartphone hiking photography
For only $25 and some basic technique, you can take far better photos with your iPhone or Android.
- Take the photo! Don’t ever think your smartphone camera is holding you back.
As hockey great Wayne Gretzky says, “you miss 100% of the shots you don’t take.” The same applies to photography, maybe more so. Grab your smartphone and start shooting. Some of my best photos were taken on a lark. An “I wonder what this will look like attitude” pays off! - Clean your camera lens. It’s likely filthy! That layer of grime will make every photo worse.
- Clean with just your breath and a quality lens cloth like a MagicFiber Microfiber Cleaning Cloth.
- Avoid any case covers over your lens (unless absolutely necessary).
- Get an App for manual control of your camera. Camera+ is a personal favorite for it’s ease of use and power. It also has decent photo editing capabilities.
- For iPhone: Camera+ , or Manual, or VSCO, or ProCamera, or ProCam 4 – Manual Camera
- For Android: Open Camera (free), Camera FV-5, and VSCO
- Note that your Camera App doesn’t need to be complicated or hard to use. All you really want is control over ISO, shutter speed and focus area. This is mostly for shooting off the tripod in the magic light of dawn and dusk. [Ideally, you want to manually set focus and a low ISO (around 32) to get the best images.]
- Tip: Get the best quality photo negatives from your smartphone. If you will be doing serious editing of your photos (see #9 below) then use your camera app to also save in RAW format.
- Get a small tripod: This eliminates camera shake, and blurry photos in low light.
- Also take way better better selfies! (See more on this below.)
- Larger tripods: Joby GripTight GorillaPod Tripod (REI) or Amazon
new JOBY GripTight ONE GP Stand – Flexible Universal Smartphone Stand for Large Smartphones - Smaller tripods: Joby GripTight Micro Stand (REI) or Amazon
new JOBY GripTight ONE Micro Stand -Super Compact Stand for Smartphones - Or improvise a “natural” tripod. Jump to section on this below.
- Get a remote shutter button: This prevents photo blur when you press your camera to take a photo (the camera moves/vibrates while touching it). It’s also fabulous for high quality selfies (e.g. without your face smashed into the phone see more on this below).
- Bluetooth Smartphone Camera Remote Shutter
- Or use the 2 or 10 second timer setting for your smartphone camera
- Or a little known free feature: Your iPhone wired headphone set works as a remote shutter button. Just press the ‘+,’ volume up button to take a photo!
- Get closer to your subject and fill the frame (if you can).
- Closer is almost always better! So walk, scramble or climb closer to your subject.
- DON’T USE YOU CAMERA’S ZOOM! (unless you have one of the new dual lens cameras like the iPhone 7+, 8+ or X. Then go ahead and use that ‘2x’ button.)
- All your smartphone’s “zoom” function does is pre-crop your photo. You aren’t getting any more pixels or resolution than if you just cropped it yourself. As such, you might just as well have the additional area around your subject in case you want to use it later.
- Try and shoot with the sun behind you, or around 90 degrees from the sun (sun to your left or right.)
- If you shoot into the sun, light will fall directly onto your camera lens. This will create washed out low contrast photos lacking in color and detail.
- If you absolutely need to shoot into the sun… you can try and shade the lens with your hand, but this can be difficult to do and still tap the shutter button. Sometimes a friend’s hand is a big help.
- Take a breath and carefully REVIEW YOUR PHOTO after taking it! You’ll likely not get a 2nd chance, so make sure it’s right.
- Sharpness: Enlarge your photo and scan it. Is everything you want in focus, especially critical areas like people faces/eyes & foreground detail?
- Exposure: Correct overall exposure? Is there some detail in both shadows and highlights?
- Dim Light Problems: Any camera shake (overall photo blur) from a low shutter speed? Smudging, poor color and other nastiness from a high ISO?
- People: Eyes open? Good expression? Awkward position, clothing malfunction?
- Extraneous Objects: Any odd objects in the photos. E.g. trekking poles you left in the foreground, piece of garbage, somebody photobombing, etc.? Also, make sure you didn’t inadvertently cut off something critical like the top of a mountain.
- Use a good photo editing app like Snapseed to dramatically improve the look of your photos. Spending just a few minutes editing can transform a so-so photo to something special. Many of these programs are free and simple to use.
- My personal favorite is Snapseed but some apps like Camera+ also have decent editors.
- And of course Lightroom Mobile is good if you already own one of the Adobe Creative Cloud Photo Plans. But some people may not like the subscription fees.
- Tip: Use your camera app to also save in RAW format to give you the most latitude to edit your photos. The RAW file has more dynamic range (ability to capture a larger range of lights to darks without losing detail). E.g. clouds and other light objects will still have good detail while the normal (JPEG or HEIF) files will not.
- Manage your battery life and carry a backup battery.
- Manage your battery life. Nothing is worse than having an incredible photo opportunity in front of you and pulling out a dead smartphone. With good battery management I get 7 days on trail use hiking with my iPhone. Read more on battery management here.
The best batteries for charging smartphones are: - The 5 oz EasyAcc 6000mAh USB Battery. The highest capacity for its weight, it charges a smartphone 2 to 3 times. I use it on 7-14 day backpacking trips. It has a built-in micro-USB connector and you can connect a lightning cable to its USB port. So you can charge lightening and micro-USB devices at the same time.
- Jackery Bolt 6000 mAh USB Battery. This has faster charging and both micro-USB & lightning connectors. Downside is it has slightly less overall tested (vs. claimed) capacity than the EasAcc.
- Manage your battery life. Nothing is worse than having an incredible photo opportunity in front of you and pulling out a dead smartphone. With good battery management I get 7 days on trail use hiking with my iPhone. Read more on battery management here.
6 Bonus Hacks
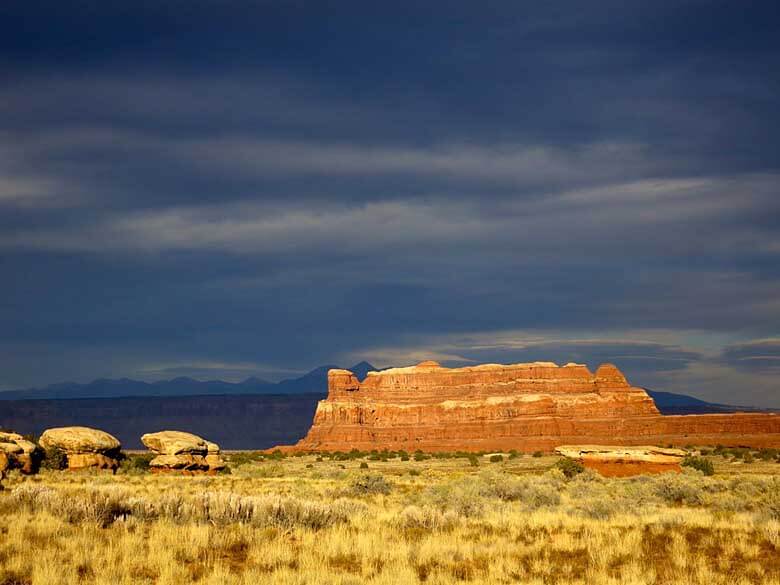
Take the photo! Don’t ever think your smartphone camera is holding you back – I took this shot with a cheap 2011 point & shoot camera but my current iPhone X would have taken a better photo! The major point is that I had a camera and made the time to take the photo. [Pic is Canyonlands UT: An ugly storm of sleet & snow was about to break when a sudden opening in the clouds illuminated the bluff in front of me. I had less than 30 seconds to extract the camera from my pocket, get it out of a waterproof baggie and take the shot before the sun was gone and the heavens opened.]
- Take High Quality Selfies. Use one of the small tripods and a Bluetooth Smartphone Camera Remote Shutter. That way you and your friends can easily pose in a picturesque spot many feet from your phone and casually press the remote shutter to take a great photo!
- Shoot in the “golden hour” of dawn and dusk. This is when the pro’s shoot. Take the time when you get into camp to scout out some good areas to shoot at dawn and dusk. Then get there with plenty of time to setup and wait for the light show to unfold.
- A headlamp is a big help to hike there/setup in the dark, and/or to takedown and hike back in the dark. Use a good Headlamp with a dimming function so you can have low light for not blowing your eyes out when setting but also have a very bright light for hiking.
- Protect your smartphone in the field and save weight and money. Rather than bulky, awkward and expensive cases like an OtterBox Case, use the following items:
- A simple sub-$10 phone case like this Spigen Ultra Hybrid iPhone X Case or the same one for iPhone 7/8.
- Tempered Glass Screen Protector
- Pint Ziplock Freezer bag. I highly recommend using a Pint Ziploc Freezer Bag used to protect your smartphone from dust, scratches and water (effective, lighter and less expensive than elaborate waterproof cases! And it works well for other electronics.).
- Take dreamy blurred water photos. Using Apples new “LIVE” mode or using an app like Slow Shutter Cam. Note that you WILL need to use a tripod and a remote shutter button to get best results. (see above for gear details).
- Make your smartphone into the best hiking GPS going. See How to use your Smartphone as the Best Backpacking GPS.
Final Hack – Improvise a “Tripod” to Stabilize your Camera
You can get much of the benefit of a tripod to stabilize your smartphone by improvising a “tripod.” You can brace your smartphone up against a rock, tree, or even hold it against your trekking pole. Remember to squeeze off that shutter gently! Every bit of stability helps to get a sharp photo.
Or better yet, you can use folded garment (or other prop) on top of a rock, or fallen tree to make an improvised tripod/camera rest. Now that you are not holding the camera, remember to put the shutter release on a 2-second delay for sharpest results. But many times pressing the camera will bump it out of position or knock it over. In this case, use a bluetooth remote shutter release (or for iPhone users, remember that your headphones as a remote shutter button) see details in hacks above.
Additional Reading
Best Backpacking Cameras 2017 – This highly ranked article lays out the best gear and technique for larger, non-smartphone cameras.
How to use your Smartphone as the Best Backpacking GPS – This is the definitive article on how your smartphone can blow away the best dedicated GPS units from Garmin and other major GPS manufactures.
Disclaimer
This post contains affilate links. If you make a purchase after clicking on the these links, a portion of the sale helps support this site at no additional cost to you. I do not receive compensation from the companies whose products are listed. For product reviews: unless otherwise noted, products are purchased with my own funds. I am never under an obligation to write a review about any product. Finally, this post expresses my own independent opinion.
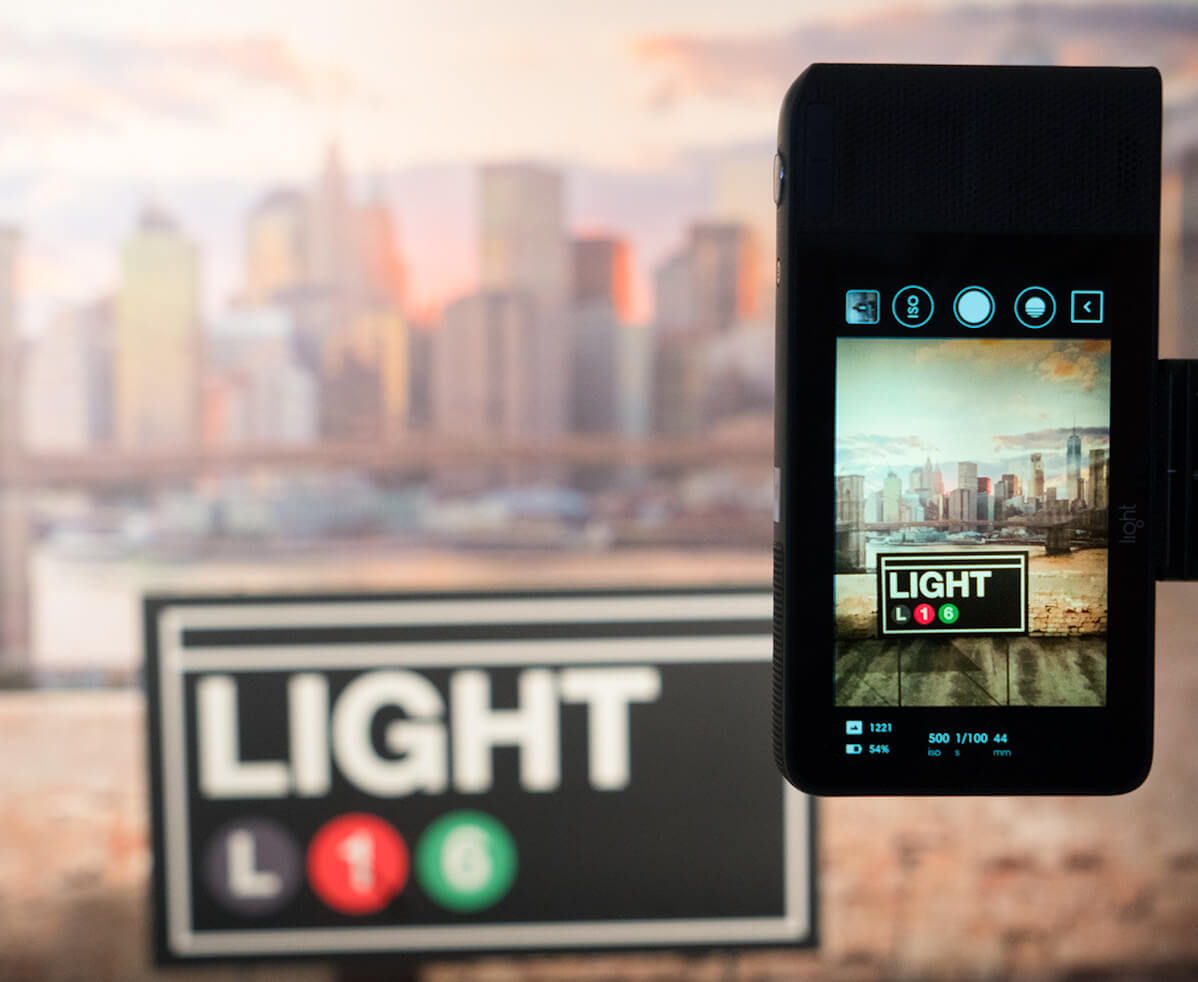
The Light L16 is one of the first “computational” cameras to hit the market. If it works it’s a game changer for high resolution and lightweight photography. Especially for hikers, backpackers, outdoor adventures, travelers or anybody that needs a light, pocketable camera that can produce a 52 megapixel image! And it has the promise of not needing to be traditionally focused. That is, you can determine where and how you want to focus a photo AFTER you take it. So how does the L16 hold up to the hype and high expectations?
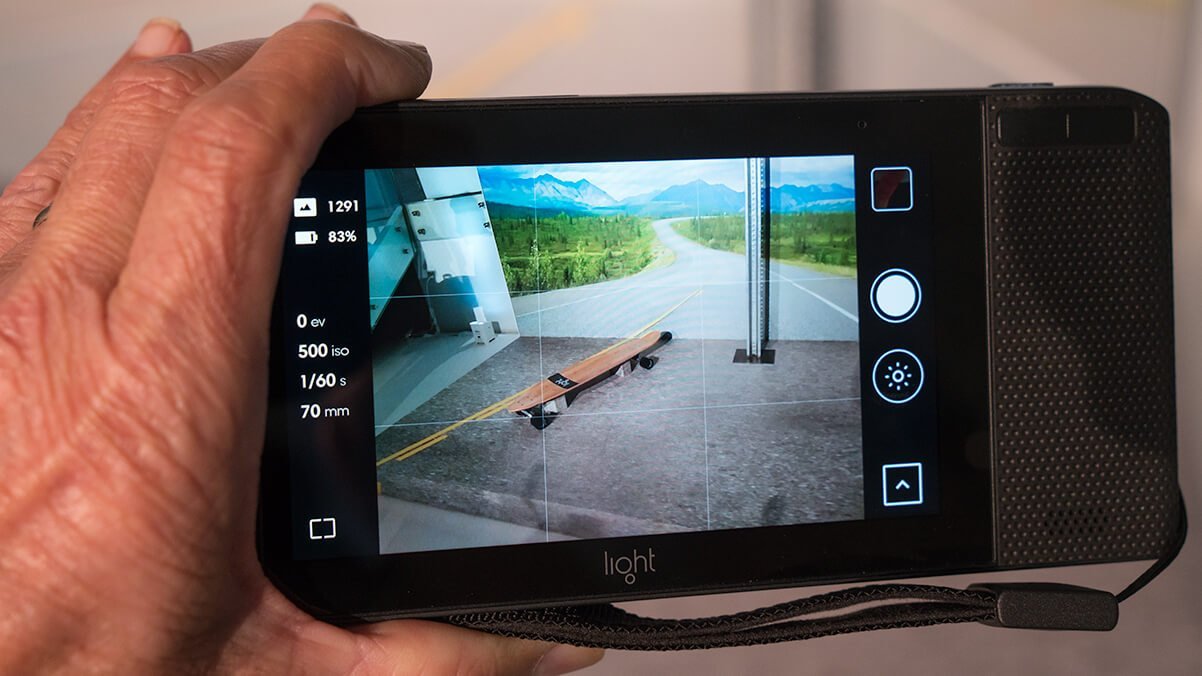
The Light L16 is much smaller and lighter than a conventional camera that takes a 50 megapixel photo. And it has a simple smartphone-like interface—not so surprising since it is an Android-based, touchscreen device. This make the L16 much faster and easier to learn and use than all the knobs, dials and nested menus on a conventional camera.
The Light L16 is a completely new approach to high-resolution photography. It’s a computational camera. That is, a camera that combines the information from many small, inexpensive “smartphone” lenses/sensors, arrayed across the front of the camera like spider eyes, into a single high resolution image. This is done by sophisticated, “computational,” imaging software that merges the data from the camera’s 16 lenses of different focal lengths (wide angle, normal/portrait, and telephoto lenses) into a single photograph.
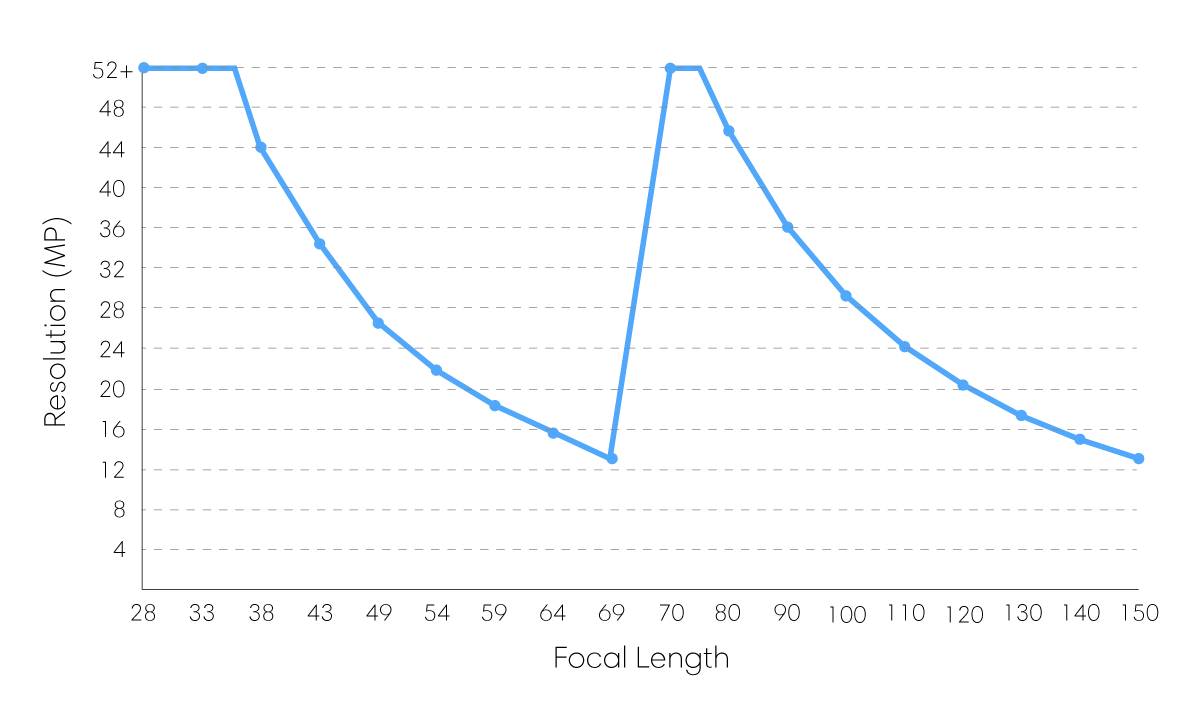
The Light L16 is exceptionally small and low-weight for a 52 megapixel zoom camera. It looks more like a slim smartphone vs. a bulky, awkwardly shaped, conventional camera with a big lens sticking out. It’s half the weight of the lightest comparable conventional cameras with similar resolution and lens zoom range (28mm to 150mm).
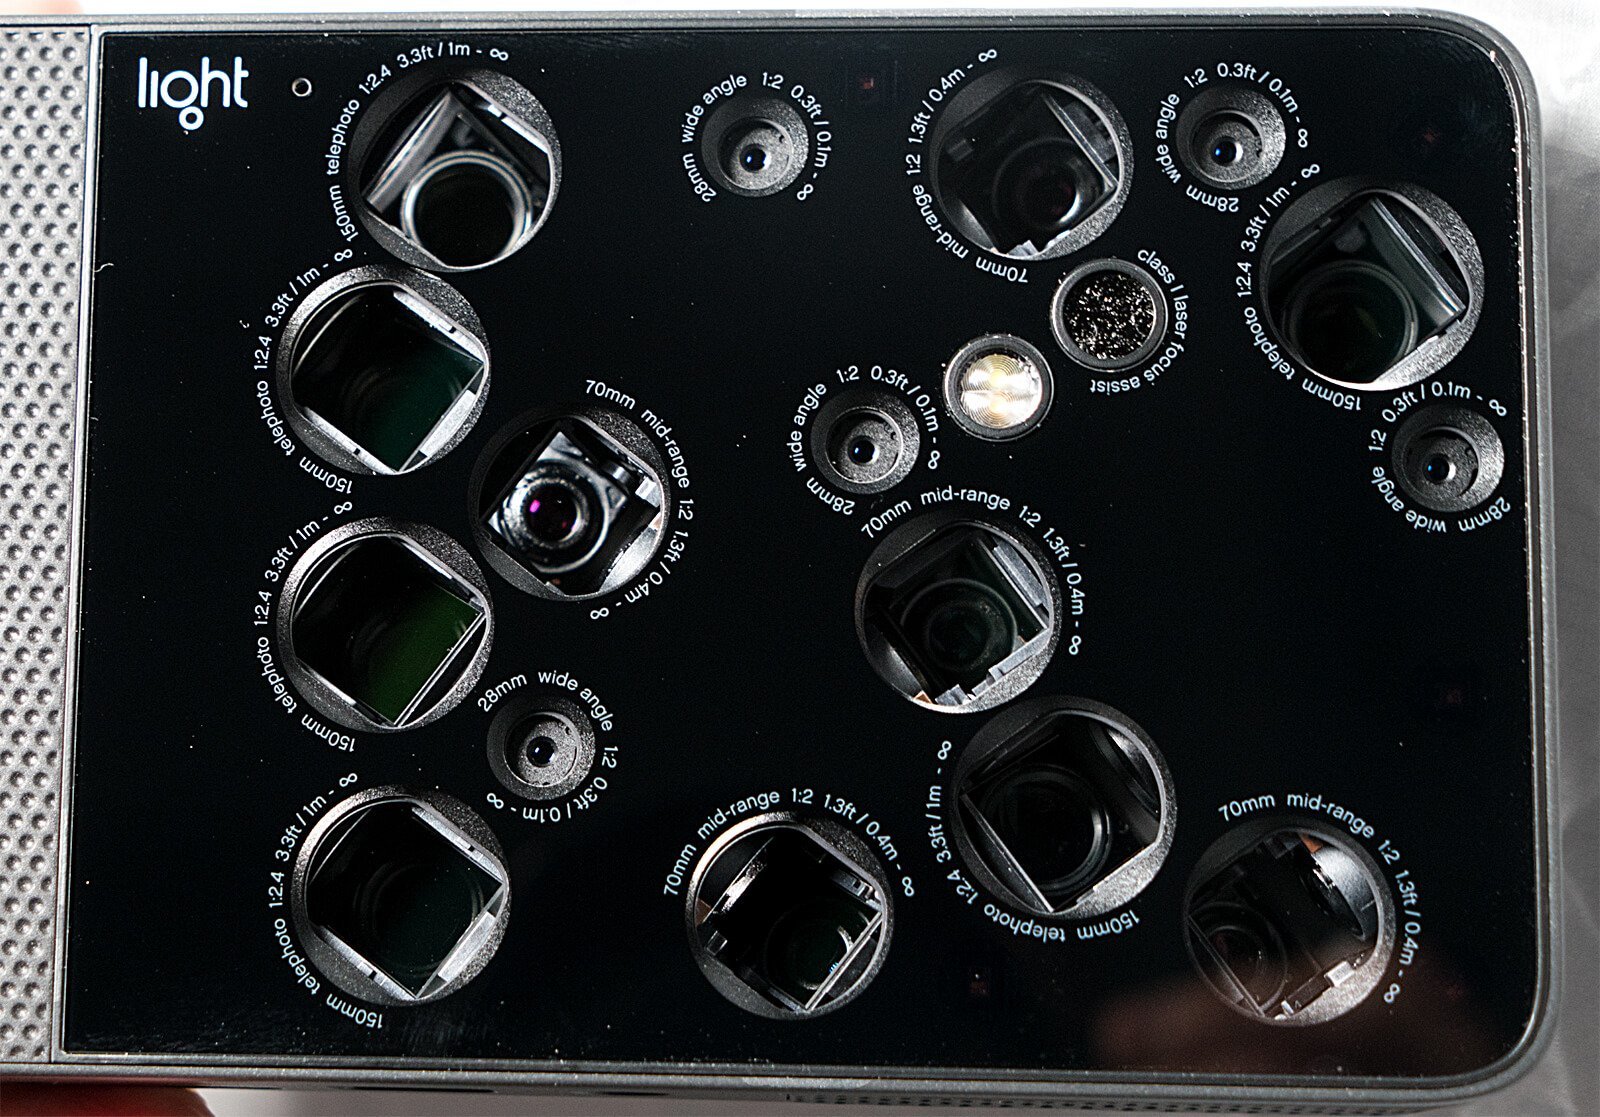
To take a single high resolution image competing with much larger cameras, the Light L16 combines the information from many small, inexpensive “smartphone” lenses/sensors, arrayed across the front of the camera like spider eyes. Pictured is the L16’s lens array of (5) 28mm f/2.0, (5) 70mm f/2.0, and (6) 150mm f/2.4 lenses for a total of 16 lenses. The white circle slightly off-center is the camera’s LED flash. [click on image to enlarge]
Hands on First Look at the Light L16 Computational Camera
Last week I got a few hours of hands on use with the new Light L16 camera. Here’s my take after using the camera, looking at it’s post processing software and talking with a some of Light’s technical staff. Note: This was a short time. Some of it in a controlled environment, although I did get some time to wander around New York City at night with the camera and do some street shooting. Fun!
LIGHT PHOTO KIT
Note: For comparison, the following PROS & CONS loosely use a traditional crop format camera like the 24 MP Sony a6500 with a Sony 18-105 f/4 lens (see my lightweight hiking, backpacking and travel photo kit
PROS
- 52 Megapixel resolution! (But at certain focal lengths, see more below…)
- Low weight at 15.3 oz
- Slim profile and pocketable. (Somewhat larger than an iPhone 8 Plus or Samsung Galaxy)
- No moving parts. Fewer failure modes, limited area for dust and water entry.
- Can adjust depth of field AFTER taking the shot.
- Light says that “Adjust focal plane [the actual place of focus in the photo],” is coming in the next release of Lumen software—maybe a week away. This will be a game changer!
- 5x “optical” zoom. 28mm to 150mm zoom range (35mm equivalent). This is done with multiple 28mm, 70mm and 150mm fixed lenses arrayed on the front of the camera.
- Simple smartphone like interface with touchscreen operation. Fast to learn and use.
- Frequent software upgrades vs. a conventional camera.
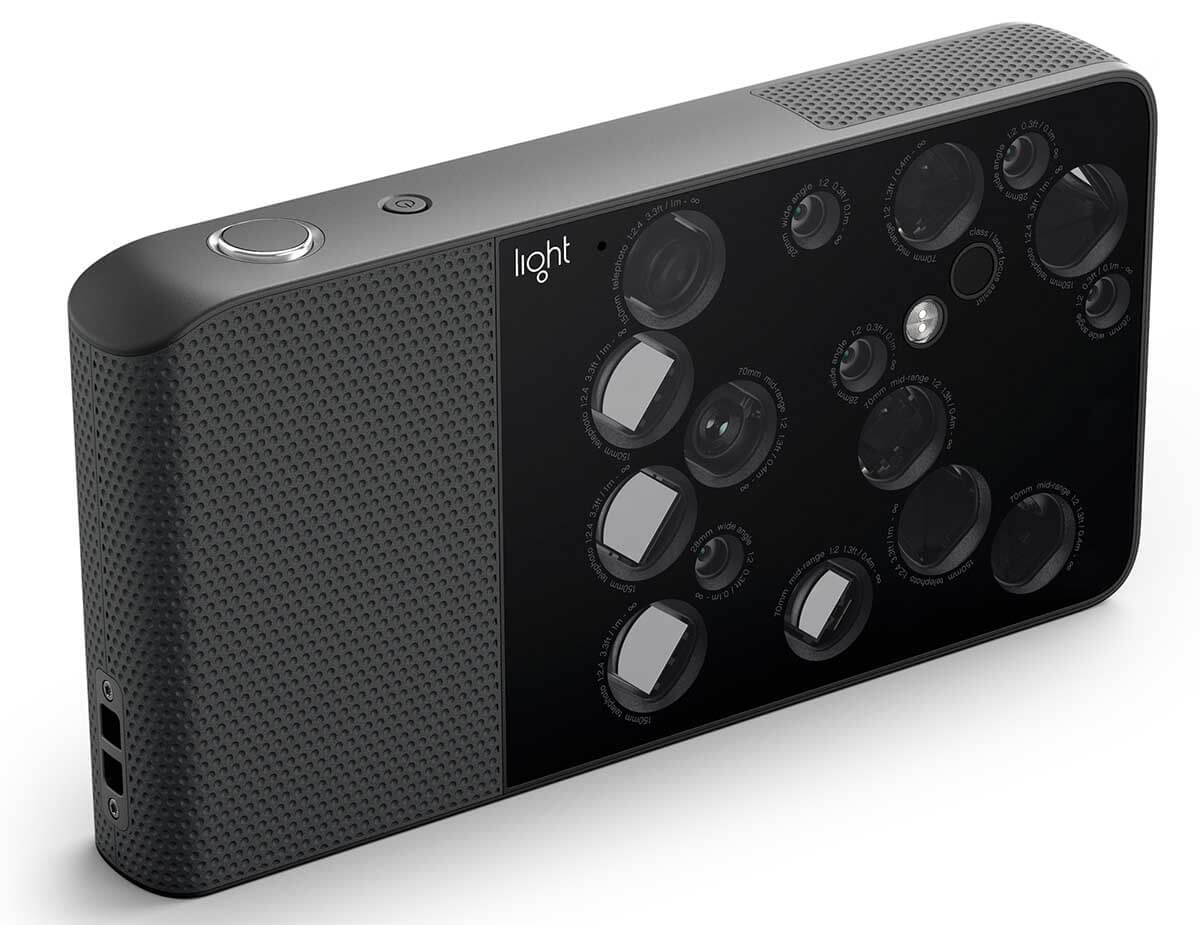
The Light L16 looks more like a slim smartphone vs. a bulky, awkwardly shaped, conventional camera with a big lens sticking out. At 15 oz it’s half the weight of the lightest comparable conventional cameras with similar resolution and lens zoom range (28mm to 150mm). It has no moving parts, which means far fewer failure modes and limited area for dust and water entry.
NOT THERE YET and CONS
- Full 52 megapixel resolution is only at a few focal lengths. The L16’s “variable resolution” is lower than 52 megapixels at other focal lengths. So the L16 is not quite the same as a fully optical 28-150mm zoom on a conventional camera which has fairly consistent resolution across most of it focal range. According to Light ‘The “ideal” focal lengths to shoot at for maximum size and quality across the entire image are 35mm or 75mm.’ On the bright side, these are respectively excellent focal lengths for landscape and portrait work.

- No image stabilization.
- Low light, high ISO performance not there yet. Light suggests a maximum working ISO of 800. This makes some sense with the small size of its smartphone sensors. Altho over time Light may be able improve upon this with software. That is, combining/processing the information from all the sensors to reduce noise and improve ISO. After all the sum of the combined area (10) 13 megapixel sensors is the equivalent of a much larger sensor.
- The following two above likely limit the camera to tripod only use in low light, including the “golden hour” favored by photographers.
- Dynamic range 1 to 2 stops less than competitive conventional digital cameras like the Sony a6500 (claimed by a Light tech rep. to be in the range of 13 stops). This makes sense due to the small size of smartphone image sensors. Again Light.co believes they the can improve upon this via software for reasons similar to the ISO bullet point above.
- Video not yet available. When it is, it will be 4K video shot at a single 28mm, 70mm or 150mm (focal lengths at full frame equivalent)
- No sophisticated, multi-zone exposure metering. Just center weighted, touch to set focus zone, and manual
- No replaceable memory storage, e.g SD cards. Instead has 256 gb of permanent internal memory.
- No smart focus, e.g. the camera making an intelligent focus point choice using hundreds of points across the image. Instead, you manually touch the screen where you want focus. If not the camera defaults to focusing on the center of the screen. Focusing can be slow at times.
- No exposure bracketing, HDR modes, or similar exposure management features.
- No remote control operation, e.g. remote shutter release to avoid camera shake shooting from a tripod.
- Camera is always at full aperture. Without ND filters it will be difficult to get long exposures necessary for blurred images, e.g. flowing water.
- Built in, non-replaceable battery claimed to get about 500 shots. So you either need to shoot with it tethered to an external USB battery. Or wait 1-3 hours to recharge and use it again. Charging takes 1-2 hours with the Li16’s 15 volt charger, or a 2-3 hours with a conventional USB power source/charger.
- No lens hood/shades available. No way to mount specialized filters like neutral density or polarizing.
- It has no viewfinder. So, like a smartphone the display can be hard to see in bright light.
- Only 25% resolution image preview in the camera (e.g. 13 of 52 megapixels)
- Not off-the-shelf: New pre-orders should start shipping on Q1 2018. (2015 pre-orders started shipping in July and continue to ship out…)
SUMMARY
AS of right now the Light L16 has the basic functionality of high resolution camera. In good light and at certain focal lengths, it takes high resolution, ~50 megapixel photos. It’s small, light and easy to use with it’s simple smartphone-like interface. There are no moving parts or items sticking out making it ideal for people on the go (like hikers , backpackers, travelers and outdoor adventurers of any ilk). Just pull it out of your pocket and take good, high resolution photos. And it offers truly new features like adjusting depth of field after you take the picture (and hopefully, in the near future, the ability to adjust focus point after you take a photo). In all, it’s an extremely attractive camera that’s half the weight and far easier to use than a conventional camera!
Even in its current level of deployment/evolution I can see using the L16 for backcountry photography
- Shoot off of a tripod, and keep ISO around 100
- Shoot at or near one of its prime focal lengths; ~28-35mm, and ~70-75mm
- Take my time to get focus right by touching the screen where I want focus
- Use timed shutter delay (hoping for a remote soon)
- Manually do bracketed exposures if needed
- Hand shade lenses as best I can if needed
- Carry a backup USB battery
And to be truthful this is how I would normally take a serious photo about 80% of the time anyway.
Where the Light.c0 L16 falls short is that it lacks many of the features and nuances of conventional single lens/sensor digital cameras in the same price range.
That’s not surprising, since conventional, single-lens digital cameras have been constantly refined and improved for over 40 years (“first” digital camera was a 1975 Kodak prototype by engineer Steven Sasson). The Light L16 has only been in design/development for a few years and in production for a few months. As such, the Light L16 lacks image stabilization, good low light performance (high ISO), multi-zone exposure metering, smart focusing, exposure bracketing, remote shutter release, lens hoods, and a number of other features that are pretty much standard on conventional, high-resolution cameras for serious photography that are in the same price range. Some features like smart focusing, good low light performance, exposure bracketing, and remote control can likely be improved upon or added via software upgrades— a clear benefit of being computational. Other physical features like image stabilization, a non-replaceable battery, non-replaceable memory (e.g. SD cards), and lack of filters and lens hoods will be harder to address (altho third parties could make aftermarket solutions for some, similar to what has happened for smartphones).
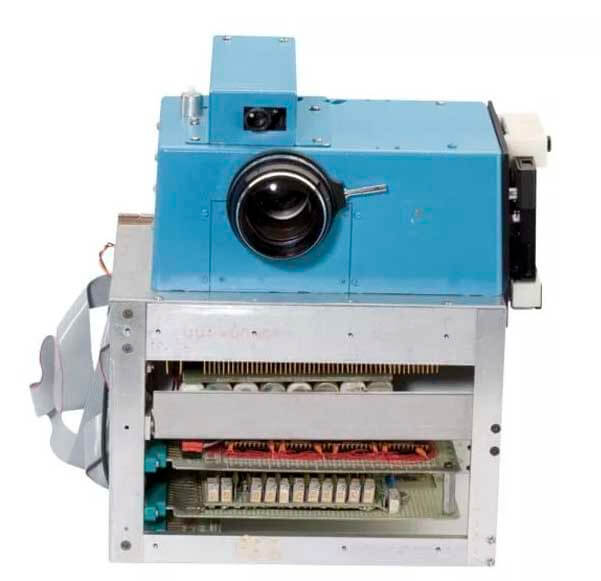
Conventional, single sensor, single lens digital cameras have come a long way in 40 years! Pictured is the first digital camera designed by Kodak engineer Steven Sasson in 1975. The camera weighed 8 pounds and had a 0.0009 megapixel sensor (100 x 100 pixels). [Photo – the George Eastman House]
The Verdict is Still Out
As a serious hiker, backpacker, outdoor adventurer, and globetrotter who travels light and wants great photos… I really want the Light L16 to achieve its promise! And it’s the L16’s reliance on software rather than hardware gives me hope. It seems that many of the L16’s current shortcomings and missing features can be improved upon and added over time via their “frequent” software updates. Case in point, I belive that AFTER-taking-a-photo, focus plane adjustment is coming very soon. As I write, a Light representative says “This feature will be available when we release the new version of Lumen in about 1 week.”
I wish Light all the best in quickly addressing many of these issues I and others have raised, to make the L16 the game changing camera it could be. And if it isn’t the L16 v01, it will be v02 or another computational camera. When you reflect on the improvements to conventional digital cameras over 40 years… just think of what 5 to 10 years of development and refinement of computational photography might achieve!
Specifications as of Nov 1, 2017
- Approx. dimensions: 6.5 in. (165mm) x 3.3 in. (84.5mm) x 0.94 in. (24.05mm)
- Approx. weight: 15.3 oz. (435 g)
- Chassis Die-cast aluminum alloy
- Grip: Rubberized non-slip grip with a lanyard connection
- Screen: 5″ FHD touchscreen
- Lenses: 16 individual modules- 5x28mm f/2.0, 5x70mm f/2.0, and 6x150mm f/2.4 (Focal lengths at full frame equivalent)
- Sensors: 16 individual 13MP sensors
- Minimum focus: 10cm at 28mm, 40cm at 70mm, 1m at 150mm
- Storage: 256GBUSB on-the-go compatible
- Capacity: 1000+ images
- Effective pixels (megapixels): Up to 52 million+ (52+ MP)
- Output: File types – JPEG, DNG, LRI
- ISO sensitivity: ISO 100-3200
- Shutter speed: 1/8000 to 15 sec. Fastest shutter speed 1/8000 Slowest shutter speed 15 sec.
- Focus: Tap to focus, Half-shutter press to focus
- Self-timer: 3, 5, 10, 20 sec
- Metering method: Center-weighted, Touch-weighted
- Exposure modes: Auto, Manual
- Shutter Release Modes: Single-frame Self-timer, 3 and 6 shot burst, Advanced low-light burst (coming soon!)
- Chip set: Qualcomm Snapdragon 820 + Light ASIC
- Operating system: Android
- Security: Full disk encryption
- Connectivity: GPS, Wi-Fi, and Bluetooth
- Battery: 4120mAh Lithium-ion polymer
- Flash: Dual-tone LED (no sync port/shoe)
- Tripod mount: Standard 1/4″-20tpi
- USB: USB 3.0 SuperSpeed, Type-C connector
- Video (coming soon!): 4K video with 28mm, 70mm or 150mm focal lengths at full frame equivalent
- Image processing – L16: 5MP optimized for social sharing
- Image processing – Lumen: Process photos, Adjust depth of field, Edit depth, Adjust focal plane (coming soon!), Export photos for further editing
- System requirements – Lumen: All systems, 8 GB or more of RAM (16 GB recommended), 200MB of available hard-disk space (1GB recommended), 64-bit processor
Mac: 2012 or newer (recommended) OS X version 10.11 (El Capitan) or higher
PC: 2012 or newer (recommended) Windows 7 with Service Pack 1 or Windows 10 - Sharing: Wi-Fi (on-camera browser), Bluetooth to Android or Windows, iOS (coming soon!), Direct social integration (coming soon!)
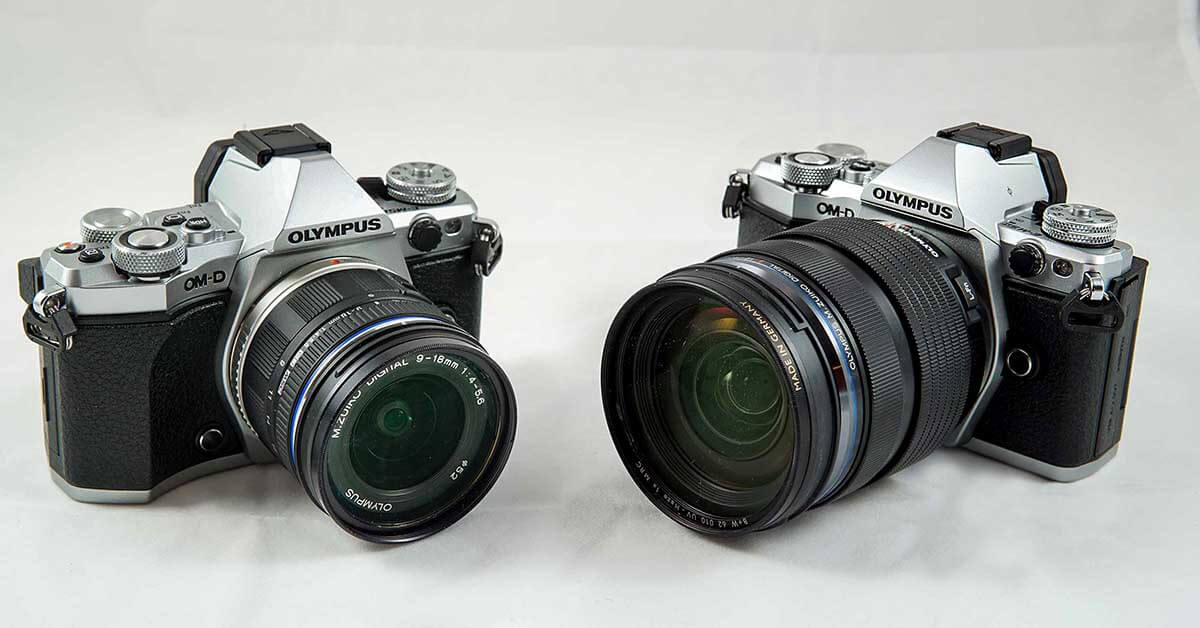
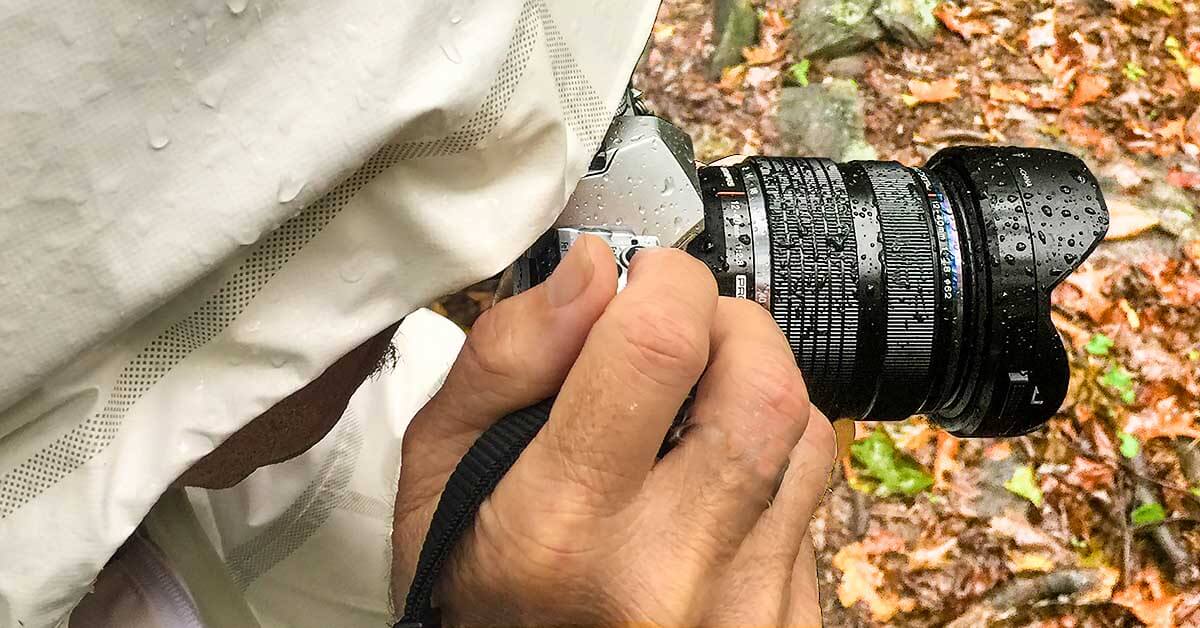
Superb zoom lenses & weather resistance set the Olympus OM-D EM-5 II apart as a great backpacking & hiking camera. With the EM-5 II you’ll continue taking great pictures in tough environmental conditions that would shut down other cameras. [Picture above is the environmentally sealed Olympus OM-D EM-5 II and 12-40 f/2.8 PRO lens working in the rain-shadow of hurricane Matthew.]
Note: This Olympus OM-D EM-5 II Camera Review focuses on how well it does as a backpacking and hiking camera. As such, this review criteria differs significantly from mainstream camera reviews like DP Review. See more on what makes a great backpacking camera…
[Photo taken on the Appalachian Trail in the rain-shadow of hurricane Matthew.] With the Olympus OM-D EM-5 II Camera you’ll continue taking pictures in tough environmental conditions that would have had other cameras stowed in your backpack hours ago.
Quick Specs – Olympus OM-D EM-5 II Camera Review
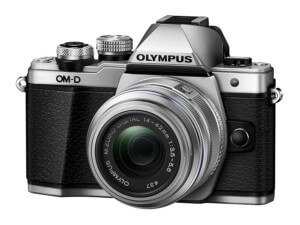
- The Olympus OM-D EM-5 II is a weather-sealed, 16 megapixel mirrorless u-4/3 (MFT) sensor camera
- It is smaller and lighter than APS-C, crop sensor cameras like the Nikon D7200 or Canon EOS 80D
- Highlights: weather-sealed; excellent zoom lenses (better than many primes); and its 5-axis, in-body image stabilization works with any lens
- Weights: 14.5 oz camera body only with battery
19 oz with 14-42 f/3.5-5.6 “kit” lens, 21.0 oz with 9-18 f4.0-5.6 lens; 29 oz with 12-40 f/2.8 PRO lens
Light and sharp Olympus lenses are key to great image quality. Right is the weather and dust resistant 12-40mm F2.8 PRO. When combined with the also weather-resistant EM-5 II camera, you get a setup that can deal with tough environmental conditions. Left is the 9-18 9-18mm f4.0-5.6 lens with an exceptionally wide 18-36mm equivalent range. At only 5 oz and super compact, it’s an engineering marvel.
Contents of this Review (links to sections)
What’s Good about the Olympus OM-D EM-5 II
What’s Not so Good about the Olympus OM-D EM-5 II
Summary – Why the Olympus OM-D EM-5 II is an Excellent Backpacking Camera
Top 5 Criteria for a backpacking and hiking camera – how the Olympus OM-D EM-5 II does
Suggested Lenses for the Olympus OM-D EM-5 II
Tips for Using the Olympus OM-D EM-5 II
COMPARISON: Olympus OM-D EM-5 II vs. the Sony a6000 through a6500 Cameras
What’s Good about the Olympus OM-D EM-5 II
- Weather sealed – dust-resistant / splash-resistant
- Excellent zoom lenses exceeding the resolution of most prime (fixed focal length) lenses
- Olympus M.ZUIKO DIGITAL ED 12-40mm F2.8 PRO. Fast and weather sealed.
- Olympus M.ZUIKO DIGITAL ED 9-18 f4.0-5.6 lens. Exceptionally wide 18-36mm equivalent range. Light and compact!
- First-rate, 5-axis in-camera image stabilization works with any lens. This hugely expands the lens options for handheld shooting when backpacking.
- Fast focusing
- Excellent camera controls (2 knobs and many function buttons) allow you to make essential adjustments quickly and without having to take your eyes off the viewfinder
- Highly customizable to your shooting style = faster easier photo taking in the backcountry
- Bright large viewfinder with excellent information display options
- Fully articulated touchscreen display (great for tripod and video shots)
- Nice out-of-camera JPEG images (speeds post-trip workflow and publishing images)

Out of camera JPEG images are really nice and don’t require as much tweaking in a photo editor. This greatly speeds getting photos to publication—the single largest time consumer/bottleneck in the whole photographic production process. [Barn taken at the end of a long hike in the Blue Ridge Mountains of Virginia]
What’s Not so Good about the Olympus OM-D EM-5 II
- 16 MP vs 24 MP of competitive mirrorless APS-C cameras (but good Olympus zoom lenses close the resolution gap)
- High ISO performance ⅓ stop less than APS-C cameras from Sony, Nikon and Canon
- u4/3 sensor has slightly lower 5% color depth, and 8% dynamic range than best APS-C cameras like the Sony a6500
- Video is not class-leading (but it shoots solid 1080p with excellent image stabilization and focusing, with an articulated touch screen. This is likely the bread and butter for most backcountry video)
- Reading the manual and customizing the camera takes time. (But once done you’ll reap the benefits of fast access to your most used controls.)

Handheld @1/6 sec and sharp: Literally shooting in a cave—Luray Caverns, VA. Olympus OM-D EM-5 II Camera with ED 12-40mm f/2.8 zoom lens. [1/6 sec, f/2.8, ISO 400] And the camera’s moisture resistance was great in the extremely damp cave.
Summary – Why the Olympus OM-D EM-5 II is an Excellent Backpacking Camera
To fully appreciate why the Olympus OM-D EM-5 II is an excellent backpacking camera you have to look at the camera, its excellent lenses and features as a whole. As such, it has an unbroken chain of elements to produce excellent final images, even shooting handheld in the challenging situations encountered backpacking. As you can see below, the camera does well in all of the Top 5 Criteria for a Backpacking Camera. [For a full explanation of these criteria see: 5 Most Important Features for a Backpacking Camera (clickable link)]
Top 5 Criteria for a backpacking camera – how the Olympus OM-D EM-5 II does
- It has a sharp, wide angle zoom lens.
Both the Olympus ED 12-40 f/2.8 PRO lens and the 9-18 f4.0-5.6 lens yield images approaching the maximum resolution of the camera’s sensor—better than most prime lenses. The 12-40 stands out for being weather sealed, and for having a large aperture (good for low light). The 9-18 is exceptionally wide for dramatic creative angles and taking in large landscapes.
The extremely sharp dust/water resistant 7-14mm f/2.8 PRO Lens and 12-40mm F2.8 PRO lenses have manual focus activation by sliding the focus ring back. This exposes traditional focus setting marks.
- It takes sharp, high quality photos handheld. Especially in the dim light of dawn and dusk.
- The Olympus OM-D EM-5 II has excellent in-body stabilization that works for any lens (stabilized or not). This allows for the stabilized use of a vast array of u4/3 lenses. The 12-40mm F2.8 is quite fast for 13 oz zoom lens—great for low light performance.
- The camera has quick and accurate auto focusing. In addition, I use its excellent manual focus (with “focus assist”) to get focus exactly where I want it. Its touchscreen is particularly good when focusing and making adjustments when shooting from a tripod—and great for shooting video!
- Out of camera JPEG images are quite nice and don’t require as much tweaking in a photo editor. I had little reason to use RAW images.
- On the down side, since its micro-4/3 sensor is smaller, the EM-5’s high ISO performance is about ⅓ stop less than leading APS-C cameras.
- Essential controls are fast and easy to use. You can take a great photo in a few seconds and move on.
Two large, knurled control dials on the top of the camera due the bulk of the work. Once the program buttons where programmed, I could quickly adjust exposure, aperture, shutter speed, ISO setting, activate manual focus, manage DRO (digital range optimization) or “Shadow Adjust Mode,” timed shutter release, etc. I could adjust all of these in a matter of seconds without taking my eye off the viewfinder.
You can control almost every setting from the top panel of the Olympus OM-D EM-5 II without having to dive into menus. Make sure you do a good job of programming the four Fn buttons to your needs. I usually have the Fn 1 button programmed to switch between Manual and Auto Focus.
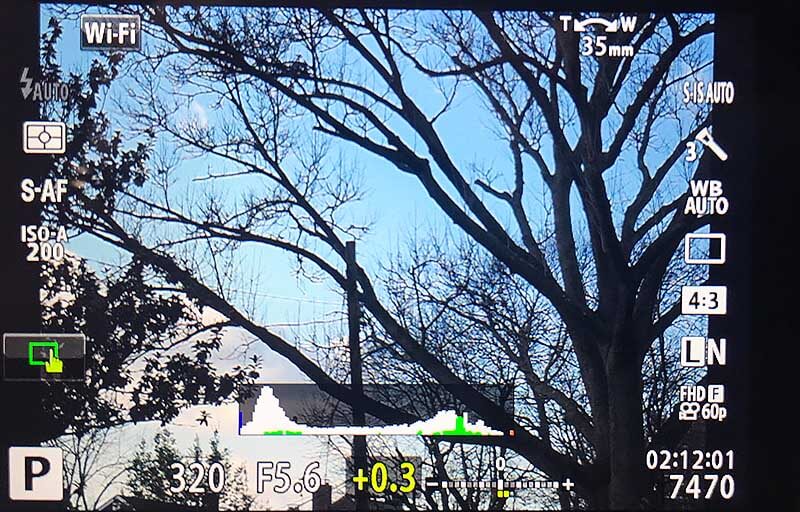
- It has a bright viewfinder with all essential information displayed on one screen.
This is one of the brightest and nicest EVFs (electronic viewfinders) I’ve used. The swivel touch display is also great when operating off of a tripod or shooting video. There’s enough information available that you can shoot and make adjustments without taking your eyes of the EVF.

All essential information is in the display, including a histogram so you can get the exposure right before taking the photo. [Theres also a nice dual level mode to get your photo aligned.]
- Light and compact body with ruggedness and weather resistance a plus.
I’ve covered this in a fair amount of detail already. But to summarize, the Olympus OM-D EM-5 II has a rugged metal body. There is little plastic to get scratched or damaged. The EM-5 body is also dust/water resistant. Finally, there are two superb dust/water resistant zoom lenses for the EM-5. The combination of a both dust/water resistant body and lens is very attractive for windy/dusty/gritty desert environments, and damp rainy climates like the Pacific Northwest.
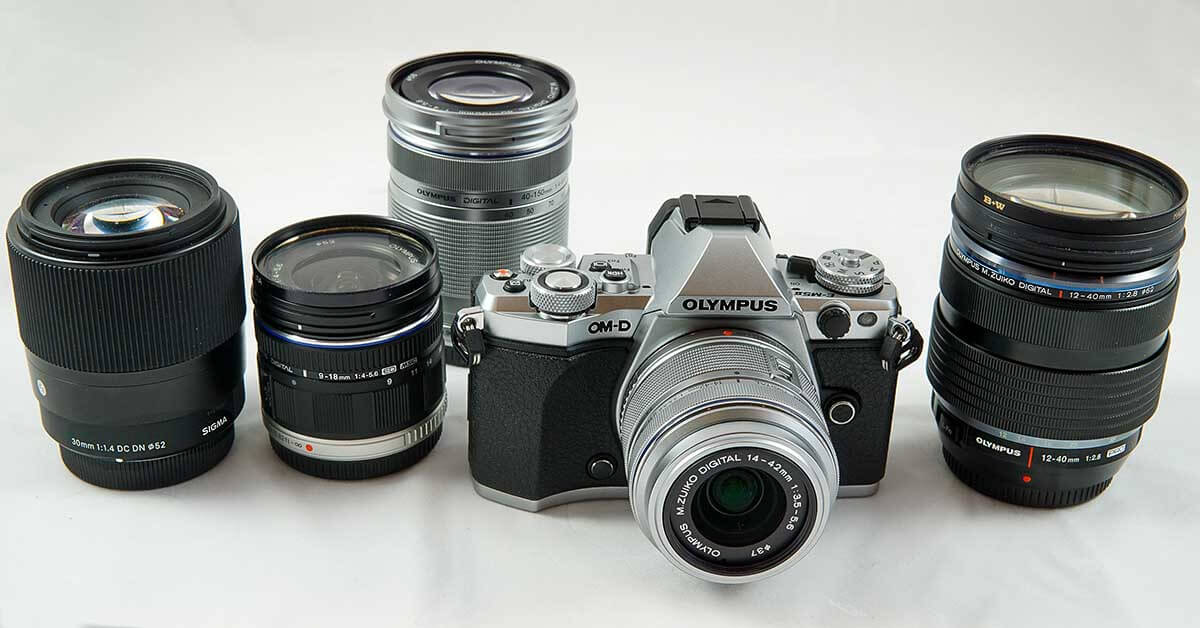
An example of a great lens system. From R to L: the very sharp environmentally sealed, 12-40mm f/2.8 PRO lens; on camera 14-42mm f/3.5-5.6 II R standard kit lens; 40-150mm f/4.0-5.6 R telephoto zoom; the compact, wide and sharp 9-18mm f4.0-5.6 lens weighing only 5 oz!; and far left is the sharpest lens of the bunch, the Sigma 30mm f/1.4 prime.
Suggested Lenses for the Olympus OM-D EM-5 II
Again, what sets the Olympus apart from many cameras is an excellent selection of lenses. But in particular, superb zoom lenses!
Moderate Price and Budget Lenses
- Olympus M.Zuiko Digital ED 14-42mm f/3.5-5.6 II R. Standard kit lens. Light, super compact, good if not exceptional image quality. Good value.
- Olympus M.Zuiko Digital ED 40-150mm f/4.0-5.6 R. Inexpensive, light and surprisingly good image quality. Good value.
- Sigma 30mm F1.4 DC DN C Micro 4/3. Very sharp. Between a long normal and short portrait lens.
- PANASONIC LUMIX G II Lens, 20mm, F1.7 ASPH. Exceptionally sharp normal lens.
Alert! Unless you really need a single lens solution that includes a long telephoto, I would shy away from the Olympus M.ZUIKO DIGITAL ED 14-150mm F4.0-5.6 II lens that is sometimes bundled with the camera. It’s expensive and has lower image quality than the combination of the 12-42 and 40-150 lenses above.
Higher Priced Lenses
- WR Olympus M.ZUIKO DIGITAL ED 12-40mm F2.8 PRO. Fast and weather sealed.
- Olympus M.ZUIKO DIGITAL ED 9-18mm f4.0-5.6. Exceptionally wide 18-36mm equivalent range. Light and compact!
- WR 7-14mm f/2.8 PRO Lens. A beast at 18.8 oz. but it’s fully rectilinear and at 7mm it’s the equivalent of a 14mm lens on a 35mm camera!
- Panasonic Leica Summilux DG 25mm F1.4. Exceptionally sharp and fast normal lens.
If you need/want more u4/3 lenses
Micro 4/3 is an open format also used by Panasonic, which along with Sigma (and a few others like Rokinon and Tamron) also makes some excellent lenses.
 |
Also consider the less expensive, but non-weather resistant Olympus OM-D EM-10 II. Most of what is written about the Olympus OM-D EM-5 II is also true of OM-D EM-10 II. That makes the EM-10 II a tremendous value! Both cameras share the same image sensor, electronics and selection of great lenses. For a killer wide-angle backcountry setup for moderate cost and low weight, consider the EM-10 II paired with the compact, wide and very sharp ED 9-18mm f4.0-5.6 lens. This lens is exceptionally wide-angle (18-36mm equivalent) for dramatic perspectives and sweeping landscapes. Compact and only 5 ounces, it is a marvel of optical engineering. |
Tips for Using the Olympus OM-D EM-5 II
- For sharpest pictures shoot in Aperture Mode, “A” on the mode dial. Set it to the lens’ best aperture (usually around f/4 or f/5.6 for u4/3 lenses).
- Program the F1 function button to manual focus. One of the joys and strengths of mirrorless cameras is how quickly and well you can manually focus. With the F1 button you can switch between auto focus and manual in less than a second. (Or just use the manual focus clutch on the focus ring of the PRO lenses)
- Use the “Shadow Adjust Mode,” in bright daylight. It will take some of the contrasty sting out of your midday/full-sun photos. Expose for the highlights and let the camera auto-adjust to better expose the shadows.
- Use the nice histogram in the display. This will give you a good idea if you are losing shadows or blowing out highlights before you take the photo.
- Do take the time to customize the camera to make your most used features quickly accessible via the many function buttons on the camera, and even on some of the lenses. This may require downloading a PDF of the manual and doing some reading but you’ll thank yourself later.
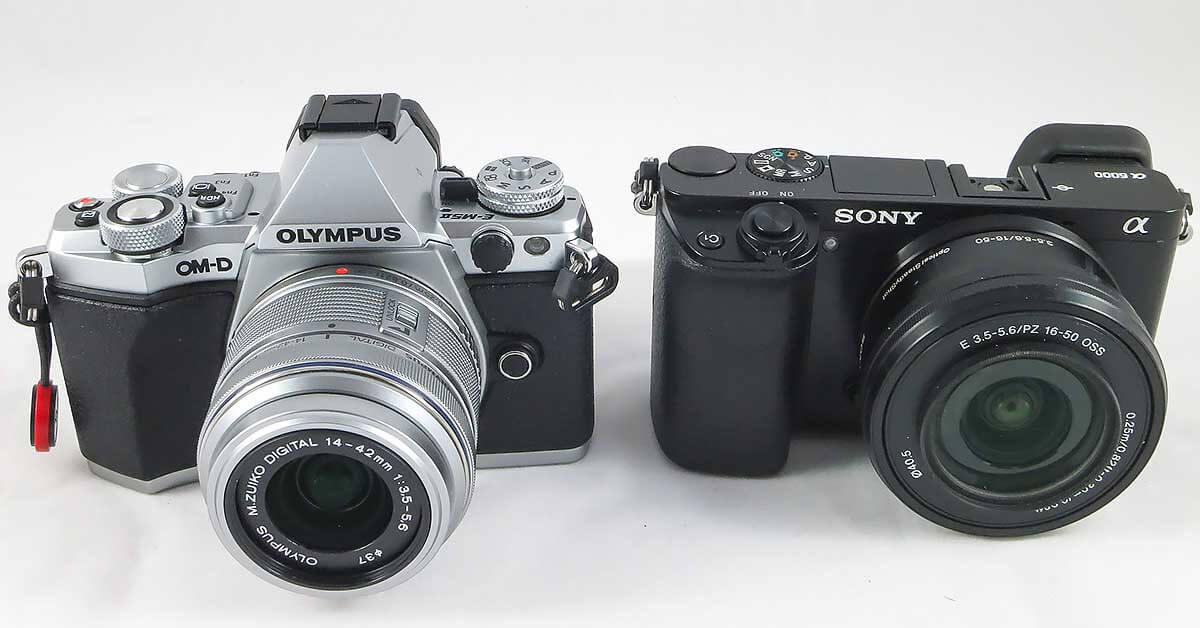
Olympus OM-D EM-5 II vs. the Sony a6000 through a6500 Cameras
Speed and Ease of Use – advantage Olympus
The Olympus’ excellent camera controls (2 knurled top knobs and many function buttons) allow you to make essential adjustments quickly and without having to take your eyes off viewfinder. In comparison, some important Sony adjustments must be made in-menu or using the less than perfect camera back dial. In addition, the Olympus has a much larger and brighter EVF display. The Olympus has a better rear touchscreen display that both rotates and twists. The Sony a6000 and a6300 have non-touchscreen displays that only tilt. (The a6500 has a touchscreen display but it only tilts.)
Camera Sensor and Video – advantage Sony
The Sony 24 MP sensor when combined with the best prime lenses will out resolve the Olympus 16 MP sensor. In addition the larger Sony sensor has slightly better high ISO performance, color depth, and dynamic range. But Olympus wins the resolution battle for zoom lenses. The best Olympus u4/3 zoom lenses have slightly higher perceptual resolution of 10 MP vs. 8-9 MP for the best Sony zoom lenses. The Olympus is a solid but not exceptional video camera, while Sony cameras are killer video machines.
Zoom Lenses and Resolution – advantage Olympus
With their standard kit lenses ( Olympus 14-42 F4.0-5.6 II lens and Sony 16-50mm f/3.5-5.6 OSS) the perceptual resolution of the Sony and Olympus cameras are essentially equal at 6 MP. Even though the Sony has a 24 MP sensor vs. the Olympus 16 MP sensor. This is because the Olympus kit zoom is a higher resolution lens. But the Olympus OM-D EM-5 II has a clear advantage when you need a higher quality/higher resolution zoom lens. There are six u4/3 mount zoom lenses with perceptual resolution of 8-10 MP—at least two are weather resistant. These zoom lenses approach the 12 perceptual MP range of the best Sony E-mount prime lenses. (They even slightly beat the perceptual resolution of the bestSony zoom lenses!) In comparison, there are only three Sony E-mount lenses with perceptual resolution of 8-9 MP—none are weather resistant. These Sony E-mount zoom lenses are nowhere near reaching the 16 perceptual MP range of the best Sony E-mount prime lenses.
Prime (fixed) Lenses and Resolution – advantage Sony
Sony has the perceptual resolution advantage when it comes to prime (fixed focal length) lenses. There are six Sony E-mount prime lenses with perceptual resolution of 12-16 MP. In comparison, there are four u4/3 mount prime lenses with a perceptual resolution of 11-13 MP. This is mostly due to Sony’s larger 24 MP sensor.
Image Stabilization – advantage Olympus (with the exception of the Sony a6500)
Olympus has the advantage with its tried and true 5-axis in-camera image stabilization that works with any lens. This hugely expands lens options for handheld shooting when backpacking. Only the most recent Sony a6500 has camera image stabilization. But this is huge deal for Sony fans that hike and backpack (that is don’t use a tripod often).
Weight with Kit Lens – a draw (with the exception of the Sony a6000)
The Olympus OM-D EM-5 II is 19 oz with its 14-42 F4.0-5.6 II lens kit lens. But the comparable (weather sealed, in body stabilization) Sony camera, the a6500 is about an ounce heavier with its 16-50mm f/3.5-5.6 OSS kit lens. The Sony a 6000 is a svelte 16 oz and about 3 oz lighter than the Olympus.
Alert! as a backpacker you are not well served by mainstream camera reviews like DPReview.
That is, the 5 Most Important Features for a Backpacking Camera are quite different than those for a general use camera in mainstream reviews. Here are the major differences.
- CAMERA WEIGHT – In mainstream reviews, the weight of the camera with a sharp zoom lens is not factored into their ratings. In fact, they routinely think that hefty cameras are better!
- ZOOM LENSES – Many zoom lenses commonly sold with good cameras can only resolve 6 to 9 perceptual megapixels of the camera’s 24 MP sensor! Something not highlighted in mainstream reviews.
Bottom line: a great camera with a mediocre lens will give you mediocre results. - IMAGE QUALITY HANDHELD – Mainstream review image quality assessment is done with the camera on a tripod using the highest quality (expensive and heavy) non-zoom lenses in the controlled environment of a test facility. While lightweight backpackers and hikers usually shoot in the field, handheld using a single zoom lens. (This saves the weight of a carrying a heavy tripod and multiple lenses.)
- DAWN/DUSK PERFORMANCE – A backpacking photographer is further challenged by taking handheld photos in the dim light of dawn and dusk. This is the golden hour when the light is perfect for that great backcountry photo. Unfortunately, these are also conditions particularly vulnerable to images being completely ruined by blur from low shutter speeds and camera shake. This is not well covered in mainstream reviews.
A great backpacking camera is light but equally important, it gives you sharp photos even when handheld using a zoom lens in the low light of dawn and dusk. Pictured the environmentally sealed Olympus OM-D EM-5 ii with 12-40 f/2.8 PRO lens.
5 Most Important Features for a Backpacking Camera – Summary
- Light and compact with ruggedness and environmental sealing a plus
- Sharp, wide angle zoom lens that is also light. These can be very difficult to find!
- Takes sharp, high quality photos HANDHELD
- Fast and easy to use in manual or semi-manual mode (many light/compact cameras are not!)
- Bright viewfinder with all essential information displayed on one screen
And at the end I list What Cameras I take Backpacking that meet these criteria.
Surprised you don’t see any point and shoot cameras in here?
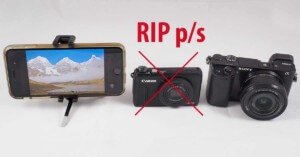
In The Point and Shoot Camera is Dead for Hikers, I discuss why I belive the point and shoot camera is dead (or approaching non relevance) for hikers and backpackers. But to summarize:
- The point and shoot (p/s) camera is being squeezed into the grave from two sides. 1) on the inexpensive side by constantly improving smartphone cameras. And 2) on the more expensive side by very light mirrorless, interchangeable-lens cameras. If photography is a serious objective of your trip, their near “pro-level” performance justifies their cost/weight vs. carrying just your smartphone.
- I am covering very light mirrorless, interchangeable-lens cameras in this post
- And I will cover smartphone cameras, accessories, and techniques in a future post.
Top 5 Most Important Features for a Backpacking Camera – Detail
1) Light and compact with ruggedness and environmental sealing a plus
- Yes number 1 is weight, but not in the way you might expect. First, this is the weight of the camera with a sharp zoom lens. And second, as long as it’s below a critical weight I don’t worry about it so much. After that, capturing a good photograph is my primary concern. Criteria 2 through 5 below all contribute to getting the best possible photo when backpacking.
- For me, the critical weight for a backpacking camera is determined by what I comfortably carry all day mounted to the shoulder strap of my pack. That is around 24 oz (1.5 lb) for camera and lens. And around 30 oz when I need an environmentally sealed camera/lens system, e.g. the Olympus OM-D EM-5 ii with 12-40 f/2.8 PRO lens.
- Environment sealing is important in some situations but not others. It adds significant cost and weight to a camera. Dust resistance is probably the most important since blown dust from dry and windy environments is quite common.
- If you are hiking on trail and take reasonable care of your camera, ruggedness is not a big deal. On the other hand, if you are bushwhacking, scrambling, or outright climbing and frequently using your camera, ruggedness may be a very good feature.
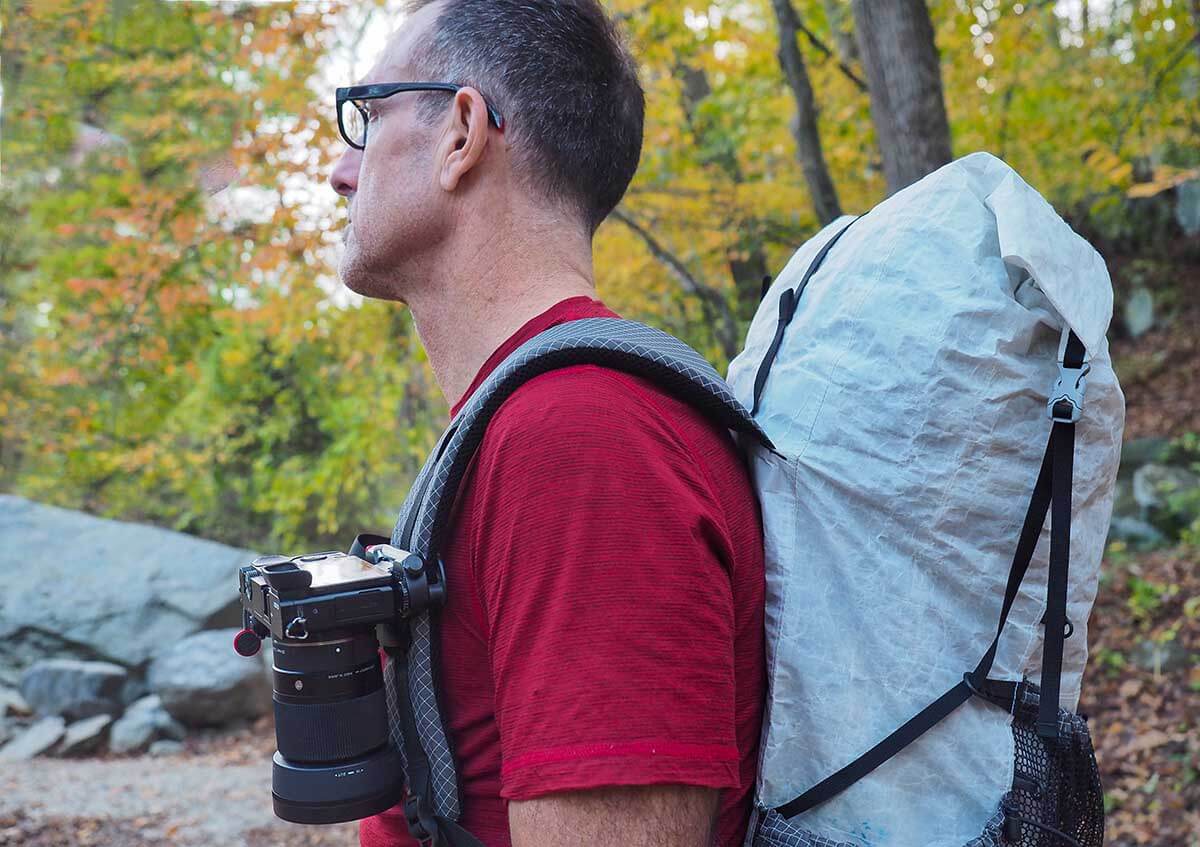
For me the maximum weight of a camera is determined by what I an comfortably carry all day on the shoulder strap of my pack. Pictured is a Sony a6000 camera with the stellar Sigma 30mm f/1.4 Art lens (22 oz total wt). They are mounted to a Peak Designs CapturePRO on the shoulder strap of my pack. See 15 second video below to see this fast system in action.
2) It has a sharp*, lightweight wide angle zoom lens
- This is number 2 for a reason. And one could argue it should be number 1. The lens, not the camera is the limiting factor for image quality. Unfortunately, most light and inexpensive zoom lenses sold with cameras (“kit lenses”) can only resolve 6 to 9 perceptual megapixels of a 24 MP camera sensor! And sharp zoom lenses light enough for backpacking are few and far between. As such, it pays to do your research to find zoom lens and camera combinations that produce the best image quality.
*See more on sharp below… - Zoom lenses save weight by not having to carry multiple prime (fixed focal length) lenses. Wide zoom lenses are well suited to the sweeping landscapes of the backcountry and and allow for dramatic perspectives. They speed up work by not having to change lenses. In addition the lens stays on the camera protecting the sensor from dust and moisture.
- And for prime lens aficionados, yes there is an argument for them. Two good primes; one wide angle (around 35mm equivalent) for most work and supplemented by a fast and super sharp normal lens is a a great setup. Your feet do a great job of lens zooming! (Or I have used a light zoom supplemented by a fast and super sharp prime lens for critical shots.)
- For both zoom and prime lenses make sure you consider 3rd party lenses from the likes of Sigma, Tokina, Tamron, and even Zeiss. Many times these lenses will significantly outperform your your camera’s native lenses. Personally, I’ve had great results from Sigma lenses.
- Bottom line: a great camera with a mediocre lens will give you mediocre results.
An example of two sharp wide angle zoom lenses for Olympus’ u4/3 system. 1) To the left of the camera, the compact, wide and sharp 9-18mm f4.0-5.6 lens weighing only 5 oz! 2) On the right the very sharp environmentally sealed, 12-40mm f/2.8 PRO lens. Far left is the sharpest lens of the bunch, the Sigma 30mm f/1.4 prime.
The Olympus ED 9-18mm f4.0-5.6 lens is a great example of a light, sharp zoom lens well suited to backpacking. This lens is exceptionally wide-angle (18-36mm equivalent) for dramatic perspectives and sweeping landscapes. Compact and only 5 ounces, it is a marvel optical engineering.
Camera Shake – the Fastest Way to Ruin a Backpacking PhotoCamera Shake can quickly blur a 24 megapixel image down to essentially zero megapixels!
If you combine all three above, you can gain a 5-9x increase in shutter speed with minimal impact on image quality. This is what makes handheld shots possible at dawn or dusk. Even so, bracing your camera against a tree, rock, trekking pole or even using a small, 1-3 oz tripod are all improvements over handheld. All Olympus camera bodies and now the new Sony a6500 have in-body image stabilization. |
3) It takes sharp, high quality photos handheld
Especially in situations encountered backpacking like the dim light of dawn and dusk. Contributors are:
- Excellent image stabilization (in-camera is preferred.). A tripod is a last resort for most backpacking photos—it’s both heavy, and time consuming.
- High ISO performance gives you sharper images in low light, gaining you 2-4 shutter speeds This is with only a slight decrease in image quality. After that, image quality increasingly degrades as you go higher.
Note: for handheld shots at dawn or dusk the shutter speeds gained from a & b above, may have more impact on image sharpness than the camera’s sensor and lens! - Fast and light lenses are usually primes (fixed focal length) and will gain you 1-2 shutter speeds. Fast zoom lens with good image quality are very expensive and sometimes weigh more than the camera they are mounted to. But some of these zooms have image quality that equals the best prime lenses. This makes them a tempting option if photography is a major objective for your trip.
- Fast accurate focusing on the correct subject is essential to quickly getting sharp photos.
- Good DRO (digital range optimization). DRO deals-with the less than flattering, high-contrast light of midday when we take most of our photographs. It automatically brings up shadow detail without blowing out highlights. DRO is faster and easier to use than high dynamic range (HDR) photography which takes multiple images and must be done on a tripod.
- Finally but by no means least, good quality JPEGs out of the camera: This greatly speeds getting photos into publication—the single largest time consumer/bottleneck in the whole photographic production process. (I am only going to edit RAW images for the few critical shots that need it.)
Sometimes to get the highest image quality you need a sharp prime and a small tripod. In this case the Sony a6000 camera with the super sharp Sigma 30mm f/1.4 Art lens. At only 22 oz, this camera/lens combo has image quality equal to or exceeding the very best, and much heavier APS-C camera systems.
Bad Focus – Another Way to Ruin a Backpacking PhotoOccasionally the camera’s “smart” auto-focus algorithm fails and puts the focus in the wrong place, leaving your “intended” subject all blurry. And sometimes in the low light of dawn and dusk there may not be enough light or contrast to get reliable focus. In either case, the resulting photo is useless.
|
4) It is is fast and easy to use in manual or semi-manual mode
By the nature of backpacking we are moving—we have places to go and other things to do besides fiddling with a camera. That is, we need to quickly take our best photo and move on. To do this:
- You should be able to adjust all critical functions without taking your eye away from the viewfinder.
- Fast easily accessed controls are key. Ideally at least two knobs on the top of the camera do the bulk of the work. And a number of customizable function buttons do the rest. You use all of these to quickly modify your major camera settings: exposure, aperture, shutter speed, ISO setting, activate manual focus, manage DRO (digital range optimization), timed shutter release, etc. All in a matter of seconds, not minutes.
- Small dials on the camera back, critical items buried in nested menus, etc. all slow down picture taking.
- A touchscreen, while not essential, has its advantages, particularly when focusing and making adjustments when shooting from a tripod.
5) Bright viewfinder with all essential information displayed on one screen
A Good viewfinder allows for faster photo taking, better photos, and fewer re-takes. That is, the better you see your image and the more information you have before you take your photo, the better the photo.
- Cameras without viewfinders are close to non-starters. Rear screen displays are almost impossible to see in bright daylight. And even if visible, the image is usually far too small to see essential details well enough to assess the quality of the picture before taking it.
- In the viewfinder, you should be able see all your critical settings (including histogram). This enables you to quickly assess your photo and make the necessary adjustments before you take it.
- A good viewfinder also helps with manual focus.
What is Sharp?
Sharp as I use it is the “perceptual megapixels” of the final image. This is a combination of both lens and camera—not simply the native resolution of the camera sensor! As an example, for most 24 MP, APS-C (crop sensor cameras like the Sony a6300 and a6500, Nikon D7200 or Canon EOS 80D) the perceptual megapixel resolution final image maxes out at around 17 MP or around 70% of the native 24 MP sensor resolution, even with the best and most expensive prime lenses.
Almost all of the loss of the camera sensor’s 24 megapixels is due to the lens. Compared to primes, most zoom lenses do worse, with image resolutions well below 50% of the camera’s sensor. Some going as low as 25% or only 6 MP of your camera’s 24 MP sensor. So it’s important to consider the camera lens combination with a major focus on the lens image quality. One could even argue to select your lens first, and get a camera body that works it.
Bottom line: a great camera with a mediocre lens will give you mediocre results. |
For more reading see DxOMark on Perceptual Megapixels, and take a look at a sample table of the Perceptual Megapixels for Nikon DX lenses on various camera bodies.
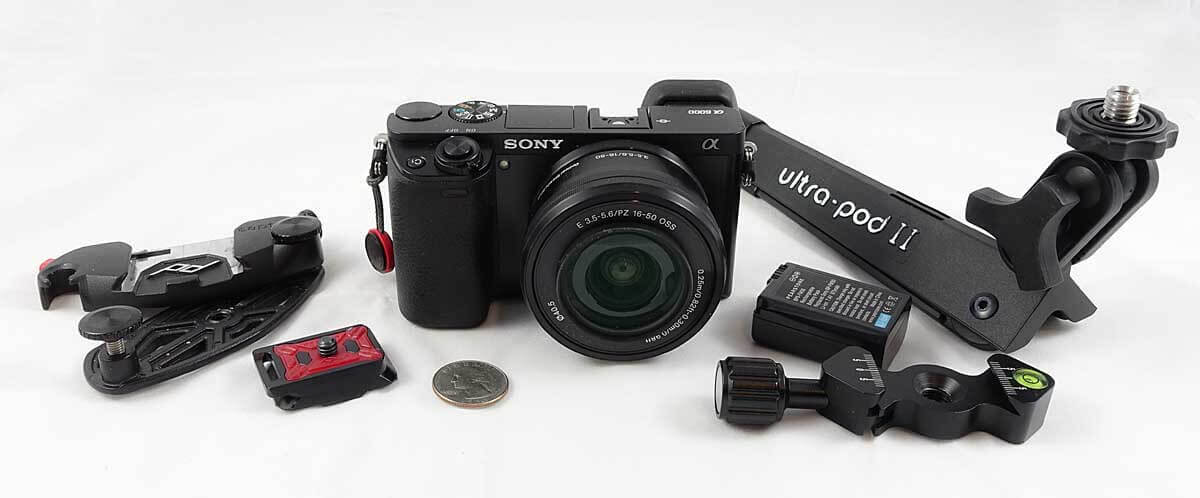
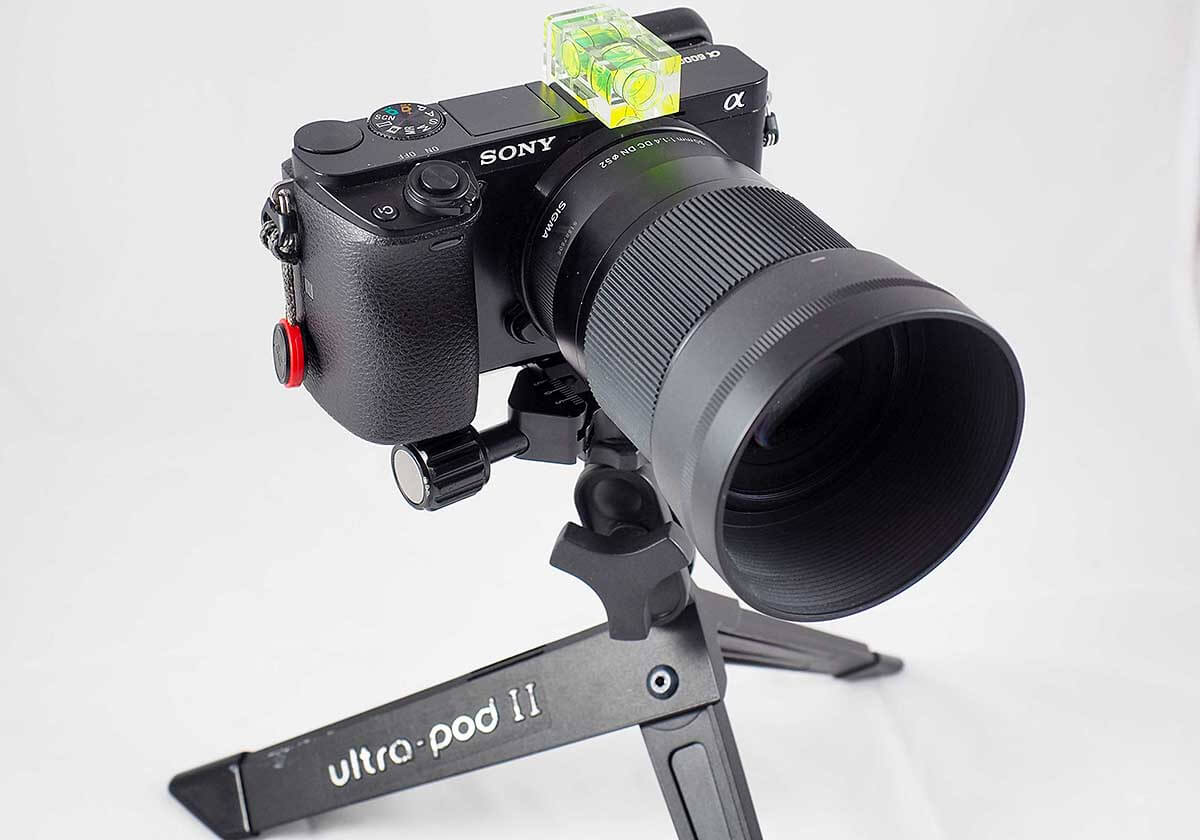
The full Sony a6000/a6500 kit: Peak Designs CapturePRO (mounts to backpack shoulder strap), Peak Designs Micro Plate (mounts to camera bottom), Pedco utra-pod II (small tripod), Sony NP-FW50 Battery, and Newer® Fish Bone quick release for tripod head.
What Backpacking Cameras I Use Most of the Time
On most of my backpacking trips and on international travel, I carry:
- My iPhone 6 plus, and
- A light mirrorless a mirrorless camera, like a Sony a6000/a6500 or Olympus EM-10 Mark II
- Optional: when I need an environmentally sealed camera/lens system (dust and rain) I carry something like the Olympus OM-D EM-5 Mark II with 12-40 f/2.8 PRO lens.
Sony Cameras |
Olympus Cameras |
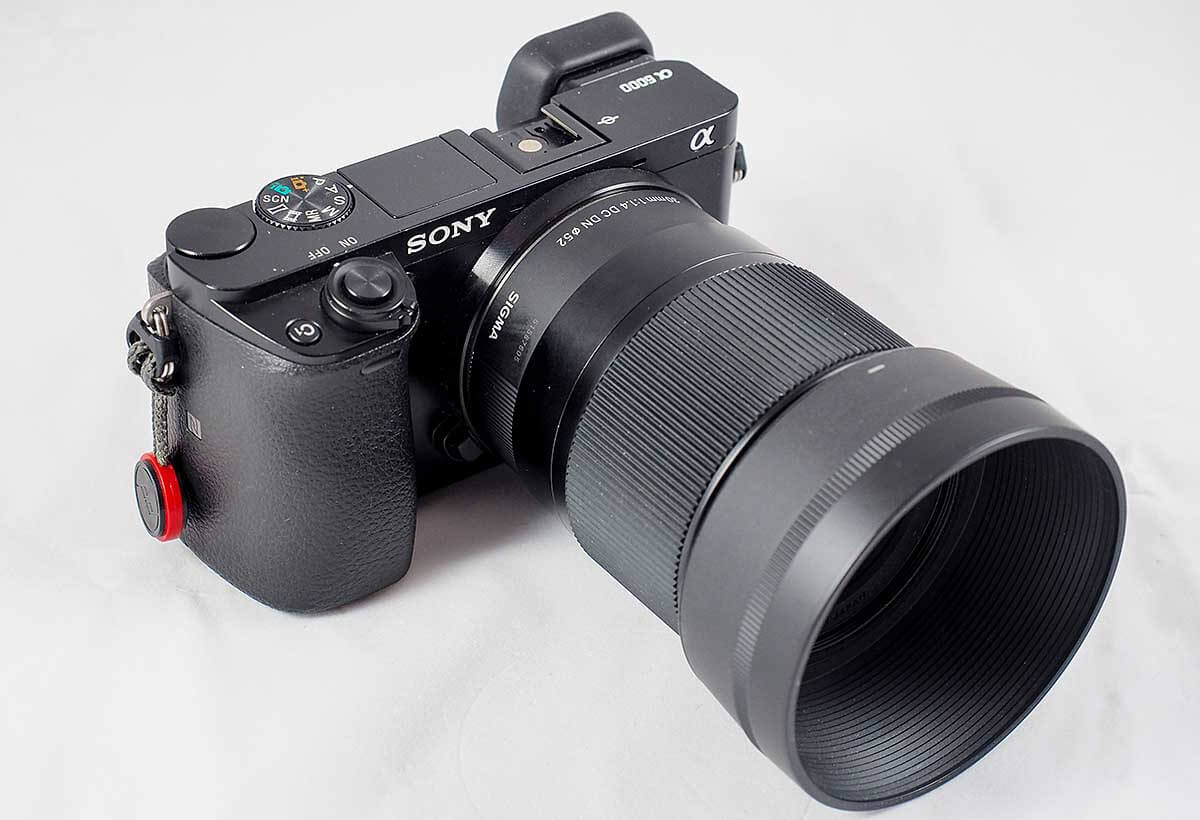
Sony a6000 or Sony a6500
Lenses for SonySigma 30mm f/1.4 Contemporary lens sharp as it gets! |
Olympus EM-10 Mark II or EM-5 Mark II
Lenses for OlympusOlympus 9-18mm f4.0-5.6 super wide, 5 oz! |
For astro/star photographers
The lens for this is probably the Rokinon 12mm F2.0 NCS CS Ultra Wide Angle Fixed Lens available in Sony-E and u4/3 mount. Excellent value, fast and reasonably sharp. Manual focus tho, not that it is a big deal when doing astro work, just set it to infinity and go.
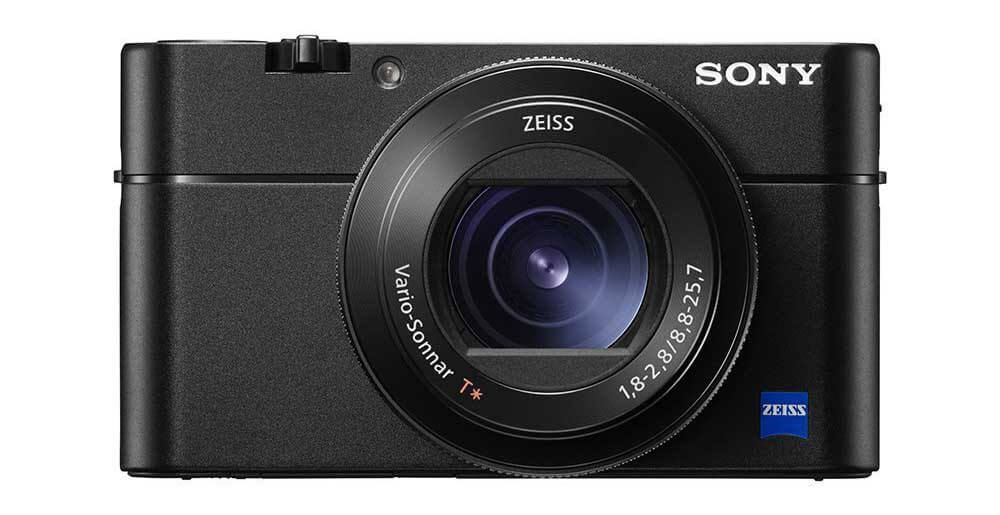
The Possible Exception to P/S Death“Point and shoot like,” 1-inch-type sensor cameras, e.g. the Sony RX-100 series do perform significantly better than the best smartphone cameras. For some their smaller size and lower weight vs. a mirrorless camera is a godsend. As such, they occupy a valid but narrow niche between smartphone cameras and mirrorless cameras. But note that their image quality not quite as good as similarly priced mirrorless cameras that may weigh only a few ounces more. They are too large and heavy to be truly “pocketable.” And finally, their single lens is only about 1/3 as sharp as the best interchangeable camera lenses for mirrorless cameras like the Sigma 30mm f/1.4 Contemporary lens.
|
How I Carry my Backpacking Camera – or how to get more photos
For me, its all about the speed and ease of taking a photo. Since I changed to using the Peak Designs CapturePRO mounting system on the shoulder strap of my pack, I get 2 to 3 x more photos per trip. More than I ever got with a point and shoot camera in my pocket!
Note in the video how quickly easily I put my pack on with the camera already attached to my shoulder strap. No camera spinning around and twisting up the shoulder strap.
This post answers two questions. First, why the point and shoot camera is dead for hikers? And second, what are the best cameras for hiking now that the point and shoot camera is dead?
Why the Point and Shoot Camera is Dead for Hikers
The point and shoot (p/s) camera is being squeezed into the grave from two sides. 1) on the inexpensive* side by constantly improving smartphone cameras. And 2) on the more expensive side by very light mirrorless, interchangeable-lens cameras. If photography is a serious objective of your trip, their near “pro-level” performance justifies their cost/weight vs. carrying just your smartphone.
* smartphone cameras are “inexpensive/free,” in the sense that you likely own a smartphone, thus there is no additional cost and weight since most hikers and backpackers are already carrying their smartphone.
The Two Obvious Hiking Camera Options
1) You are satisfied with your smartphone camera
Therefore, a point and shoot (p/s) camera provides no additional benefit. The rapidly increasing capabilities, image quality (and video) of smartphone cameras are closing in on the performance of low to mid-range priced p/s cameras. Your current smartphone is essentially free* and no additional weight. Finally, you are likely an expert using your smartphone’s camera. It’s a perfectly valid option!
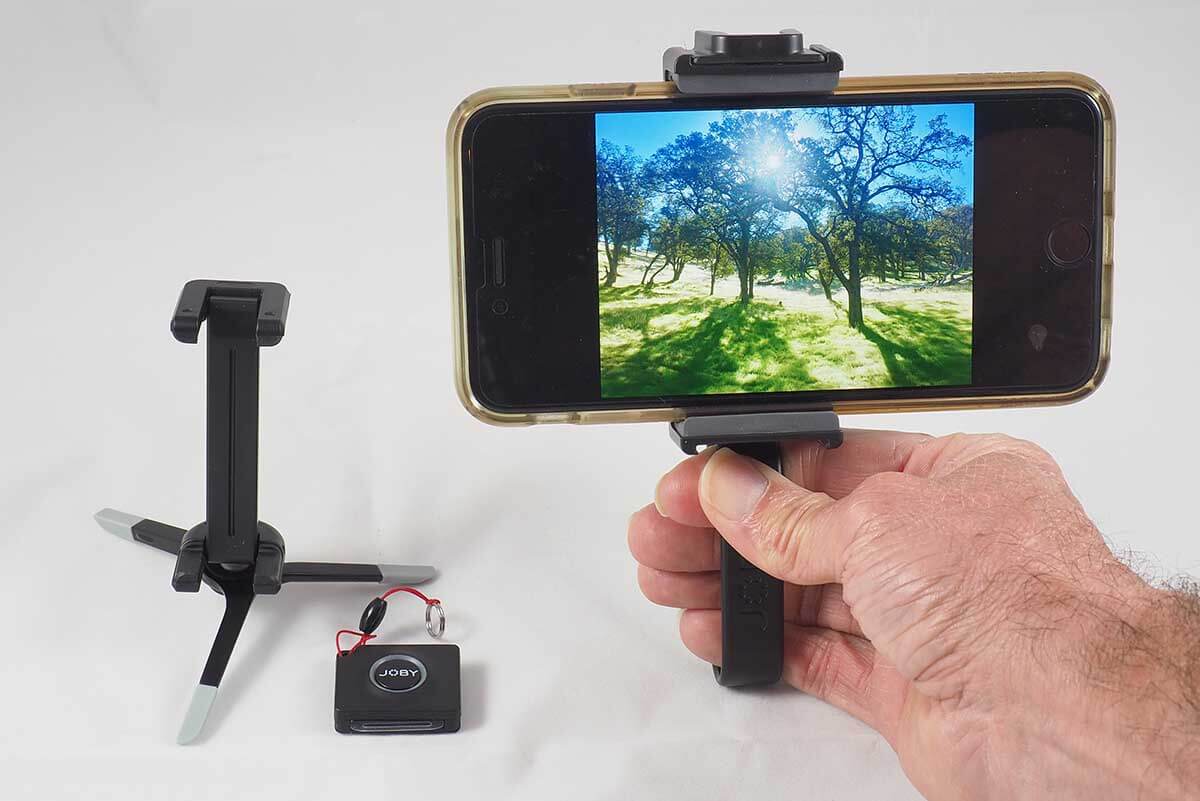
In good light smartphones take great pictures. In addition, there are a vast array of inexpensive accessories and apps/software to get the absolute best photos and video from your smartphone. Left JOBY GripTight Micro Stand. Right JOBY POV kit with bluetooth remote.
2) You want a camera that is significantly better than your smartphone
In this case you likely want better image quality, sharper lenses, an electronic viewfinder, more controls, etc. A p/s camera will not provide this! A light mirrorless, interchangeable-lens camera (mirrorless camera) will. In fact, mirrorless cameras are approaching “pro image quality” at a fraction of the cost and weight of many “pro” cameras. E.g. the Sony a6000/a6500 or Olympus EM-10 Mark II.
Class leading image quality for less weight: Sony a6000/a6500 camera with Sigma 30mm 1.4 DC DN Contemporary lens. This setup goes toe-to-toe with far heavier and more expensive APS-C (crop sensor) camera setups from Nikon and Canon.
Mirrorless Cameras are better “point and shoot” cameras than point and shoots
When you mount a light mirrorless camera on a quick release shoulder mount and put it in smart-auto mode, it’s faster and easier to use than a p/s camera. But you have all the benefits of interchangeable lenses and full camera control if you want. And of course, the image quality is in another league vs. a p/s camera.
For me, it’s all about the speed and ease of taking a photo. Since I changed to using the Peak Designs CapturePRO mounting system on the shoulder strap of my pack, I get 2 to 3 x more photos per trip. More than I ever got with a point and shoot camera in my pocket!
Note in the video how quickly and easily I put my pack on with my Sony a6000 mirrorless camera already attached to my shoulder strap with the Peak Designs CapturePRO. No camera spinning around and twisting up the shoulder strap.
The Bottom Line
If you want something significantly better than your smartphone camera a p/s is not sufficiently better to justify its cost and weight. On the other hand, a mirrorless camera is substantially better than a smartphone camera and therefore its cost and weight are justifiable. In addition, a mirrorless camera is far more versatile than a p/s (or even a 1″-type sensor camera). It is also an excellent general-purpose camera for use at home, nature photography with a long lens, for extended international travel (backpacking and non-backpacking), etc. This makes it a far better value than a p/s camera or even 1″-type sensor cameras like the Sony RX-100.
The full Sony a6000/a6500 kit: Peak Designs CapturePRO (mounts to backpack shoulder strap), Peak Designs Micro Plate (mounts to camera bottom), Pedco utra-pod II (small tripod), Sony NP-FW50 Battery, and Newer® Fish Bone quick release for tripod head.
What I Use Most of the Time
On most of my backpacking trips and on international travel, I carry both options:
- My iPhone 6 plus, and
- A light mirrorless a mirrorless camera, like a Sony a6000/a6500 or Olympus EM-10 Mark II
- Optional: when I need an environmentally sealed camera/lens system (dust and rain) I carry something like the Olympus OM-D EM-5 Mark II with 12-40 f/2.8 PRO lens.
Sony Lenses |
Olympus Lenses |
| Sigma 30mm f/1.4 Contemporary lens sharp as it gets! Sony SEL35F18 35mm f/1.8 sharp, fast, stabilized Sigma 19mm f2.8 DN low cost, light Sigma 30mm f2.8 DN sharp, low cost, light kit Sony 16-50mm f/3.5-F5.6 decent, low $, light |
Olympus 9-18mm f4.0-5.6 super wide, 5 oz! Olympus 12-40mm f/2.8 PRO very sharp, environmentally sealed Sigma 30mm f/1.4 prime. tack sharp, fast kit Olympus 14-42mm f/3.5-5.6 IIR decent, low $, light |
The Possible Exception to P/S Death“Point and shoot like,” 1-inch-type sensor cameras, e.g. the Sony RX-100 series do perform significantly better than the best smartphone cameras. For some their smaller size and lower weight vs. a mirrorless camera is a godsend. As such, they occupy a valid but narrow niche between smartphone cameras and mirrorless cameras. But note that their image quality not quite as good as similarly priced mirrorless cameras that may weigh only a few ounces more. They are too large and heavy to be truly “pocketable.” And finally, their single lens is only about 1/3 as sharp as the best interchangeable camera lenses for mirrorless cameras like the Sigma 30mm f/1.4 Contemporary lens.
|
![A sudden opening in the clouds illuminates a lone tree and a small outcrop overlooking Loch Marie in Wester Ross. The summit of Slioch (left) is still shrouded in mist at midday. [Handheld with Olympus E-520 and stock 14-42mm f/3.5-5.6 Zuiko ED Zoom lens.] This photo looks great enlarged to 14x19.](https://www.adventurealan.com/wp-content/uploads/2015/11/scot_08-10-sm.jpg)
A sudden opening in the clouds illuminates a lone tree and a small outcrop overlooking Loch Marie in Wester Ross. The summit of Slioch (left) is still shrouded in mist at midday. [Handheld with 16 oz, mirrorless digital SLR camera (like this) with its stock zoom lens. ] This photo looks great enlarged to 14×19.
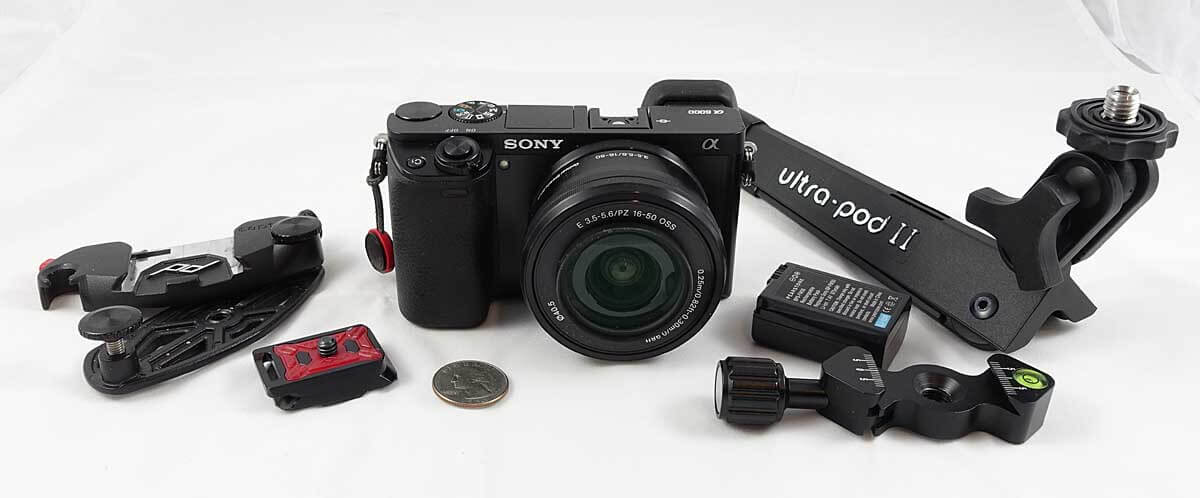
The 16 ounce Sony a6000 with the right $200 prime lens (Sigma 30mm f2.8 DN), can produce image quality challenging the Canon 5D. Pictured is my full Sony a6000 backpacking kit: Sony a6000 Mirrorless Camera w (kit 16-50mm lens or alternate lens), Peak Designs CapturePRO (mounts to backpack shoulder strap), Peak Designs Micro Plate (mounts to camera bottom), Pedco Ultrapod II (small tripod), Sony NP-FW50 Battery (spare), Newer® Fish Bone quick release for tripod head.
| Camera | Item | Oz | Comments |
|---|---|---|---|
| Camera SLR crop format |
Sony a6000 w kit 16-50mm lens* new model: Sony a6300 |
16.0 | Among lightest 24mp APS-C cameras. With the right lens, image quality approaching Canon 5D |
| Lens alt/add’l | Sony SEL35F18 35mm f/1.8 Prime Fixed Lens w hood (6.2) | Fast, superb resolution, normal lens w image stabilization. Use dawn & dusk. Possibly w/o tripod! | |
| Lens alt/add’l | Sigma 19mm f2.8 DN, w hood (6.1) | For landscape. Light, inexpensive, sharper at 19mm than the a6000 16-50mm kit lens | |
| Lens alt/add’l | Sigma 30mm f2.8 DN, w hood (5.7) | Only $199! Superb resolution. Lightweight. | |
| Battery spare | Sony NP-FW50 Battery (1.5) | Alt less $: Wasabi Power Battery (2-Pack) & Charger | |
| Mount | Peak Designs CapturePRO 110g | 3.8 | Take more photos! Fast access to camera! Attaches to backpack shoulder strap |
| Mount | Peak Designs Micro Plate 25g | 0.8 | Needed to clear a6000’s hinged LCD screen |
| Tripod SLR | Pedco ultra-pod II 114g, 4.0 oz | For small mirrorless SLR cameras | |
| Tripod mount | Newer® Fish Bone quick release for tripod head 51g, 1.8 oz | For quick attachment of camera with Peak Designs Micro Plate (alt = Desmond DLVC-50) | |
| Protection | Gallon Freezer ZipLoc | To protect camera gear from rain | |
| TOTAL | 20.6 | ounces | |
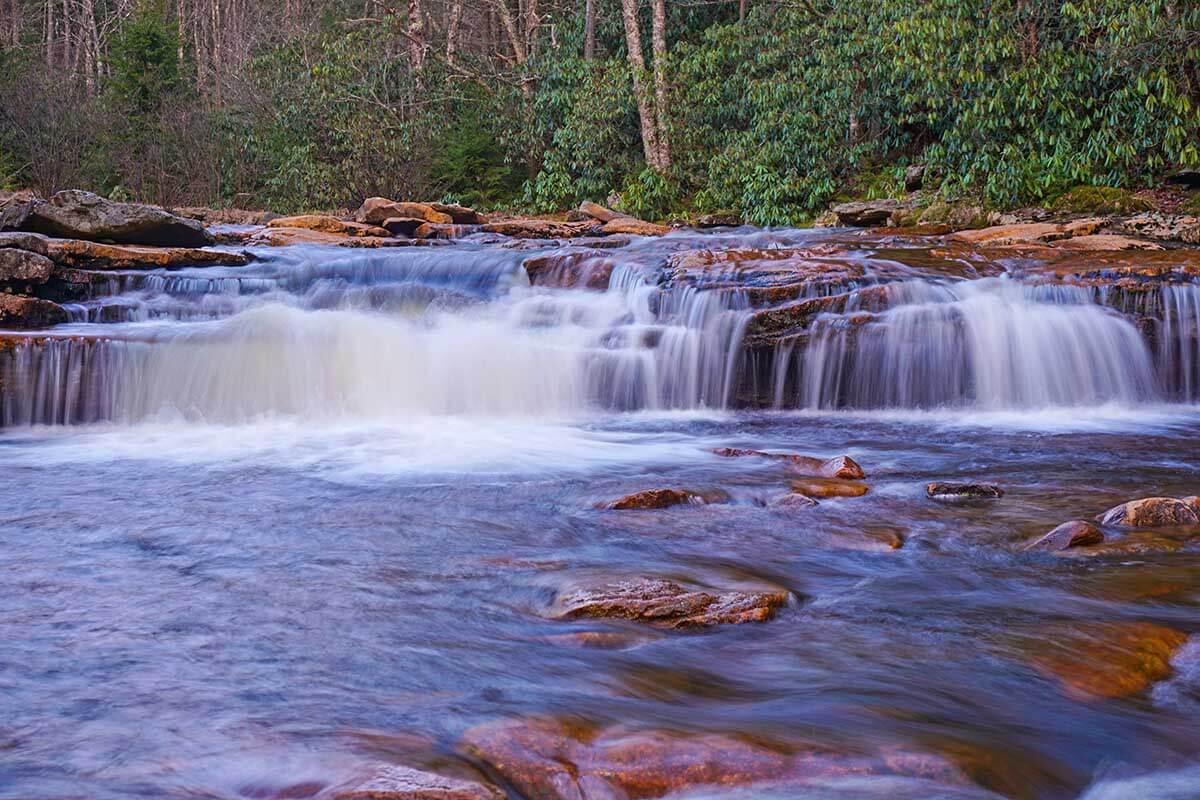
A recent photo shot in Dolly Sods Wildness with the 16 oz Sony a6000 mirrorless digital SLR camera and its stock zoom lens (listed in table above).
Lightweight Backpacking Camera Selection 101 – Why Sensor Size Matters
If you don’t want to go into all the gory details at this point you can just jump to a discussion of the Lightweight backpacking cameras I use.

My three lightweight backpacking cameras L to R: Canon PowerShot S100 (current model s120), Sony a6000 w kit 16-50mm lens (new model: Sony a6300), Sony RX100iii (current model RX100iv). With each increase in size, weight and cost you get higher quality images, but at expense pocket-ability and rapid access to the camera for a quick shot. (photo taken with my iPhone 6+)
While some point and shoot lightweight backpacking cameras may produce quite serviceable photos, don’t expect professional quality images from a camera with a sensor* the size of your little fingernail and a lens the size of a snap pea. It would be great if a 5 oz Point and Shoot (P/S) compact camera produced images close to the quality of images from a 3 ½ pound digital SLR (DSLR) camera and lens combination like a Canon 5D and 24-105mm f/4L IS lens. But camera sensor and lens size has significant impact on image quality. In summary: better image quality requires a larger sensor, which in turn requires a larger camera body and a larger lens, and ultimately a heavier camera.
Since we can’t bypass laws of physics (sensor* and lens size), each backcountry photographer will need to find a satisfactory compromise between camera size/weight and image quality.
* Sensor is the device in a digital camera that electronically captures the image. It performs the same function as film in old style film cameras.
 Also see 5 Most Important Features for a Backpacking Camera
Alert! as a backpacker you are not well served by mainstream camera reviews like DPReview. That is, the 5 Most Important Features for a Backpacking Camera are quite different than those for a general use camera in mainstream reviews. Hear are the major differences.
Major factors to consider for image/photo quality
- Larger sensors produce better image quality: (see Table of Sensor Sizes and Pixel Densities below)
A P/S camera has a sensor 5% the size of the full-frame sensor of a camera like the Canon 5D. If each camera has the same number of pixels, then the pixels on the P/S camera will need to be 5% the size of the full-frame camera’s pixels in order to fit on the smaller sensor. So each P/S pixel can only gather 5% of the light of a full-frame sensor pixel—sometimes only a few photons per pixel (yes literally down to the photon level!). Without going into gritty detail, the close pixel spacing and limited light gathering ability of smaller sensors leads to less resolution/sharpness (for the same pixel count), less dynamic range (especially problems with clipped highlights, i.e. entirely white areas without detail), less color saturation, more noise, decreased ISO performance, and ultimately lower image quality. - Lens size matters: A larger sensor requires a larger lens to cover the larger sensor area. In addition, there is a limit to how precisely one can shape a small lens (e.g. a P/S camera lens). Due to the immense popularity P/S cameras and digital video recorders, there have been astonishing advancements in the optical quality of small molded plastic lenses. Nonetheless, the best optical quality is still from precisely ground glass lenses. These are the lenses used for for mid-size-semi-pro-sensors (approx. 30-40% of 35mm coverage) to full frame sensors (100% of 35mm coverage). Larger lenses do cost a lot more. A top quality lens might cost between $800 to several thousand dollars. But there are bargains to be had with some gems in the $200 to $500 range (e.g.Sigma’s Art Series prime lenses). And even some quite good zoom kit lenses.
- Intended print size or use of images: If you intend to use the camera to produce 800 pixel snaps for your webpage, a good P/S camera should to the trick (although you will still a reduction in dynamic range, and color accuracy). But if you intend to frame large prints, you will be disappointed with the results from a P/S camera. To get sharp 16×20 or larger prints, with good color and tonality you’ll need at least a mid-size-semi-pro-sensor camera (approx. 30-40% of 35mm coverage) with a high quality lens—something like the Sony a6000.
Finally, there are no takeovers for backpacking photography. A small sensor P/S camera is extremely unlikely to produce a high quality enlargement no matter how fabulous the shot. Photoshopping is unlikely to make significant improvements. Think hard before you commit to a smaller sensor camera.
Killer Point and Shoot Cameras for backpacking
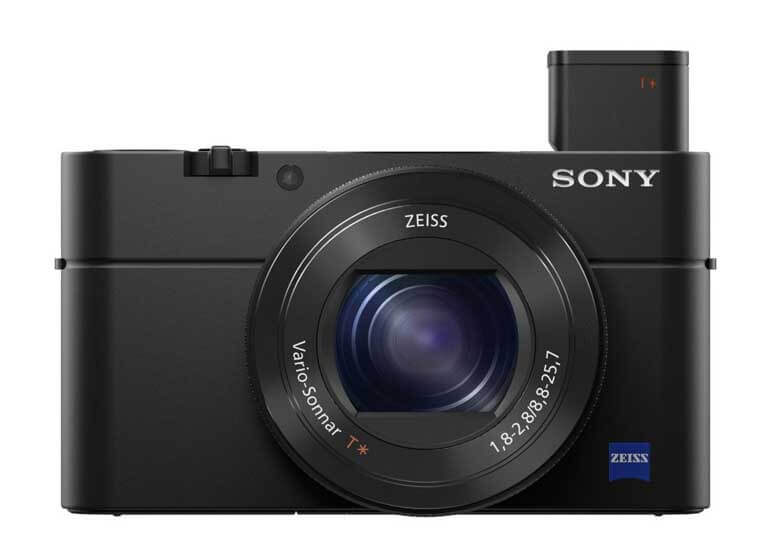
The Sony is in a class to itself for image quality for a light & compact camera.
Some great, almost pocketable, 11 ounce “point and shoot” cameras produce superb images. The major disadvantage is high cost.
- Sony Cyber-shot DSC-RX100 IV 20.2 MP with its large 1″ technology-leading sensor, excellent optics and image stabilization
- Panasonic LUMIX DMC-LX100K 13MP with a huge 4/3 sensor (only uses a portion of the sensor, so gets about 1.5x more sensor area than the Sony) but is only 13 megapixels.
Mirrorless crop format cameras are probably your best option for serious photography
You best option for serious backpacking photography is probably one of the inexpensive mirrorless crop format camera (APS, APC, μ4/3) like current Sony a6000. The best of these cameras approach full-format SLR picture quality in a light, compact camera with interchangeable lenses. By doing away with a SLR mirror and viewfinder, but retaining the larger sensor and lenses of an SLR, you significantly reduce weight and bulk but retain picture quality. The 16 ounce Sony a6000 with the right $200 prime lens (Sigma 30mm f2.8 DN), can produce image quality challenging the Canon 5D.
Canon 5D challenger: The 16 ounce Sony a6000 (new model: Sony a6300) with the right $200 prime lens (Sigma 30mm f2.8 DN), can produce image quality challenging the Canon 5D. Above is the full Sony a6000 backpacking kit use: Peak Designs CapturePRO (mounts to backpack shoulder strap), Peak Designs Micro Plate (mounts to camera bottom), Pedco Ultrapod II (small tripod), Sony NP-FW50 Battery, and Newer Fish Bone quick release for tripod head.
And I admit, even I am tempted from time to time to carry a Canon 5D into the backcountry for its superb resolution and image quality! Note: The full-format mirrorless Sony a7 is starting to make inroads into the serious professional photo market. Even here photographers are finally getting tired of the weight and bulk DSLRs.
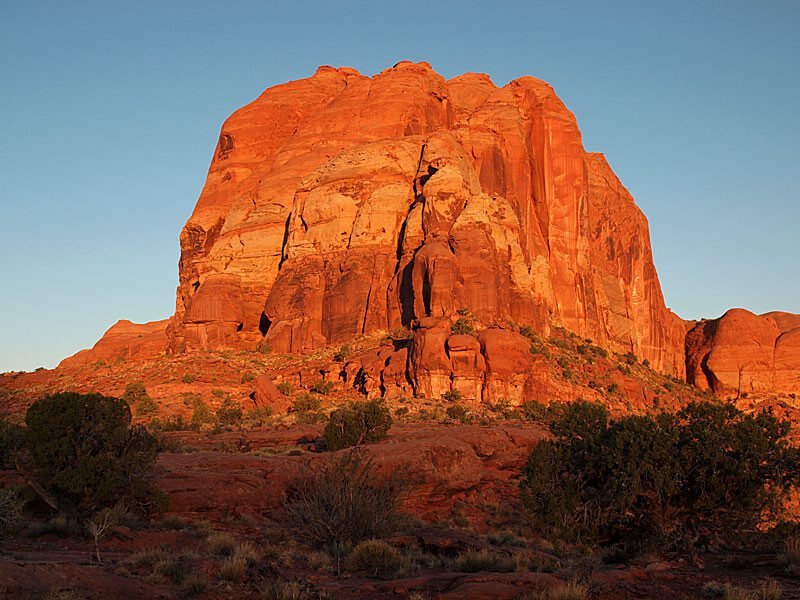
Sunrise Escalante River, Olympus E-30 and stock 14-42mm f/3.5-5.6 Zuiko ED Zoom lens. This photo looks great enlarged to 14×19. I just got done looking at the pictures my friend took with a compact P/S camera vs. the pictures I took a few weeks earlier in the same area with an Olympus DSLR with a 4/3 sensor (about nine times larger sensor). The P/S pictures are ”muddier“ and not nearly as sharp. The colors are muted and there is less tonal range. There are lots of pictures with detailess dark shadows or white (not blue) sky, sometimes both in the same shot. True, my friend still has a nice (and serviceable) photo record of her trip but most of these photos are not technically worthy of an 8×10 enlargement. Some of the shots, if they were taken with a better camera would make excellent enlargements worthy of framing. Bottom line—larger camera, larger sensor, better picture.
Cameras and Their Sensor Sizes
The following is a list of some cameras and their sensor sizes.
As a rough estimate, the lower the pixel density (mp/cm2) the higher the image quality of the camera.
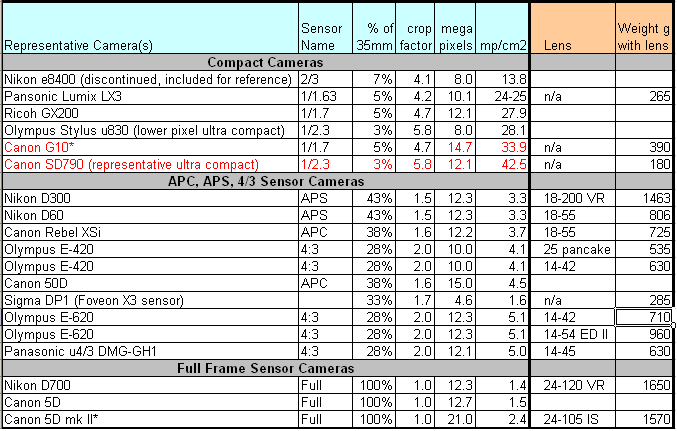
Note: the example cameras in this are a bit dated, but the message is still good. Altho, now over 5 years later sensor technology has improved to the point where a current crop sensor camera like the Sony a6000 out-performs a 5-year-old, full-format DSLR.
Pixel density counts, but there may still be significant image quality differences between cameras with sensors of similar pixel densities (although probably not enough to jump camera classes). These differences in image quality are usually due to improved sensor technology and improved camera image processing. E.g.:
- Even though it has a higher pixel density, the new Olympus E-620 has almost 1.0 EV more highlight range than the older E-520. But it still doesn’t have the RAW headroom (dynamic range) or high ISO performance of the best, mid-sized sensor APC/APC cameras (e.g. Nikon D300 or Canon Rebel XSi), let alone a full 35mm sized sensor camera (e.g Canon 5D mk2 or Nikon D700).
- The Canon PowerShot G10 performs considerably better against compact cameras than its extremely high 34 mp/cm2 pixel density might indicate. But its 10x higher pixel density cannot match the image quality of the mid-sized APC/APS and 4/3 sensor cameras like the Canon Rebel XSi or Olympus E-620.
- The improved technology of the Canon 5D Mk II (sensor and image processing) has better image quality (but not by a lot) over the older and lower pixel density 5D. And at 21 vs. 12.7 mega pixel the Mk II has more resolution. But the 2.4 mp/cm2 Canon 5D Mk II does not have near the RAW headroom (dynamic range) of the 1.5 mp/cm2 Nikon D700.
Available Lenses: Their Quality and Their Weight
Larger sensors require larger lenses. Larger lenses are heavier, and significantly more expensive to make. In particular it is quite difficult to make an inexpensive, high quality full frame (35mm) lens for cameras like the Canon 5D. This is where the smaller, high quality midsized sensor lenses like the Olympus Zuiko μ4/3 format lenses really shine. For the Sony a6000 there are some incredible deals with Sigma’s Art Series prime lenses. So make sure you check out the availability of high quality lightweight lenses before committing to a particular camera line. Sometimes, the lenses are significantly more important for weight and image quality than the camera body. And it is likely that you will own and use the lenses far longer than a given camera body.
Down to the Canyons of Utah – Another year of the spiritual spaces and beauty of the canyons and mesa.
Photographs (except as noted) taken by Alan with an Olympus E-30 digital SLR (info on cameras) and Zuiko 14-42mm 1:3.5-5.6 lens. More on lightweight photograpy…
Backpacking Photography Gear Lists
- A short gear list for backpacking photography – Point and Shoot Cameras
- A gear list for backpacking photography – Larger Cameras for higher quality images
The Trip in Brief

Dawn on a ledge 600 feet above the Escalante. Our last campsite.

Cottonwoods glowing in early morning light.
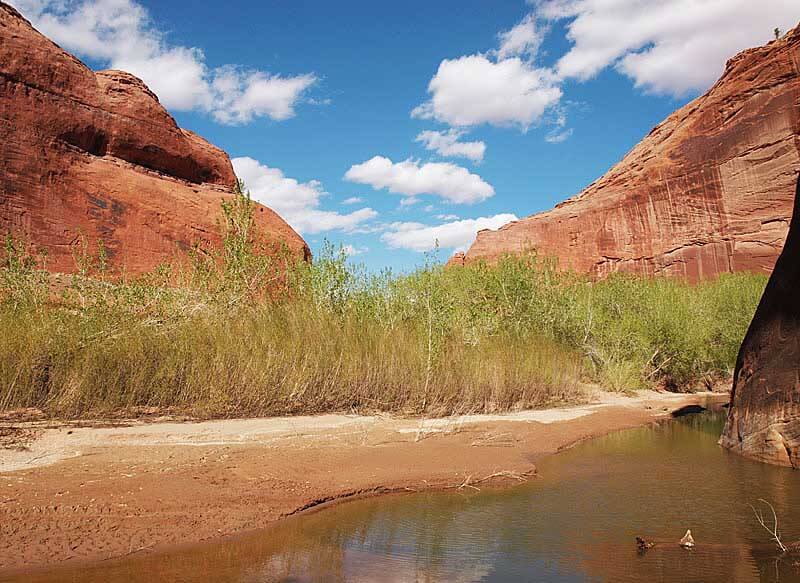
A wash in late afternoon sun.
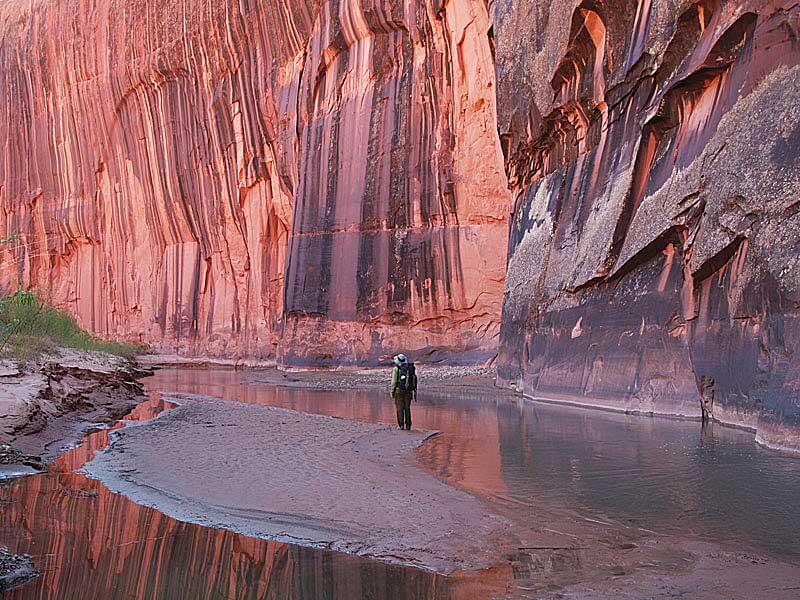
Finally working our way to the the mid-day shade of a deep Escalante canyon.
Trip Start – detailed report
Our trip began with the most exciting 4-wheeling either of us has ever done. Apparently, Kane County is not interested in grading roads to trail heads.
We arrived at trailhead at an earlybird 3:00pm (note low sun) and jumped in.
Starting off always requires a walk “into nowhere”. Somewhere in this vast expanse of slickrock we needed to drop into a deep canyon at a very specific place.
We’ve located the right spot and are preparing to downclimb into the canyon.
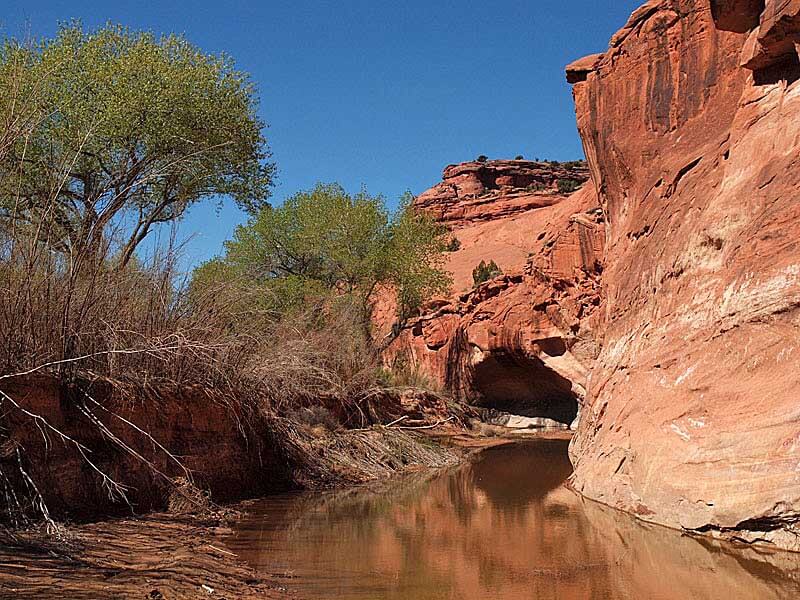
Into a sunlit wash that feeds into the Escalante River
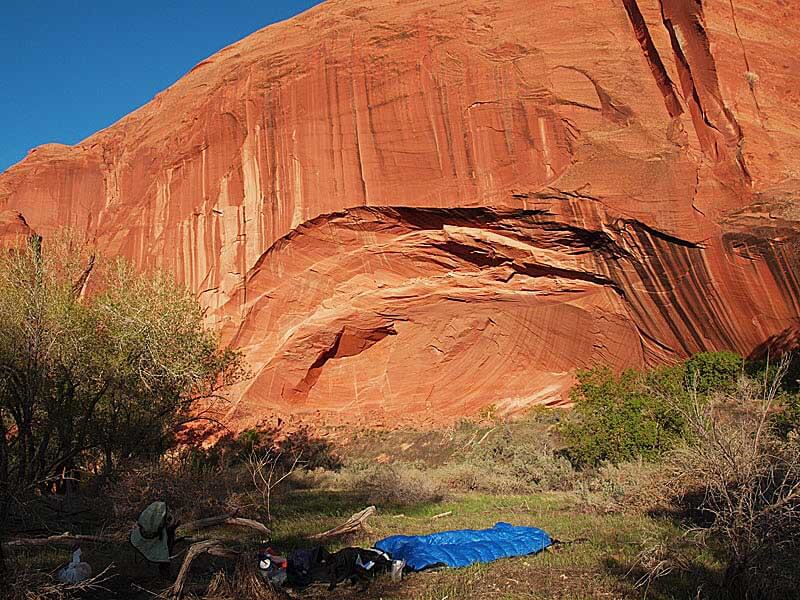
We walked for about five hours before dropping our stuff at this arch campsite surrounded with fragrant sage.

As we approach the Escalante, the canyon walls get higher and shade increases
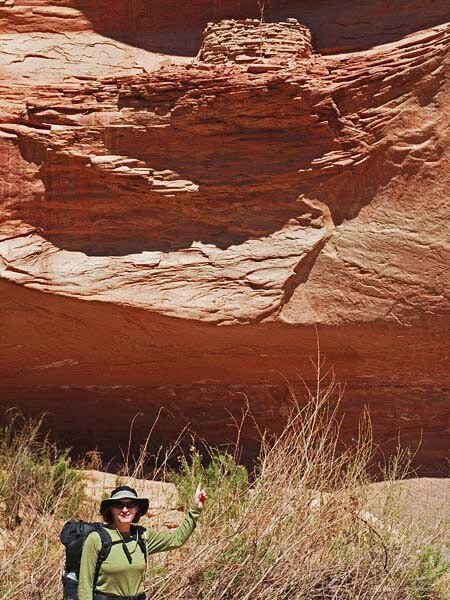
Al got to see her first real Indian ruins, a granary. How they got up there, is anybody’s guess.
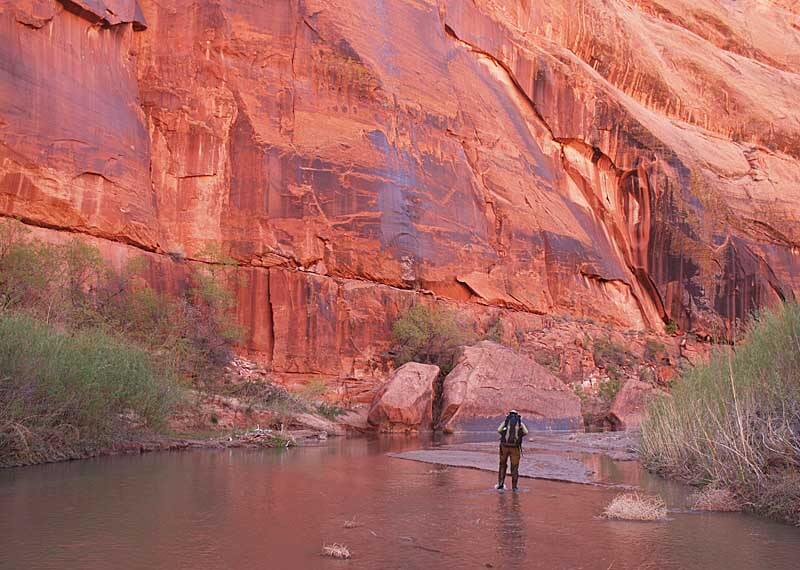
Finally, walking down the canyon of the Escalante with its orange-red mid-day light

With river levels at record lows (snow pack 40% of normal) crossing the Escalante was not difficult. We crossed or waded it often to get better footing and faster hiking on the benches on either side of the river. Frequent crossings left our feet wet all day. The next morning, we again got to put on our wet shoes.

It seemed every bend was an opportunity for a new photograph.

We entered a side canyon and headed for the rim. As we climbed past the Kayenta, we passed
this detached pillar of Navajo sandstone.
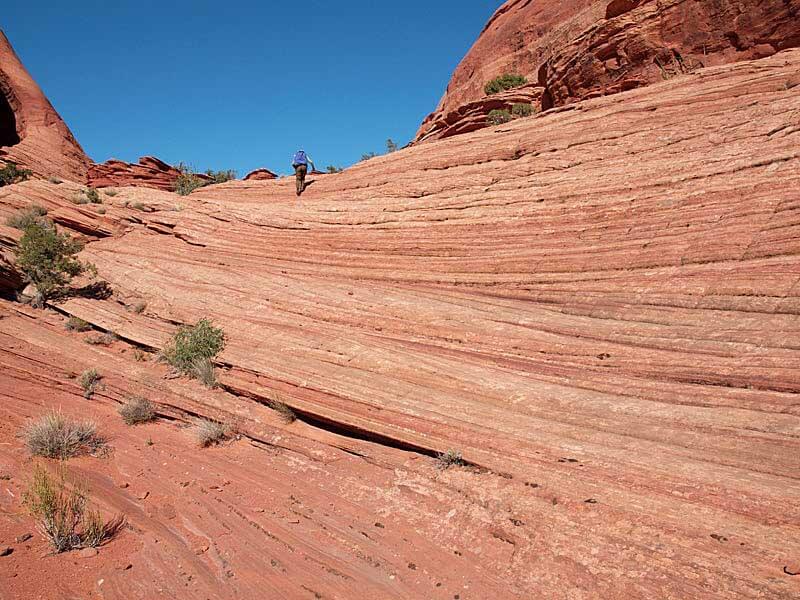
In early evening, we climbed up a striated sandstone ramp past old Indian caves.
![]()
Our first view. The gorge of the Escalante is below (behind the green bushes, not seen in this photo) and the white Navajo domes of Circle Cliffs in the distance. Al is standing below the arrow in the next picture
![]()
A breathtaking perch
Nearly 1,000 feet above the Escalante, a superb view

Alan climbed a few dicey slabs to get a bit higher. A Navajo dome at the top of our world.
A close-up of the flowers in the lower right corner of the previous picture.
We climbed back down to a dream campsite at a spring-fed desert oasis. A waterfall sits right next to our sleeping bags. We slept to the frogs singing (croaking) to us all night… ALL NIGHT.
Sleeping-bag-view the next morning.

Moving down the Escalante again. This tower marks an abandoned meander where the Escalante used to run.
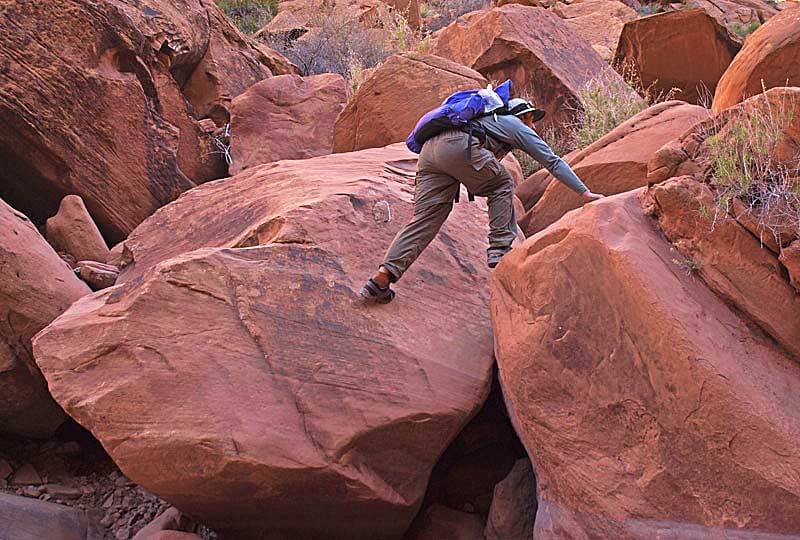
We did more bouldering up clogged streambeds and bushwhacking thru willows and tamarisk than we wanted.
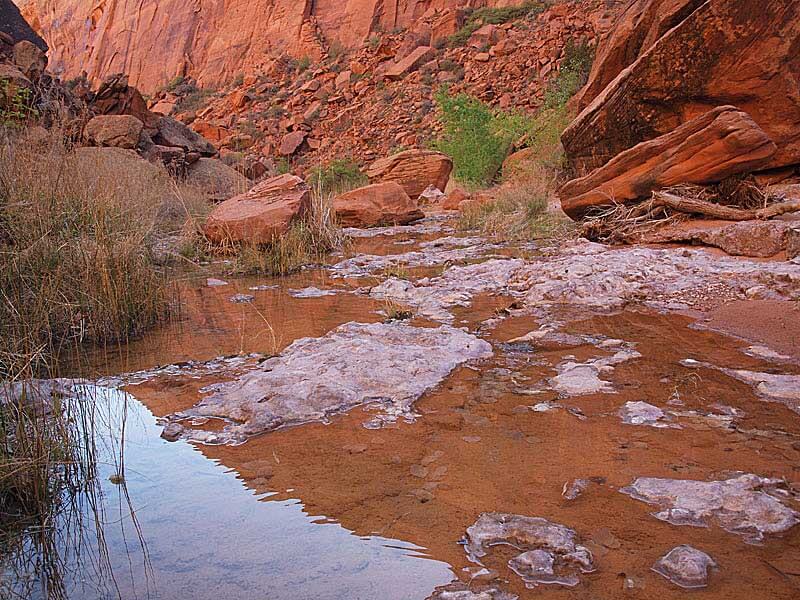
Spring pools not shown on any map….a surprising find given the severe drought.
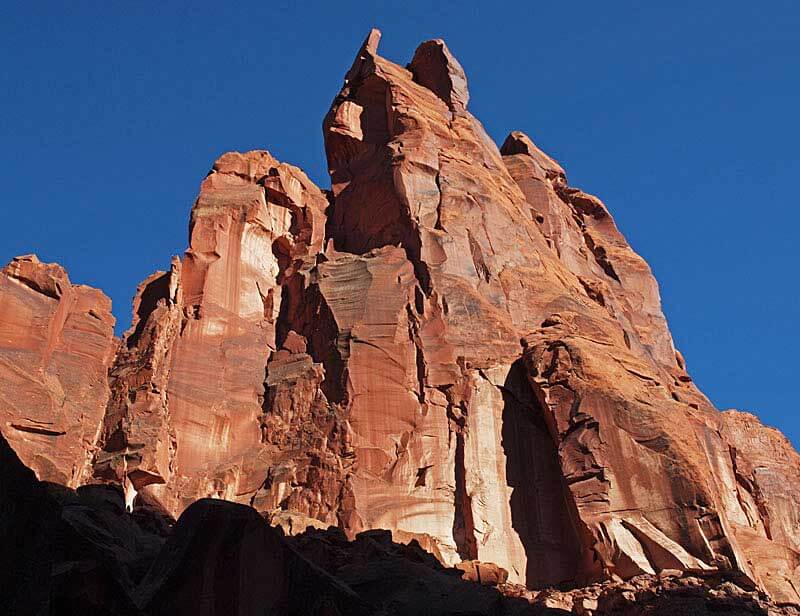
A jagged wingate tower above the pools.
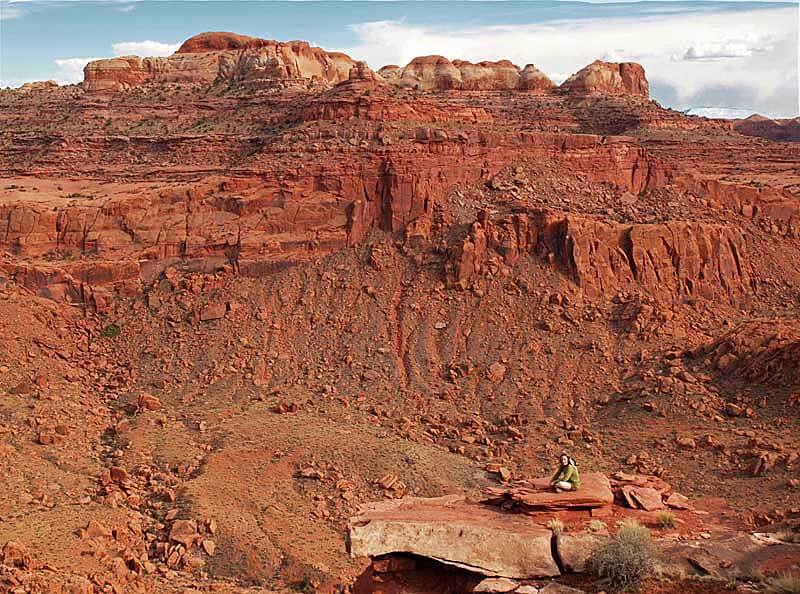
On our last night, we climbed 600 feet above the Escalante River to camp on this ledge.
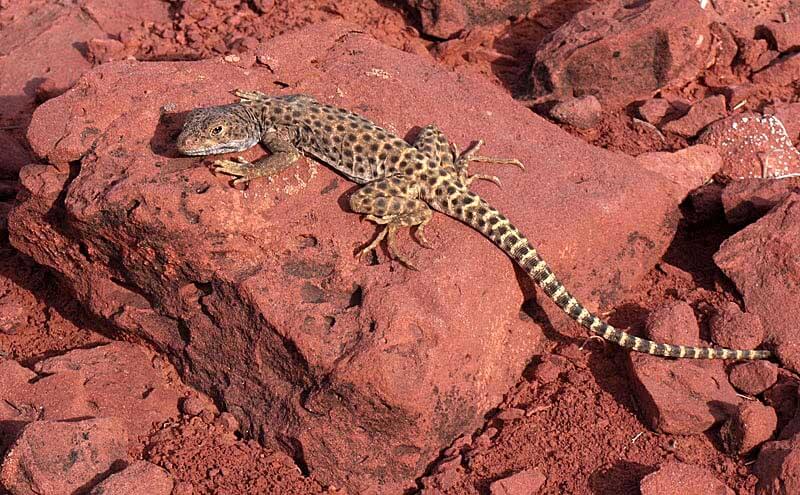
A Long-nosed Leopard Lizard kept us company on the ledge.
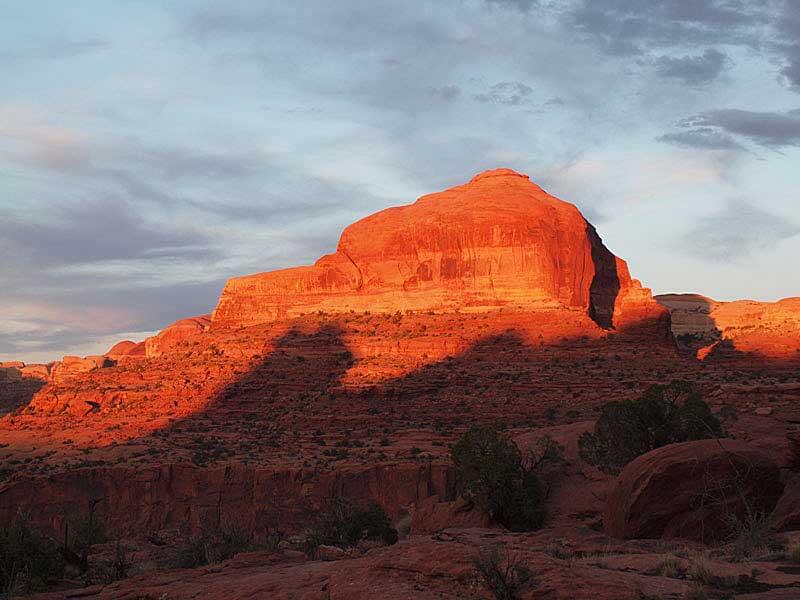
Sunset view from our camp.
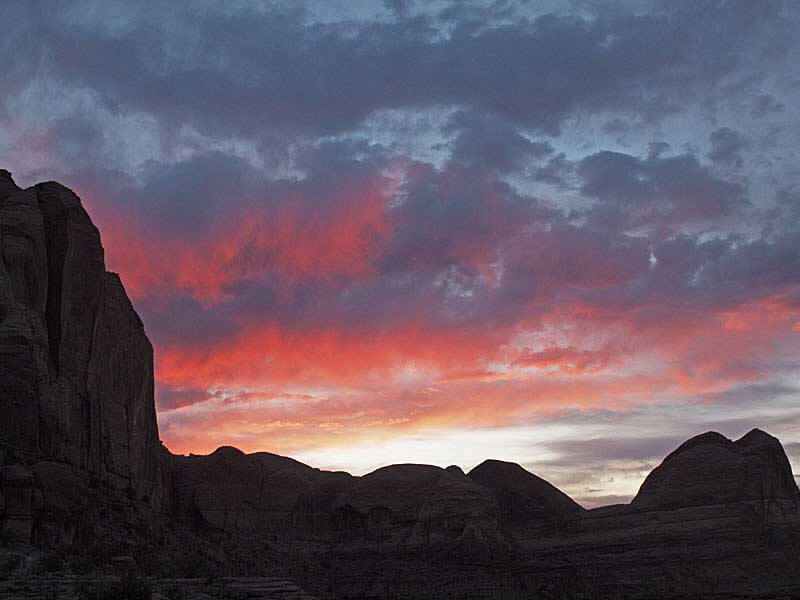
A bit later in the evening — the other direction.
And a stunning dawn view from our campsite the next morning.
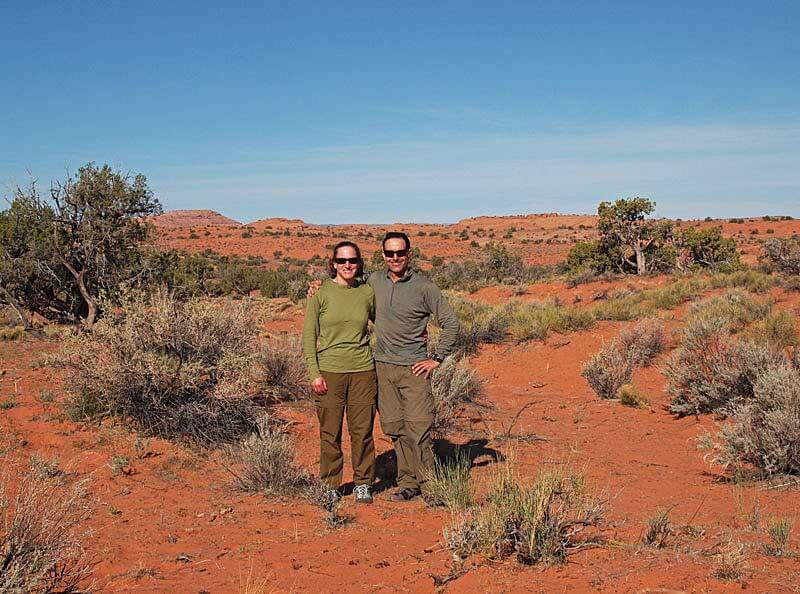
After taking photos. We left camp and walked along ledges on the canyon wall (described as “the finest ledge walk in the Escalante”). After we were over the canyon rim it was a very long march without stopping through sand and Navajo domes. Difficult overland navigation and blazing desert sun. We were though all 4 L of water each by the time we reached the car at 3:00 pm. Zero food and zero water after 7 days is excellent planning on our part.
Parting Shot
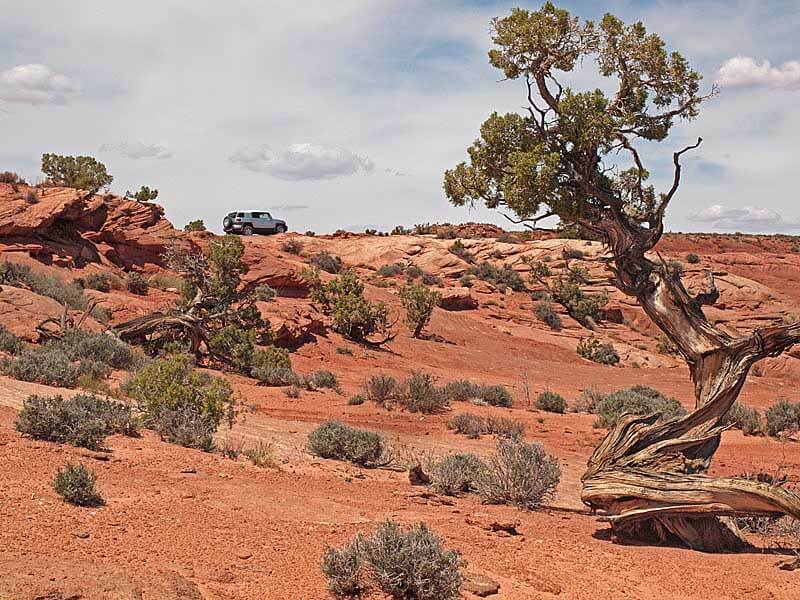
Trail head and our car which blessedly has a spare gallon of water in the back.