Best Camp Coffee | Backcountry Barista Pour Over Coffee
For only $7 & 2 ounces get the stunning taste of barista quality coffee in the backcountry
Say Goodbye to Starbucks VIA | Forget Cowboy Coffee
This Coffee Tastes Amazingly Better!
Friends, after 11 years it’s time to push back on Starbucks VIA Ready Brew Coffee. Sure it’s taken the “camp coffee” by storm, sadly killing many creative backcountry brewing methods. But is that a good thing? We think not! Better yet, we have a solution for a stunning cup of camp coffee — a low cost and lightweight technique for brewing World Class Coffee in the backcountry. And we really mean World Class Coffee!
$7 “Camp Coffee” Using World Brewers Cup Champion Technique
In this post we’ll detail a $7, two ounce method for brewing camp coffee that’s a backcountry adaptation of the recipe and technique used by the 2016 World Brewers Cup Champion, Tetsu Kaysuya. With it you’ll get the stunning taste of barista coffee in camp. It really isn’t that hard to do. In this article, we’ll give you the gear, recipe and technique to easily brew fantastic camp coffee.
Why It’s Great Coffee
Well, beside the fact that you’re using freshly roasted, freshly ground, high quality REAL COFFEE… You’ll use a “pour over” brewing technique that’s taken barista coffee brewing by storm. The controlled series of pours used in Tetsu Kaysuya’s technique bring out the best in the coffee. The first initial two pours control the levels of sweetness and acidity your coffee will have. By pouring less water (only 40%) into the coffee for the first ½ of the brew, you’ll bring out the sweetness in a light roast coffee. And using 60% of water for the second ½ of the brew strengthens the coffee and balances out the flavors and acidity.
While you’re here, check out our guide to the best backpacking mugs and cups.
You make Adventure Alan & Co possible. When purchasing through links on our site, we may earn an affiliate commission at no additional cost to you. Here’s why you can trust us.
Quicklinks to other resources on this site
- Best Backpacking Food | our favorite foods for backpacking
- Best Backpacking Stove System | our comparison of the Trail Designs Caldera and the JetBoil
- 9 lb Gear List | Nine pounds of backpacking gear is all a hiker needs to be safe and warm
Full Video Guide to Brewing World Class Camp Coffee
If a picture is worth a 1,000 words what is a comprehensive video of Guide to Brewing the Best Camp Coffee worth? There’s stuff in here that we can’t begin to cover in this written guide.
If you want to jump directly to the actual brewing it’s at around 6:20 using this link

The $7 of Gear that You Definitely Need
- $7 Hario V60 01 Plastic Dripper – Red 2.2 oz (63g)
(also Hario V60 Paper Coffee Filters, Size 01)
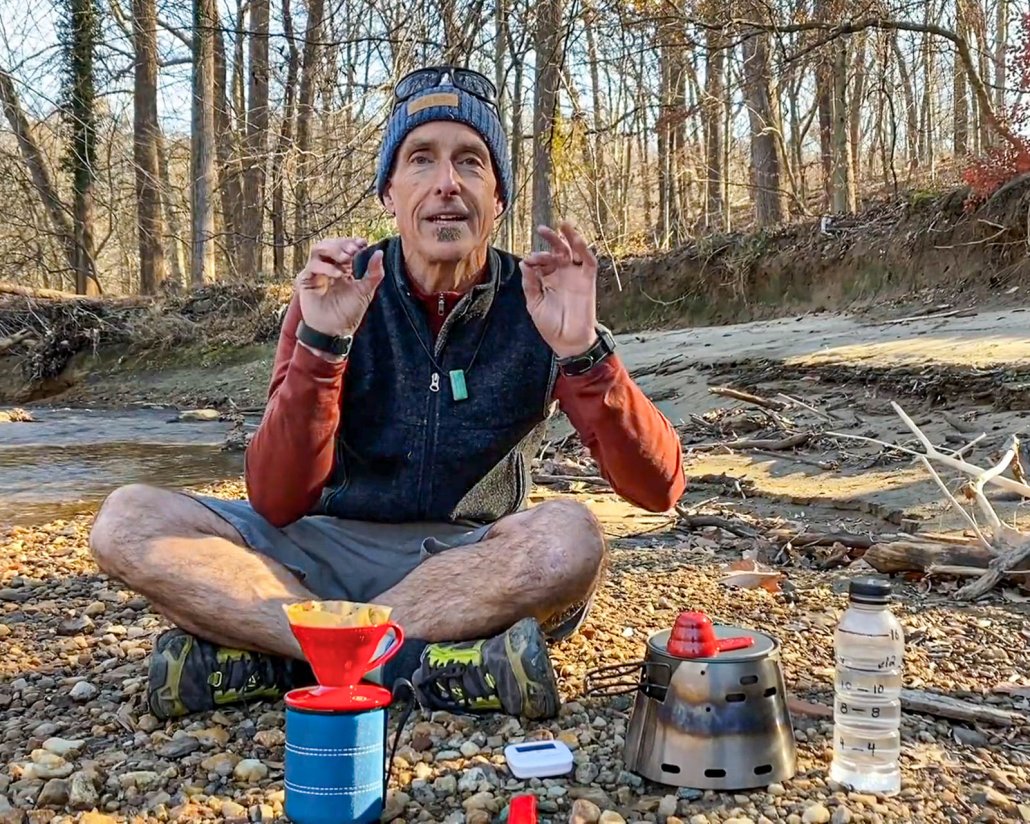
This 2.2 oz marvel is the coffee dripper that Tetsu Kaysuya used to win the 2016 World Brewers Cup Championship! - $0 Some way to measure 12 ounces of water (we mark up a 16 oz, widemouth ice tea bottle). Look in the lower right of the lead picture to see ours.
- Pennies per cup: Locally roasted (light roast) coffee from your favorite independent coffee shop (We used La Coop Coffee based in DC). Trust us that with this technique you’ll appreciate the taste of a light roast! Whole beans are best but if you do get them pre-ground, get a medium grind for drip coffee.
- $0 A timer. We use our iPhone in the backcountry. Or you could get one of these very light and inexpensive timers as shown in this post and the video.

Optional Gear that you may not have
TOAKS Titanium 450ml Mug — $20
A great deal for $20! A caffeinated backpacker is a happy backpacker! Enjoy your morning coffee with minimal weight penalty in this durable, lightweight, attractive titanium mug. A backpacker can never have too much titanium… or coffee.

Trail Designs Sidewinder + Toaks 900ml Pot Cooking System
Only 5.5 oz and does a good job of a controlled pour for coffee brewing
Staff picks best backpacking stove! In our opinion the Trail Designs Sidewinder Ti-Tri Cooking System is the most practical cooking system on the market. It’s exceptionally light — about 1/3 the weight of a JetBoil. It’s very stable, wind-resistant, and fuel-efficient. The Toaks 900 ml titanium pot works well for both solo and 2-person use — and its thin lip makes for well behaved pouring — nice for doing pour-over coffee.
Cheap alcohol fuel is available almost everywhere in the world. Take only the fuel you need, no canister disposal as waste. The wide pot is easy to cook in and easy to clean. The cone has an option to burn wood. TD Kojin Alcohol Stove stores unburned fuel so no need to minutely measure the fuel.
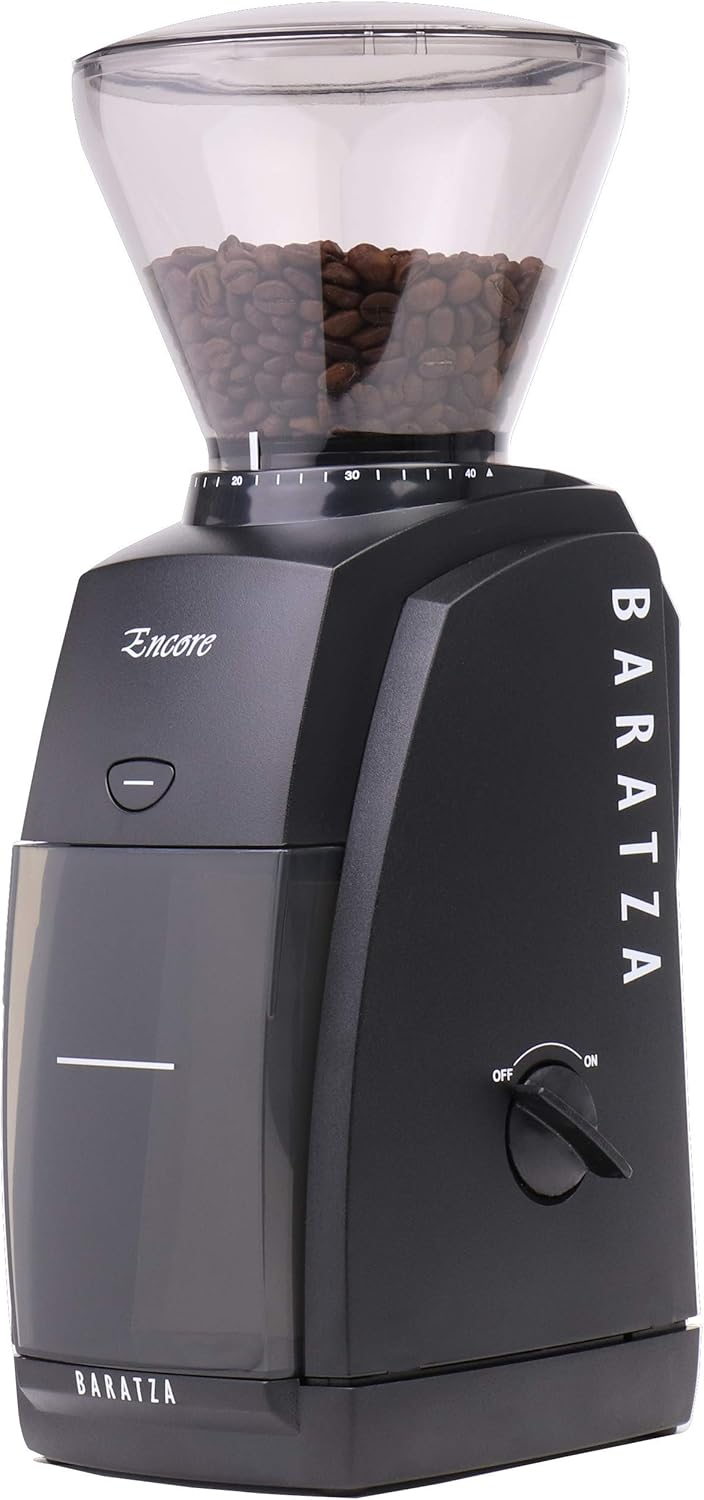
Baratza Encore Conical Burr Coffee Grinder
Value Grinder that Gives You a Barista Quality Grind
The Baratza Encore Conical Burr Coffee Grinder is the best deal on an actual/sharp burr coffee grinder that gives you a barista quality grind. And it’s used by many professionals.
Zero Cost Grind Option
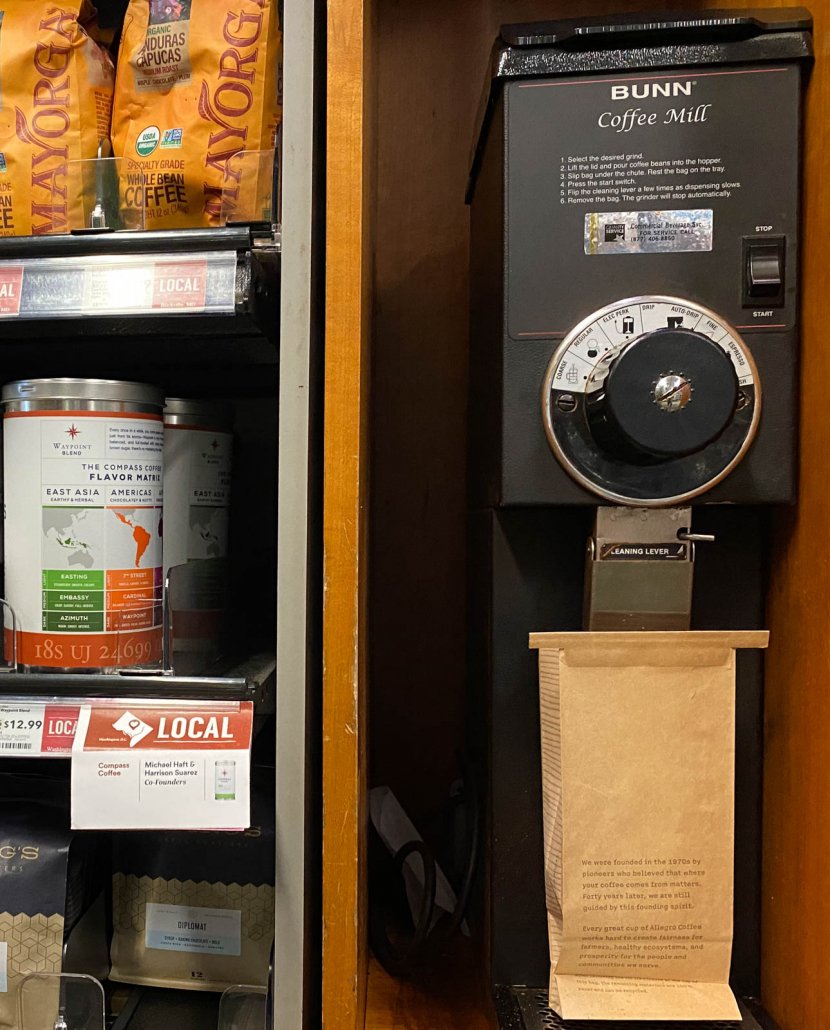
Or you can grind your own at a supermarket or have a local coffee shop grind your coffee.
How to Make Barista Quality Camp Coffee
It’s Delicious & It’s Easy!
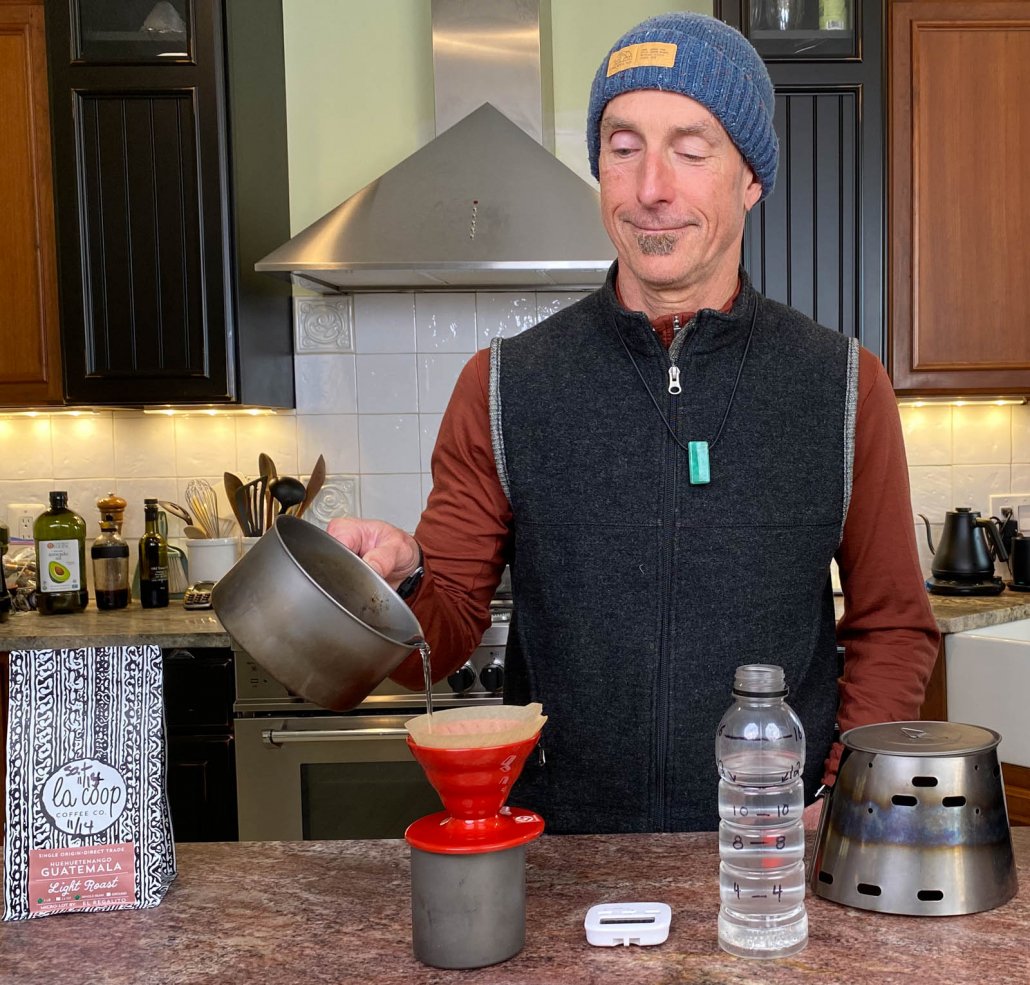
Don’t get too worried about amounts of water and timing. If you pour about 5 equal parts of your water during 3 minutes you should be fine! [Note: here we show our locally sourced, light roast coffee from La Coop Coffee in DC)]
Steps Pre-Trip
First get some locally roasted (light roast) coffee from your favorite independent coffee shop (We used La Coop Coffee based in DC). You’ll get high quality coffee that’s fresh and they’ll happily grind it for you if need be. So support local roasters, most of which, in addition to getting you great coffee, purchase it using fair trade and other ethical business and growing practices.
- Grind your whole bean coffee just before your trip. We suggest using the #15 setting on Baratza Encore Conical Burr Coffee Grinder.
- Or get your whole-bean coffee pre-ground locally either at supermarket grinder or from your local roaster. Try for a medium drip grind. It should be around the consistency of granulated sugar.
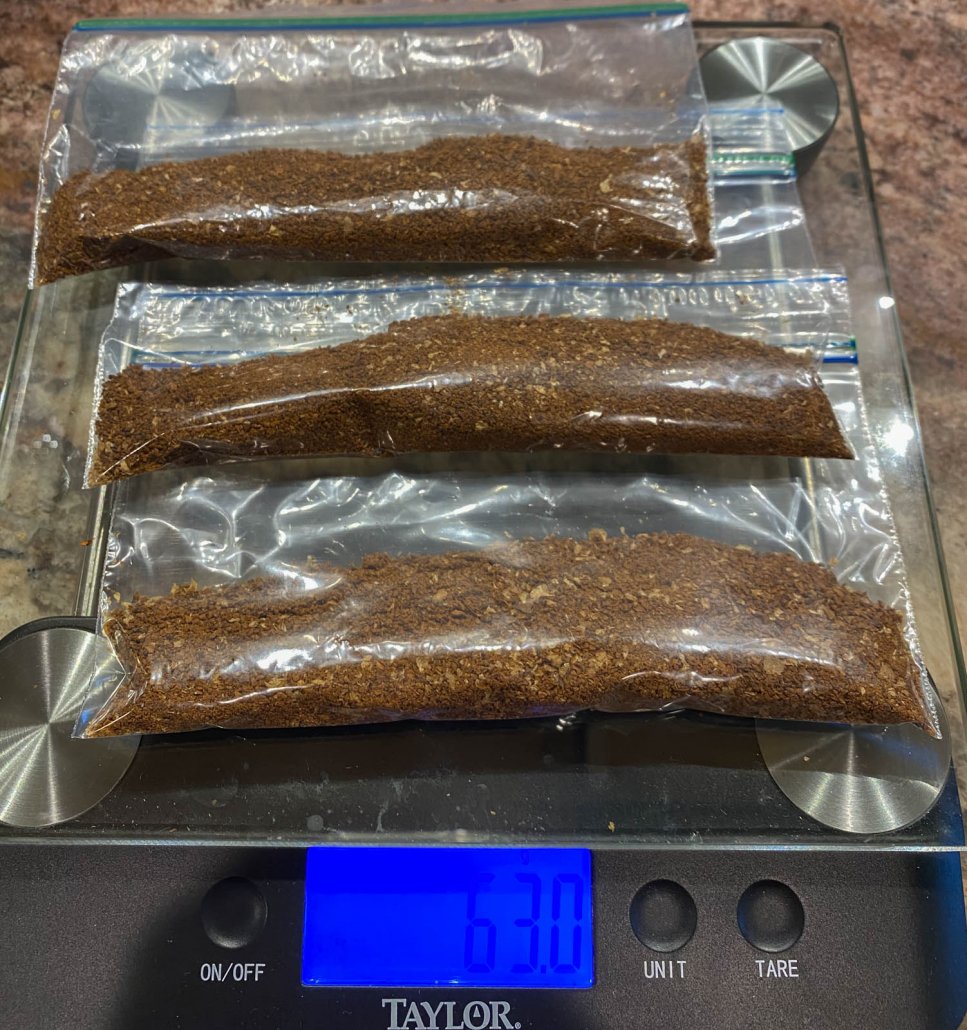
- Measure 20g of coffee into individual snack baggies (our preference). And we do re-use them.
- Or bulk grind your coffee and use about 1¼ scoops of the measure that comes with the Hario V60 dripper for each cup of coffee.
- Don’t forget to bring as many Hario V60 Paper Coffee Filters as you’ll need.
Ready to brew! Cone and filter wetted and warmed. Dry coffee grounds added and leveled. Timer set to zero.
Steps in the Field
Important: It will really help, if you watch our video on this starting around 6:20.
Getting Ready to Brew
- Put the Hario V60 01 Plastic Dripper on top of your mug and put the folded and shaped filter in the dripper.
- Bring 360 ml (~12 oz) of water to a boil
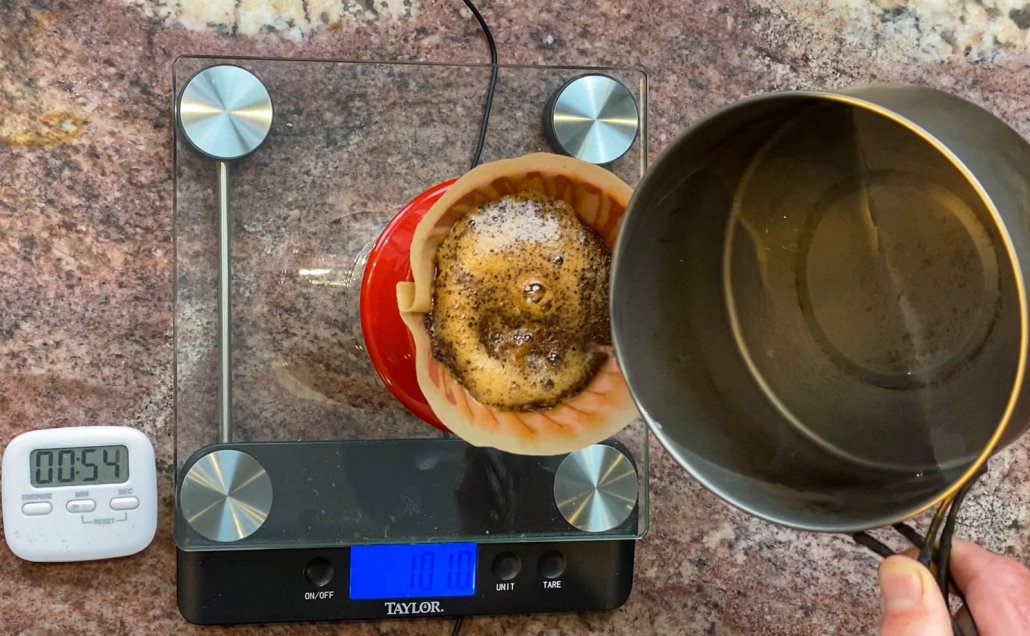
- Pour ~60 ml of boiling water into the dripper. Using a circular pour, wet the filter paper and warm the dripper. Let stand for 30 secs and then discard the water in the mug.
- Add coffee into the bottom center of the filter and tap to level the grounds.
Brewing your Camp Coffee
Finishing the second pour just to the top of the bloom.
Making your Pour Over Coffee in the Backcountry
Now you’ll pour the remaining 300 ml (~10 oz) of water into the coffee using 5 separate pours over 3 minutes. Don’t get too worried about amounts and timing. If you do five pours in about 5 equal parts over 3 minutes you should be fine!
Set your timer to zero. (We use our iPhone to time)
- 0:00-0:15 Pour just enough water to cover/wet the coffee grounds (approx 50 ml) and watch the coffee expand (the bloom).
- 0:45-1:00 Pour a bit more water again just covering the bloom or a bit more (approx 70 ml)
- 1:30-1:45 Pour water that is just a bit over the bloom (approx 60 ml)
- 2:00-2:15 Pour water that is just a bit over the bloom (approx 60 ml)
- 2:30-2:45 Pour the remaining water in (approx 60 ml) and let fully drain
3:30 remove the dripper from your cup
Enjoy your coffee!
Enjoy Your Camp Coffee!
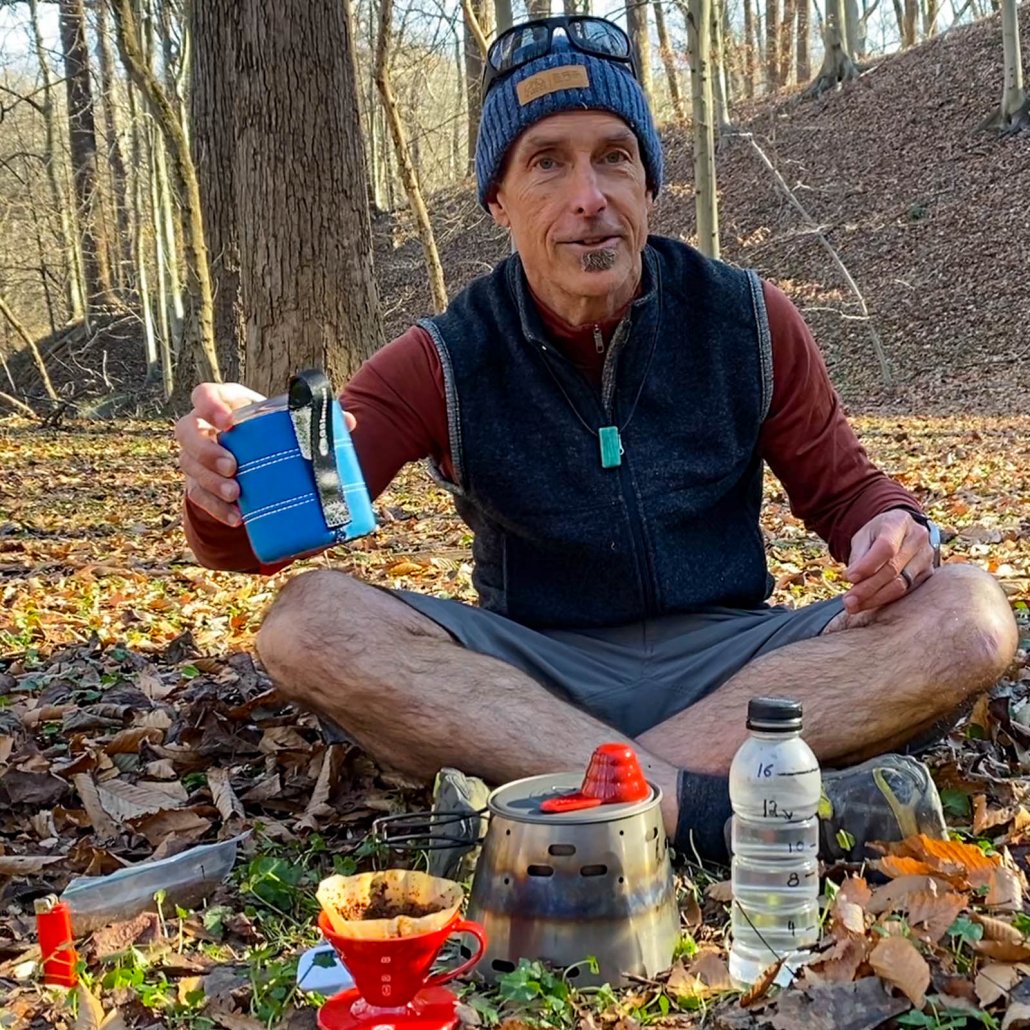
This is an amazing cup of coffee. Wonderful sweetness/chocolate flavors balanced with juicy floral/citrus notes and just the right acidity. So yeah, it blows Starbucks VIA out of the water.
Finally a Few Words on Leave No Trace!
We would be remiss if we didn’t cover cleanup
So to be clear, you can’t just throw the filter and coffee grounds out in the field. Leave No Trace (LNT) says that you need to carry those used coffee grounds and filter out with you. Fortunately, that’s not so hard. Just lift the filter and grounds out of the dripper cone and put them into a ZipLock baggie and carry them out. This is way easier than cleaning out a oily pot of cowboy coffee or trying to clean coffee grounds out of a gold filter. And no, you can’t just rinse coffee grounds out of your coffee pot or gold-filter into a lake or a stream. Not even OK to spread them out on the ground. LNT says you need to carry these out as well, which turns out to be pretty messy and not a lot of fun.
Guess this is one serious advantage to Starbucks VIA — zero clean up and only once small plastic packet to pack out. Although you’d be amazed how many of these packets we DO find around camps.
Compared to the Competition
Starbucks VIA
Pros: Lighter, easier to use, much easier cleanup. Cons: VIA tastes just a bit better than ‘standard’ instant coffee (that’s because it’s a mix of instant coffee and microground coffee — and it certainly isn’t fresh). As such, any means of brewing actual freshly ground coffee beans in the backcountry will be better. So see Cowboy Coffee and MSR Gold Filter Coffee below.
Cowboy Coffee
Pros: Lighter, arguably a simpler method with less gear — not dripper cone and no filter. Cons: A harsher brew with less nuance and less balanced flavor than our method — many find it to strong/harsh. And of course you do have those gritty grounds in your cup and a final sludge at the end. Pot cleanup is NOT easy with grounds oily coffee residue adhering to the inside of your (see our LNT now about how you need to carry all those ground out with you). And if you are using your pot for something else, it will likely taste of coffee. Still we are fans of cowboy coffee, which if done well approaches the flavor of a good french press.
MSR MugMate Coffee/Tea Filter
Pros: Well, it’s lighter. Cons: It’s about 3x more expensive. There is no way to suspend the filter above your cup so you end up with a full immersion brew. And with most smaller backpacking mugs the filter and grounds can take up most of the mug. This has a few problems. 1) It means less brew circulation and less effective brewing. Everything is just sitting stagnant in the mug. 2) And more important, the MugMate and coffee endup taking up a ton of volume in your mug — sometimes more than 1/2 the volume. So when you pull it out you are left with a tiny amount of very strong coffee in the bottom of your mug. 3) finally like the cowboy coffee, cleaning out the MugMate filter of coffee grounds is not easy (see our LNT now about how you need to carry all those ground out with you).
Conclusion on World Class Camp Coffee
Life is too short to be drinking instant coffee out of packets
There’s really no reason to settle for less than fantastic backcountry coffee. With the $7 Hario V60 Coffee Dripper [2.2 oz (63g)] used to win the 2016 World Brewers Cup Championship, you too can easily make an incredible cup o’ joe in the backcountry. And with the technique in this guide, it’s really not all that hard to do. Finally, life is too short to be drinking instant coffee out of packets, even if it is Starbucks VIA.


Share this entry