New World Class Trek in Chile’s Patagonia National Park
by Alan Dixon and Alison Simon
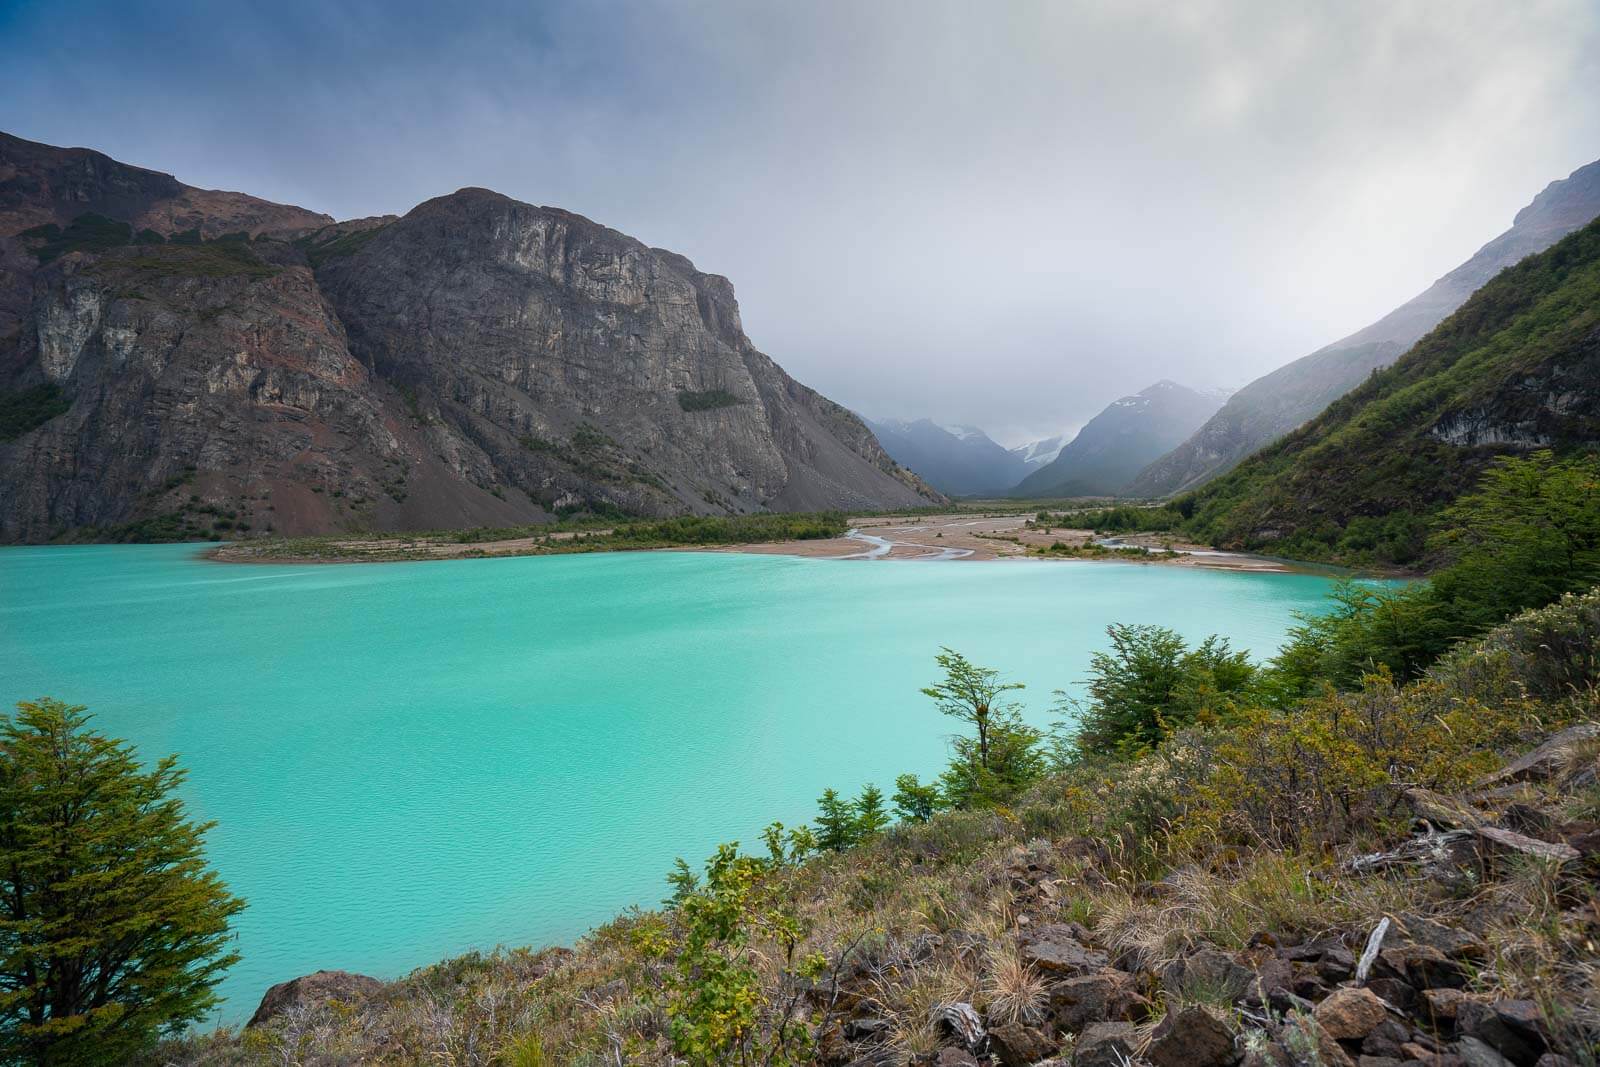
Chile’s new Patagonia National Park may well become the “Yellowstone of South America” due to its rich diversity. The new Park has it all — the high glaciated peaks of the Southern Andes, wide valleys with ice cold glacial rivers, forests of southern beech hanging with moss, and startlingly green glacial lakes. Fairly unique to the park is its expansive grasslands supporting a vast array of wildlife. It’s easy to see herds of guanacos, condors, flamingos, armadillos and more. And while a puma sighting is extremely rare in the more famous Torres del Paine, we had a puma saunter through our camp one night!
The new Park is a trekker’s paradise. It rivals the trekking of more well known areas of Patagonia — like Chile’s Torres del Paine Trek, or Argentina’s Fitz Roy Trek in Los Glaciares National Park. The new Patagonia National Park is big! It’s about the same size as the the vast Yosemite National Park in the US and about 1.5x the size of Torres del Paine National Park. But there are far less people. So, it’s not surprising we saw only a few other hikers on our trek from end to end though the new park. As such, Patagonia National Park is the perfect place to trek in glorious Patagonia and skip the crowds.
You make Adventure Alan & Co possible. When purchasing through links on our site, we may earn an affiliate commission at no additional cost to you. Here’s why you can trust us.

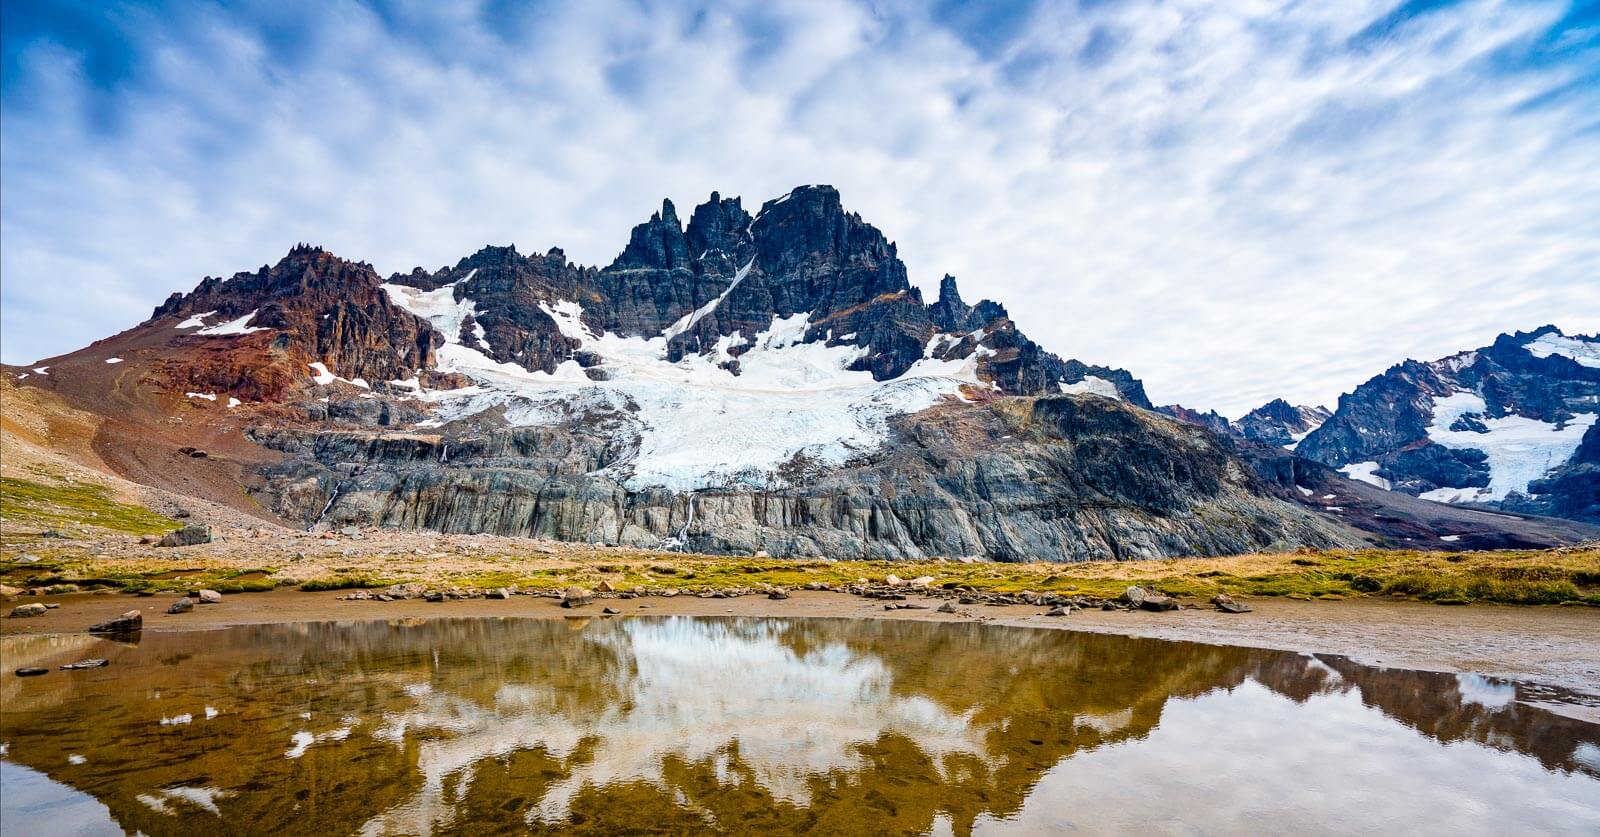
The aptly named Lago Verde with Valle Hermoso leading up into the Southern Andes Mountains shrouded in mist from an incoming rain storm.
The Only Guide to the New Patagonia National Park Trek
As far as we know, this is the only guide to the new Patagonia National Park Trek, online or in print. This guide contains all the information you need to successfully complete this new world class trek in Patagonia — the only complete map set of the trek in geospatial PDF, GPS files, hiking distances & times; detailed, day-by-day route descriptions, camping locations, elevation profiles and more.
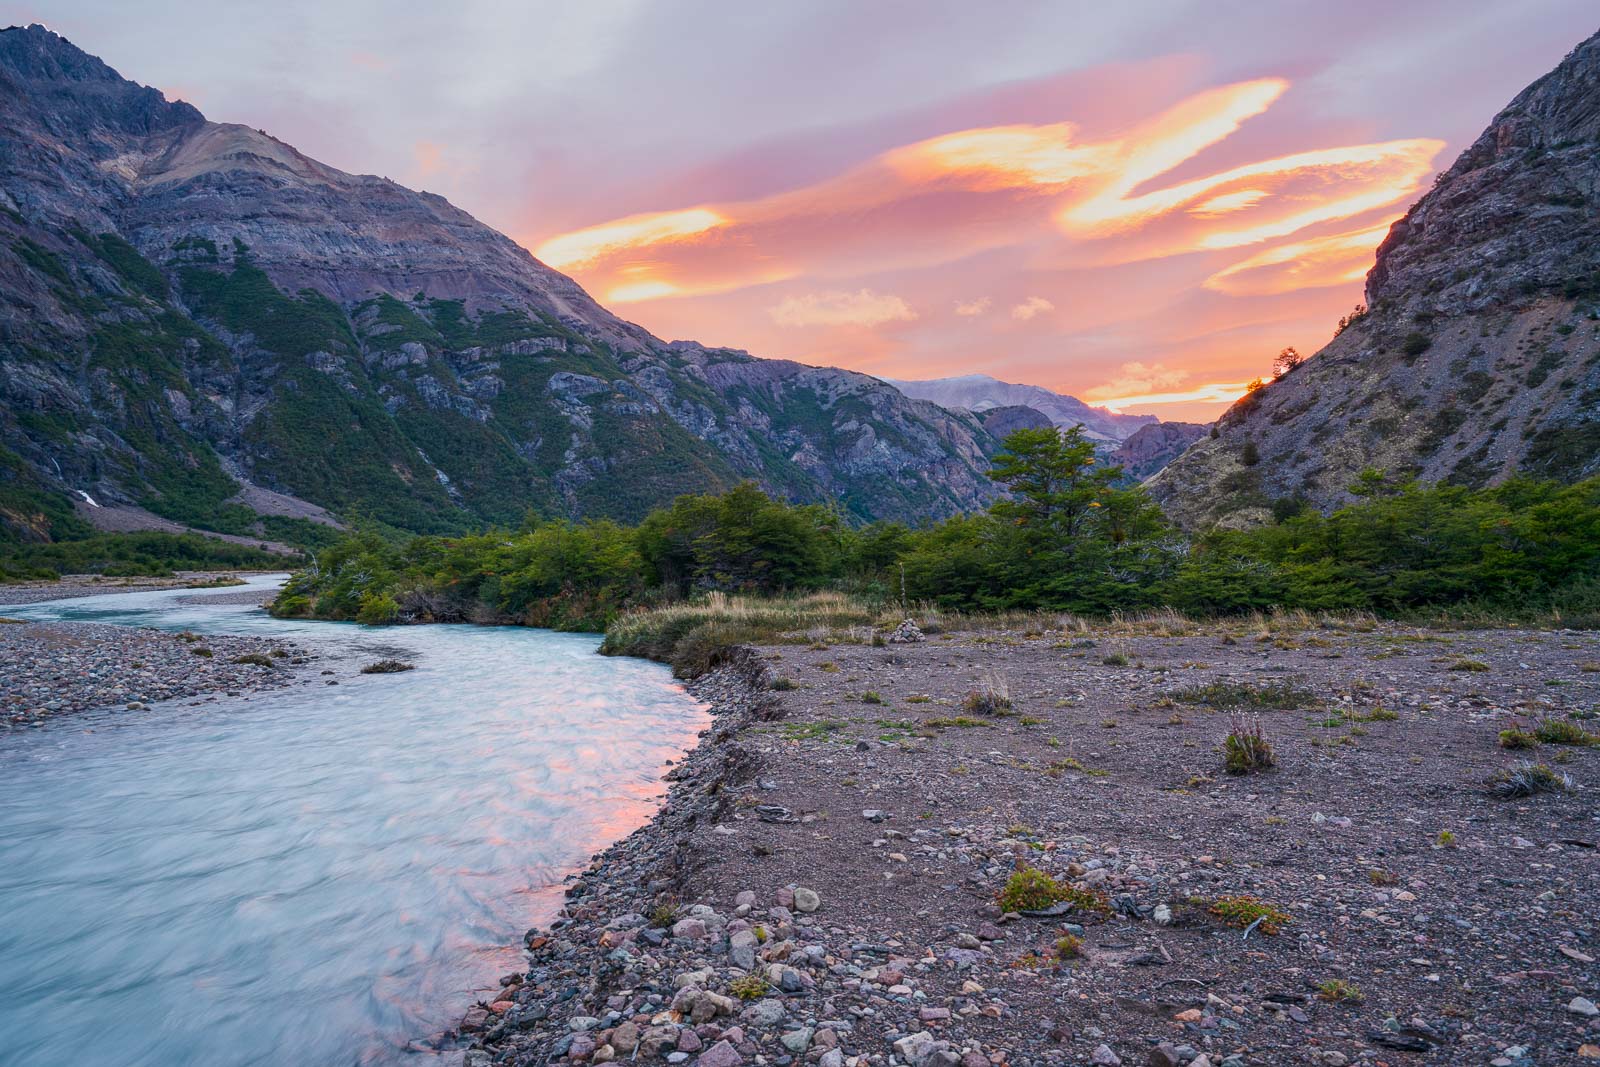
Sunrise Valle Hermoso (Beautiful Valley).
What is Chile’s new Patagonia National Park?
Still in progress, Chile’s new Patagonia National Park will combine three separate areas into a single park. Two existing conservation areas, 1) Jeinimeni National Reserve in the North and 2) Tamango National Reserve in the South along with new land between the two, the Chacabuco Valley, that was recently donated by Conservacion Patagonica. When fully integrated, these three areas will become Chile’s new Patagonia National Park a vast, contiguous and thriving ecosystem.

Map of Chile’s new 650,000 acre Patagonia National Park. In yellow is what all the fuss is about, the Chacabuco Valley (Parque Patagonia). Formerly a privately owned sheep ranching area that divided the Jeinimeni National Reserve (green on top) to the north from the Tamango National Reserve to the south (green on bottom left). It was purchased by Conservacion Patagonica, the organization founded by Kristine and the late Doug Tompkins of The North Face. The new land was formally given to Chile in January of 2018. When fully integrated, this new land is the key to forming a vast, contiguous and thriving ecosystem that some are calling the “Yellowstone of South America” Integration of the park areas may come as soon as 2019, but you can easily trek through all three areas right now.
Here’s a short video of the dedication of the park to Chile in January 2018.
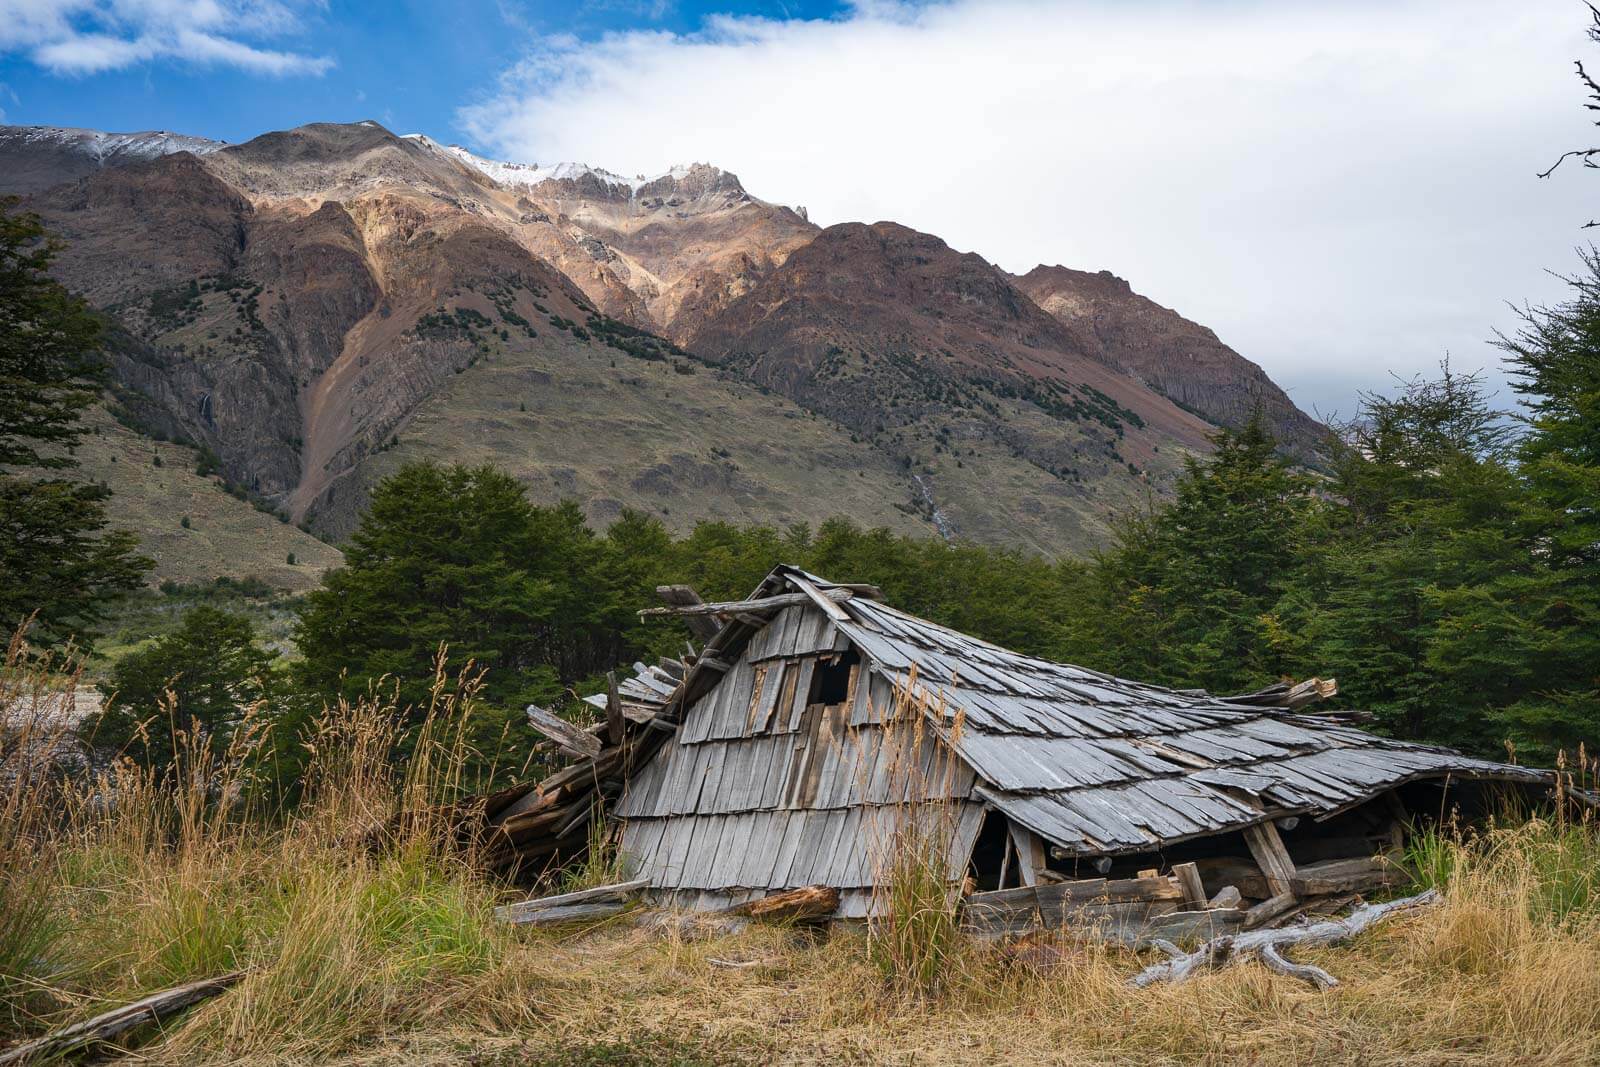
This destroyed shepherd’s hut in Valle Aviles is a reminder of the sheep ranching history of the area.
Top Things You Need to Know about the Patagonia National Park Trek
Location – Aysén Region of Patagonia in Chile. Nearest city to the south is Cochrane. Nearest city to the north is Chile Chico.
Safety – This region of Chile is totally stable and safe. In fact, most people went out of their way to be super helpful like offering us a lift to our room from the ferry so we didn’t have to walk it late at night. There’s lots tourists safely hitchhiking here.
Reference – This is the only guide online or in-print for the new Patagonia National Park Trek. Parque Patagonia.org has a few hiking maps and a brochure here but they do not cover the entire area of the new Patagonia National Park.
Navigation and Maps – As far as we know we have the only complete map with all the trails for this trek. In addition we have provided a .GPX file for the Trek.
Season – October 1 through April 20 (summer in Patagonia). Park is essentially closed April to September.
Duration – 5 to 6 easy to moderate days (fitter/faster hikers could do this in 4 days)
Distance – 60 miles (97 km) including one 16.4 mile (43 km) gravel road section. Total ascent 8,700 ft. Total decent 10,800 ft.
Level of Difficulty – Moderate to hard depending on river levels and wading expertise.
Route Finding – Moderate to easy. A few “trails” are not that well marked. You need to cross rivers at the right location. The start of one trail was not signed when we trekked.
Challenges – Wading cold glacial rivers, not so well marked sections of trail and the usual Patagonia weather and winds.
Gear, Food, Water and Camping
Gear – Patagonian weather can be harsh with frequent rain (or snow) and it’s legendary howling winds. This is a List of the Gear that worked has well for us over the years in both Chilean and Argentine Patagonia.
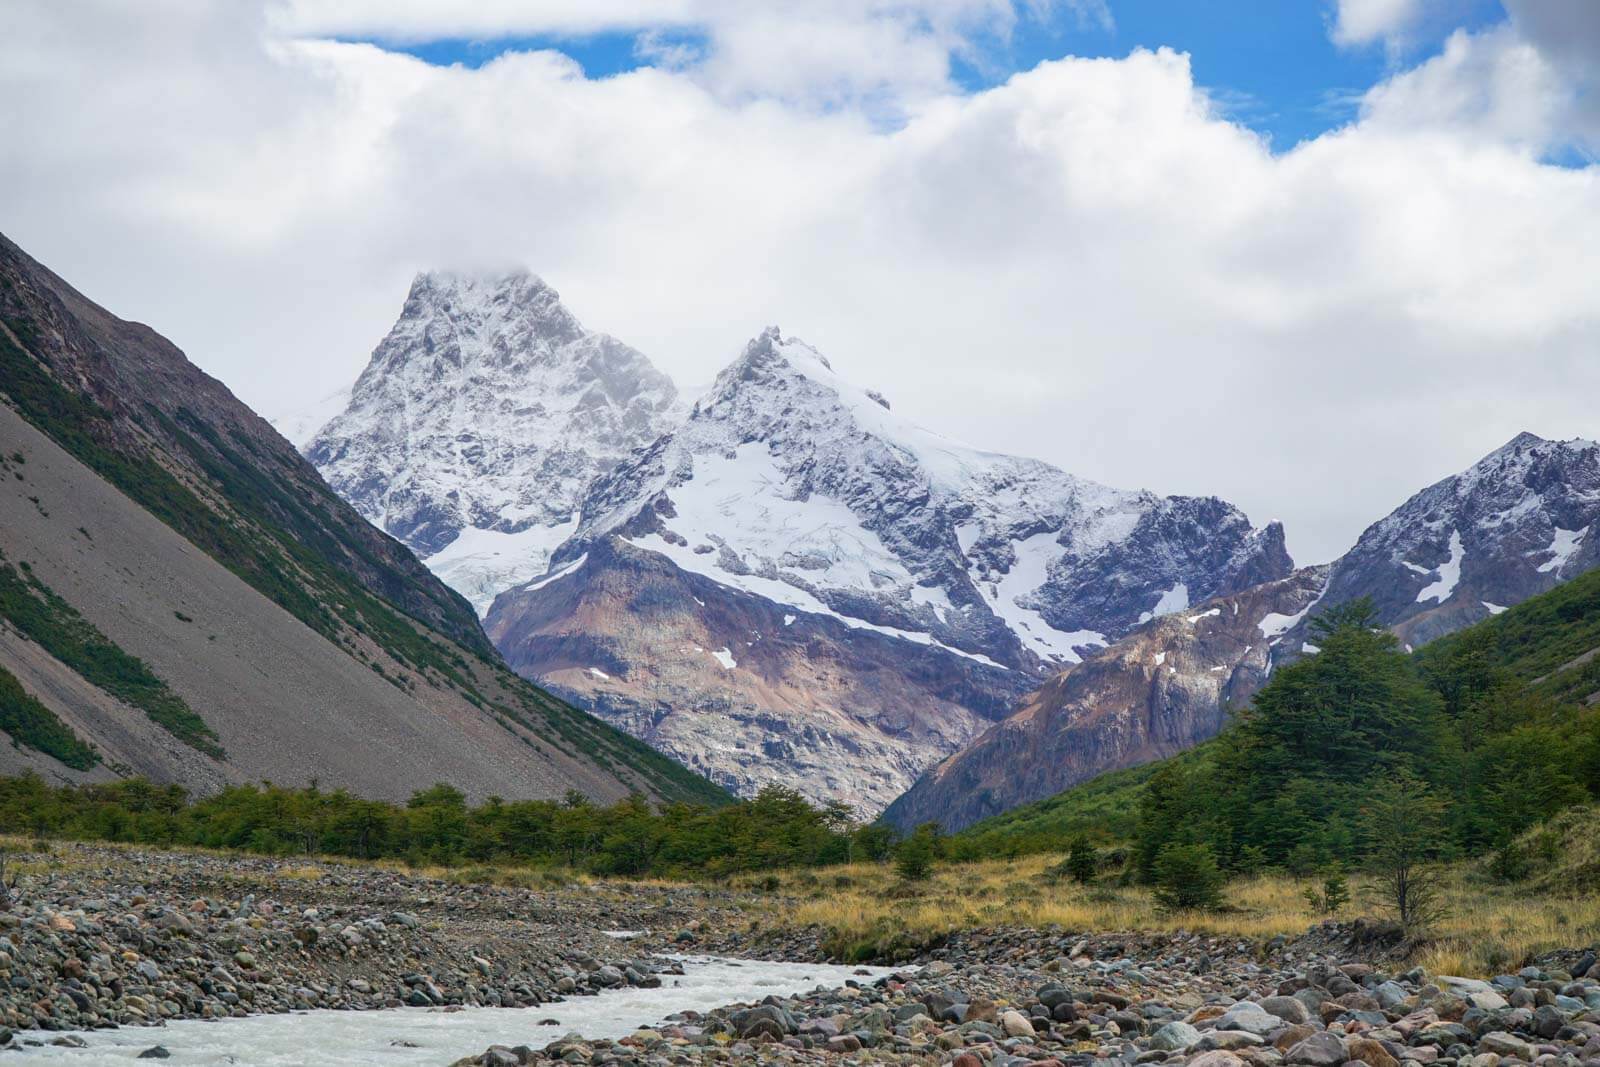
Looking up Valle Aviles towards Reserva Jeinimeni and snow capped Southern Andes.
Camping – There is both backcountry/wild camping (on the trail and no facilties) and car-accessable campgrounds that have toilets, cooking shelters, tables and sometimes showers.
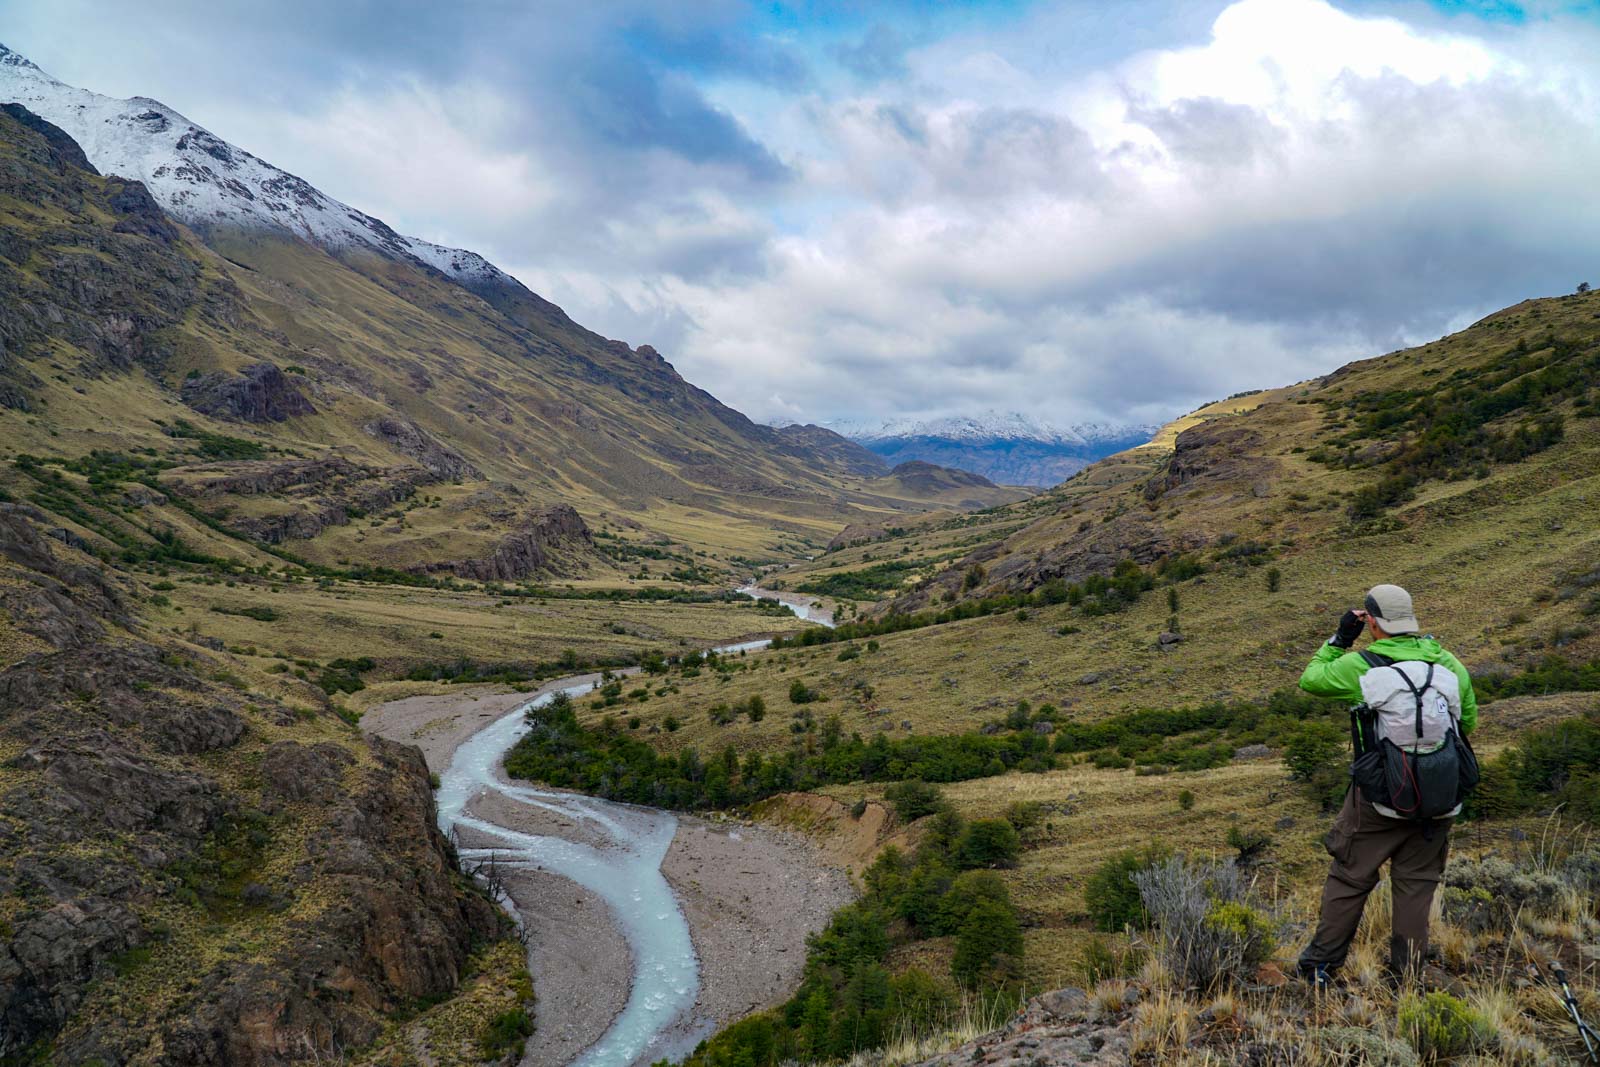
Alan looking down Valle Aviles as it winds its way down to the vast grasslands and herds of guanaco in Valle Chacabuco.
Water and Food – Water is plentiful along the trail and in backcountry camps but there is no treated water. There is no food or other services available along this route. The only exception is a fancy restaurant at the Lodge in the Park Headquarters. There is also a gift shop. But there is no food or groceries available anywhere in the park. The nearest town is Cochrane about 30 minutes by car. So you will want to purchase food in either Coyhaique, Chile Chico, or Cochrane. See “Food, Gear, & Fuel” section.
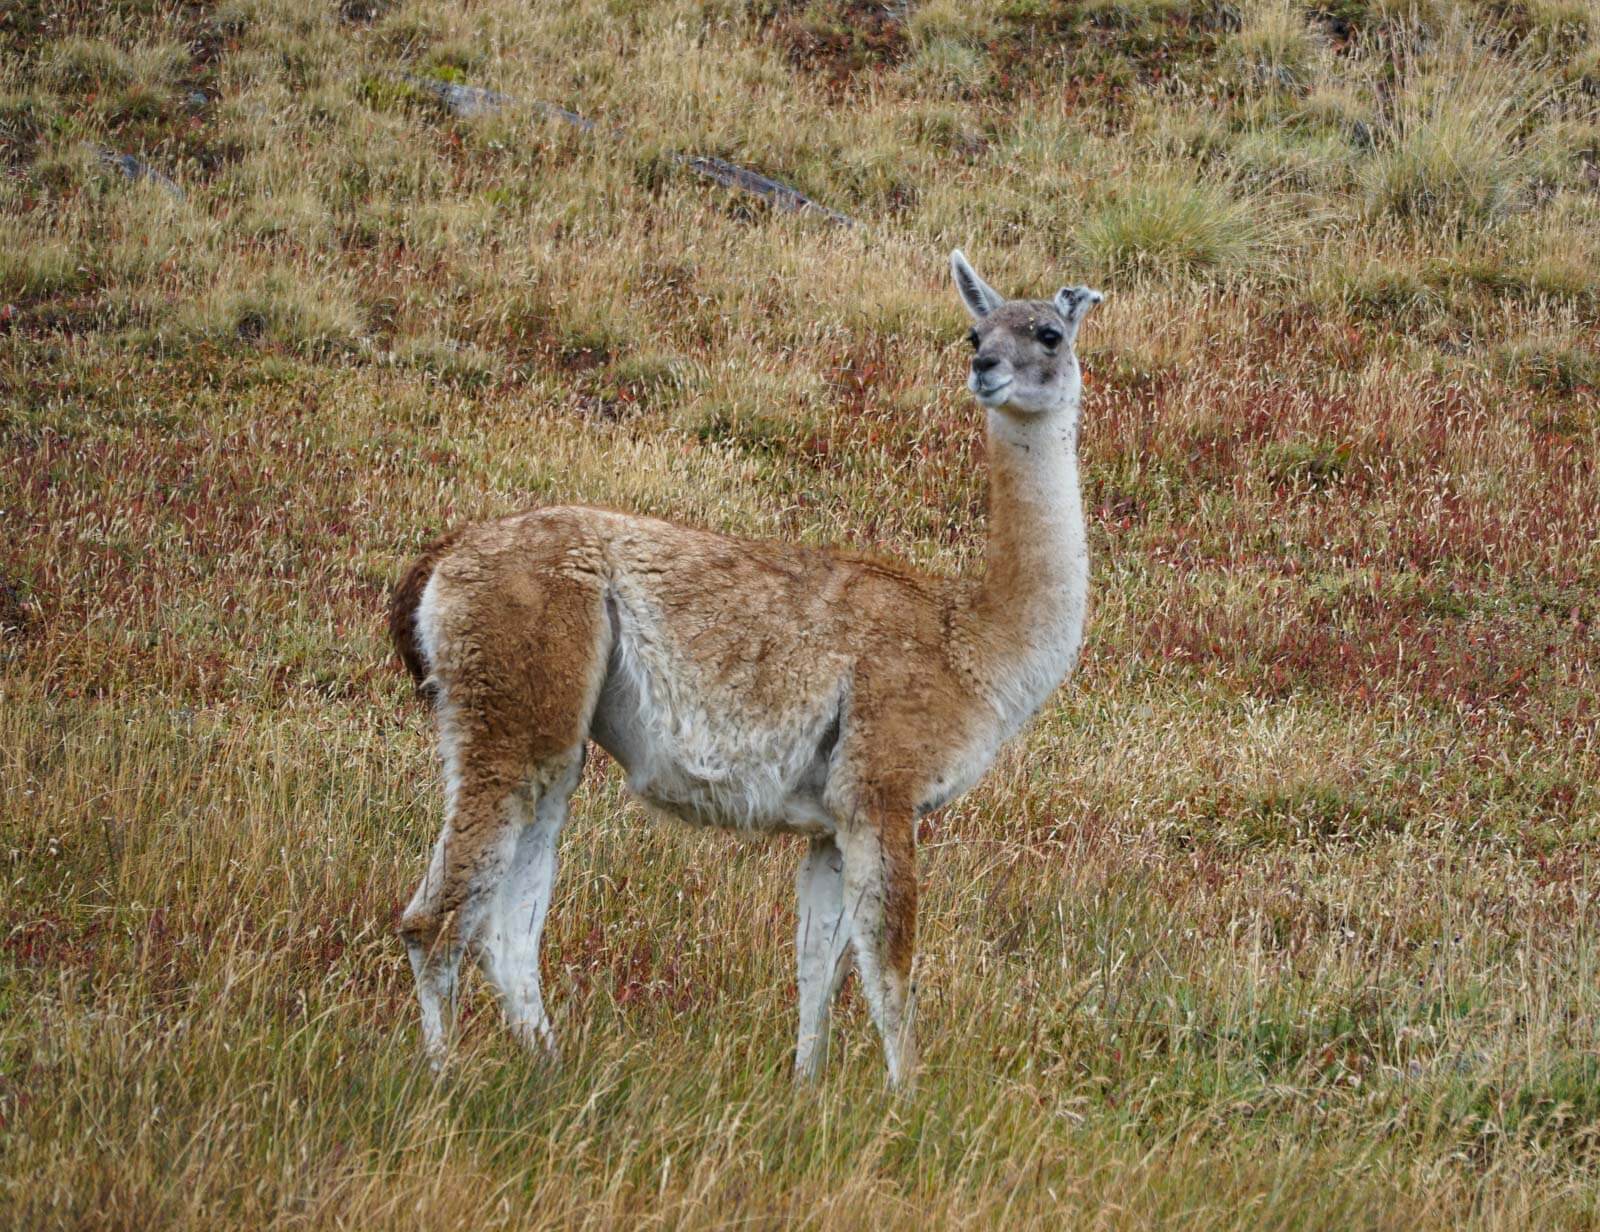
Herds of guanaco roam all over the Chacubuco Valley in Parque Patagonia.
The Details – Patagonia National Park Trek Guide

Overview map of the Patagonia National Park Trek. Each day is color coded. The route starts at the entrance to Reserva Nacional Jeinimeni. And it ends in the town of Cochrane south of Reserva Nacional Tamango. [click on map to enlarge].
Navigation and Maps
As far as we know we have the only complete map with all the trails for this trek! In addition we have provided a .GPX file for the Trek. Otherwise, decent trekking maps of the new Patagonia National Park are nearly non-existent and hard to come by. We couldn’t even get one at the Park’s Headquarters. Maps for Good had a nice park map that is now out of print. Hopefully they are updating the map and will re-publish it soon.
Note: Our map and .gpx files above are provided free for your personal use. We are happy for you to use them! But please respect our work and copyright and don’t republish or distribute them to others. Thanks!
Keeping Park Names Straight
Note: Until the new Patagonia National Park is fully integrated (possibly sometime in 2019, but don’t hold your breath) this Guide will refer to the older designations of the three separate areas. As of our trekking in 2018, the following areas were still signed and operating separately. Listed from North to South they are:
|
Details of Backcountry/wild-camping and Campgrounds
Backcountry camping: There is only one backcountry hut on the trek (in Reserva Jeinimeni). It is also the only backcountry campsite with an outhouse. In Parque Pataonia proper, wild camping is only allowed in upper Valle Aviles above the suspension bridge (otherwise wild camping is not allowed in Parque Patagonia). In Reserva Jeinimeni you are restricted to designated campsites. In Reserva Tamango wild camping is allowed but try to use existing camps. Campgrounds: Parque Patagonia has three car accessible, non-backcountry campgrounds with toilets, shelters and picnic tables. In Park Lodging: There are high end/expensive rooms at the Lodge in the Park Headquarters.

Dawn in Valle Aviles. The mountains got a fresh coat of snow overnight.
A Companion Trek to the New Patagonia National Park Trek
Also see our companion trek in the same region of Chile, the Cerro Castillo Trek, another best trek in Patagonia you’ve never heard of. Combined with the New Patagonia National Park Trek you have almost two weeks of fantatstic trekking in a much less traveled but exciting region of Patagonia.
Day by Day Trekking Guide to Patagonia National Park
Getting There
From the Santiago Airport fly into into Balmaceda, (BBA). There are two airlines that go to BBA, LATAM and Sky Airlines. Sky Airlines is cheaper, but has fewer flights than LATAM. For both, it pays to book earlier than later. When you arrive to Balmaceda airport, as of this writing, you have three choices for getting to Coyhaique—the three shuttles are lined up at the baggage claim and, as far as we can tell, all do the same thing. We went with T&T as they dropped us at our hotel (the others may do the same, just ask).
Food, Gear, and Fuel
Coyhaique is the biggest city in Aysen. There are many local outfitters as well as a Patagonia and North Face store downtown for all your gear needs. The one downside of Coyhaique is the supermarket which is rather large. Unfortunately, there is just one for a population of 50,000+ which means lines in the grocery store can take 20-30 minutes. There is talk of building a second store, let’s hope they do. Alcohol fuel is also available at Cruz Verde Pharmacias, if you bring an alcohol stove like we did. Lodging in Coyhaique is diverse. We had no problem finding a place to stay—although during high season, best to book ahead. Chile Chico had at least two supermarkets that appeared to be moderately stocked and Cochrane had a small grocery story (the smallest of the three cities) on the square. You could probably get food for the trek if you had no other choices (i.e. other towns).
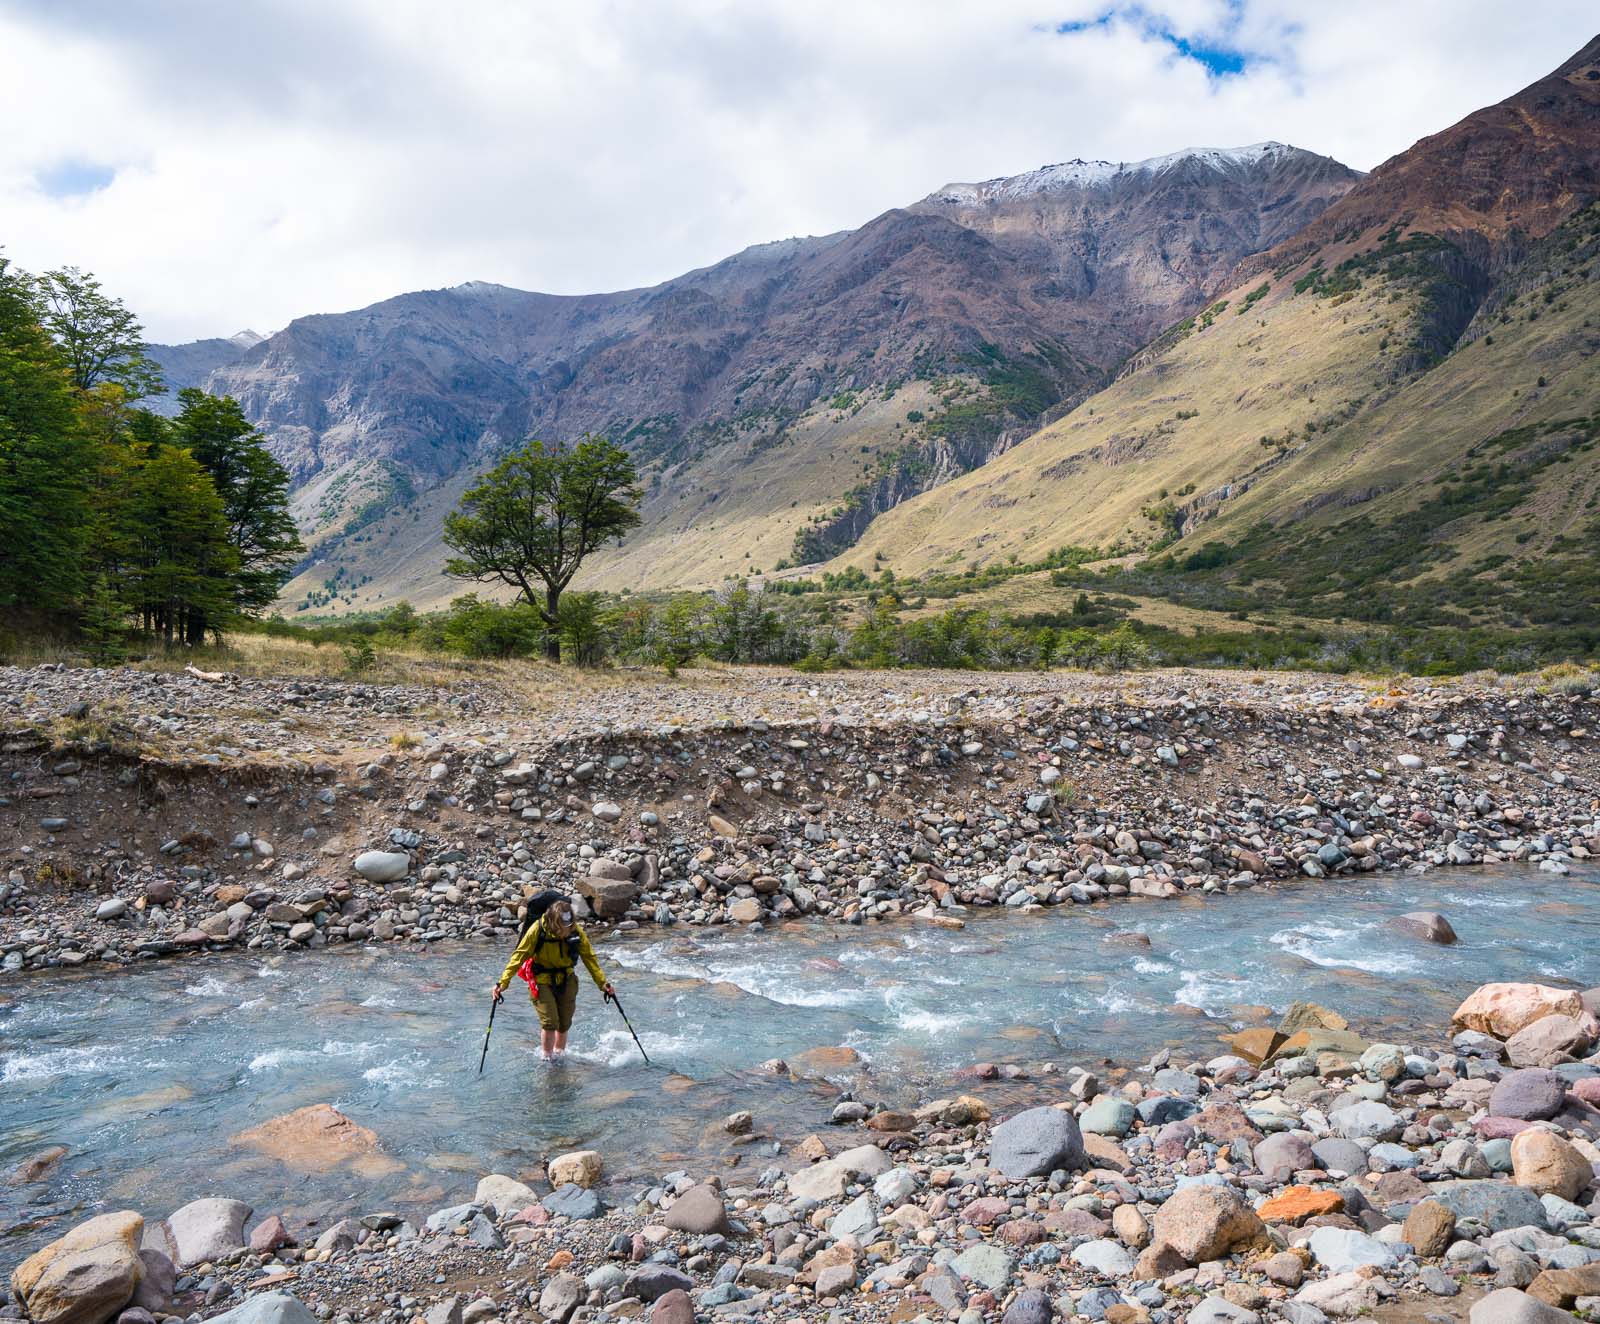
There’s a fair amount of river wading the first two days of the trek. Most are easy, just getting your feet wet. But a few wades around Rio Jeinimeni are cold and challenging.
Getting to Chile Chico (nearest large city to trek)
The start of the trek is most easily accessed via the town of Chile Chico. Unfortunately, the Carretera Austral does not go to Chile Chico. Therefore, your two options for getting to Chile Chico are taking a minibus south to Puerto Ibanez (1.5 hrs) and crossing Lake General Carrera via the ferry (2 hours) or driving all the way around the lake and back track on highway 265 (much longer). If you hitch to the ferry, you may need to find two kind souls—one to take you east on the Carretera Austral to the intersection with X-65, and another to take you down the X-65 to Puerto Ibanez.
There is only one ferry a day in each direction except Tuesday-no ferry south to Chile Chico and Wednesday, two ferries south to Chile Chico. Check the latest schedules on their website. The minibus in Coyhaique leaves in time to get to the boat at Puerto Ibanez. Cost of boat is 2,200 CLP, buy your ticket at the office in front of the boat launch.
The boat arrives in Chile Chico at 22:00 so you may want to have your lodging set up ahead of time. Chile Chico has plenty of cabanas (Air B&B) for rent as well as other options. They also have at least two well-stocked supermarkets for your trek. If you take some layover time in Chile Chico, you can fly fish or go visit the Marble Caves. It’s a nice town to layover in.
OPTIONAL TRANSPORTATION OPTIONS RECEIVED FROM HIKERS: There is a direct bus to Cochrane from Chile Chico, 4 days a week. Return trip 3 days a week 6.5 hours on a tougher road but a direct route… hitch hiking this route can be hit and miss!!! Not too much traffic
OR… ferry to Puerto Ibanez across the Lago Carrerra where you hop on to immediate connecting bus to Balmaceda Airport followed by Coyhaique.
ALTERNATIVE FROM ARGENTINA: Easy to access Chile Chico from Los Antiguos on Routa 40 in Argentina. They are only 5km apart. Transfer minibuses start at 08.30 from the bus terminal in Los Antiguos for 2,500 pesos. Several a day. Or walk or hitch hike to Chile Chico.
STAYING IN CHILE CHICO: We have received questions from hikers about staying in Chile Chico. One hiker sent the following information which we are passing along.
At entrance into town at the big arch are 2 campsites. They both charge 5,000pesos. The Hosteria has lots of NEW showers and loos.. Sweet tree surrounded camping area with tables. Camping other side of road is a bit more wind and dust prone and more scruffy but lots of tables. Be careful of the Kon Aiken camping, only one loo/shower in one room for both men and women, gets crowded.
Some hostels/ campsites provide storage of extra gear. A lot are starting to charge per day now. Plenty of opportunities to change money at local shops in Chile Chico.
Getting to Trail Head – Trek Start (Reserva Jeinimeni)
UPDATE, 2020: The 2 main agencies have paired up to provide cheaper transport into Lago Jeinimeni. Costs 20,000 pesos now. As long as you have at least 3 passengers.
Getting from Chile Chico to the trailhead of Reserva Jeinimeni (the start of the trek) is not cheap. We paid $150 USD for the two of us (using Patagonia Xpress). There are minimal day hikers and car campers who go to Reserva Jeinimeni, so hitchhiking or bumming a ride from someone in town might be challenging.
Day 1: Reserva Nacional Jeinimeni
Mileage: 9.6 mi (15.6km)
Ascent/Descent: 1400 ft (425m) ↑ 1300 ft (400m) ↓
Hiking time: 4 hr 30 min

Lago Verde and the start of Valle Hermoso near the end of Day 1.
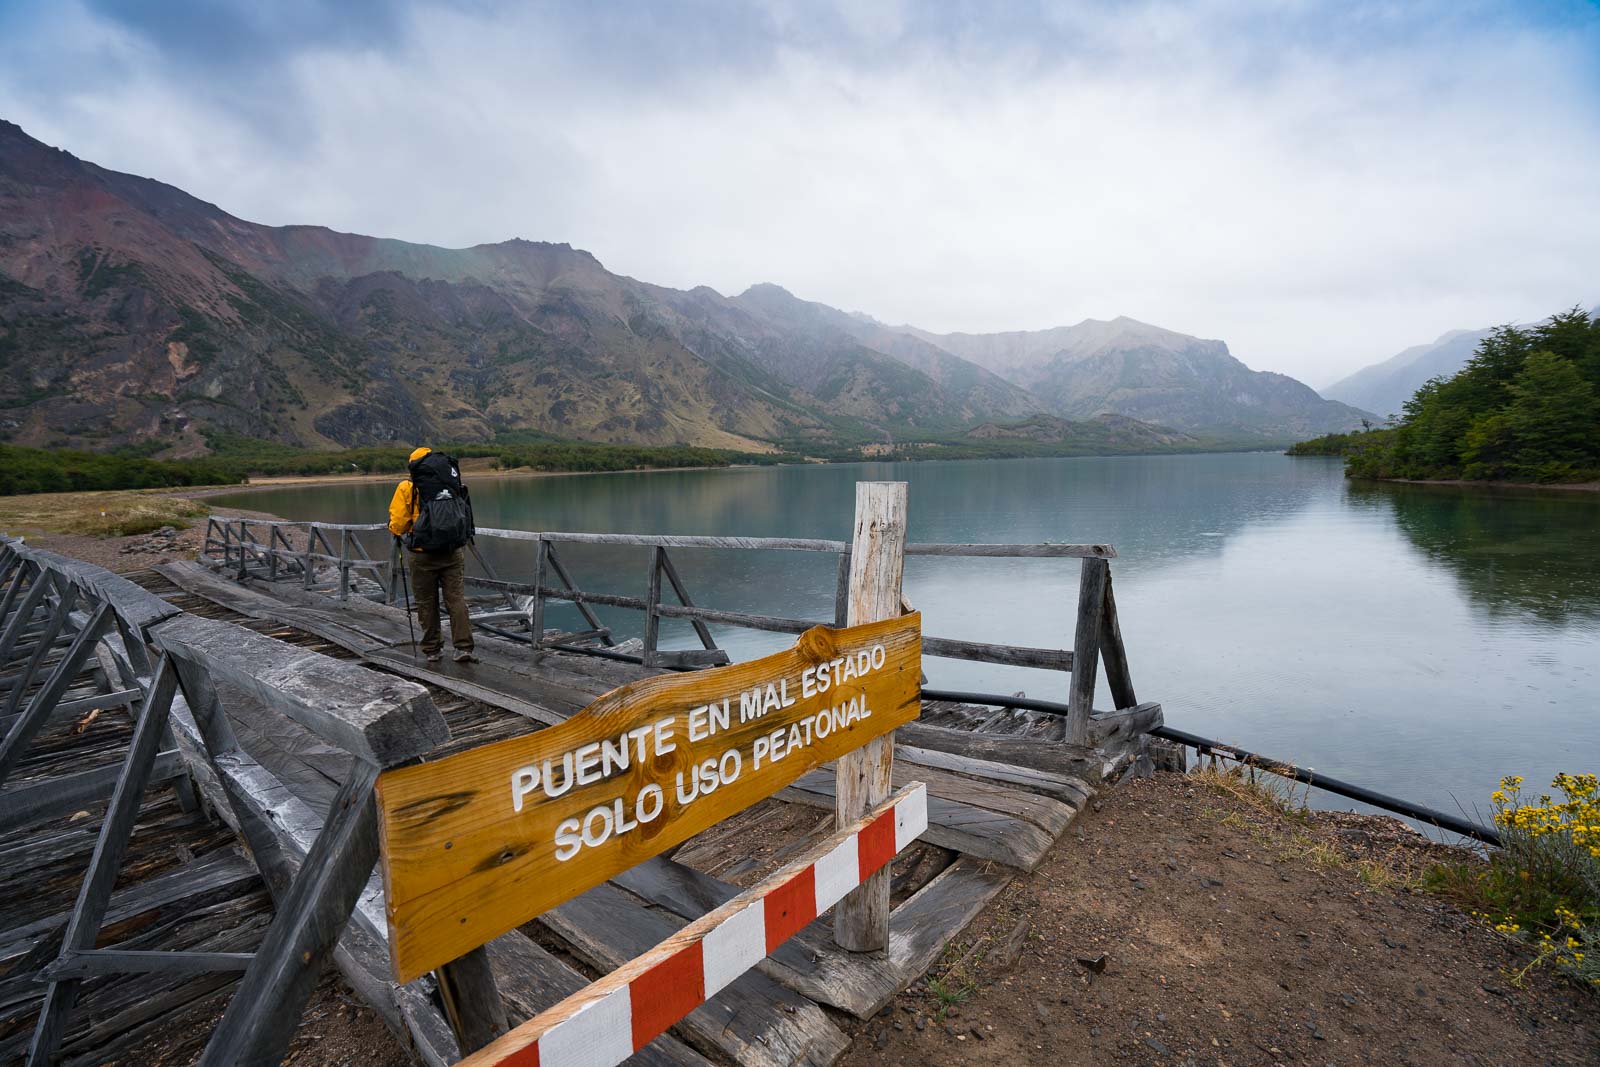
As you enter the park, have your driver go to the ranger station (about 1 hour, 20 min drive on bad roads—need high clearance vehicle). Purchase your permit from the ranger. Cost is $3,000 CLP per person to enter and another $10,000 CLP to camp (you’ll only camp one nite in this park so should only pay $10,000). We found the ranger to be extremely helpful with both directions and river crossings. The most challenging part of the two days in Jeinimeni will be the river crossings. The ranger gave us explicit information on water levels as well as exactly where to cross. Take careful notes as this information is valuable.
The start of the Trek on Lago Jeinimeni. It’s Patagonia so it’s already raining.
When finished at the ranger station, you can either walk or have your driver bring you to the trailhead (the bridge). The trailhead is at the entrance to a campground. During high season, you may have a better chance catching a ride from someone staying at his campground than off season which will save you the $150 USD.
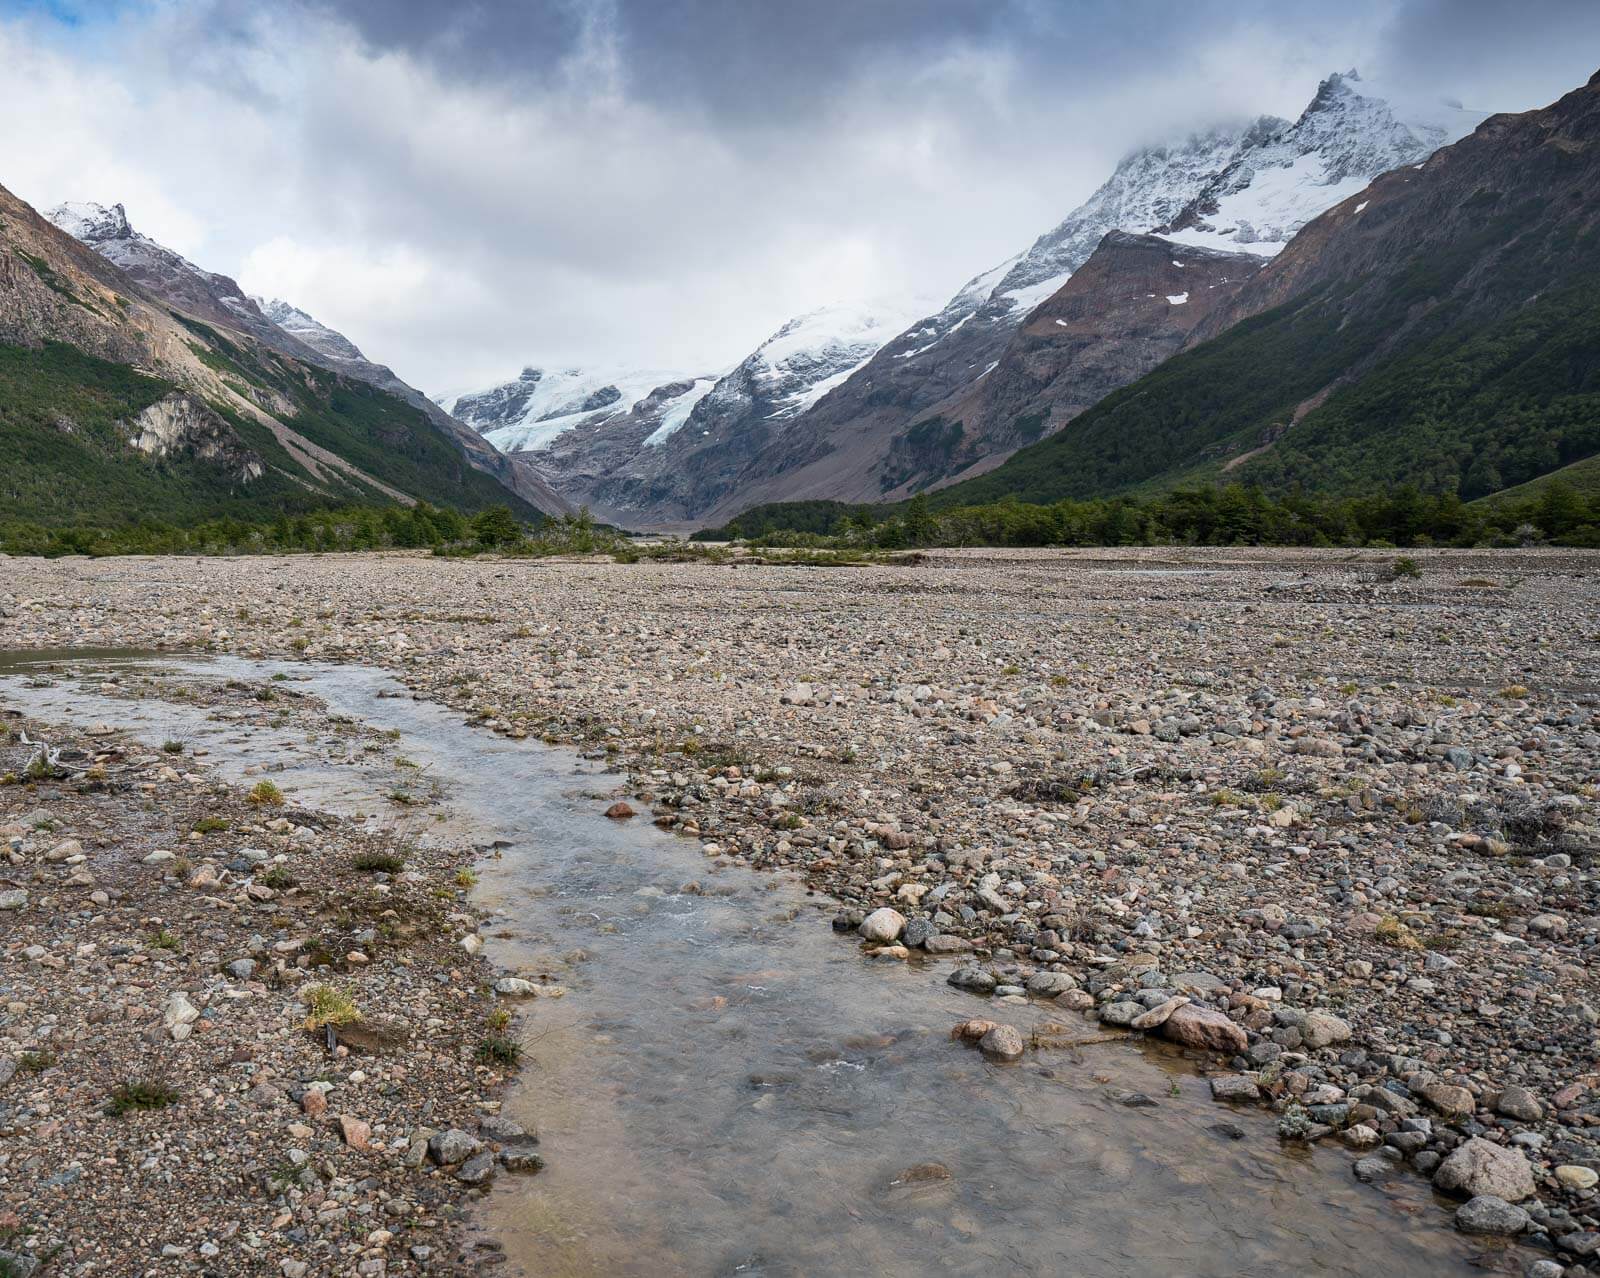
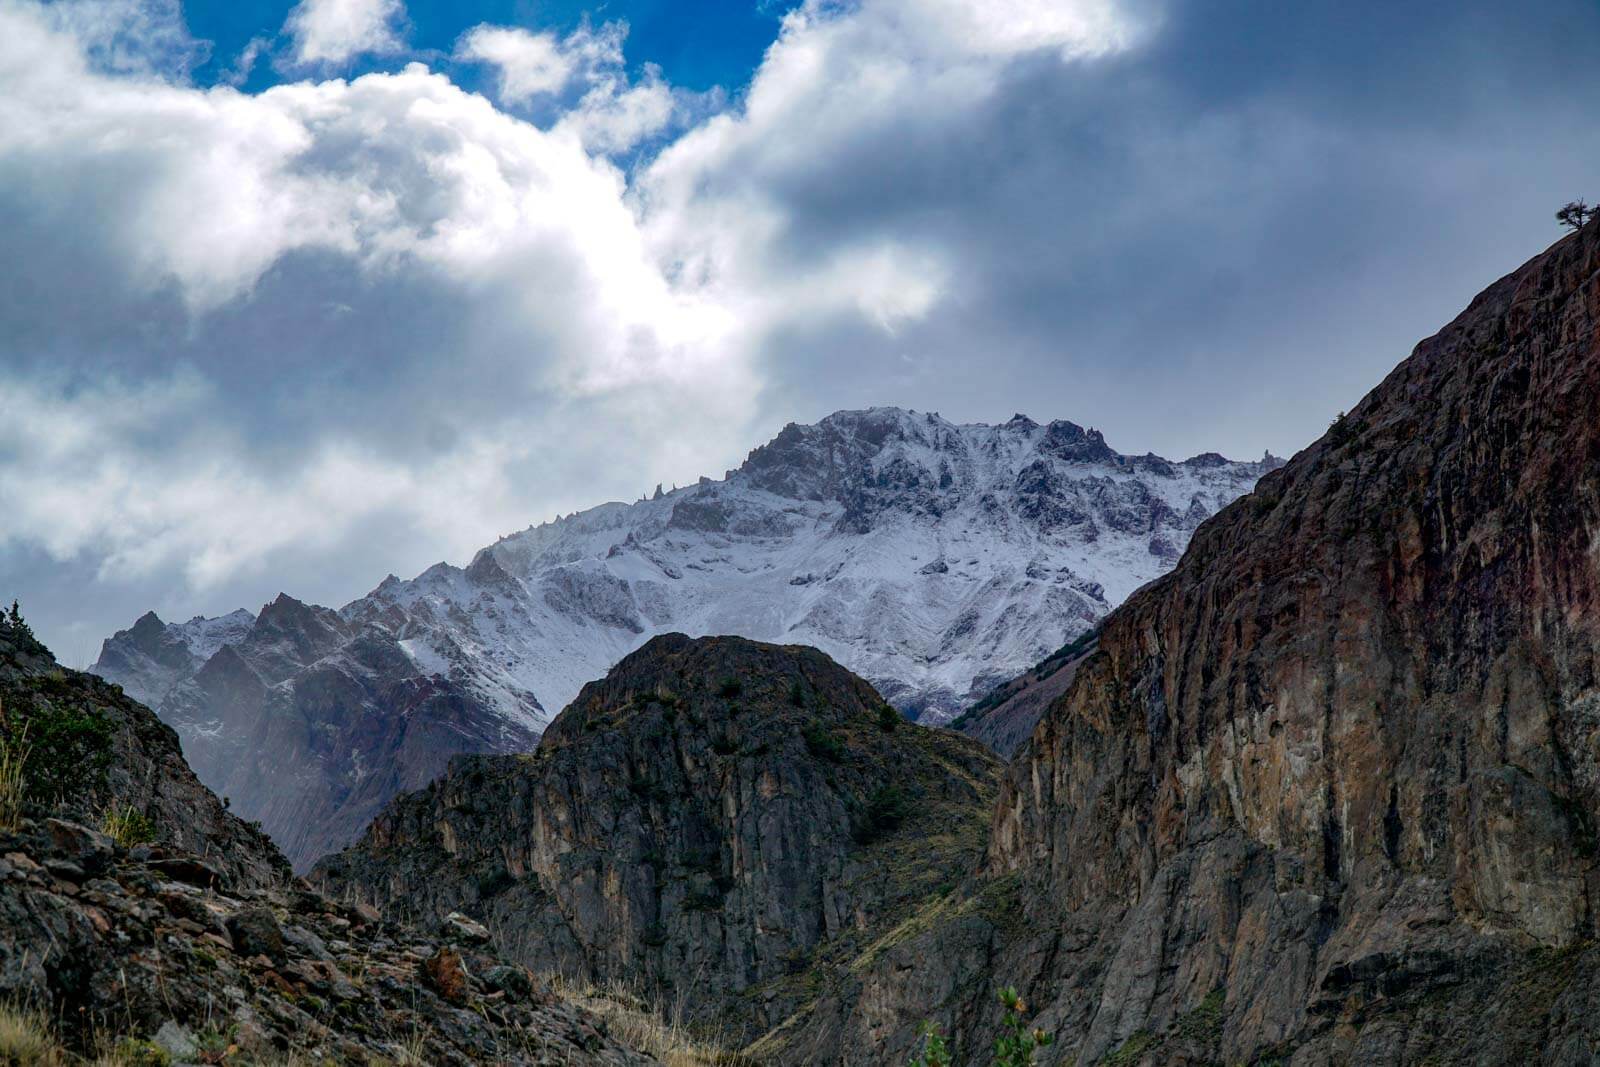
Much of the day is spent walking up glacial riverbeds with the Southern Andes looming up in front of you.
Cross the bridge to begin the hike. The first 7.5 miles of this hike is flat. Your first stream crossing is at mile 3.8 (about 1 hr 20 min). This is also where you will drop most of the day hikers who are not keen to wade the streams. Walking the trail you will continue to wade streams, and soon you will start walking a stream bed that is not well marked—stay in the stream bed.
Note: the most critical crossing of the day is of Rio Jeinimeni about 0.5 miles past Laguna Esmeralda. The river is deep and fast and you need to cross in the right/safest place. This is clearly marked as long as you pay close attention to the signs which are admittedly a bit confusing. Also make sure you pay close attention to the park ranger as he describes where to cross. [And as a rule of thumb don’t cross anything deeper than mid-thigh.]

Lago Jeinimeni
At mile 6.1 (approximately 2 hr 10 min after your start), you will see the first sign to Lago Verde. Continue on until mile 7.5 where you will leave the river bed on the left (well-marked but you need keep your eyes peeled and not walk past it!). You will walk the bank of the river for a bit and then turn left to go up and over a pass. It is a steep climb, 200 meters in 0.5 miles. Although steep, the trail is well maintained. As you crest the pass, Lago Verde will be on the other side (photo stop!). Coming down the pass towards Lago Verde is equally steep. As you circumnavigate Lago Verde, on the far end an avalanche has blown down trees and you will need to pick your way through. Continue on the trail until you get to the cabin. The cabin sits in Valle Hermoso and is basic with a few tables, a wood burning stove, and a tin roof. There is an outhouse and plenty of campsites around the cabin. The views of Valle Hermoso (Beautiful Valley) at sunset and sunrise are spectacular!
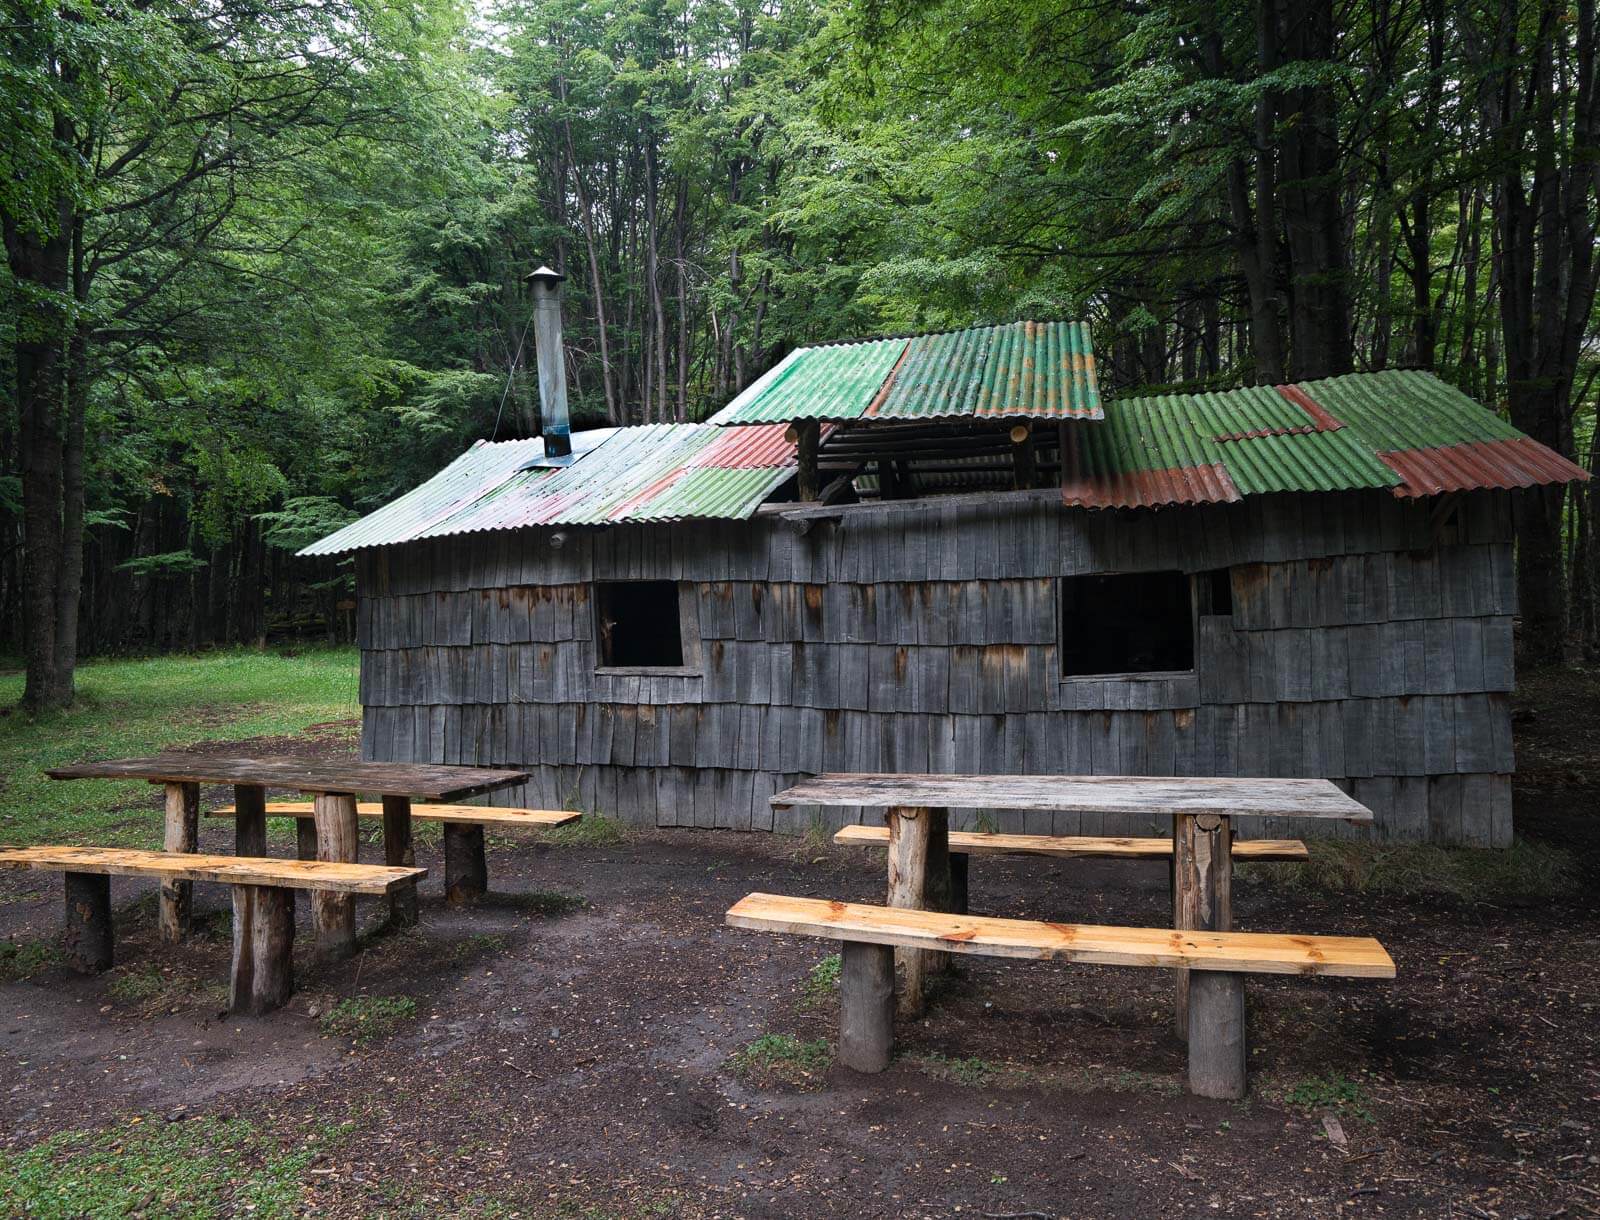
This hut in Reserva Jeinimeni is the only backcountry hut on the Trek. Mostly intended for cooking and getting out of the rain, it has a dirt floor a small wood-burning stove, a few shelves and a few benches. There are no bunks or other places to sleep. Most trekkers will prefer to use nearby tent sites in the trees.
Day 2: From Valle Hermoso to Valle Aviles/Parque Patagonia
Mileage: 9.5 miles (15.5km)
Ascent/Descent: 900 ft (275m)↑, 1200 ft (370m) ↓
Hiking time: 5 hr 30 min

Sunrise Valle Hermoso (Beautiful Valley).
Valle Hermoso sits in a glacier-fed valley and to exit, you will walk the rocky river bed and wade a number of glacier-fed streams. Some crossings are marked and some are not. The exit from the Valle Hermoso (to Valle Aviles) is in a southern beech, Lenga forest on your left after walking 2.6 miles (4.1km), about one hour. Be on keen lookout for a marker on the far bank as the ranger said a number of people miss it each season. Once you enter the forest, continue onward. Traversing through the forest at mile 5.5 (8.8km), wading more streams, you will come to the most northern boundary of Parque Patagonia (well-marked). There is a well-used campsite right inside the border if needed. Parque Patagonia is extremely well-signed including kilometers walked. In the Valle Aviles, Parque Patagonia has destroyed all the shepherd hut/cabins so there are no camping facilities. Groups have constructed protected windbreaks for pitching tents at several locations and water is plentiful. Camping needs to occur north of the 8 km trail marker, i.e. above the suspension bridge.
Looking down Valle Aviles towards Valle Chacabuco.
Once you cross into Parque Patagonia, starting at mile marker 25km, you will be following the Aviles river down the Valle Aviles. Views are spectacular all around you, yet this remote area of Parque Patagonia is fairly deserted. The trek is well marked crossing braids of the rio Aviles, but not difficult. The first crossing of the Rio Aviles is in 8.9 miles (14.3km). Around the 17km marker, there are a few good tent sites near stream crossings.
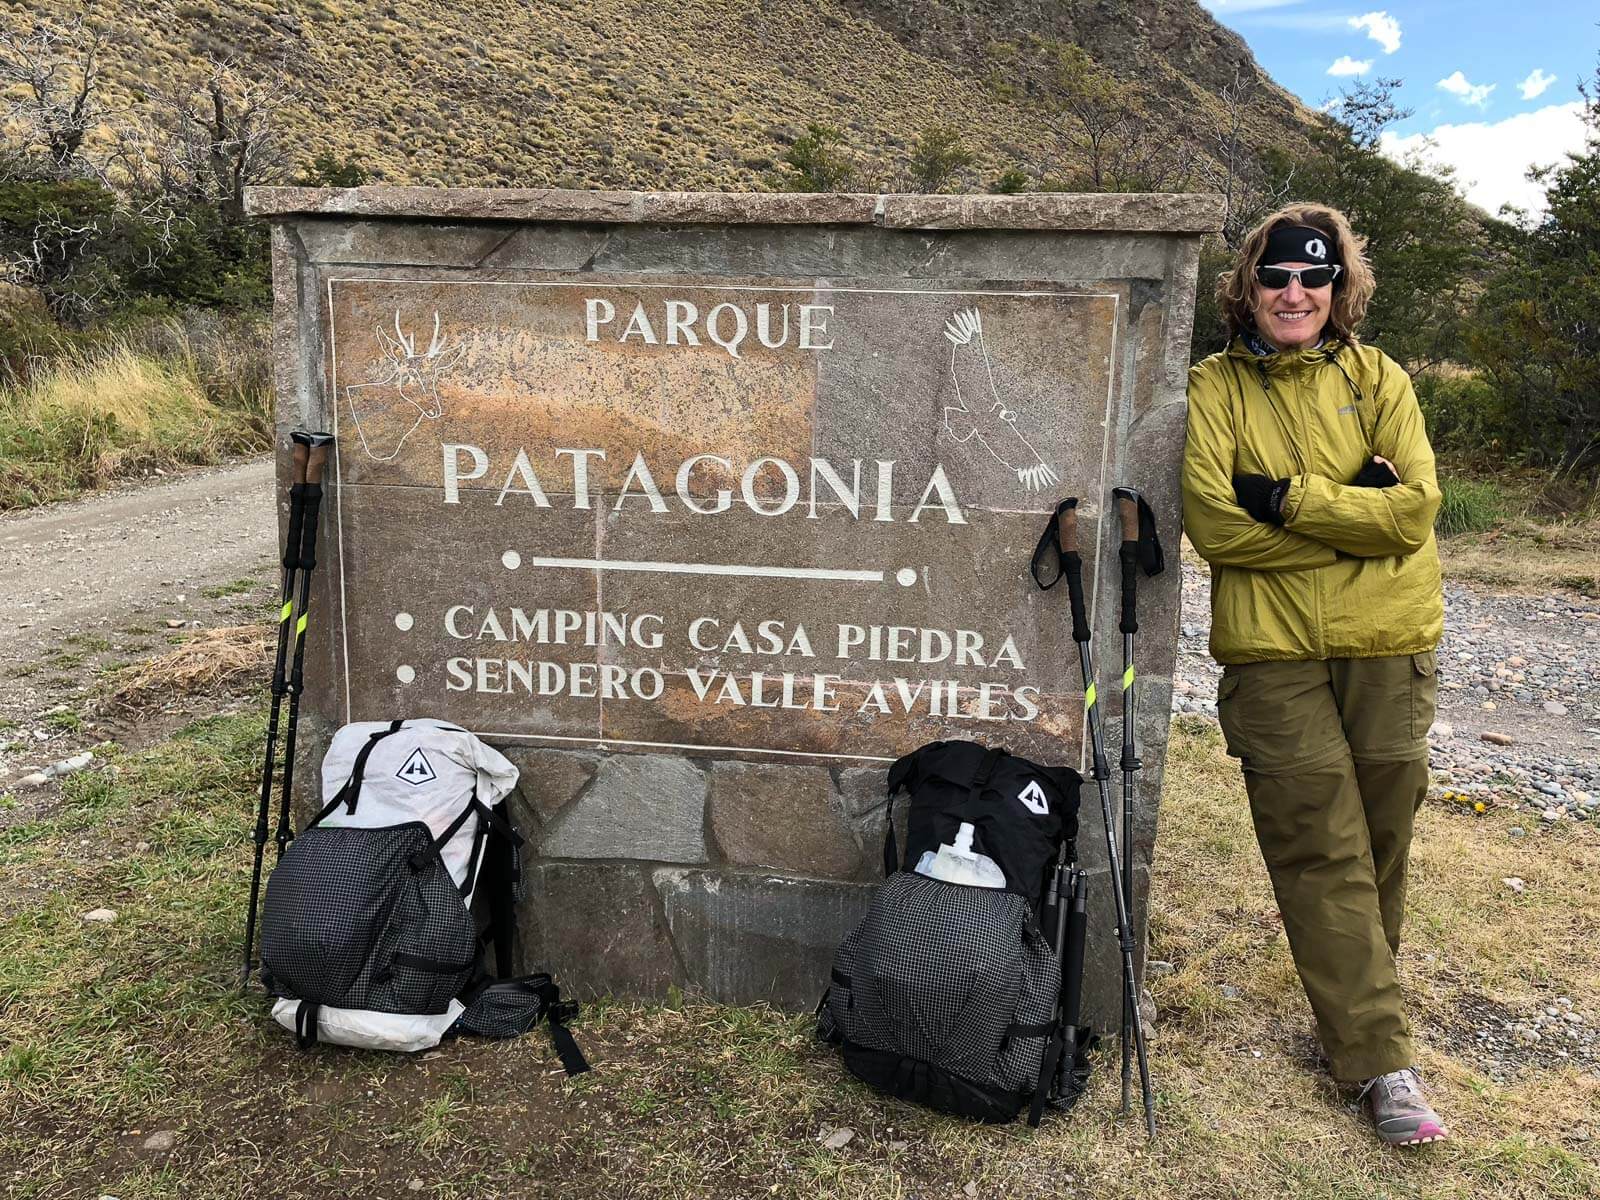
Note: In Parque Pataonia proper, wild camping in the backcountry is only allowed in upper Valle Aviles above the suspension bridge (otherwise wild/backcountry camping is not allowed in Parque Patagonia). On the floor of Valle Chacabuco, Parque Patagonia has two car accessible, non-backcountry campgrounds with toilets, shelters and picnic tables. These are Camping Casa Piedra (Stone House) at the start of the Valle Aviles trail, and Camping Westwinds near the Park Headquarters and the start of the Lagos Altas Trail.
Day 3: Upper Valle Aviles to Casa Piedra (Stone House)
Mileage: 10 miles (16 km)
Ascent/Descent: 1211 ft (365m) ↑, 2500 ft (760m) ↓
Hiking time: 4 hours

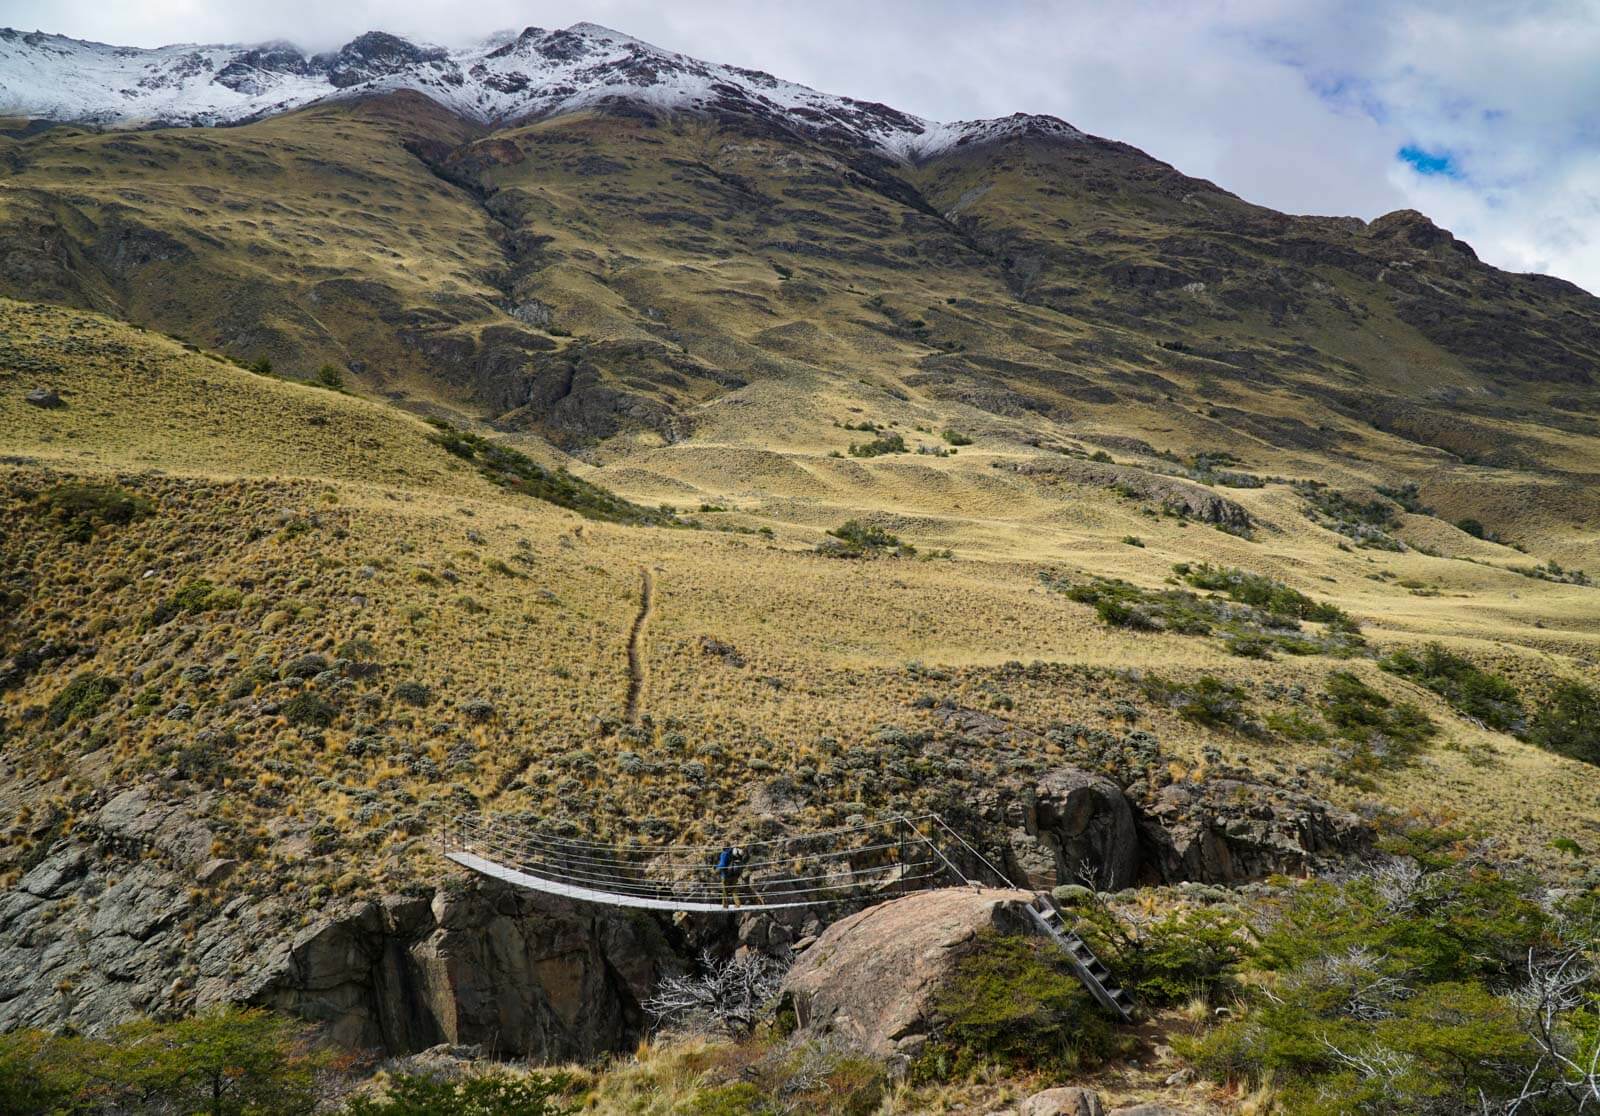
The impressive suspension bridge a few hundred feet over the chasm cut by Rio Aviles.
Hiking south into the more populated area of Parque Patagonia, you will come to a trail junction between 8 and 9 km. Either one will take you down to the Stone House. The preferred trail is to the left. It is the hillier and, we were told, more scenic, although trails both ways looked nice. If you go left, you will quickly cross the one long and high suspension bridge that is likely worth visiting whichever trail you take! After a few rolling hills where you need to head the side canyons (a bit of a pain), you will walk down the nose of the final ridge into the Valle Chacabuco (the view of the valley from here is stunning!). After you descend to the valley floor, it’s approximately 2 km to the Stone House. The Stone House has full camping amenities (no food) including water, inside tables, showers, and restrooms. Campsites surround the Stone House and have their own shelter areas with picnic tables. You pay for staying at the campsite ($8,000 CLP/person). There is a campground keeper who can answer questions.

Looking up Valle Aviles towards the suspension bridge.
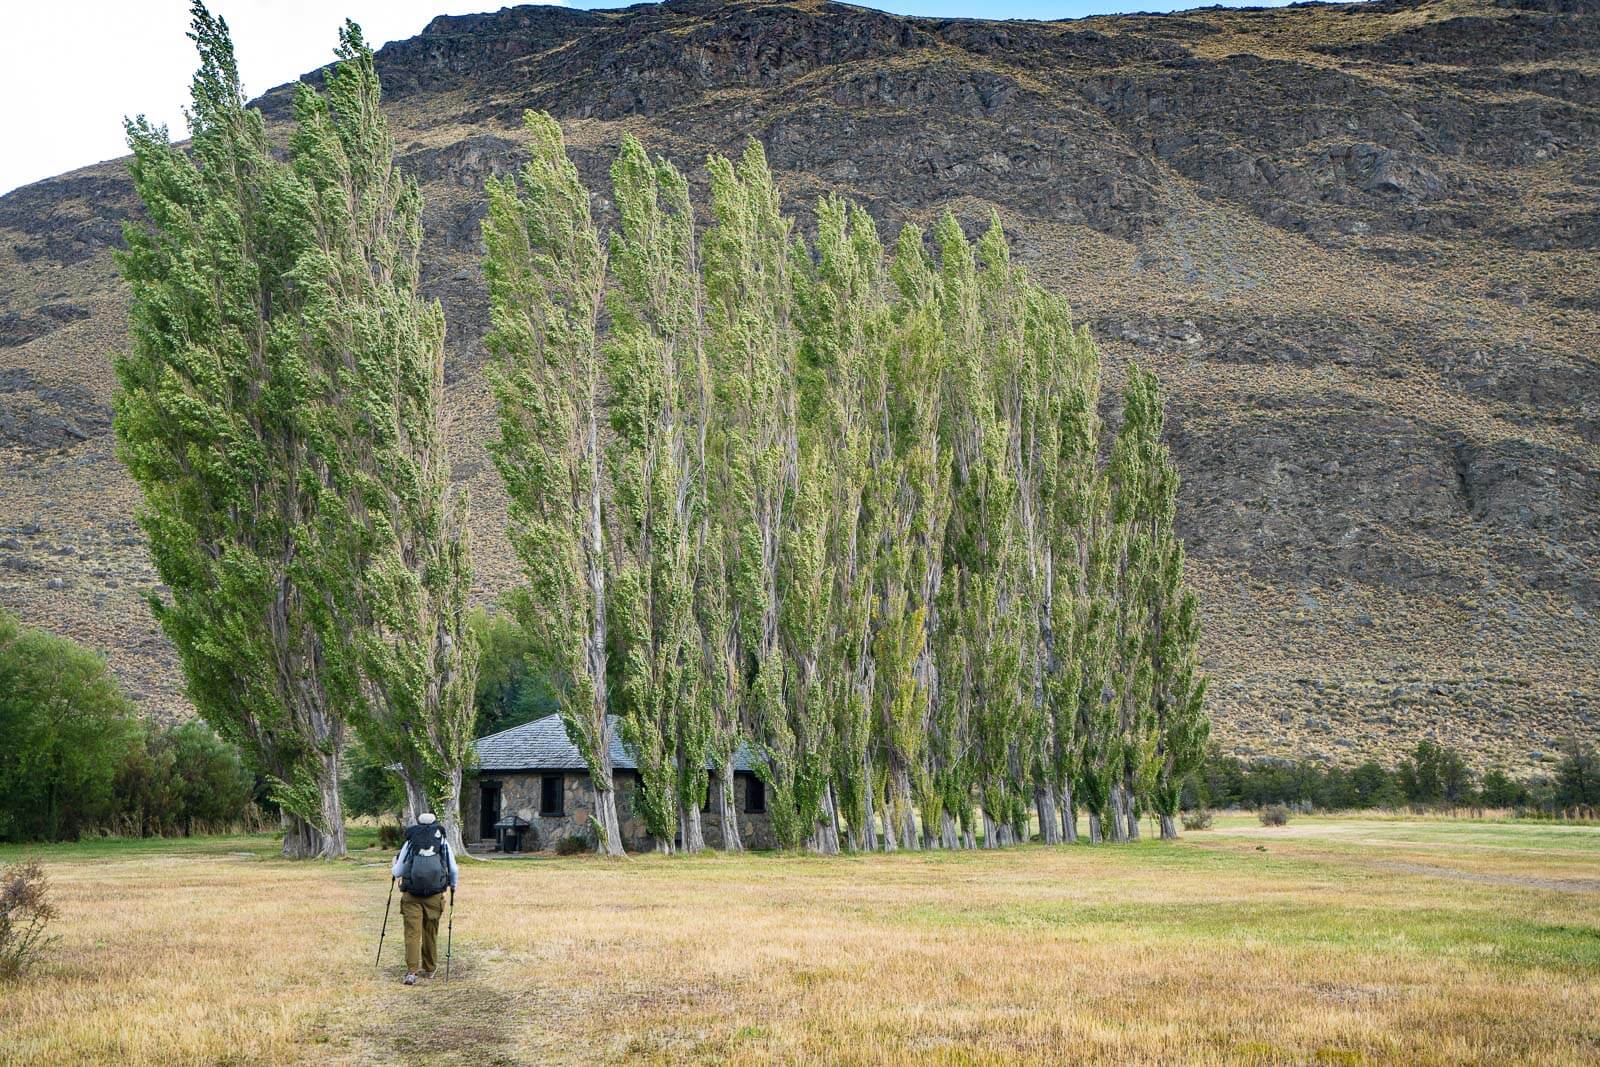
Alison hiking to Casa Piedra. It’s an old, stone ranch house that the park has converted to house bathrooms, showers, and cooking/eating rooms for campers.
Optional Day Hiking : Getting to Westwinds Camping (an extra hiking day or hitchhike)
Mileage: 16.4 miles (26 km)
Ascent/Descent: 1460 ft (450m) ↑, 1580 ft (480m) ↓
Hiking time: 6 hours (it’s fast road walking!)

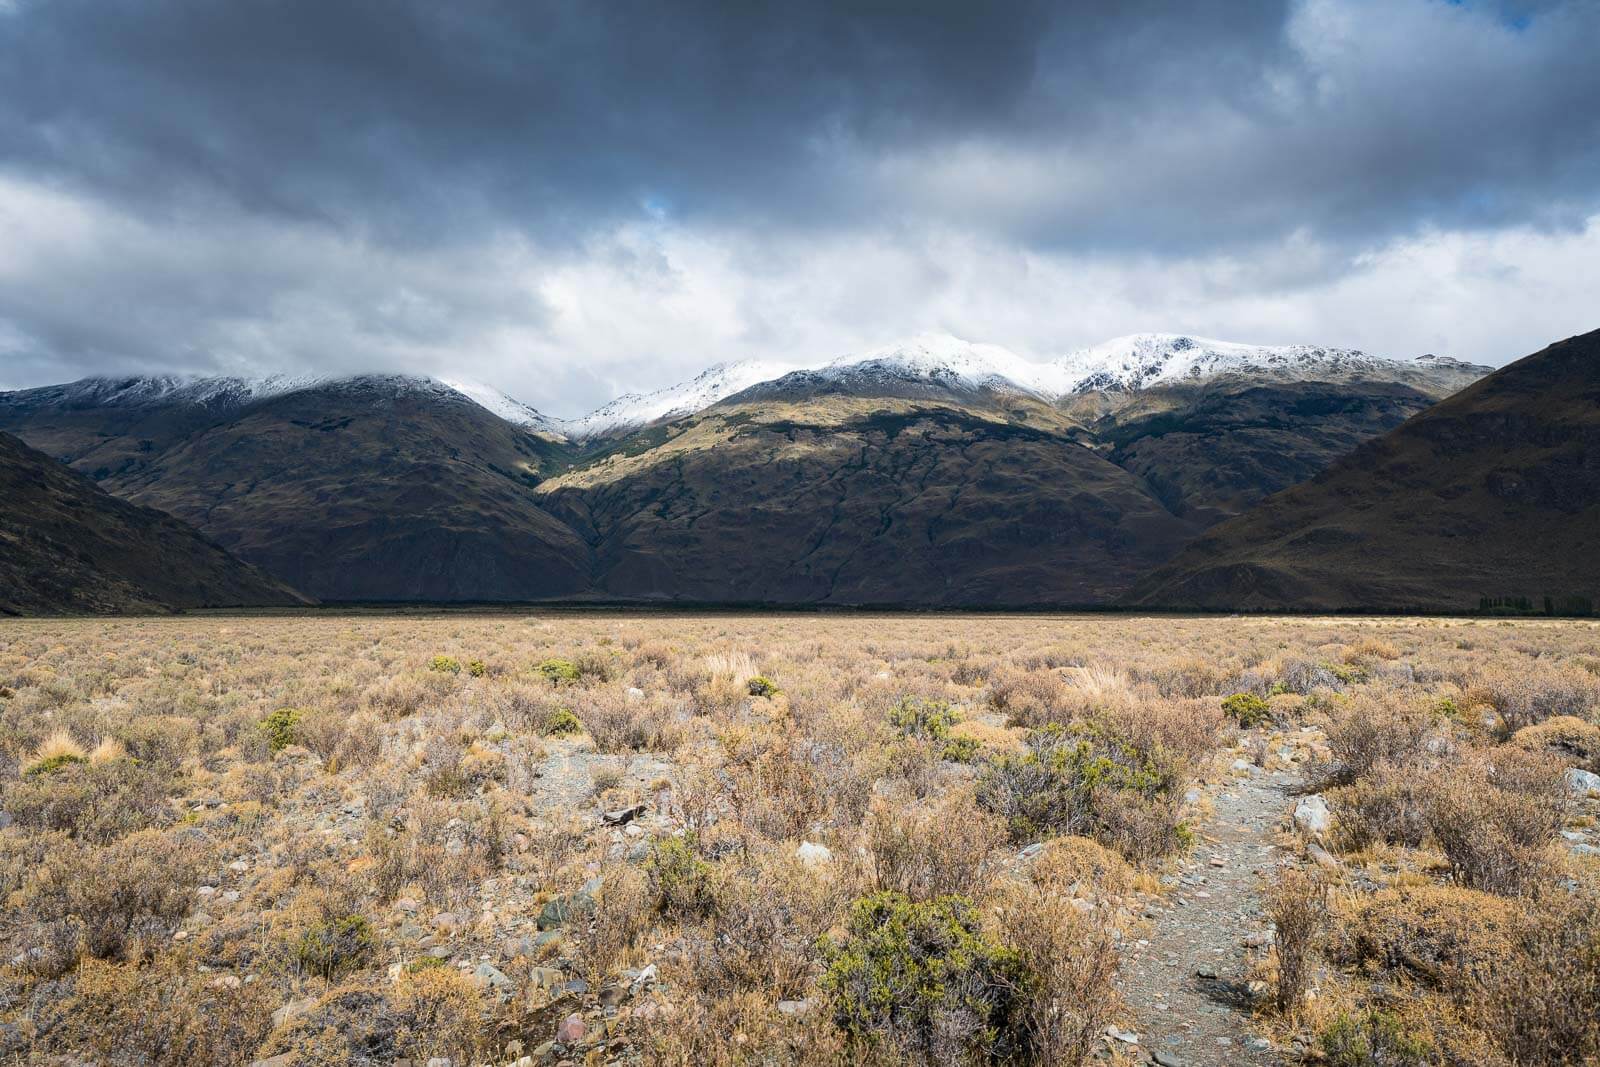
The vast Valle Chacabuco with incoming storm.
Note: The trail system in Parque Pataonia is a work very much in progress. As such, there is no trail connecting the end of the Valle Aviles trail to the Start of the Lagunas Altas Trail (Camping Westwinds). We assume that this will eventually happen, but for now Carretera X-83 is the main road through the Park and your only option. You can either walk or hitchhike this gravel road.
We are guessing that many people will choose to hitchhike. But Jay who followed our route in 2019 reports the following: “The road from Casa Piedra/Stone House was a beautiful walk. I see a lot folk folks asking you if there is way to hick hike. Just my 2 cents. Walk it. Its an easy walk and its more stunning and quiet than most tails I have been on.”
On Carretera X-83 near the Stone House Campground. This is where you start walking or hitchhiking to Camping Westwinds
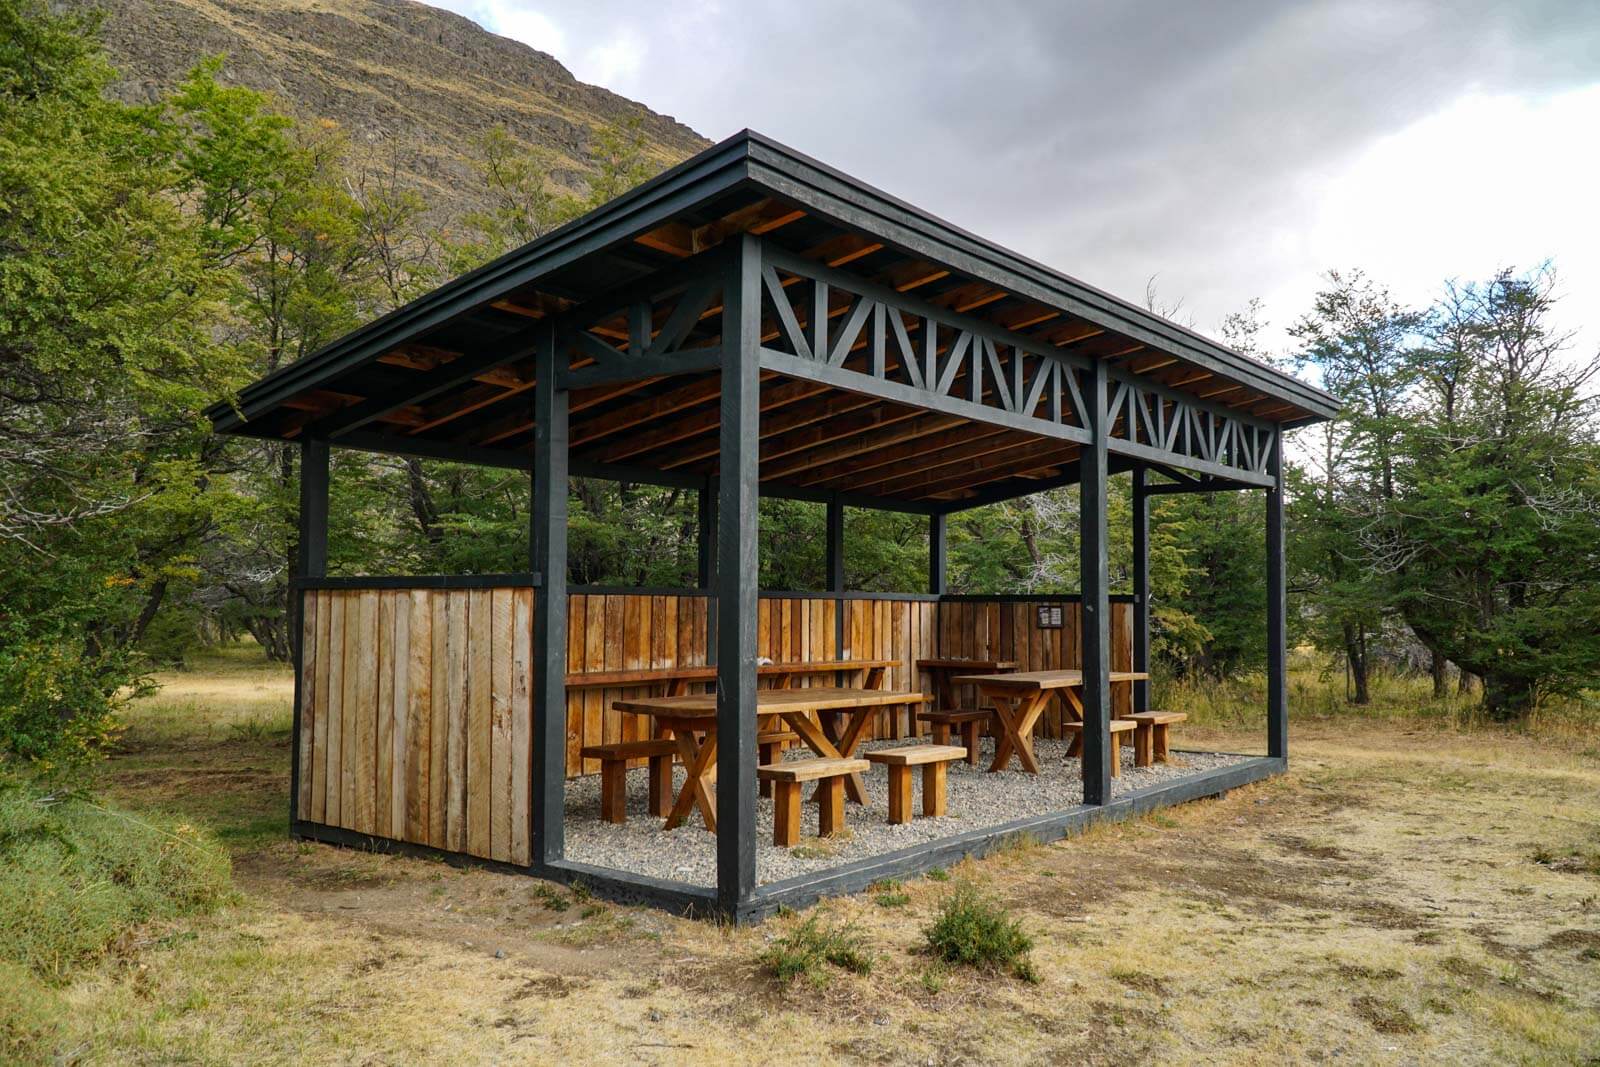
A typical cooking and eating shelter in a Parque Patagonia campground. You pitch your tent on the ground outside this shelter. Bathrooms and showers are in a shared building.
From the Stone House, it is approximately 16 miles to Camping Westwinds, the Park Visitor’s center, Lodge and restaurant. Your options are to hitch hike or walk the gravel road, Carretera X-83. The road is not well traveled by car traffic. Carretera X-83 leads to the Argentinian border to the left, and to the right it passes the main Parque Patagonia office complex eventually intersecting with the Carreterra Austral. If you get to the Stone House at a reasonable hour, there is a chance day hikers will be coming and going and they may be your best option to catch a ride to the main complex.
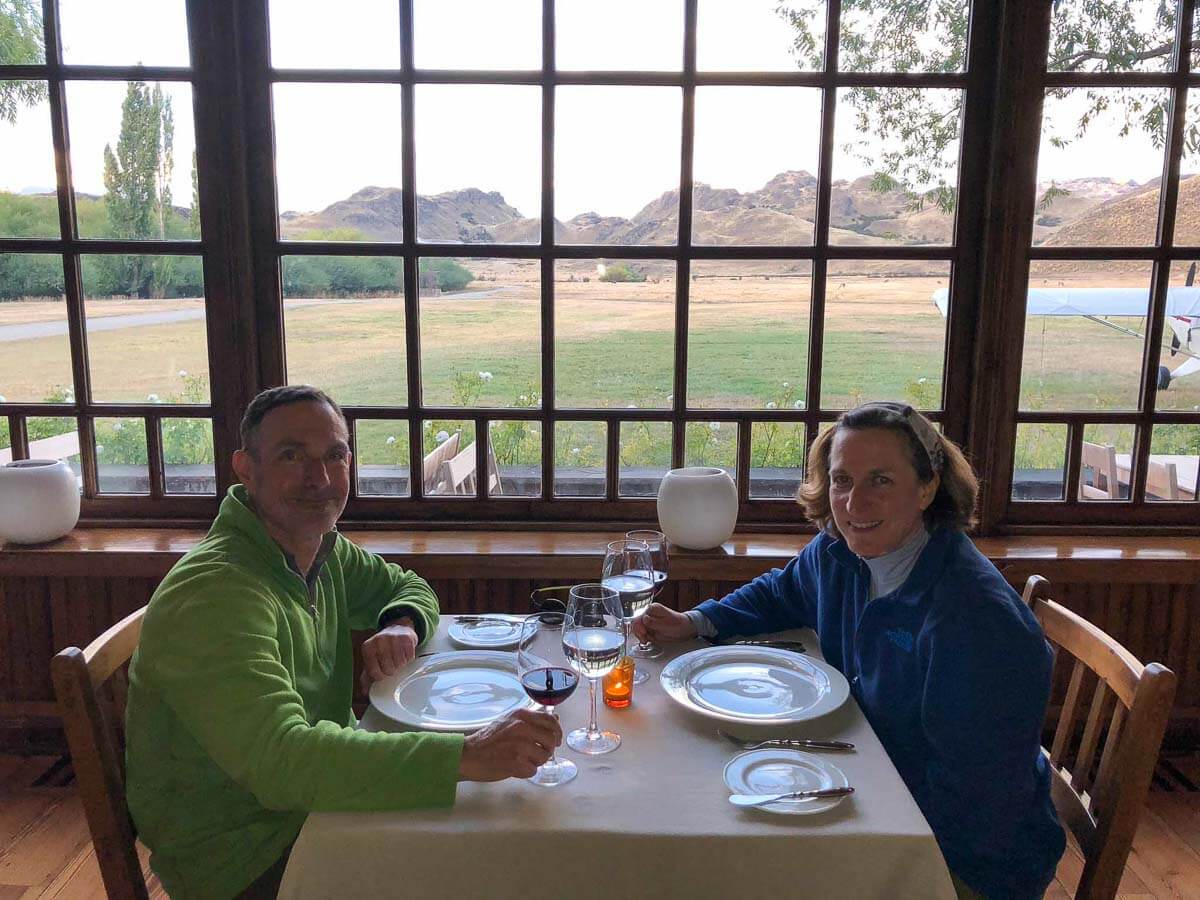
A meal with a view of the Chacabuco Valley at the restaurant at the Parque Patagonia Lodge.
The other full services campground is at the main Parque Patagonia complex: Camping Westwinds has full amenities (toilets, solar showers, picnic tables, and pavilions). It is, however, approximately 2.5 km away from the main complex (i.e. dining facilities, Lodge and Visitor’s Center) so unless you have a car, or unless you want to walk back and forth, plan to bring all your meals with you for this leg of the journey. At the main dining building, you pay for staying at the campground ($8,000 CLP/person). Alternatively, you can pay the ranger in the morning (he comes around first thing in the AM).
Two cautions for Camping Westwinds: first, habituated mice are a real problem. While we hung our food (keeping it away from the mice), the mice then went after our trekking poles. Second, per a park advisory, pumas are in the area. To prove that point, a puma walked through the our campsite at dusk which was a bit unnerving or super cool depending on your perspective!

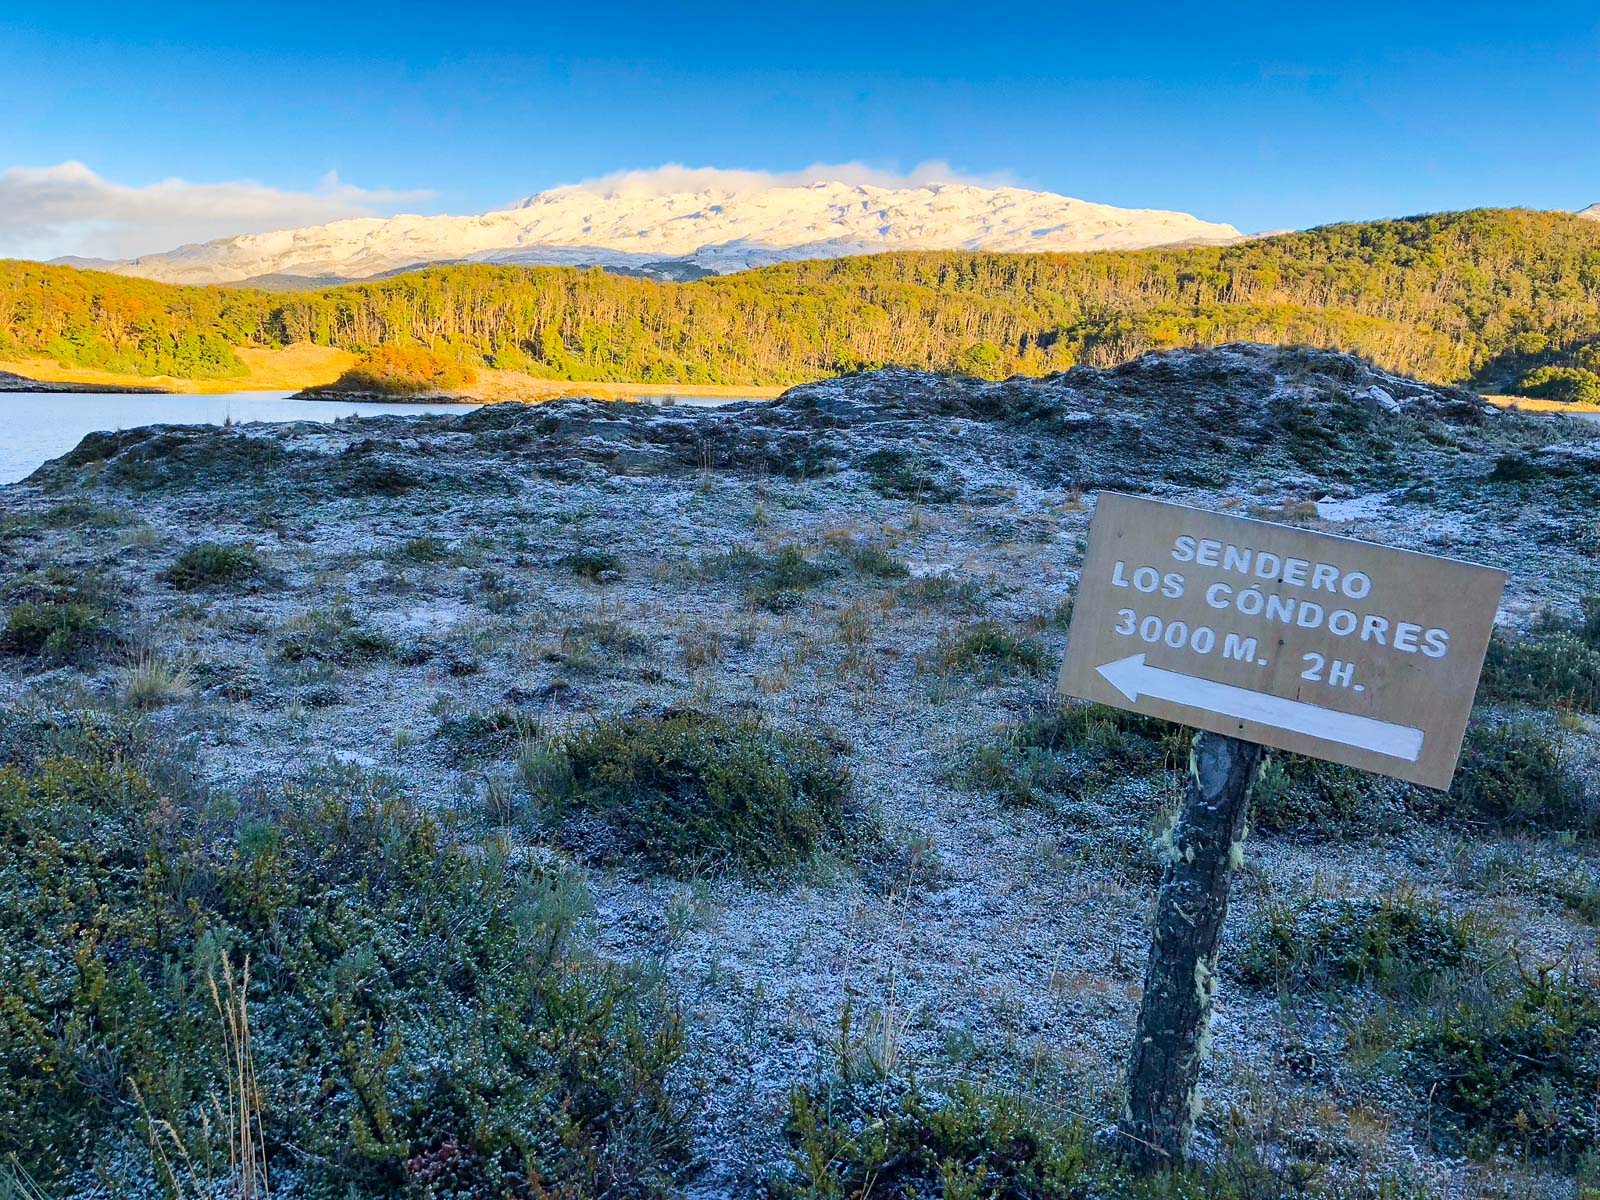
The first of the Lagunas Altas (high lakes) resting in the clouds above the Chacabuco Valley. This is also the lake where you leave the Lagunas Altas Trail and follow a faint trail up to Paso Los Condores (Pass of the Condors).
Day 4: Westwinds Camping in Parque Patagonia to Lago Tamangito in Reserva Nacional Tamango
Mileage: 7.7 miles (12.5km)
Ascent/Descent: 3200 ft (975m) ↑, 1250 ft (380m) ↓
Hiking time: 4 hours


This is your big climbing day. It’s almost 3,000 feet of elevation gain from Camping Westwinds to the high point. Paso Los Condores.
Head up the Las Altas Trail (there is an entrance in the Westwinds campground). Ascend for 3 km on an old road with a gentle climb. At that point, it becomes much steeper. Around mile 4.2 and 2,850 ft (2 hr 20 minutes) just as you crest the peak, and before you arrive at the first lake, take a faint trail heading off to the right (almost due south). It is neither marked nor clearly visible so be alert. It is a gentle climb over the next pass and quickly you will pick up orange poles or surveyors tape tied to rocks as trail markers. It is a good trail in most places. The pass is at 3,130 ft, about 3 hours and 5.3 miles from camp. At the summit, there are two small lakes. Around 6 miles, you enter a lenga rainforest and at 7 miles, you come upon a junction. Take the official trail to right, SSW along the lake. Established campsites were plentiful as was water.
Note: No camping is allowed in Las Altas as it is still in Parque Patagonia. We suggest that you not camp until you have gone over Paso Los Condores and dropped well into Reserva Tamango.

Cerro Tamangito.
Day 5: Lago Tomangito to Trip End in Cochrane
Mileage: 6.7mi (10.8km)
Ascent/Descent: 570ft (175km) ↑, 3000ft (915m) ↓
Hiking time: 3 hrs, 30 min

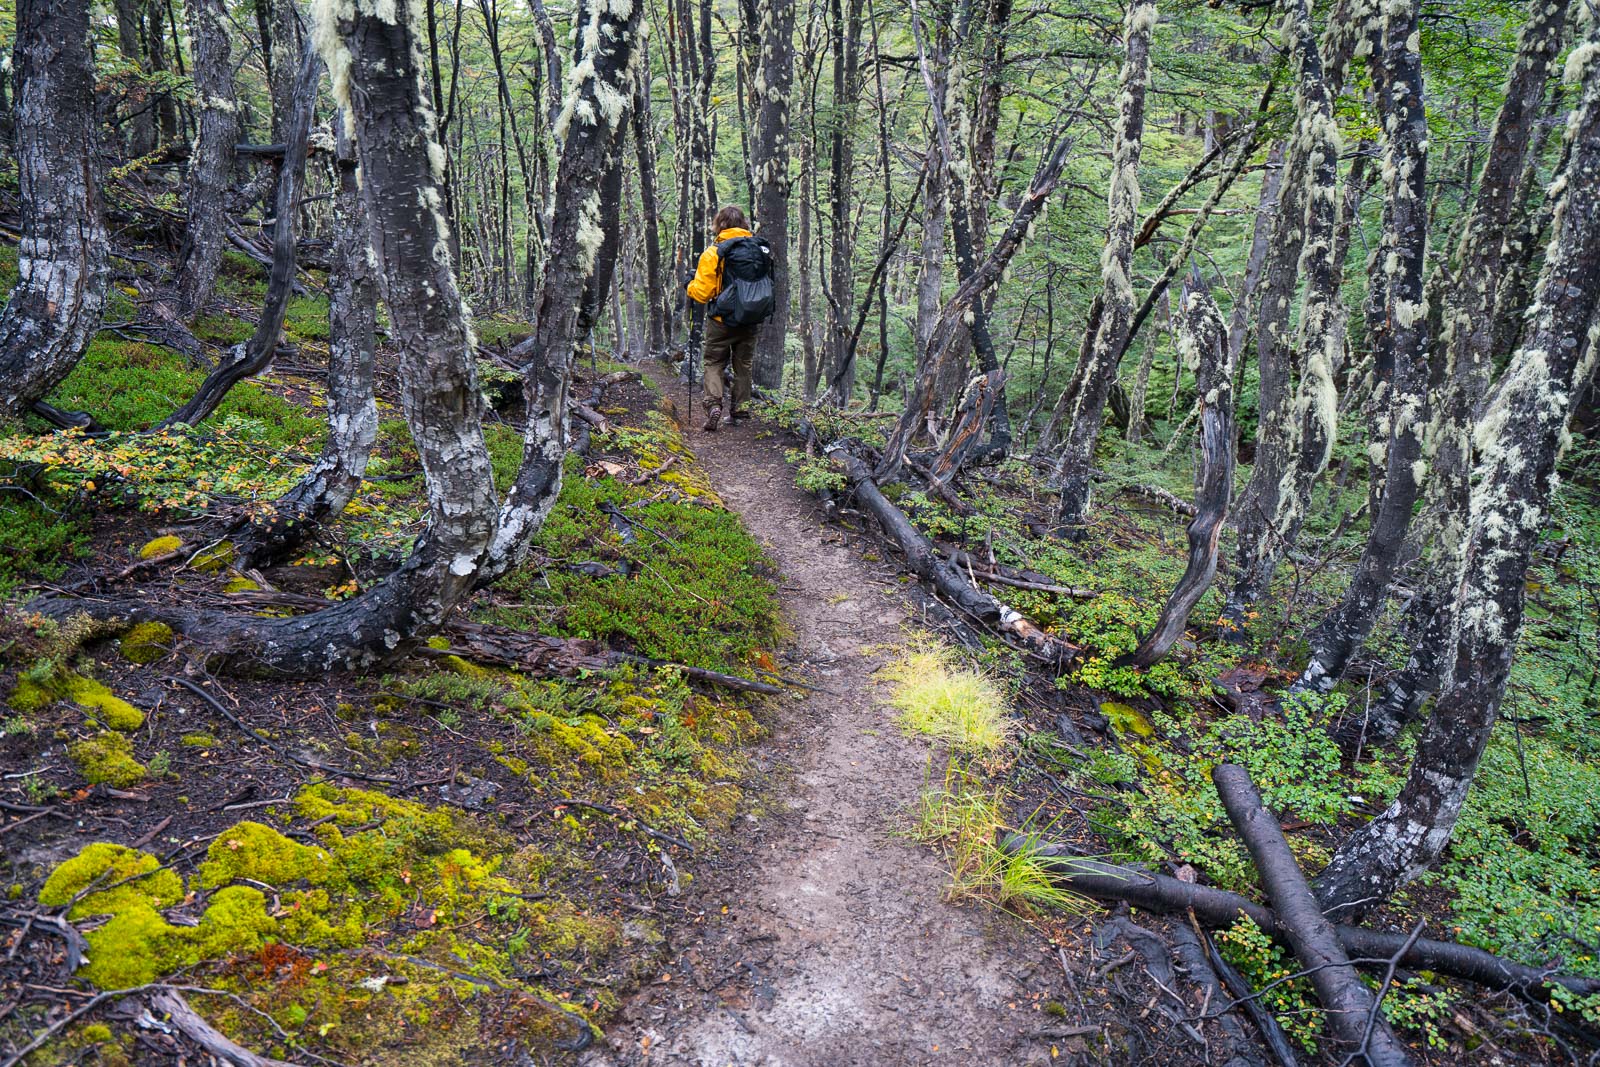
Sendero Las Lengas – Hiking a mossy rainforest of lenga (southern beech) on the slopes of Reserva Tamango.
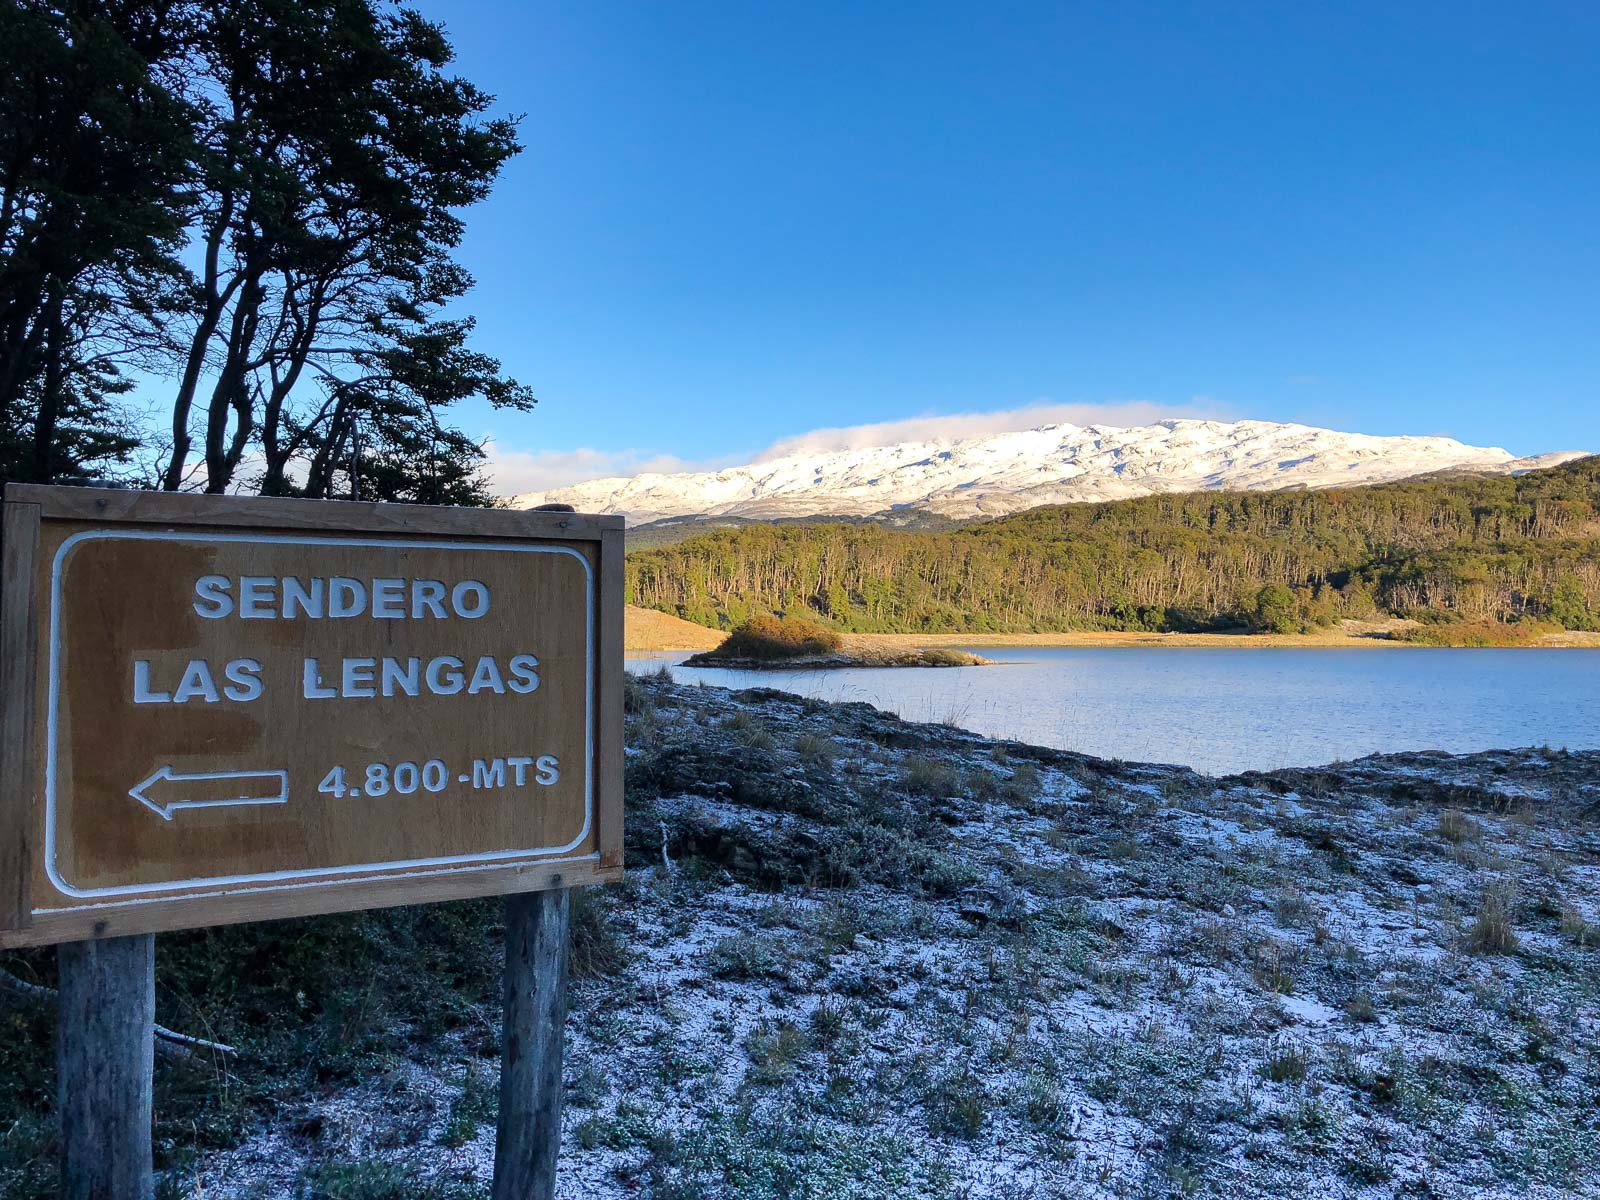
The start of Sendero Las Lengas on shore of Lago Tamangito with Cerro Tamangito in the background.
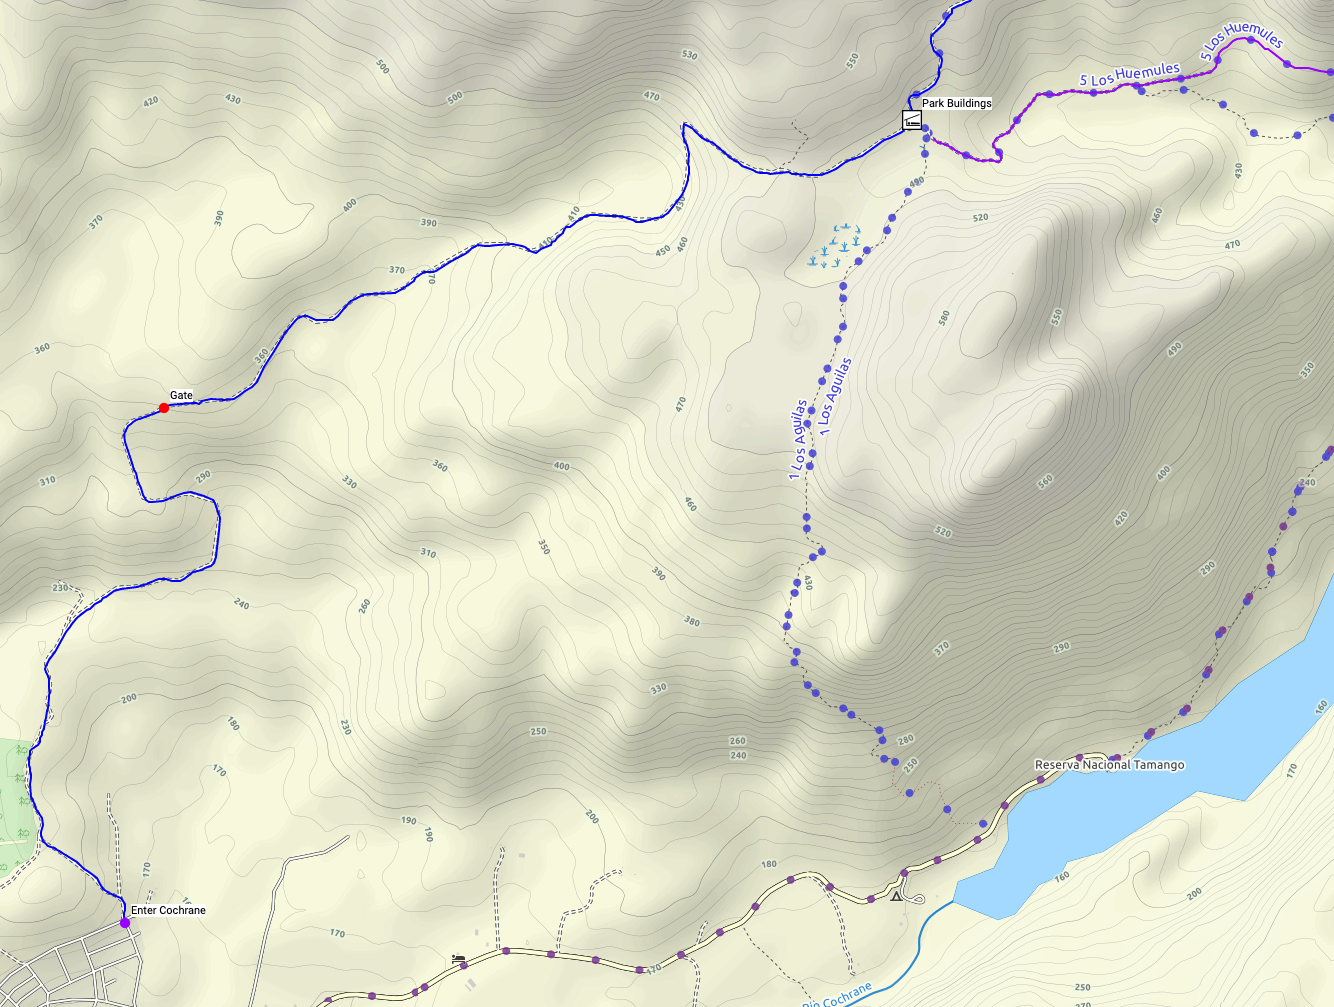
There is clear signage from Tamango down to Cochrane. On the far side of the lake, take the signs pointing to “Sendera Las Lengas” which is the exit to Cochrane. As you wind around several small lakes, the path remains flat for at least a mile. At that point, you start to drop steeply. Although the trail is not marked, it is easy to follow and you will wind downhill out of the forest. At the bottom of the trail, you will come upon a ranger station complex (a few buildings) that were under construction/renovation when we went past. On the other side of the buildings you will see the road heading WSW into town. Take this road and within a half mile you will encounter the first gate to go through. Continue on until you see a big wooden gate on your left. It looks like private property but is actually the gate into town (it’s waypointed on the map). The road drops steeply as you pass through the gate. When you get to your first T intersection, turn right and follow the road around until you see Cochrane on your left.
Note: This is confirmed, at the old park buildings you will need to take #1 Las Aguilas Trail South back to a non-private road that goes to Cochrane. One recent hiker reports that the gate is definitely marked no trespassing and shut. And further notes that this private land is patrolled.
We’ve had a report that the gate used to access the road to town (waypointed with name “gate”) is locked with clear do not enter signs. Anyway, if the gate continues to truly be a no-go, the work around is to continue from #6 Las Lengas Trail and when you get to the park buildings take #1 Las Aguilas Trail South back to a non-private road that goes to Cochrane. The distance should not be much longer. [see map below for more detail.]
Each night we were in the park the mountains got a fresh coating of now.
Alternate Route Day 5 – Sendero Los Huemuls
Day 5 is fairly short. If you want a chance to glimpse the rarely-seen huemuls (an endangered deer), take the longer and more scenic route along the shore of the large Laguna Elefantita. To do this, continue on Sendero 7, Los Valles 4.6 km, then on to Sendero 8, Los Pumas 4.2 km, and finally Sendero 5, Los Huemules 6.8 km. This trail joins the standard Day 5 at the “Park Buildings.” Continue along dirt roads to Cochrane on the Day 5 route.
Ending Your Trek
Cochrane has plenty of places to stay although some lodgings are closed in the off season. The bus terminal in Cochrane is new and lovely. You can book your ticket back to Coyhaique, a trip of 7-8 hours via the Carretera Austral, at the bus station. Several buses go to Coyhaique daily all leaving in the morning, 7 days a week. The last bus of the day to Coyhaique leaves at 9am, with Don Carlos. On Sunday, last bus is 7:00am. Buy your ticket the day before if possible. The buses fill up.
Gear Highlights for the Patagonia National Park Trek


Our Gear for Patagonia Trekking (and most trips worldwide)
A light pack is huge contributor to a fun trip! Selecting the right gear will make your trip safe and most important more enjoyable.
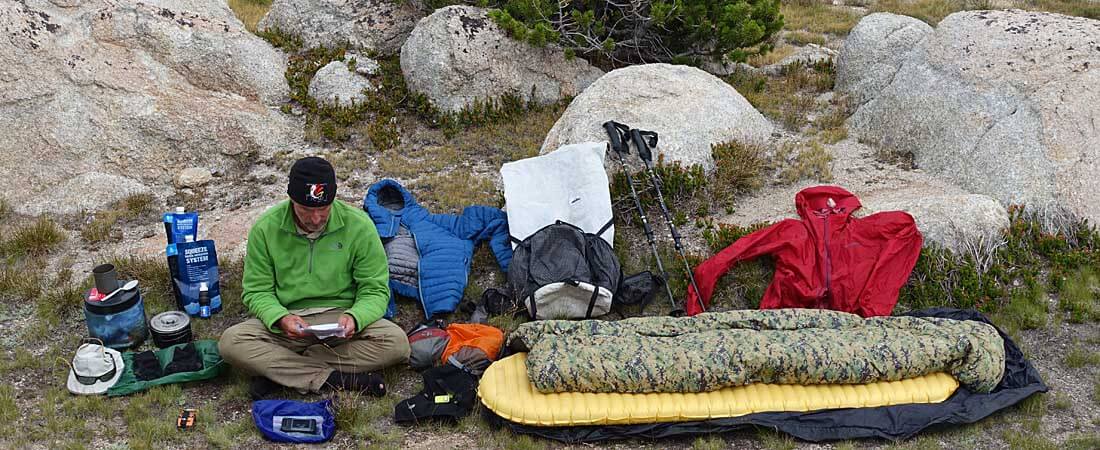
Again, we’ve logged a lot of time in Patagonia over the past 14 years . As such, we think we’ve got our gear well tuned for Patagonia. Most of the gear on this list is contained in our 9 Pound Full Comfort Ultralight Backpacking Gear List, This is the gear checklist list we use to pack for all our trips worldwide. This gear is very light but will work everywhere from Patagonia to Alaska to New Zealand and the Southwest Deserts of the US.
Disclaimer
This post contains affilate links. If you make a purchase after clicking on the these links, a small portion of the sale helps support this site at no additional cost to you. I do not receive compensation from the companies whose products are listed. For product reviews: unless otherwise noted, products are purchased with my own funds. I am never under an obligation to write a review about any product. Finally, this post expresses my own independent opinion.


Related Posts
Best Small 2 Person Tent for Backpacking & Camping 2024
Tents, Tarps & Shelters, Buyer's Guides, Gear Guides, Tents & PacksBest Ultralight Sandals For Backpacking 2024
Footwear, Clothing, Buyer's Guides, Apparel Guides, Footwear & AccessoriesBest Trail Running Shorts For Hiking 2024
Clothing, Buyer's Guides, Apparel Guides, Bottoms