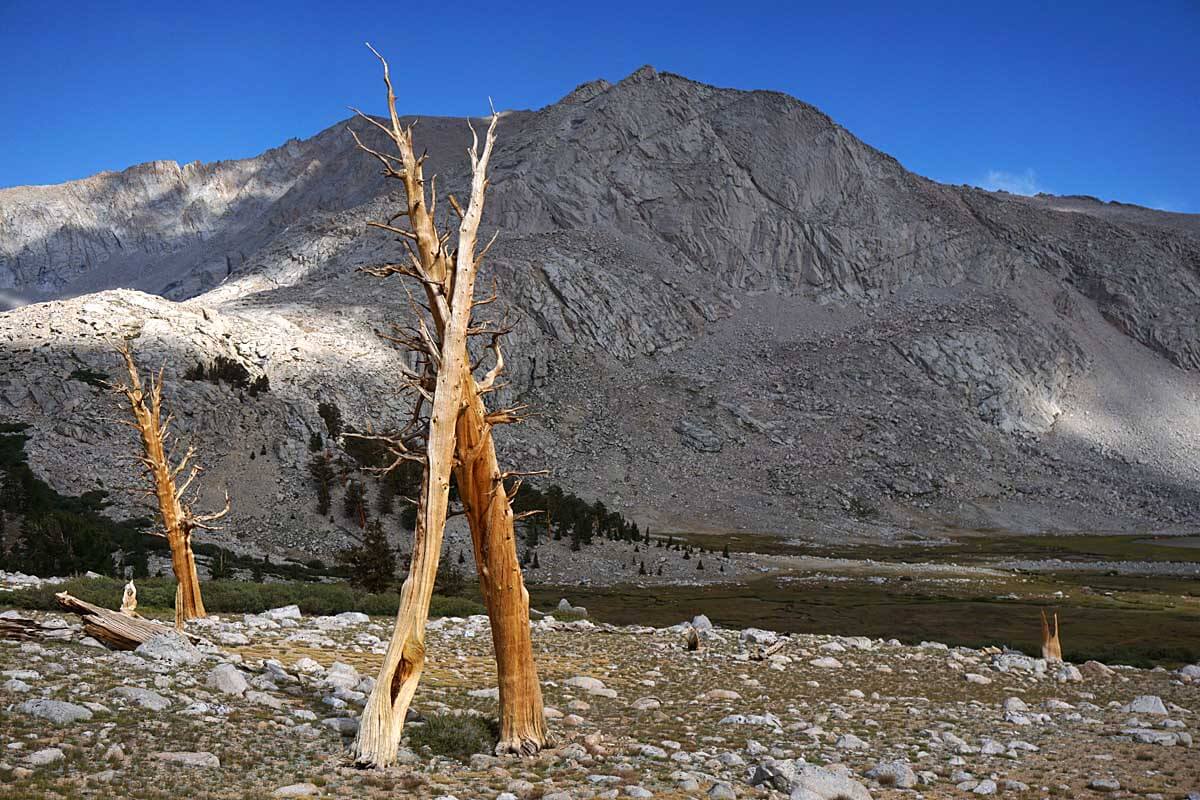
Southern Sierra High Route – an alternative to the JMT
The Southern Sierra High Route (SoSHR) is a superb alternative to the JMT for the adventurous traveler. Compared to the John Muir Trail (JMT), the SoSHR is higher and more remote. It avoids the JMT crowds, the landscape is more spectacular, and the travel more challenging. The increased solitude of the SoSHR intensifies your high-country experience. The SoSHR is significantly higher & more rugged than the JMT with 14 passes over 11,000 ft vs. 4 for the JMT and crosses the Sierra Crest 8 times vs. the JMT’s single crossing.
The SoSHR can be done as an elegant route in its own right—about 100 miles of hiking from end to end. Or it can be appended to the SHR to create a route paralleling the best of the Sierra – a spectacular ~270 mile route stretching from Twin Lakes in the north to Cottonwood Lakes in the south.
Revised in 2016: Includes new/validated route over the Baxter/Acrodectes Ridge. This route:
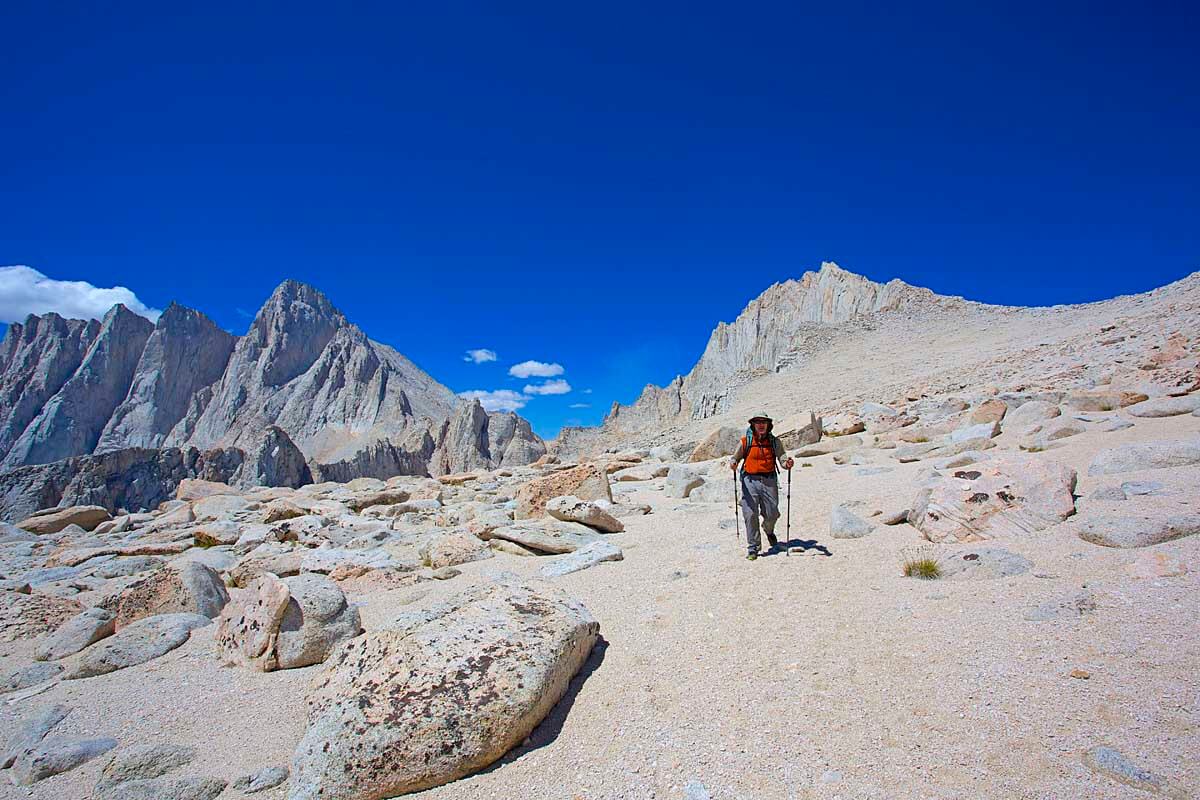
- Bypasses an additional 13 miles of the John Muir Trail
- Avoids the crowded Rae Lakes Basin (via another beautiful lake basin)
- Keeps the route continuously over 10,000 ft (by avoiding the drop into “Woods Hole”)
- Most of the 100 miles are off-trail or on unmaintained/decommissioned trails (only 20 mile on JMT)
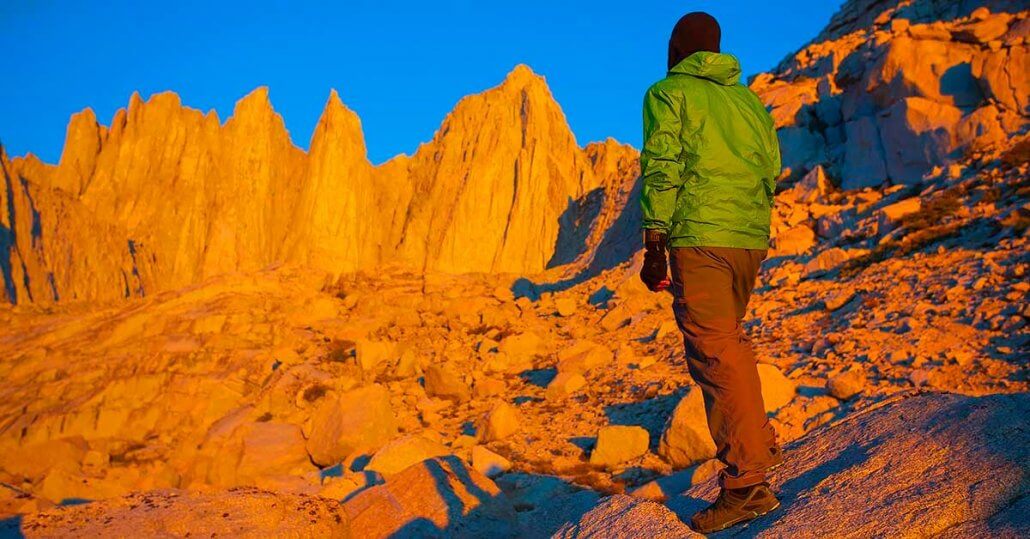
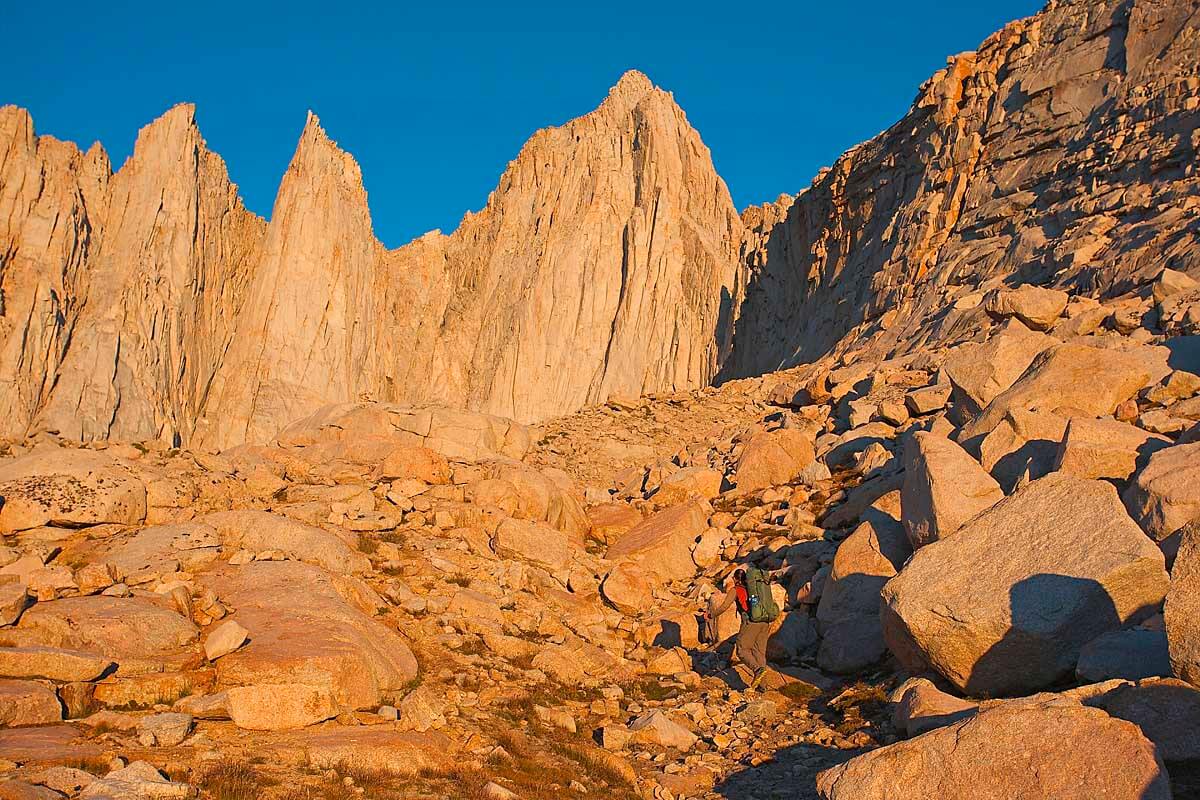
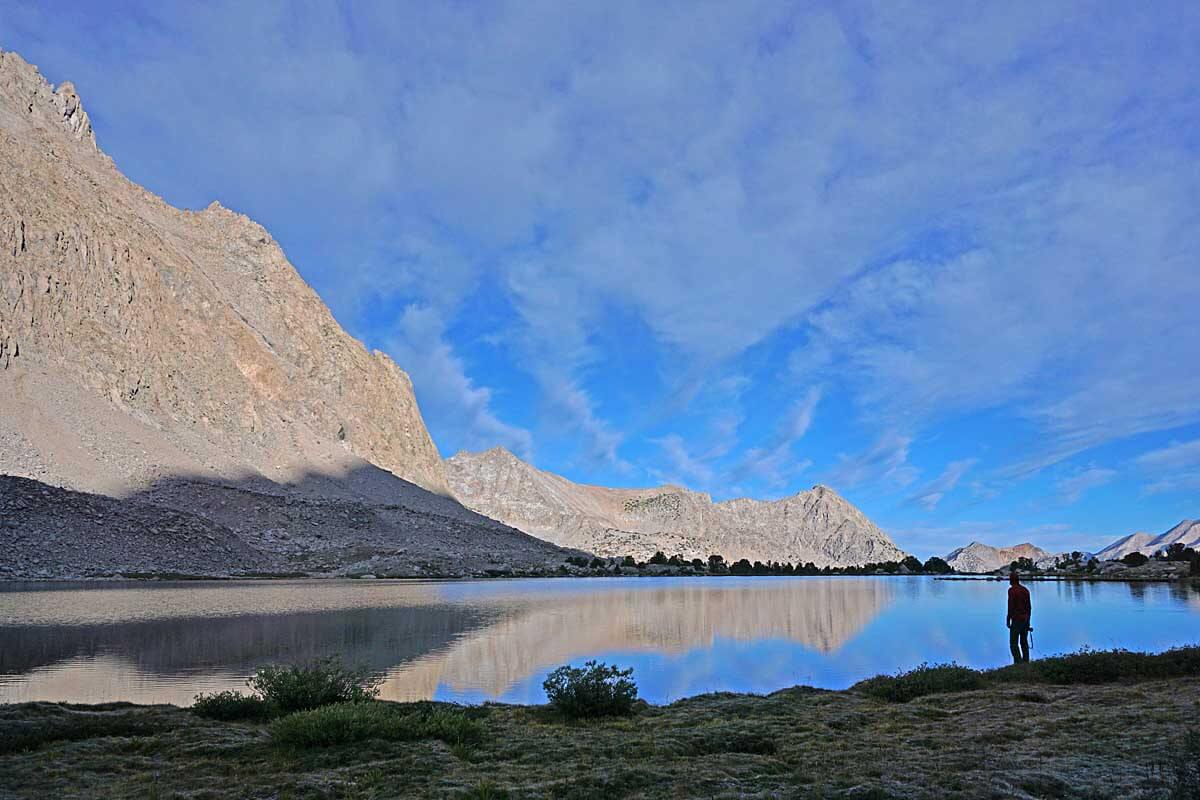
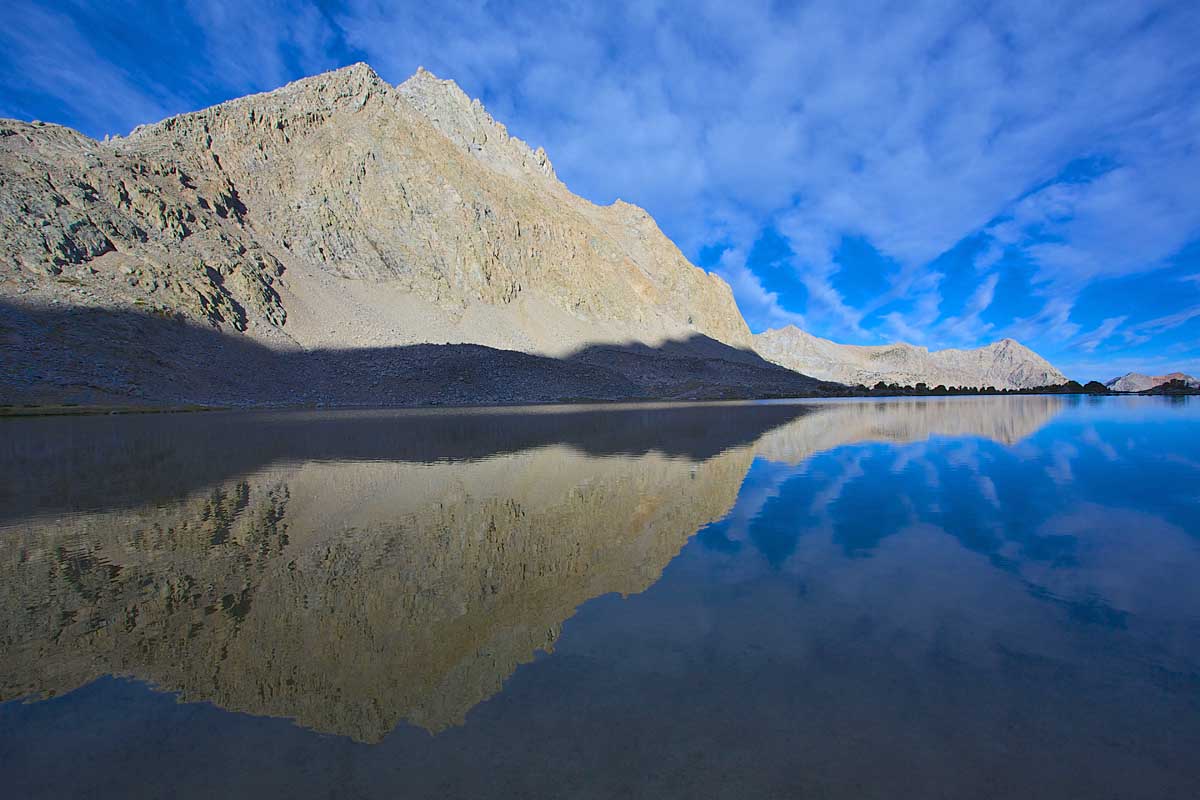
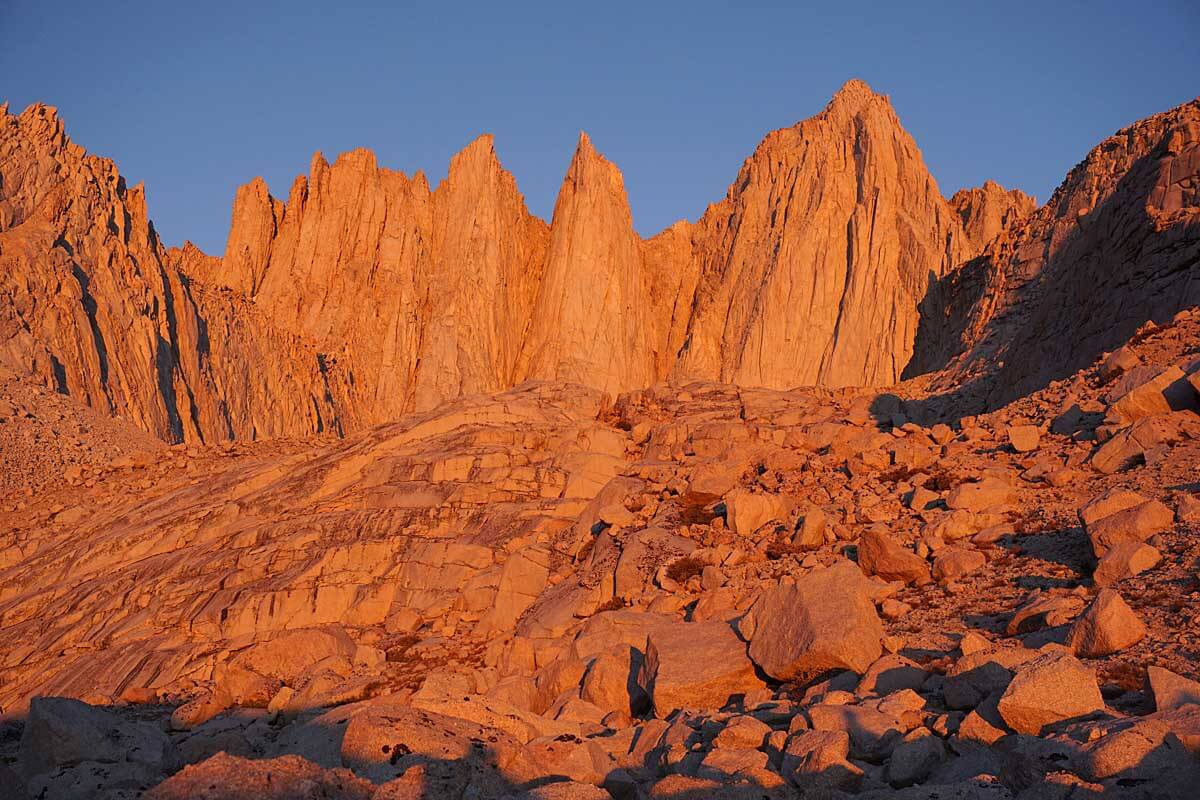
Lead photo: Dawn view of Mt. Whitney. We summited with Full Packs via the Mountaineer’s route. But rather than exiting at the traditional Whitney Portal we traversed the Whitney Crest and continued south to exit the high peaks near the shoulder of Mt. Langley 14,026′ (4,275 m), the southernmost 14er in the Sierras. [photo Don Wilson]
Overview of the Southern Sierra High Route
by Alan Dixon and Don Wilson
| To put it plainly, Roper’s Sierra High Route completely misses the highest and grandest part of the Sierra Mountains. This glorious 40 miles of the Southern Sierra Crest includes Mt. Whitney the highest peak in the lower 48 and the traditional finishing point of the JMT. It’s a must for an aficionado of the High Sierra. |
In 2014 Don Wilson and I decided to see if we could put a line together that extended the SHR to the south, traversing near the Sierra crest to Mount Whitney and beyond. A good look at the maps revealed a beautiful line that weaves across the Sierra crest numerous times, maintaining the spirit of the SHR, and offers hiking as good or better than any portion of the SHR. Our Southern Sierra High Route (SoSHR) extends south from Upper Basin, where the SHR turns west and goes toward lower terrain. It traverses the highest part of the range, mixing travel on the JMT with many miles of superb off trail hiking.
Don Wilson on Russell Carillon Col en-route to the Mountaineer’s Route for Mt. Whitney.
The SoSHR is a route in keeping with the spirit of the original SHR, and a route we believe would be close to John Muir’s heart. It starts high in the Palisades, the most rugged sub-range in the Sierra, and offers a summit of Mt Sill 14,154′ (4,314 m). According to R.J. Secor in his must-have book The High Sierra, “Mount Sill has the best summit view of any peak in the Sierra.” The route also includes an ascent of the Mountaineer’s Route up Mt. Whitney 14,505′ (4,421 m) and a traverse across its summit, before continuing on to exit the high peaks near the shoulder of Mt. Langley 14,026′ (4,275 m), the southernmost 14er in the Sierra.
Like Roper with the SHR, we do not claim to be the first or even hundredth people to hike any portion of this route. We stand on the shoulders of many generations of rugged and adventurous travelers in the Range of Light. We simply chained together existing high passes, summits, and trails pioneered by others to create a much longer route.
Resources for the SoSHR
- Full Mapset – (8) 11×17 pages [PDF] 54 Mb
- Waypoints and Hiking Timetable [PDF]
- Current Gear List (of the gear we’d use for this trip) an our older gear List
- Other Published References (books, maps, etc.)
- Photo Equipment, and Electronics/communicaton gear, and SOS and Tracking Devices. Since we were documenting this trip for publication we brought a bunch of gear that we might not have brought for a “normal trip.” Nonetheless we thought folks might be interested.
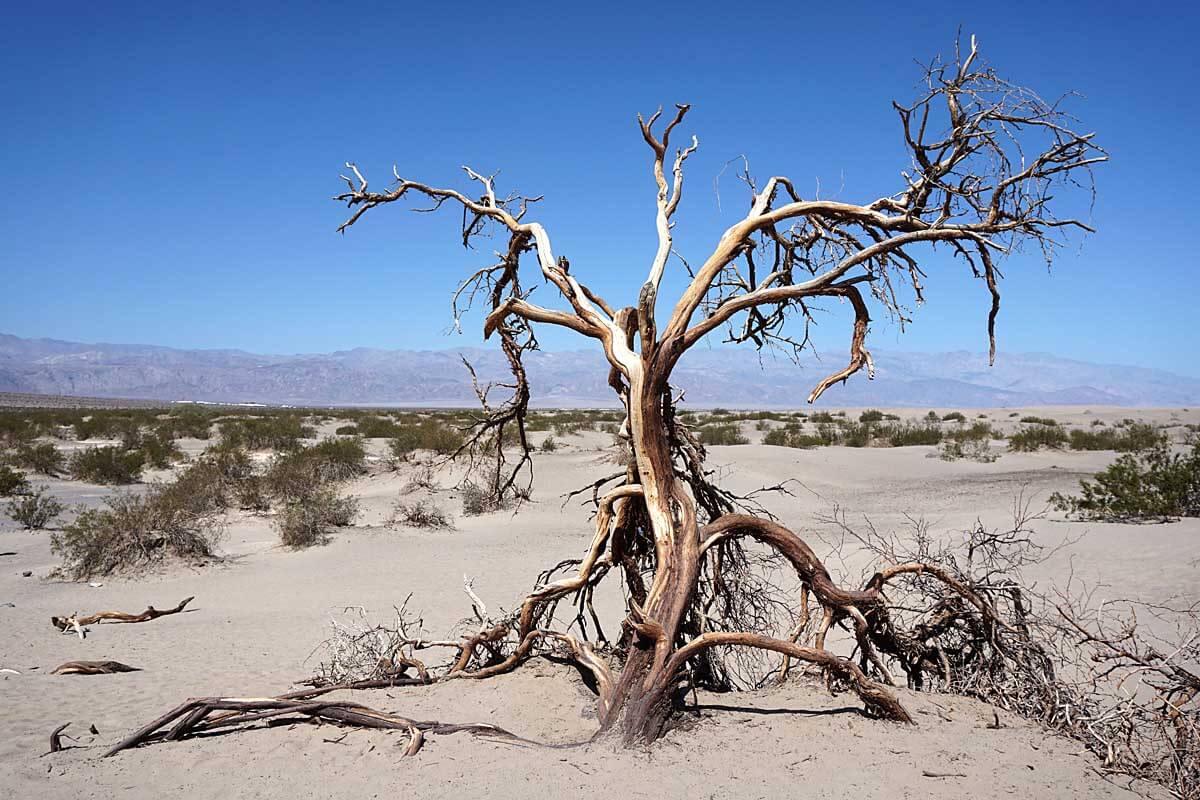
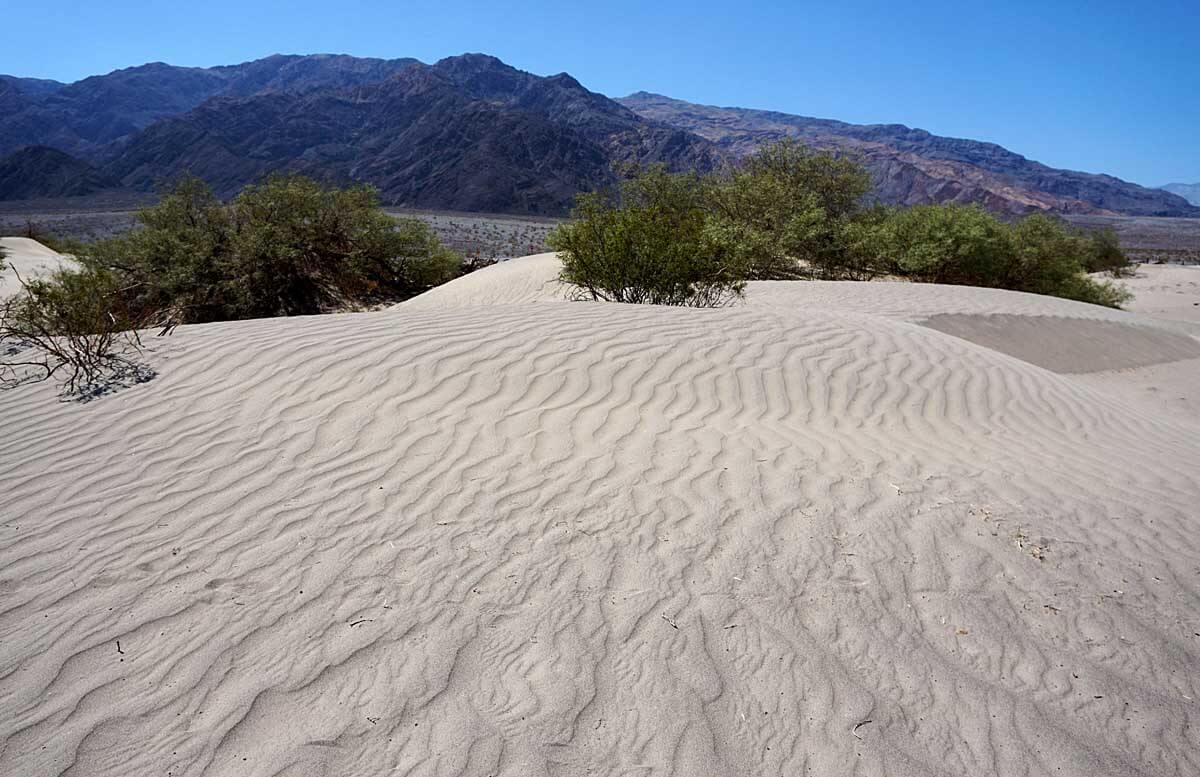
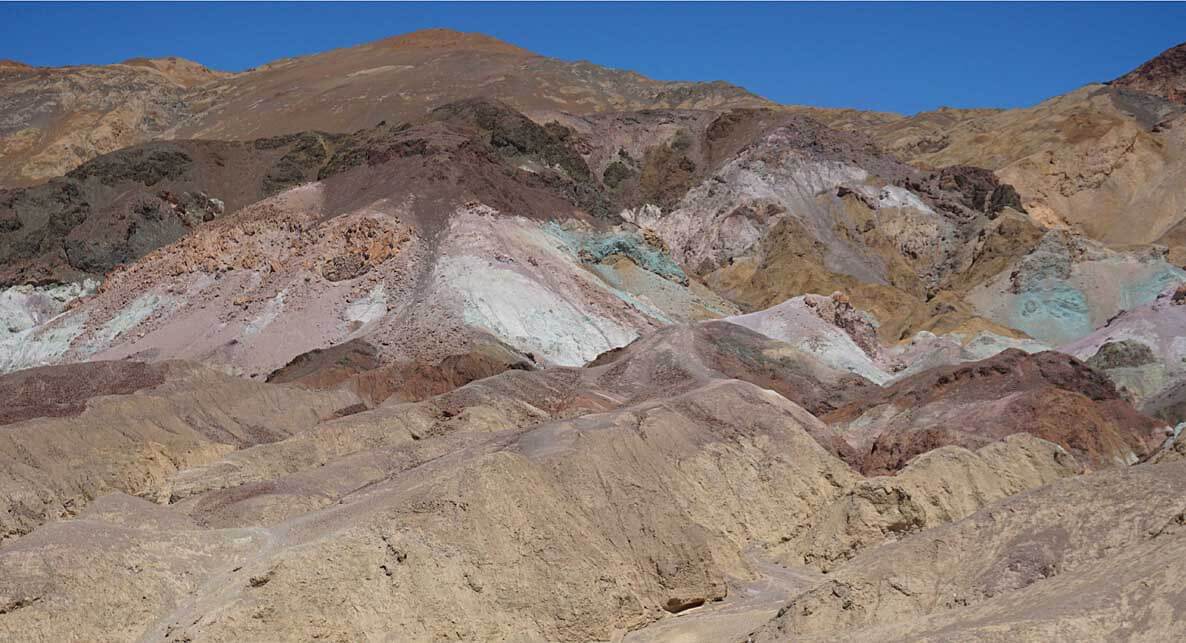
- Death Valley If you get the chance, it’s certainly worth tagging on a trip to Death Valley on either end of this trip. After climbing Mt. Whitney the highest point in the Lower 48 at 14,505 feet you can go to Badwater, the lowest point in North America, −282 feet (−86 m).
First light approach to climb the Mountaineer’s Route on Mt Whitney.
Southern Sierra High Route Overview Map
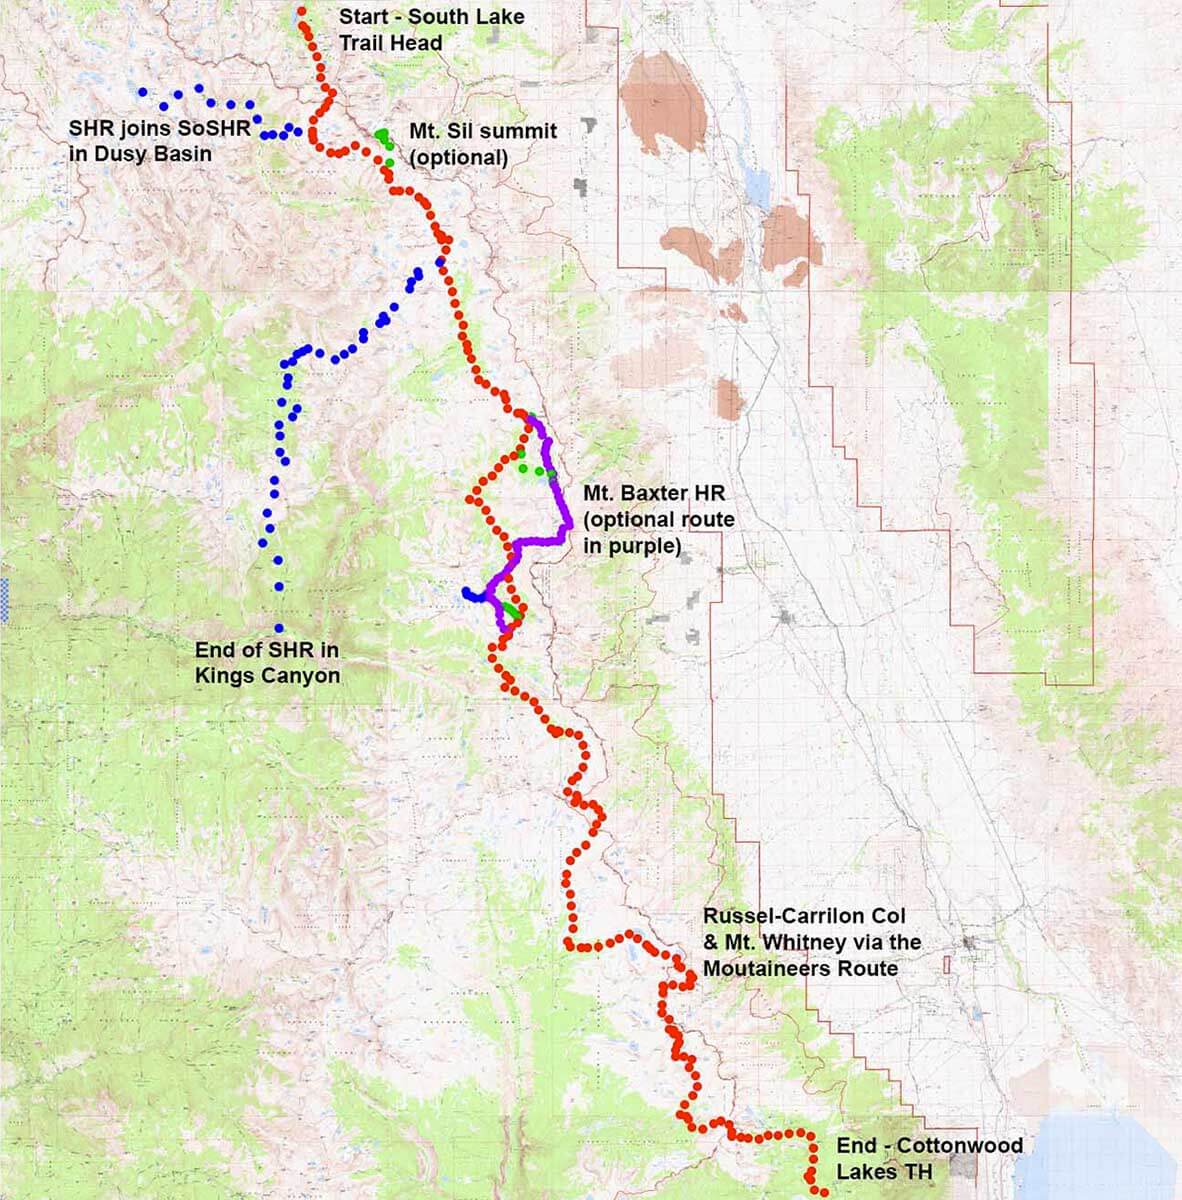
Where the Sierra High Route goes low and ends in Kings Canyon, the SoSHR continues south along the highest part of the Sierra for another 80 miles. [Click on overview map image to enlarge]
SoSHR vs. JMT — Basic stats from LeConte Canyon to Whitney Portal
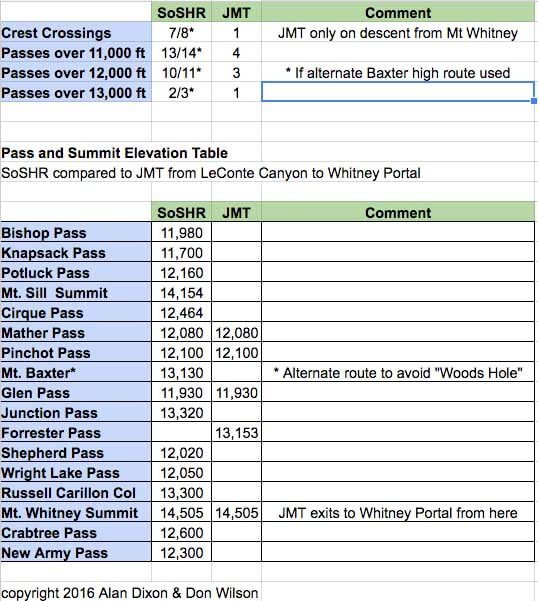
From LeConte Canyon to its the southern terminus, the SoSHR stays closer to the Sierra crest and significantly higher than the JMT.
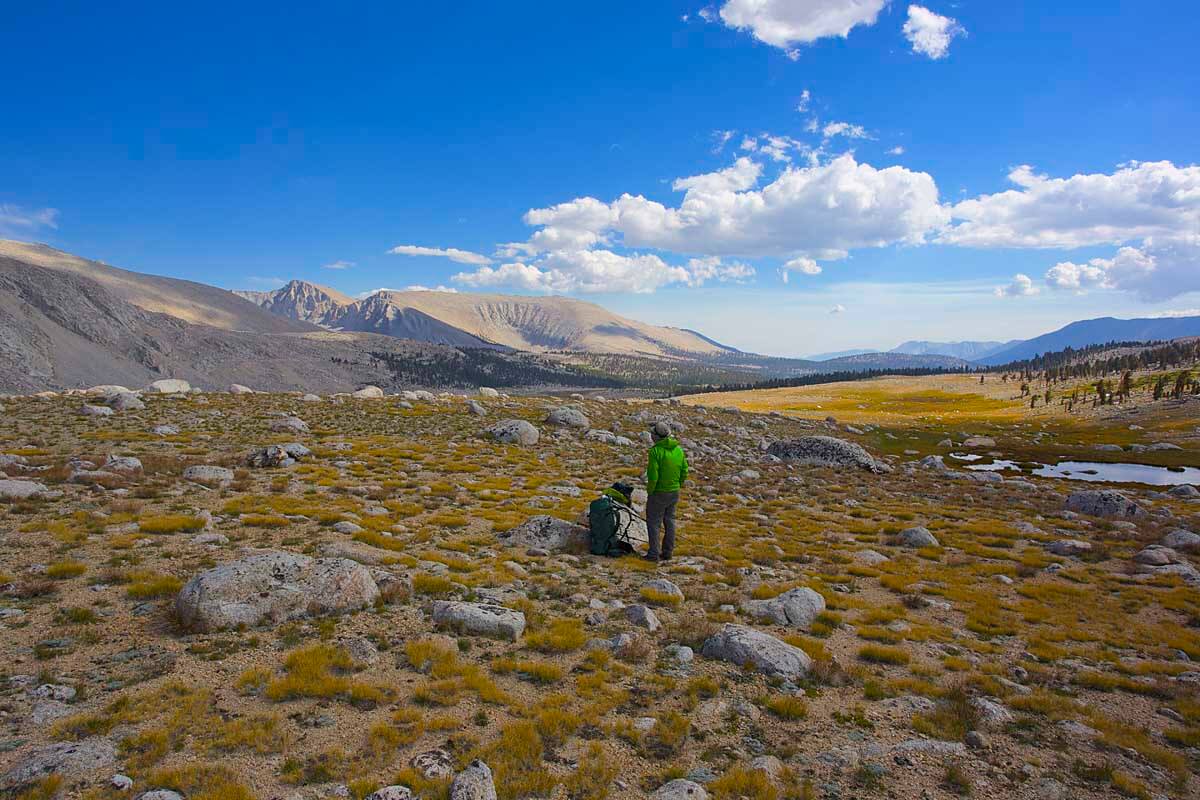
Don explores the shoreline of beautiful Golden Bear Lake. The lake lies at 11,171 feet in pristine Center Basin, on the way to Junction Pass. Lots of solitude here as it is on a portion of the old JMT that has been “decommissioned” for years.
Permits, Logistics and Other Particulars
Permits
Hiking this route requires a wilderness permit from Inyo National Forest. The entry point at South Lake trailhead is quite popular, so it is best to reserve your permit in advance. As of 2014, permits can be reserved up to 6 months in advance.
When you apply for your permit, it is crucial that you indicate that you will be traveling cross country through the Mount Whitney Zone, which will require an extra fee. After applying online, you will receive a confirmation of your reservation, but you must still pick up your actual permit on the day before your trip begins. Permits can be picked up at the forest service offices in either Lone Pine or Bishop. You can arrange to pick up your permit after hours, or on the day your trip begins by calling the forest service office.
Be aware that travel near Mount Whitney is regulated more tightly than in other areas of the range. By entering the area near from the north, you will not need to compete via the lottery for a permit, and your permit from South Lake will be all you need (be sure to choose the option to travel through the Whitney Zone!). Once you enter the area known as the Mount Whitney Zone, special regulations apply. Most notable among these regulations is the requirement to pack out your human waste. Numerous options are available for wag bags that are made for this purpose.
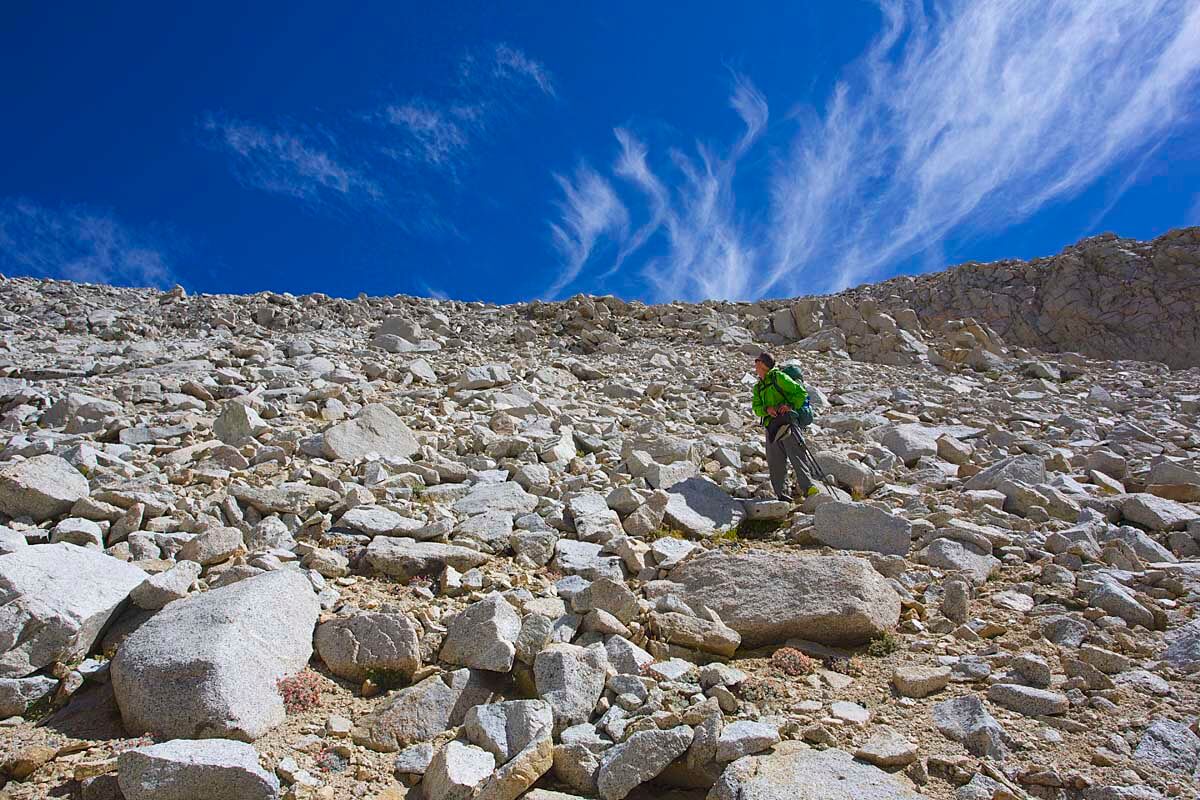
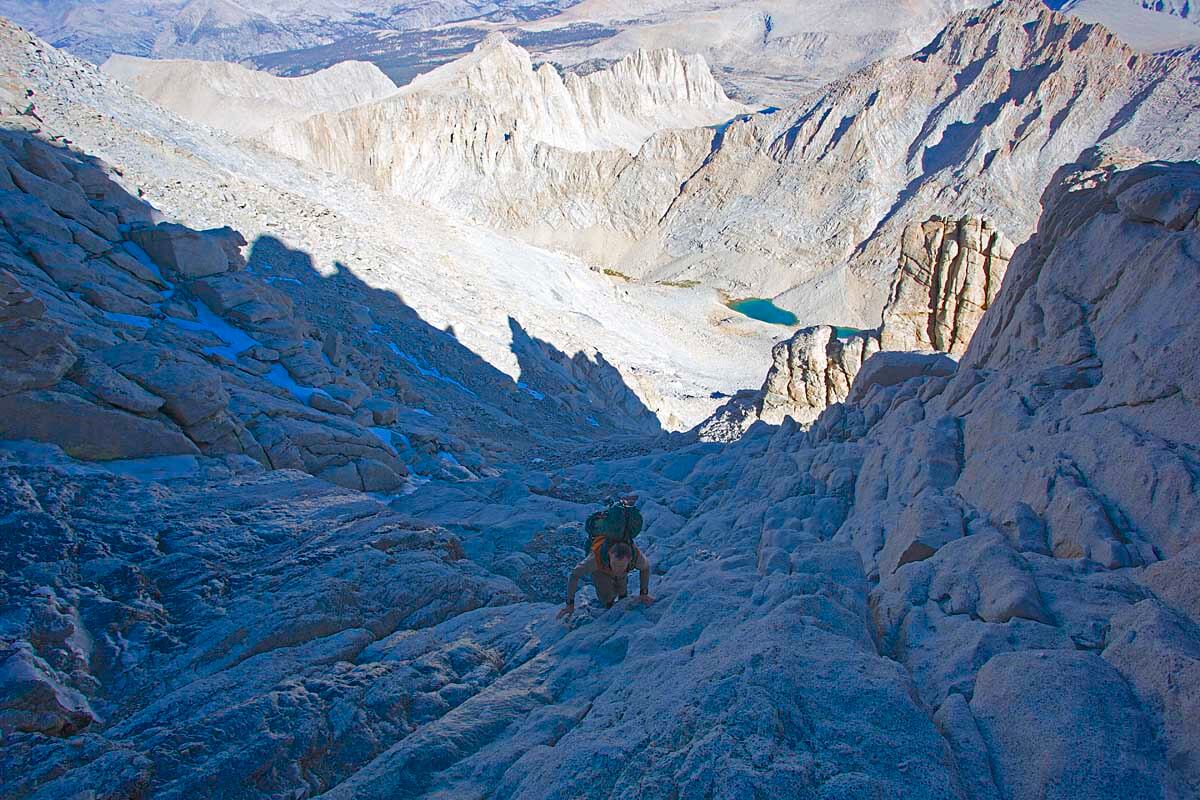
Alan on the upper part of the talus approach, below the steep class 3 section, on the climb to 13,300 foot Russell-Carillon Col. Tulainyo Lake lies below. Tulainyo Lake is the highest lake of its size in North America. The route enters near the upper left corner of the photo, crosses the snow field and traverses along the shore before starting up the talus. [photo Don Wilson]
The obvious point to access the northern start of SoSHR is Bishop Pass via the South Lake Trailhead. This popular trailhead is just outside of the town of Bishop California. Some may choose to stay overnight in either Bishop or Lone Pine to get an early morning start.
Another option, and one that we used, is to start in late in the day, hike a few miles to a convenient place, such as Long Lake, and make camp for the night. This allows you one night to acclimatize at over 10,000 feet, and gives you a dawn jumpstart the next morning, with a few miles and a thousand feet of climbing under your belt—advantageous if you plan on making it to Palisade Lakes that day. This also saves a vacation day as you can fly, even from the East Coast, and be hiking in the Sierras the same day. I.e. you can do what Alan did and fly to LAS or LAX early in the morning, rent a car, dive to Lone Pine, meet your shuttle and be at the South Lake trailhead by mid-late afternoon. There is no taxi or public bus service from the town of Bishop to the South Lake Trailhead. You’ll need to arrange a private shuttle or hitch from town.
Exit
The route terminates at Cottonwood Lakes trailhead near Horseshoe Meadows. If you opt to leave your car in the town of Lone Pine, you can easily hitch back to town from Cottonwood Lakes. By leaving your car in Lone Pine the logistics are also easier should you end up leaving the route at an earlier trailhead (Whitney Portal, for example) due to weather, slow progress or other reasons. We arranged to leave our car at the Comfort Inn, at the southern end of town.
Duration
We spent about 5½ days on the route. We had 5 full days of hiking, plus very short days on entry and exit. This included a half day of rest at Upper Boy Scout Lake, where we arrived about noon and spent the rest of the day exploring and relaxing. We did not take the option to climb Mount Sill on this trip, since we had climbed it on a previous trip. Climbing Mount Sill would add between a half and full day to the trip, depending on your climbing speed and the arrival time to start the route.
Airports
The Eastern Sierra trailheads and entry towns of Lone Pine and Bishop are approximately equidistant from the airports in Las Vegas (LAS) and Los Angeles (LAX) —LAS is four hours to Lone Pine (but a stunning drive through Death Valley National Park!), and LAX about three-and-quarter hours to Lone Pine (but susceptible to traffic problems).
From the airports you can either rent a car to get to Lone Pine, or get a shuttle bus from LAX (see East Side Sierra Shuttle). The shuttle from LAX is a bit pricey and might best be a shared expense when traveling with others. There are other private shuttle options from LAX to Lone Pine.
Shuttles
The following shuttle and bus services are available in the area. We opted to leave our car in the town of Lone Pine and take a shuttle straight to the trailhead at South Lake.
- East Side Sierra Shuttle http://www.eastsidesierrashuttle.com/
This operates in the southern end of the Sierras out of Independence. You can get shuttled between Bishop and Lone Pine trailheads, or get picked up at LAX and driven to trailhead. - Mammoth Shuttle http://originalmammothshuttle.com/
A bit further from SoSHR trailheads (i.e. a bit more expensive) this operates in the more northern portion of the Sierras out of Mammoth Lakes CA. - Eastern Sierra Transit http://www.estransit.com/CMS/content/395-routes
A bus service that operates along Highway 395 on the eastern side of the Sierras and connecting the towns of Lone Pine, Bishop and Mammoth Lakes
Bear Canisters
No way around it, a bear canister is required for this trip. The trip passes through Dusy Basin and Rae Lakes, well known hot spots for bear activity as well as the Mt. Whitney area which also requires bear canisters.
Depending on how fast you travel it may be a challenge to fit all your food into a single canister. We just barely fit our food into a Bear Vault BV500 (Don) and a Bearikade Weekender (Alan). There are no easy re-supply points for this trip, so you may need to be creative (but obviously comply with all regulations) if you have more than a canister’s worth of food—possibly sharing a smaller third canister (~300 to 400 in3) with a partner. Here’s another useful reference for bear canisters
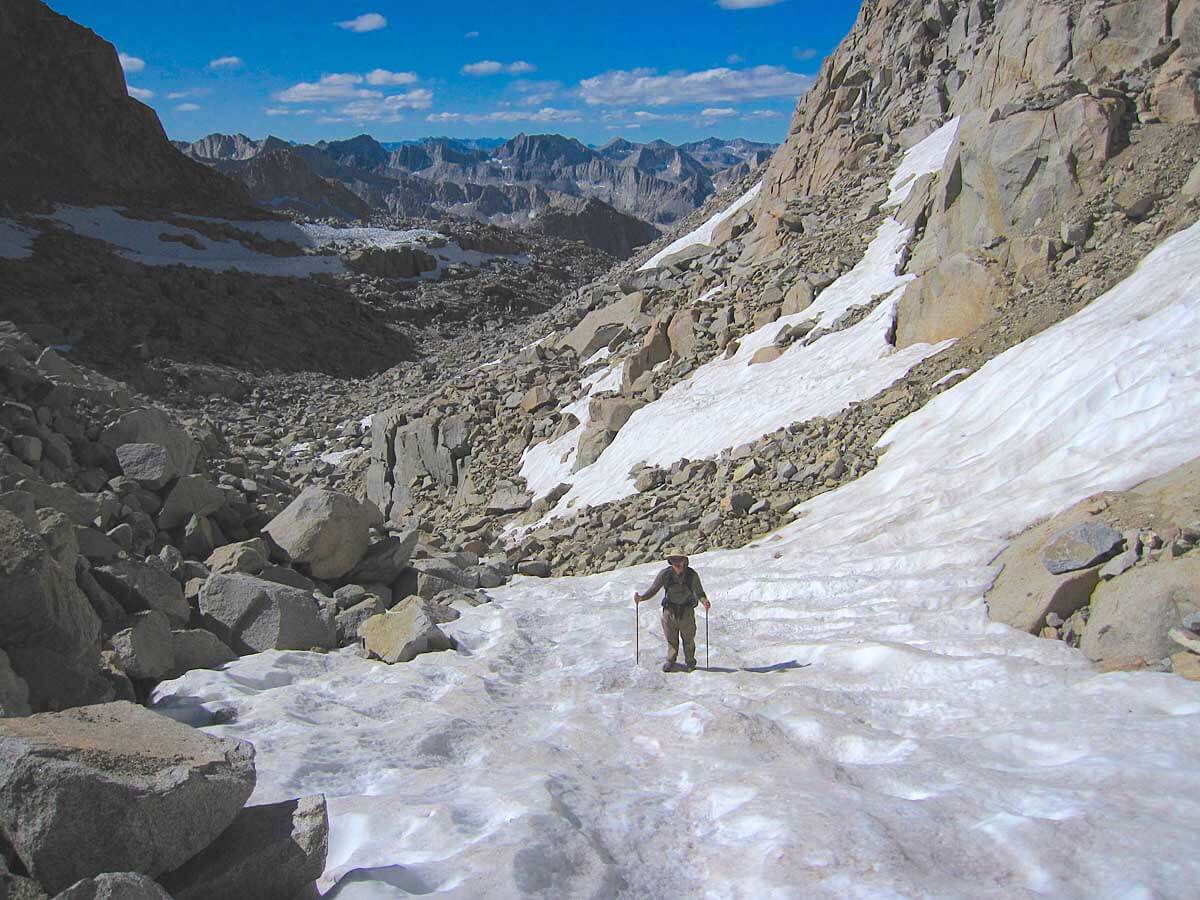
Snow Conditions
As a high country route, snow conditions play a significant role in how quickly and safely the route can be completed. While almost all of the route will hold snow early in the season, portions of the route that are most susceptible to holding late snow include Mather Pass, Grasshopper Pass, some parts of the Wallace Creek Valley, Tulainyo Lake, Russell-Carillon Col and the upper part of the Mountaineer’s Route on Mount Whitney. It is up to you to determine the proper gear based on the time of year, snow levels, and your own experience. The route is most easily done when it is nearly snow free. On our trip, it had recently snowed on Mt. Whitney with an ensuing melt and freeze cycle, leaving the final 300 ft of the Mountaineer’s Route icy and more challenging.
ROUTE DESCRIPTION
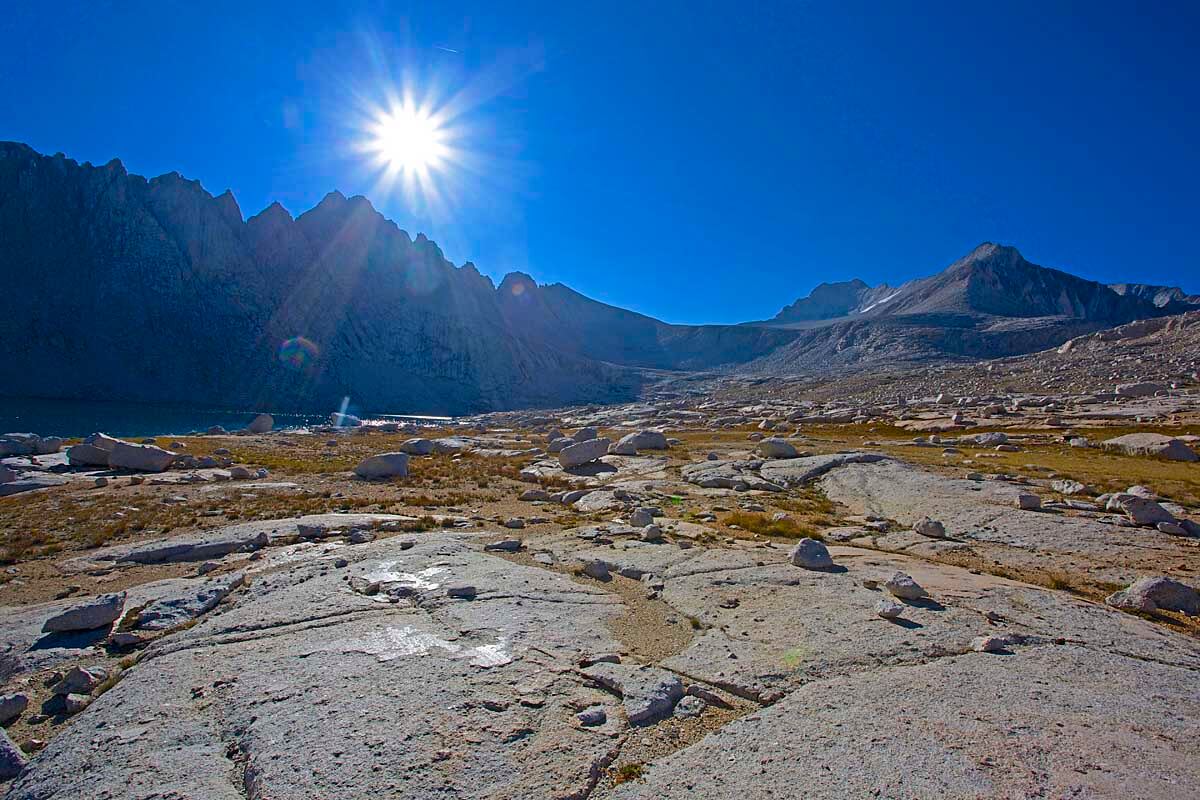
We describe the SoSHR from north to south, but it can obviously be hiked in either direction. By hiking from north to south you will save the highest and best parts of the route for the last days, when your pack is lighter and your body more acclimatized to the altitude. The route enters at Bishop Pass, joins the SHR in Dusy Basin, and then winds through lovely and complex Palisade Basin. Once over Mather Pass the SoSHR and SHR part ways. The SoSHR heads south toward the high peaks of the Southern Sierra while the SHR heads away from the Sierra Crest towards the lower terrain of the Monarch Divide and Kings Canyon. From Mather Pass, the SoSHR follows the JMT for about 11 miles to the far side of Pinchot Pass. There the SoSHR leaves the JMT and stays mostly off-trail and off of the JMT for the next 60 miles.
SECTION 1: SOUTH LAKE TO UPPER BASIN
The Southern Sierra High Route (SoSHR) starts at the South Lake trailhead, west of Bishop, CA. This popular trailhead allows fast access to the beautiful high country terrain that we seek. In this section we cross the Sierra crest for the first time, and then descend to join Roper’s Sierra High Route (SHR) near Dusy Basin. We will follow the Sierra High Route to Upper Basin, just south of Mather Pass, where our route will head south to higher country as Roper’s route heads west, toward King’s Canyon and lower terrain.
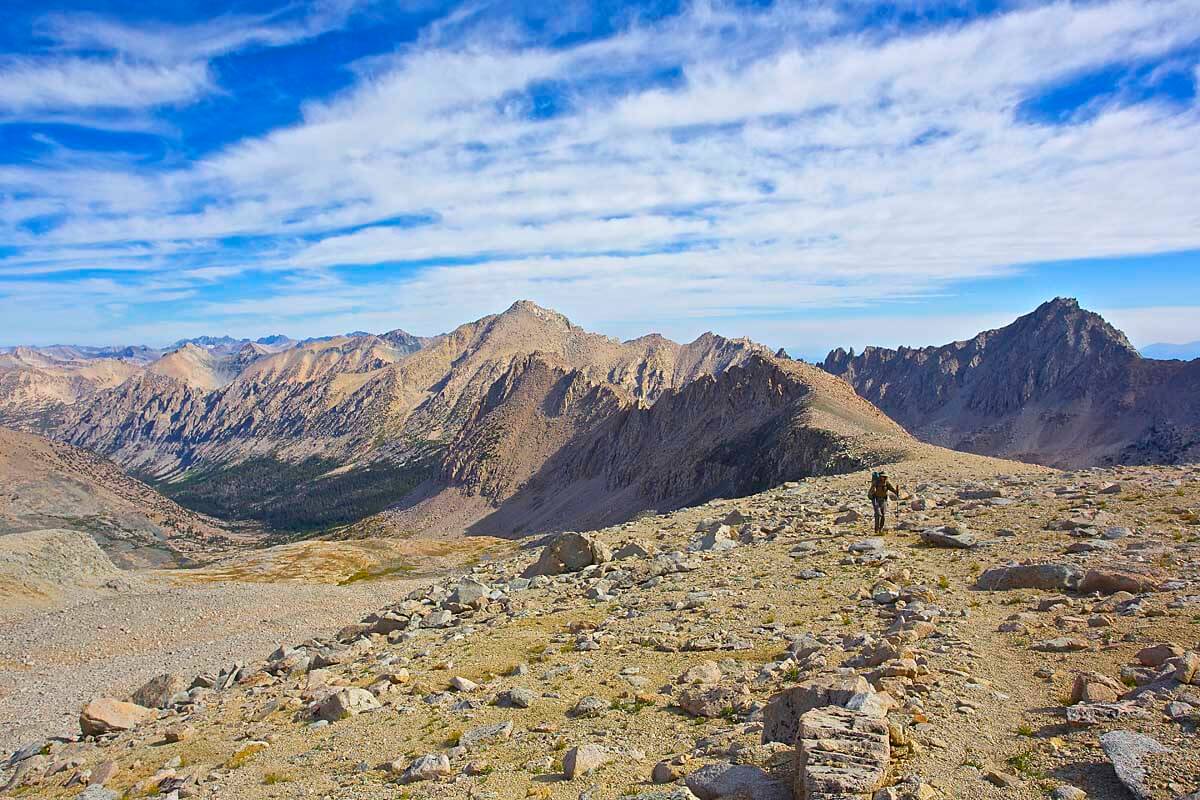
The route stays on trail for its initial miles and climbs over popular Bishop Pass. From Bishop Pass you will see rugged Mount Agassiz (13,899 feet), with its summit less than a mile to the east. Mount Agassiz is the northernmost peak in the Palisades – a fitting place to enter the high country. The Palisades are generally considered the most rugged sub-range in the Sierra, and we will get a close up view of numerous peaks as we traverse just west of the crest all the way to Upper Basin.
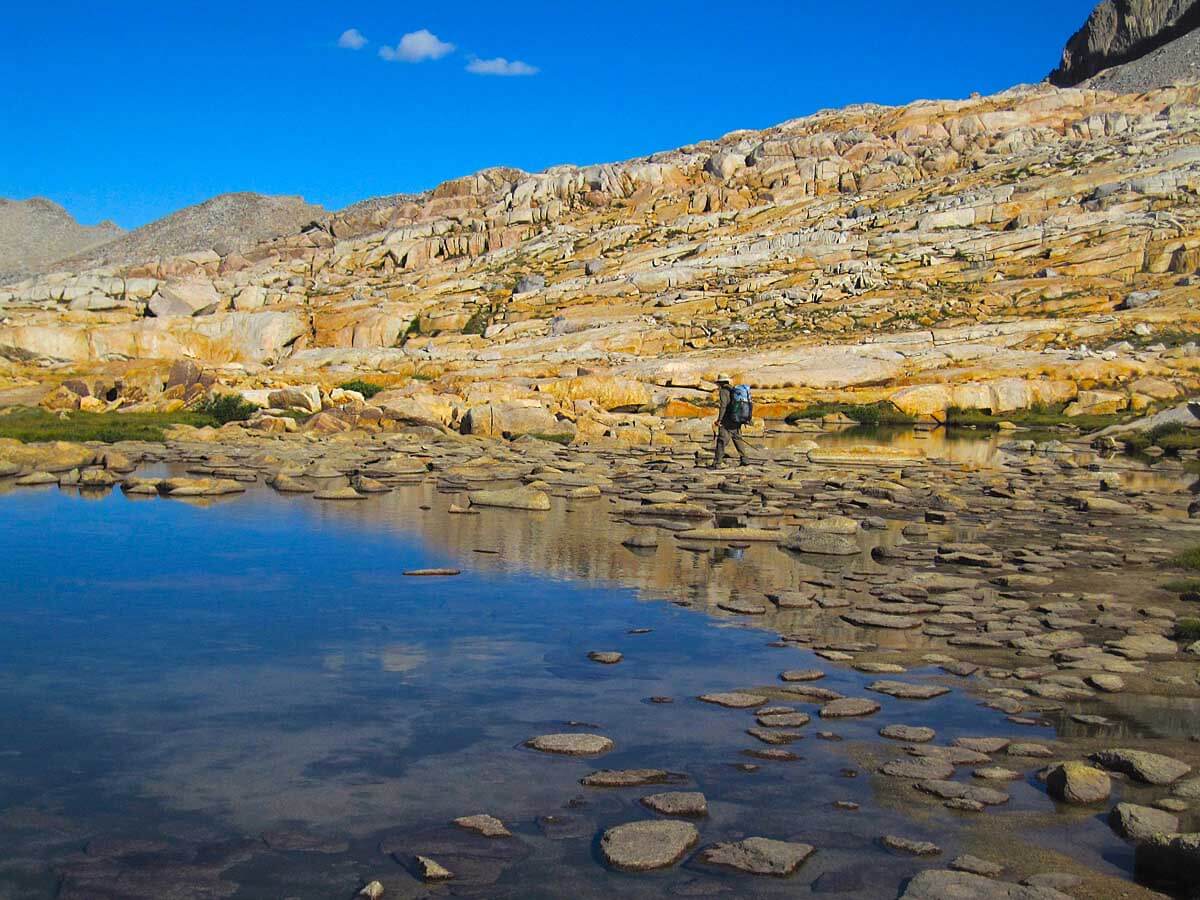
Leaving Bishop Pass, head south on the trail for about a mile and a half. The trail descends gradually towards lush Dusy Basin. Just below 11,000 feet the trail makes an abrupt right turn to the west. Leave the trail here and descend cross country to the south, and slightly east. It is only about 5 miles of cross country terrain from this point until you reach the John Muir Trail (JMT) at Lower Palisade Lake. While not technically difficult, much of the terrain in this section is complex and the travel is slow. Expect to spend 5 to 8 hours working your way from Dusy Basin to Lower Palisade Lake.
Your first goal is to traverse toward the head of Dusy Basin at the bottom of Knapsack Pass. Travel is mostly easy through this section and you may pick up an occasional use trail. Upon reaching the head of the canyon, look for a weakness and small gully system below the pass. Ascend this gully system past occasional cairns up to the pass. From the top of the pass you will not drop directly down, but instead head left (east) toward Barrett Lakes. You can drop diagonally down and left, or you can stay high (nearly the height of the pass) along a use trail for some distance before dropping. Either way, your objective is to reach the outlet of the westernmost of the Barrett Lakes (Lake 11428 on your map). Traverse along the south side of this lake and then along a use trail on the north side of the larger Barrett Lake. Your next objective is to climb up to a non-obvious saddle located just northeast of point 12,085. After reaching this saddle, an obvious and easy half mile traverse will take you to Potluck Pass.
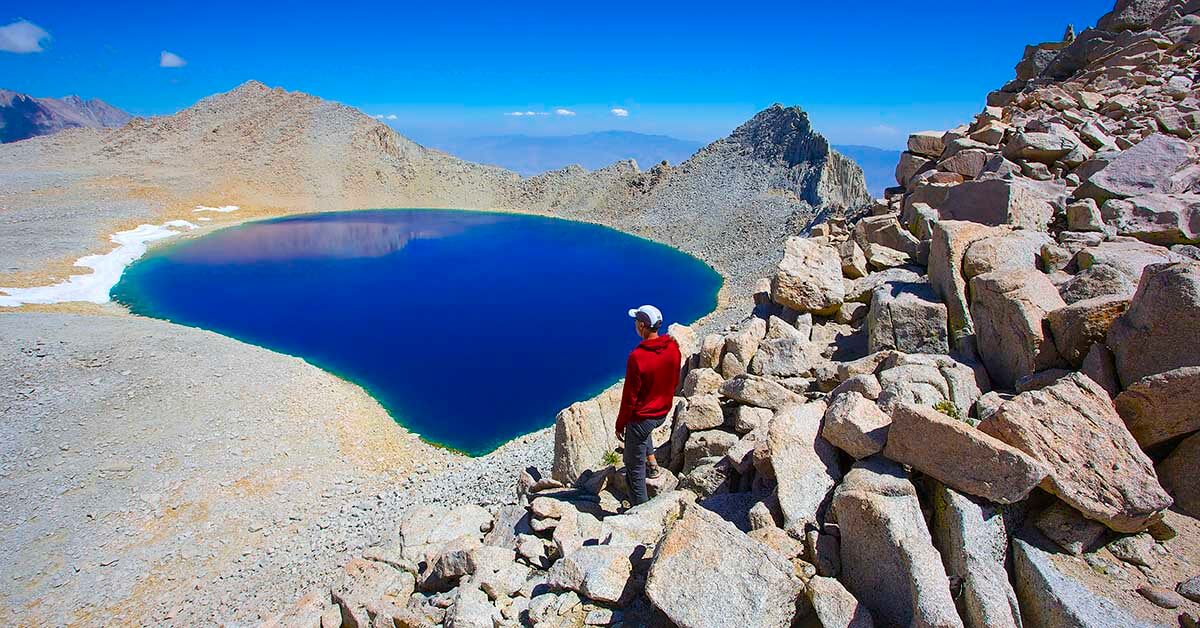
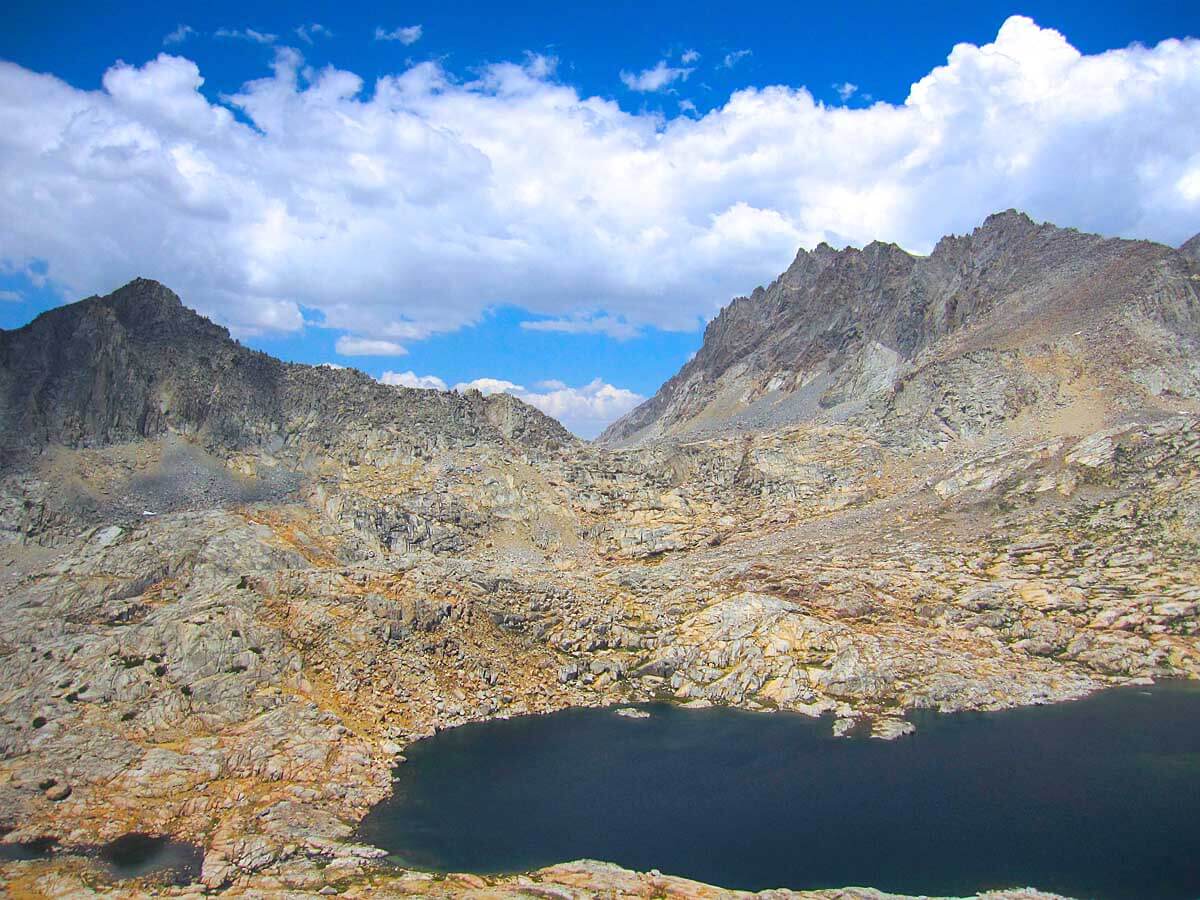
Alan hops across rocks near Barrett Lakes, in Palisade Basin. Crossing Palisade Basin involves climbing three passes and some complex terrain. [photo Don Wilson]
At this point you have the option (highly recommended) to summit Mount Sill. Mount Sill (14,162 feet) is a classic climb and one of the most beautiful peaks in the Sierra. According to R.J. Secor in his highly recommended book The High Sierra, “Mount Sill has the best summit view of any peak in the Sierra.” Head to the north end of the lake between Potluck Pass and Cirque Pass. Then continue north up slabs and talus into the cirque between Polemonium Peak and Mount Sill. Stay north of the snowfields in this cirque if possible and head to the obvious west ridge of Mount Sill. Once on the ridge, the rock improves dramatically. Ascend steep but good rock to the summit. We encountered several class 3+ boulders on the west ridge below the summit. With careful route finding you may be able to keep the difficulty at the class 2-3 grade reported by Secor. For more route information, see the description of the Southwest Slope route (The High Sierra, page 245, 3rd edition). You can expect to spend about 5-6 hours to ascend and descend this climb. By taking the option to climb Mount Sill, you will have climbed a superb 3rd class 14K peak at the beginning of the trip to match another great 3rd class 14K summit at the southern end of the trip; Mt. Whitney via the Mountaineer’s Route.
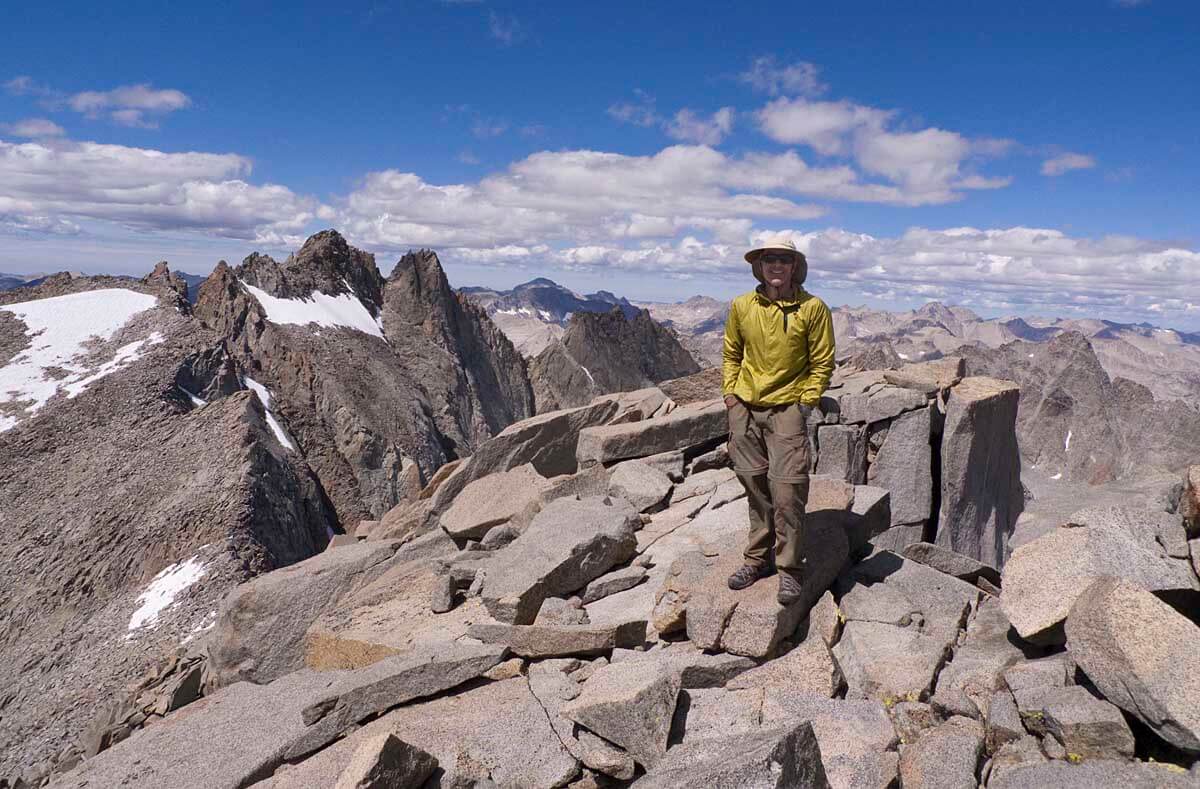
We highly recommend summiting Mount Sill. At (14,162 feet) it is a classic climb and one of the most beautiful peaks in the Sierra. According to R.J. Secor in his highly recommended book The High Sierra, “Mount Sill has the best summit view of any peak in the Sierra.” [photo Don Wilson]
Mount Sill, in the center of the photo, taken from the outlet of Lake 11,680, between Potluck Pass and Cirque Pass.
Ascending a late season snowfield en-route to summiting Mt. Sill. [photo Don Wilson]
Descending from the summit of Mt. Sill. The route to the summit is the ridge behind Alan and continues up and to the right in this photo. [photo Don Wilson]
Looking north back at Potluck Pass from the vicinity of Cirque Pass. North Palisade and Thunderbolt peak in the background. Unnamed lake at 11,680 spreads out below. Mt Sill is out of the picture to the right.
From the outlet of the large lake between Potluck Pass and Cirque Pass, head southeast up slabs, then turn left when you hit obvious ramps that head up toward the pass. Follow the ramps up to an obvious narrow slot about 6 feet wide. Hike up through this slot and then head left up more ramps and ledges to the summit.
Once on Cirque Pass you have only one more descent remaining before you reach the comfort of the JMT for a number of miles. Expect the terrain to slow you down, as many ledges and slab systems complicate the initial part of the descent. Stay right as you start to hike down, connecting ramp systems and grassy small meadows. The terrain eases up after several hundred feet of descent. As Lower Palisade Lake comes into view, do not head directly toward its outlet. Instead, stay more right heading almost directly south and carefully looking for ledge systems that will connect you to the Palisade Lakes basin below. The further left you go in this final section of the descent, the steeper the terrain will be. You should reach the John Muir Trail in nearly flat terrain west of Lower Palisade Lake. There are popular campsites at the lake’s outlet, but even better sites near the trail about a mile farther along toward Mather Pass. The route ascends the John Muir Trail over 12,100 foot Mather Pass, and then drops into pristine Upper Basin. As the trail levels off and reaches the uppermost lakes in Upper Basin, we reach the end of our first section. Here Roper’s SHR heads to the southwest and Frozen Lake Pass. Our route continues south along the JMT, heading for Pinchot Pass and the highest peaks in the Sierra.
Mount Bolton Brown at sunset, taken from near Palisade Lakes.
SECTION 2: UPPER BASIN TO VIDETTE MEADOW
New for 2016: There are two options for the route between Pinchot Pass and Glen Pass
Note: The new B route is courtesy of our friends Jim Yurchenco and Amy Lauterbach who traversed/scouted it in September 2016 (see their Baxter Pass article). Thanks a million!
- This version follows the JMT all the way from Pinchot Pass to Glen Pass. It has the advantage of being on-trail, easy to follow and with little risk. It’s disadvantages are the usual hiker traffic on the JMT and especially in the Rae Lakes Basin. Also, it is the only point on the route that drops below 10,000 feet into “Woods Hole,” at 8,500 ft. (if you take Option B the entire SoSHR will be over 10K.)
- *This version leaves the JMT and takes a higher off-trail route. After going over Pinchot Pass it goes off-trail to the Woods Lake Basin. Then summits Mt. Baxter to gain access to Baxter Lakes Basin. From there the route briefly regains the JMT before going southwest at Arrowhead Lake to bypass Rae Lakes via 60 Lakes Basin. It regains the JMT at the base of Glen Pass. The advantages of this route is that it avoids some of the highest JMT traffic areas including Rae Lakes. It it is a much higher route (keeping your entire SoSHR hike above 10,000 feet), with superb views. There’s the option of an easy and fine summit of Mt. Cotter from 60 Lakes Basin. Downsides are challenging navigation, strenuous hiking, and some risk crossing between Woods Lake and Baxter Lakes.
SECTION 2: The Start (for both Options A and B) – Upper Basin and over Pinchot Pass
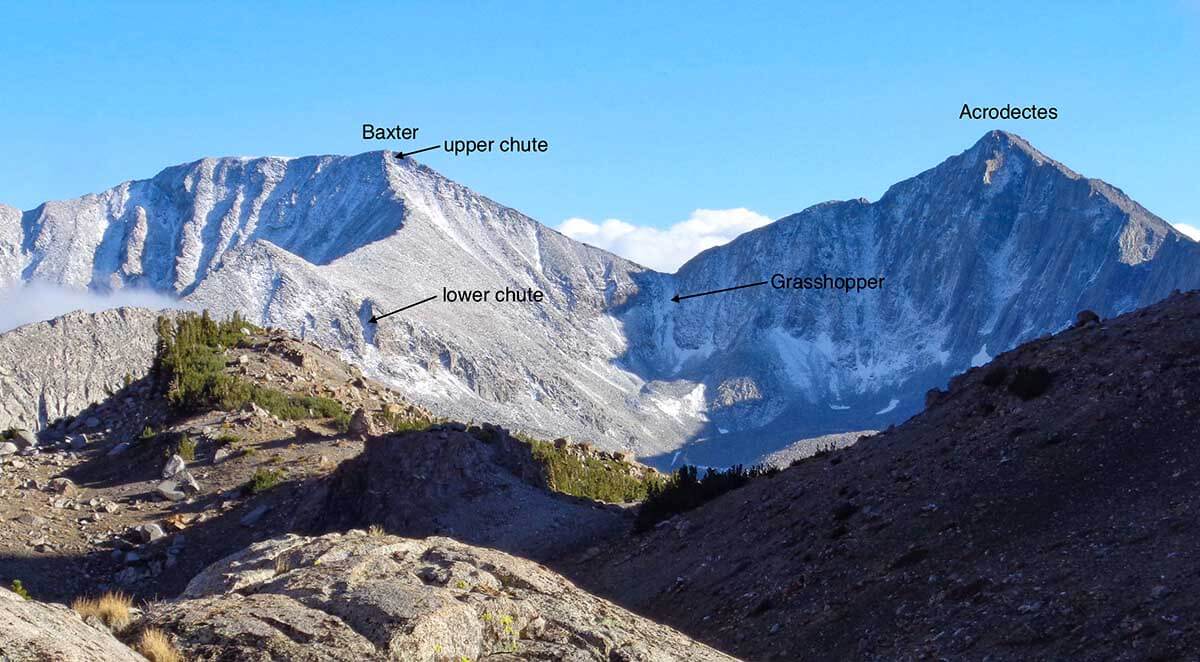
From Upper Basin the route follows the John Muir Trail for about 11 miles to the 3400m contour on the far (east) side of Pinchot Pass. The first few miles through Upper Basin are some of the most beautiful miles of the JMT, filled with alpine grasses, many small creeks and surrounded by the 14,000 foot crest containing Split Mountain and Cardinal mountain to the east, and the clean granite spires of Vennacher Needle and Mount Ruskin to the west. Descend gradually through Upper Basin, crossing many small creeklets and an infinite selection of beautiful campsites. After about 5 miles the trail reaches the valley bottom, where four creeks come together to form the South Fork of the Kings River. The crossing here can be exciting in early season, but there are frequently good log crossings. Look both upstream and downstream if the water is high. From the crossing, stay on the John Muir Trail, climbing rapidly out of the forest and into the basin below Pinchot Pass. Follow the trail up to 12,100 foot Pinchot Pass, passing several large lakes in cirques below the pass. From the top of the pass there is a beautiful view to the south. Here one can spot Grasshopper Pass in an obvious notch a little less than 6 miles distant as the crow flies. Grasshopper Pass lies at a bearing of 155 degrees (true) from Pinchot Pass. Just to the left of Grasshopper Pass is Mt. Baxter which is the route from Woods Lake Basin into Baxter Lakes basin for Route Option B.
SECTION 2: Option A – Take the JMT from Pinchot Pass to Glen Pass
Red markers on map: Stay on the JMT to the Sawmill Pass Trail junction. [Note: that there is an option to take the Sawmill Pass Trail and join the Option B route]. Go past the SPT Junction and continue on the JMT dropping gradually and following Woods Creek on its west side. After descending all the way to 8,500 feet, you reach a junction where the JMT turns southeast and crosses Woods Creek on an impressive suspension bridge. A heavily used campsite with bear boxes lies on the far side of the bridge. From this low point on the trail the route climbs steadily to the beautiful Rae Lakes which has many campsites, some with bear boxes. Note: The Option A and Option B Routes converge on the JMT above Rae Lakes at el. 3460; just before the main switchbacks at the base of Glen Pass (west of “Painted Lady”).
If you opt for the higher, non-JMT alternate route (SECTION 2: Option B) you’ll enter the beautiful Woods Lake Basin. Here due to the long closure for bighorn sheep, and now low-use as an “unmaintained” trail, we found an abundance of wildlife in this basin. It is highly recommended as an overnight (side trip, 3-4 miles total, out and back) off of the JMT even if you decide not to go over Mt Baxter and into Baxter Lakes Basin.
SECTION 2: Option B – Leave the JMT and take a higher route over Mt Baxter
Purple markers on the map: A mostly non-JMT route exists between Pinchot and Glen Passes. In no place does the route exceed class 2 in difficulty, although some short sections are quite loose and require caution to cross safely. It is assumed that the hiker has previous off-trail experience, good navigational skills and appropriate judgment.
Picture [click on image to enlarge] showing the key points for the ascent of the north ridge of Mt. Baxter (from near Stocking Lake). A more detailed route description is below. [Photo Jim Yurchenco]
Drop down the south side of the Col to the old Sawmill Pass Trail. Cross the trail and continue cross-country to Lake 3331. [Note: see below for an alternate route to here using the Sawmill Pass Trail – green markers on map.] Skirt the lake on its right side, cross the inlet creek and ascend a series of ramps and benches on the east side of the Stocking Lake drainage. Heading south, your target is a large scree slope and low point east of the mid point of Stocking Lake. South of this low point is the prominent north ridge of Mt. Baxter.
To gain the scree slopes below the crest of the ridge, a prominent chute at the 3700-meter level is climbed. This chute shows as a distinct notch on the USGS topo immediately west of the word CO in “FRESNO CO” on the map. The chute is maybe 40 to 60 meters in length and is loose but not horrible. Ascend the chute and continue up the scree to the Baxter north ridge.
The ridge is solid and easy to ascend. On ridge’s west side and at its top will be another short chute leading to just west of the Baxter summit. Once on top of Baxter, descend southwest to the lake at 3600 (see note below*) and then to the larger Baxter Lake at 3390. Here you will find remnants of the old Baxter Pass Trail. This trail heads west and appears, disappears, and reappears again as it travels down canyon. Follow this trail for something over 3.6 miles to its junction with the JMT near Dollar Lake.
Take the JMT south for a short distance to where it crosses the main drainage from the Rae Lakes. From here, head southwest cross-country to Basin Notch. Climb Basin Notch and enter the 60 Lakes Basin. Use paths and an old trail lead to the lakes at 3300. Here the trail heads east towards Rae Lakes. Leave the trail near the north end of Lake 3304 if you want to climb Mt. Cotter via the south ridge (blue markers on map – Class 2/3, Secor 3rd ed., pg. 166). This is a very pleasant climb to a peak with fine views.
Otherwise, continue on the old trail for another half mile or so and then head south off-trail to lake 3353. From here continue south cross-country over the pass at 3560 and descend the other side to the lakes just west of the JMT. Regain the JMT just below the switchbacks leading to Glen Pass. [Note there is also the option to continue on the 60LB trail to meet the JMT a bit sooner at Rae Lake “3213.” green markers on map]
* Note: Some travelers have advised to be careful when descending to the lake at 3600 as a number of the chutes to the lake have loose rock and debris. Pay close attention to the route on the map, and pick your route carefully. Note that the route holds the ridge/county line until almost reaching “PARK” before descending SW towards the lake. Be sure to take your time to find the best and most solid footing on the way down.
Alternate route into Woods Lake basin to connect with SECTION 2: Option B
Green markers on the map: From the 3400m contour hike the JMT about 1.5 mils to the Sawmill Pass Trail Junction. Take the SPT southeast and immediately cross Woods Creek. The sometimes faint trail then climbs slowly and turns east, traversing along the northern boundary of several lakes. To the south, you will get occasional views of enormous Woods Lake. Your objective is to leave the trail about two miles after the Sawmill Pass junction and head to an L shaped lake at 10,930 feet. This lake is labelled as Lake 3331T on the USGS Quad. You will now join the “SECTION 2: Option B” route and headed over Mt. Baxter.
View of Acrodectes Peak from the summit of Mt. Baxter. Grasshopper “pass” is hidden behind the near pile of talus. [Photo Jim Yurchenco]
SECTION 2: The End (for both Options A and B) – Glen Pass to Vedette Meadow
The Option A and Option B Routes converge on the JMT above Rae Lakes at el. 3460; just before the main switchbacks at the base of Glen Pass (west of “Painted Lady”). From here the JMT climbs steeply via switchbacks to 11,930 foot Glen Pass. Follow the trail down from the pass for several miles, where you will encounter several junctions with trails heading down from Kearsarge Pass. Look at your map carefully. After crossing a sandy flat basin below the trail junctions, you will drop more steeply toward Vidette Meadow. Finally reaching the valley floor near Bubbs Creek, you come upon a junction where you will turn east and traverse along the nearly level Lower Vidette Meadow. There is little that resembles a meadow here. The terrain is heavily forested, with a few small glimpses of grass. There is reason to celebrate your arrival here. You’ve completed a long section on the SoSHR, and the route ahead gets much more challenging. It contains some of the best and highest cross country travel in the Sierra.
Leaving the junction at 9500 feet, you travel east on the JMT through thick pines and past numerous campsites. The trail stays fairly level for a little over a mile, then begins a gradual climb. Just before reaching 10,000 feet the trail enters a sandy flat section with open forest. For the next mile and a half the trail stays close along the east side of Bubbs Creek. Good campsites abound again from about 9900 feet to 10,200 feet.
Finally departing slightly from Bubbs Creek, the trail climbs more steeply. When you reach 10,650 feet, a faint trail cuts off to your left, heading east where the JMT turns south. This junction is difficult to find. There is no sign and not much evidence of travel (there has obviously been a dedicated effort to conceal the turn-off to this “decommissioned” trail). After the hard to find junction, the trail will level off and drop slightly to a small creek at 10,600 feet. If you missed the trail junction (we missed it), leave the JMT at this creek and begin a gradual climb to the east through the forest. When you encounter steeper rocky terrain ahead, bear diagonally left and you will eventually cross the faint trail heading up to Golden Bear Lake. Stay on the trail, winding around some meadows and boggy terrain, reaching sublime Golden Bear Lake at 11,175 feet. Continue on this faint trail, which is the former route of the JMT, heading upward toward Junction Pass. You will pass above two lakes and climb onto a ridge at 12,600 feet. From this ridge a great view of Forester Pass and the JMT opens up before you as the JMT climbs toward the dramatic notch of Forester Pass. You can be a voyeur here and watch tiny backpacker ants slowly toil up to the pass. Continue up to the Sierra crest at 13,320 foot Junction Pass and admire the view of Junction Peak, just to your south. Get a good rest here, as the route ahead will require your full attention.
Early morning reflections on Golden Bear Lake. [photo Don Wilson]
Alan hikes along the 12,600 foot ridge approaching Junction Pass. This ridge has spectacular views of Junction Peak, Forrester Pass and the JMT. You can be a voyeur here and watch tiny backpacker ants slowly toil up Forester pass. [photo Don Wilson]
The descent from Junction Pass starts with easy walking and then degrades into steep, loose talus. Here Alan looks back uphill part way down the loose descent. [photo Don Wilson]
The climb up to Shepherd Pass is steep, but the trail is fairly good and the climb goes easily. Once on Shepherd Pass (just over 12,000 feet), you enter a long section of excellent travel across high basins and passes. Follow the trail down from Shepherd Pass for about 1.5 miles on mostly low angle terrain. At about 11,500 feet, turn directly south, heading for an obvious notch, which we call Wright Lakes Pass. Easy class 2 hiking leads up to the 12,040 foot pass. Descend south toward Wright Lakes on easy terrain and begin a beautiful 2.5 mile long walk past Wright Lakes across a high basin dotted with ancient dead pines. South of Wright Lakes, you will begin to pass through some trees and meadows, heading toward Wallace Creek.
Alan on the approach to Wright Lakes Pass. Shepherd Pass lies in the notch at the right side of the photo. [photo Don Wilson]
Ancient pines dot the 11,500 foot plateau south of Wright Lakes. Easy walking and great views abound along the two miles south of Wright Lakes Pass, heading toward Wallace Creek.
As you near Wallace Creek you will encounter increasingly rocky terrain. Depending on your location, you will likely need to climb slightly up, and then drop several hundred feet before encountering the faint trail that lies north of the creek. You should aim to hit the trail following Wallace Creek at about 10,800 feet, crossing the ridge north of Wallace Creek at around 11,000 feet or a bit lower. (Note: don’t succumb to the urge to cross too soon and too directly into Wallace Creek. The ridge north of the creek is rocky, and there are a steep sets of cliff bands descending into Wallace creek that are hard to navigate).
The southern shore of Wallace Lake makes for easy walking on the approach to Russell-Carillon Col. The lake lies on the left of the photo. Mount Russell is the furthest peak that can be seen on the right. [photo Don Wilson]
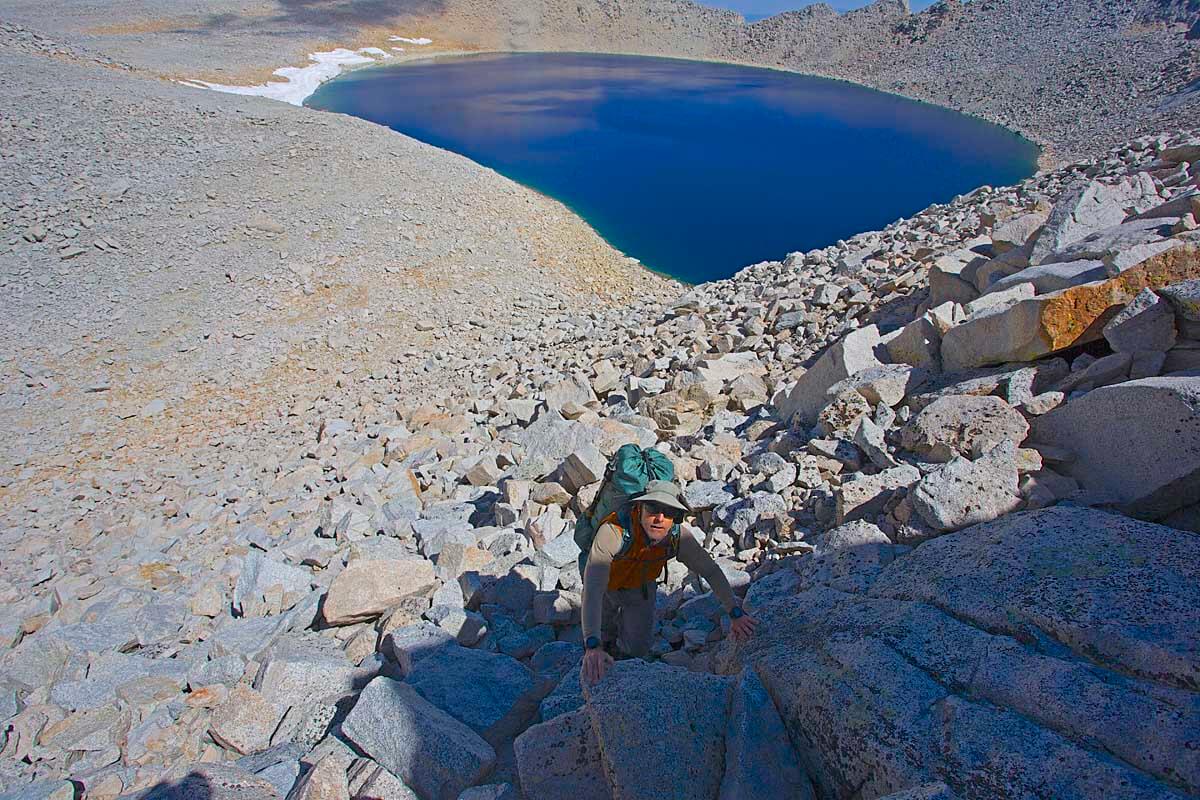
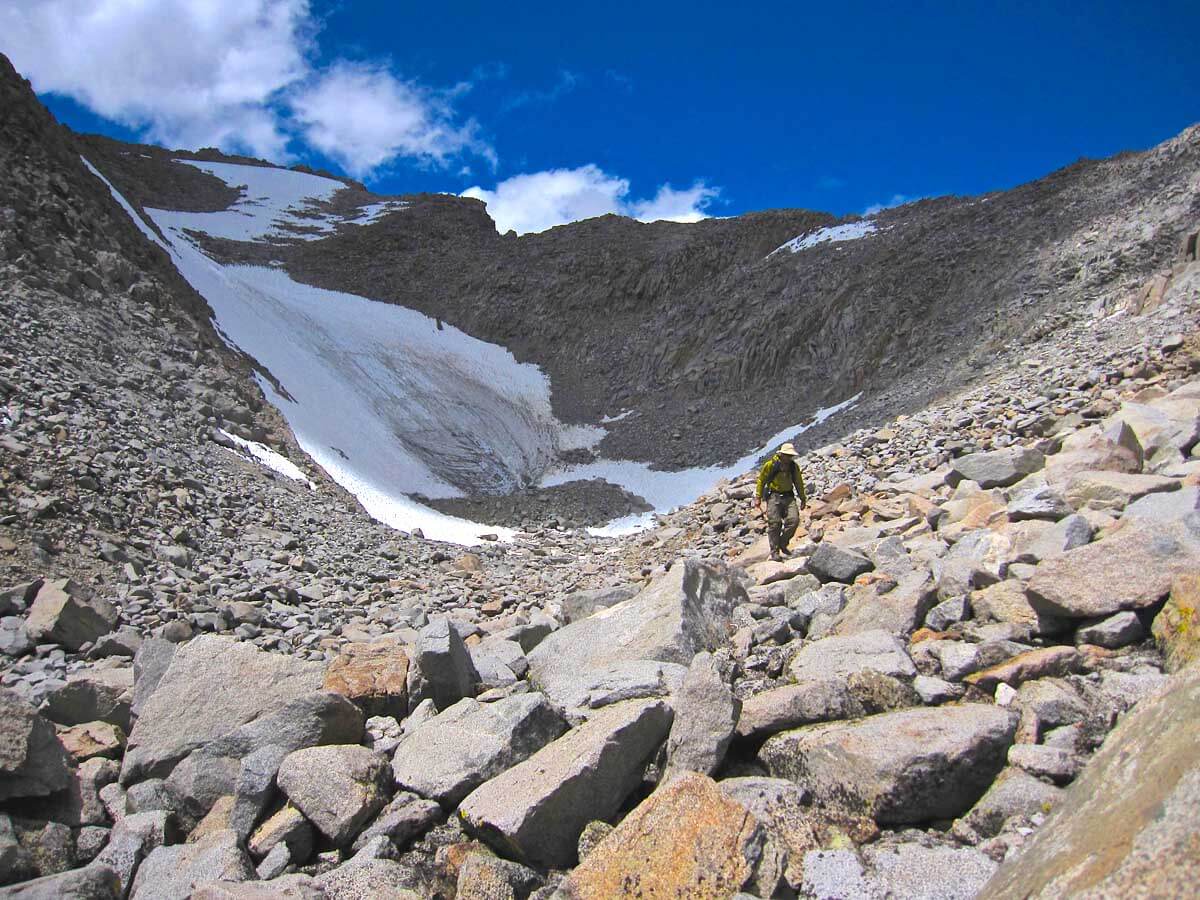
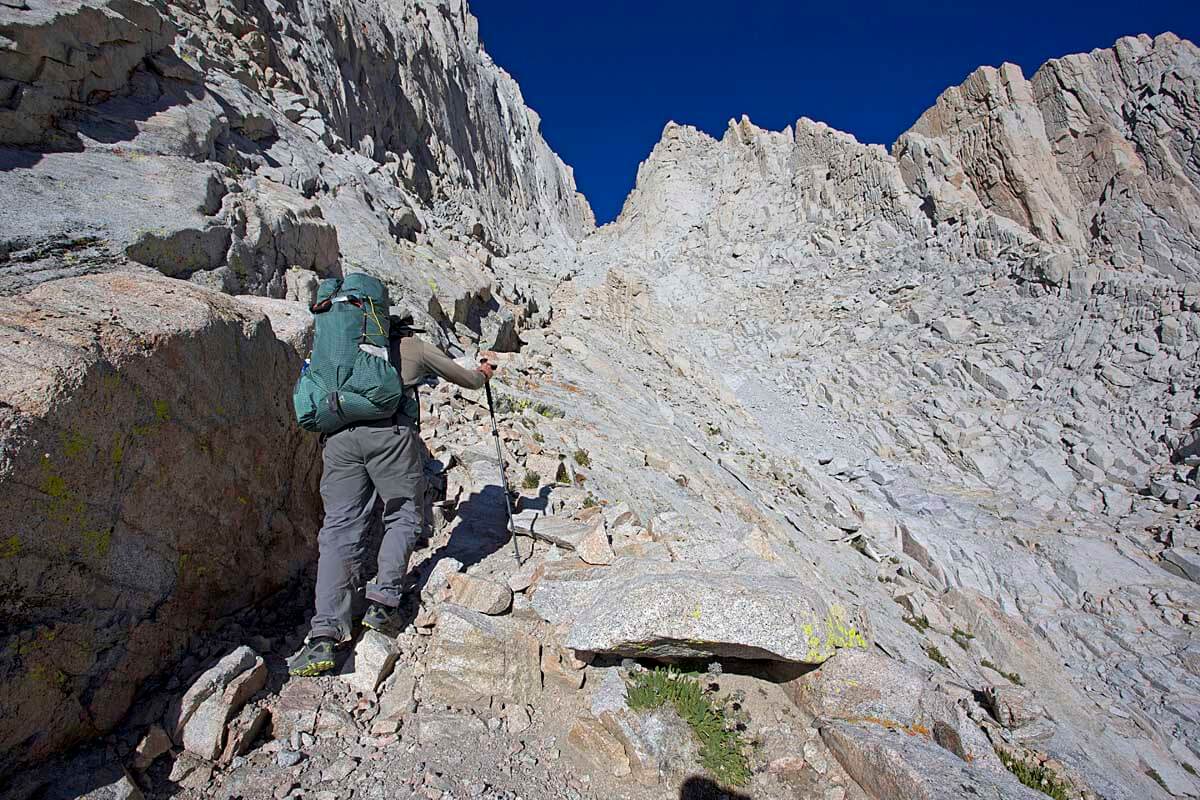
Above the headwall, a welcome and inviting walk of just over a mile leads toward Tulainyo Lake. This lake is the highest lake of its size in the lower 48 states. It has no inlet or outlet, instead it is tucked away in a bowl just below 13,000 feet, where few people get the pleasure of seeing it. Take another rest at the lake and get your bearings. Your next objective is the Russell-Carillon Col. This pass will be located far off to your right as you initially encounter the lake, and is not fully visible when you first see the lake. Drop down to the lakeshore, probably crossing large snowfields that are nearly permanent, and traverse along the southwest shore. The Russell-Carillon Col will now become obvious and somewhat intimidating. It is easier than it appears. As you near the southern tip of the lake, begin the climb up on the talus, heading for a point directly below the low point of the pass. At the top of the talus you will encounter a point where the rock suddenly gets steeper and scrambling is required. This climb of about 250 feet is moderate class 3, and is broken up by numerous large ledges. Some hikers may want a hand in a few places, or may want to pass up their packs for a move or two. The ledges make this climb quite safe, with the most significant danger being loose rock dislodged by your own party. We suggest you alternate climbing and use the large ledges to keep your party clear of the fall line from your highest members at all times. In a few fun minutes you will emerge again onto the Sierra crest at 13,300 feet on the Russell-Carillon Col.
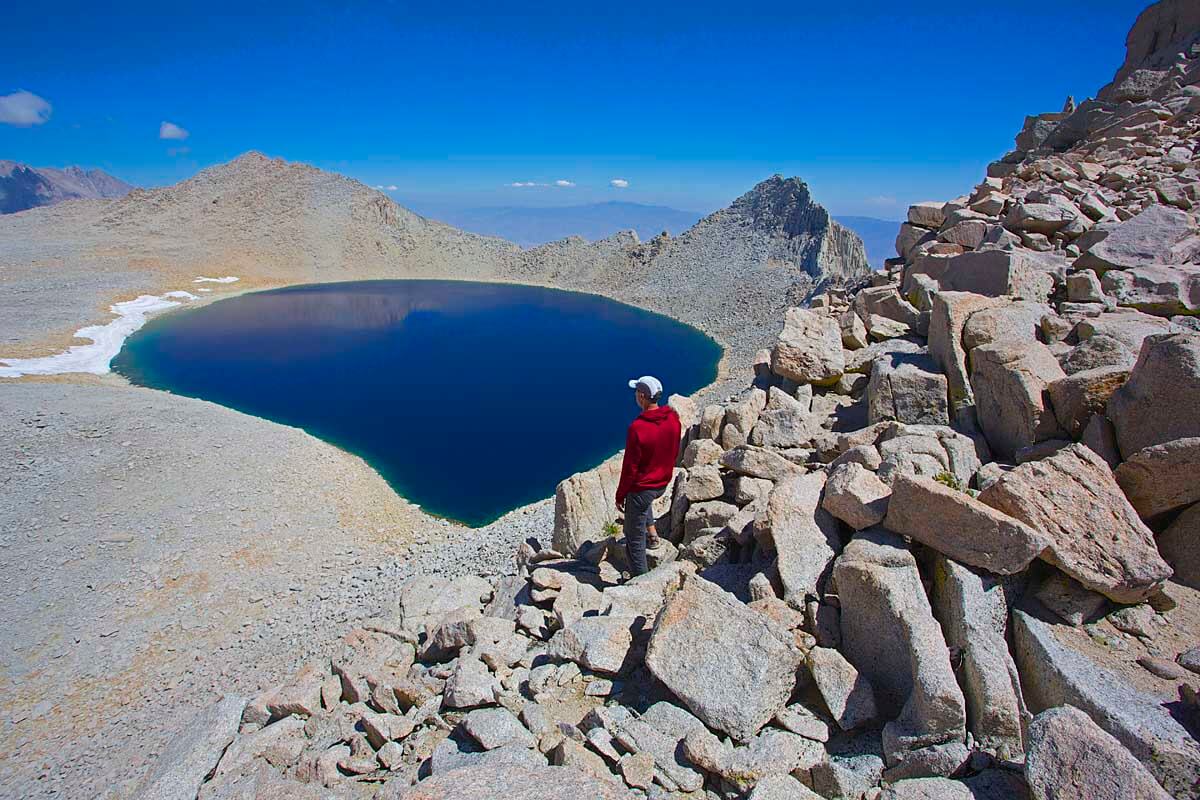
Don checks out the blue depths of Tulainyo Lake from the top of Russell-Carillon Col.
Alan begins the descent from Russell-Carillon Col down to Upper Boy Scout Lake. The col is at far right, Mount Russell is directly behind Alan. Mount Whitney is the highest (rightmost) peak of the three peaks on the left. [photo Don Wilson]
SECTION 4: UPPER BOY SCOUT LAKE TO HORSESHOE MEADOWS
It just keeps getting better. This section is the highest bit of off trail hiking that either of us has done in the US. It contains a full traverse of Mount Whitney, a walk along the highest mountain ridge in the lower 48, an enormous and fun scree slope, challenging and intricate navigation, and several large and lonely alpine lakes. It’s worth a reminder that you will be in the Mount Whitney Zone, with its regulations regarding human waste, from the time you cross the Russell-Carillon Col until you summit Mount Whitney.
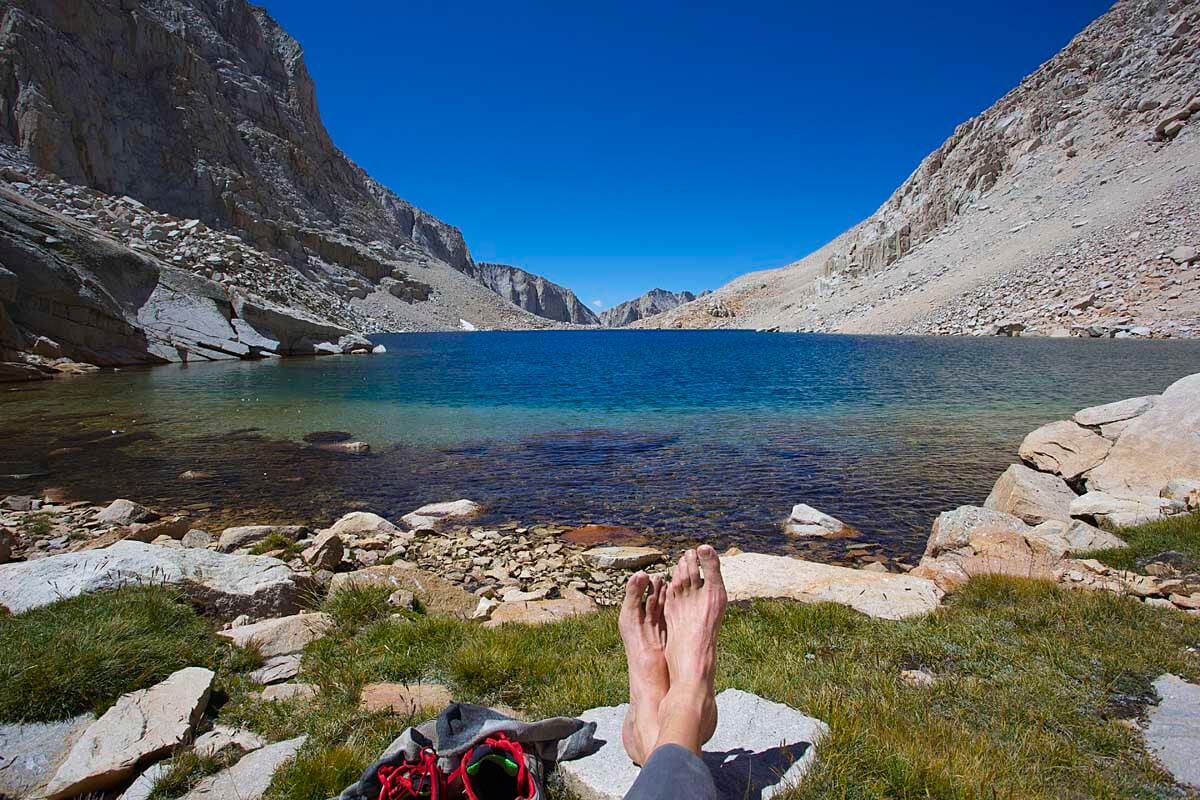
Our first downtime of the trip. Don reading some Rilke at Upper Boy Scout Lake. We arrived here mid-afternoon and had a relaxing and restorative afternoon before climbing Mt. Whitney the next morning.
Alan at our bivy site along the shores of Upper Boy Scout Lake. [photo Don Wilson]
Morning light on the east face of Mount Whitney. Keeler Needle rises in the center of the photo, left of Mount Whitney.
Leaving Upper Boy Scout Lake, head south across its outlet and scramble up slabs until you join the informal climber’s trail that heads east up and over a headwall. If you hike this section in the early morning you will be granted spectacular views of the east face of Mount Whitney as the sun lights up the peaks. Continue east up fairly easy to follow trails until you begin to traverse along a south facing slope which is south of Iceberg Lake. There are many possible routes to reach Iceberg Lake, all of them requiring an eventual turn to the north up steep slopes. There are numerous seeps in this area which can make the slabs slippery, especially if temperatures are near or below freezing. At 12,700 feet you will climb over a final rise and come to the south shore of Iceberg Lake. Isolated and cold, the lake is nestled snugly in a steep cirque between Mount Whitney and Mount Russell. There are numerous bivy sites along the south shore, most with level camping and stone walls to provide some protection on windy nights. This is a good place to rest, get a drink and refill your water supplies. There is no water, other than possible snowmelt, for the next 5 hours or so of hiking (until you reach the uppermost Crabtree Lake, below Crabtree Pass).
Your next objective is an ascent of Mount Whitney via the Mountaineer’s Route. This route is not at all difficult in good conditions, but if the route holds significant snow or ice it can quickly become more serious, requiring a rope and crampons for most people. It’s a popular route, so a little searching on the internet can usually provide good info on current route conditions before you leave home. In most years the route is in good shape by early July and remains so until mid September.
Alan slogs his way of steep, loose scree on the Mountaineer’s Route. The climb of Whitney and traverse across its southern ridge is a highlight of the SoSHR.
From Iceberg Lake, head almost directly east up slabs and boulders, aiming for the north side of the east buttress. The notch that is your eventual objective is obvious on the skyline at 14,000 feet, some 1,300 feet above Iceberg Lake. By staying left of the scree you can hike and scramble to the base of the east buttress on mostly good rock. As you reach the base of the east buttress you will be forced to the right into the main gully of the Mountaineer’s Route. Continue up the gully, staying on the most stable rock you can find (usually on the left). Eventually you will be forced to head directly up a long section of loose scree. This can be a lot of work, as you climb up and slide down with each step. But it is not difficult, and your position alongside the east buttress is simply spectacular. Clean, golden granite surrounds you, and the vistas to the north and east more than make up for the loose conditions of the climb. After a long grunt, you arrive at the notch, just above 14,000 feet. From here you will climb the most technical section of the route in the final push to the summit.
The final Class 3 portion of the Mountaineer’s Route to the summit of Mt. Whitney. It had snowed on Mt. Whitney the week before with an ensuing melt and freeze cycle. This left the final 300 ft of the Mountaineer’s Route quite icy and a bit more entertaining. The easier route up the notch (to the left of Alan in the photo) is completely covered in a sheet of ice (verglas). This forced us up on steeper and more difficult rock. Fortunately we were able to find non-icy rock and did not need any traction devices. [photo Don Wilson]
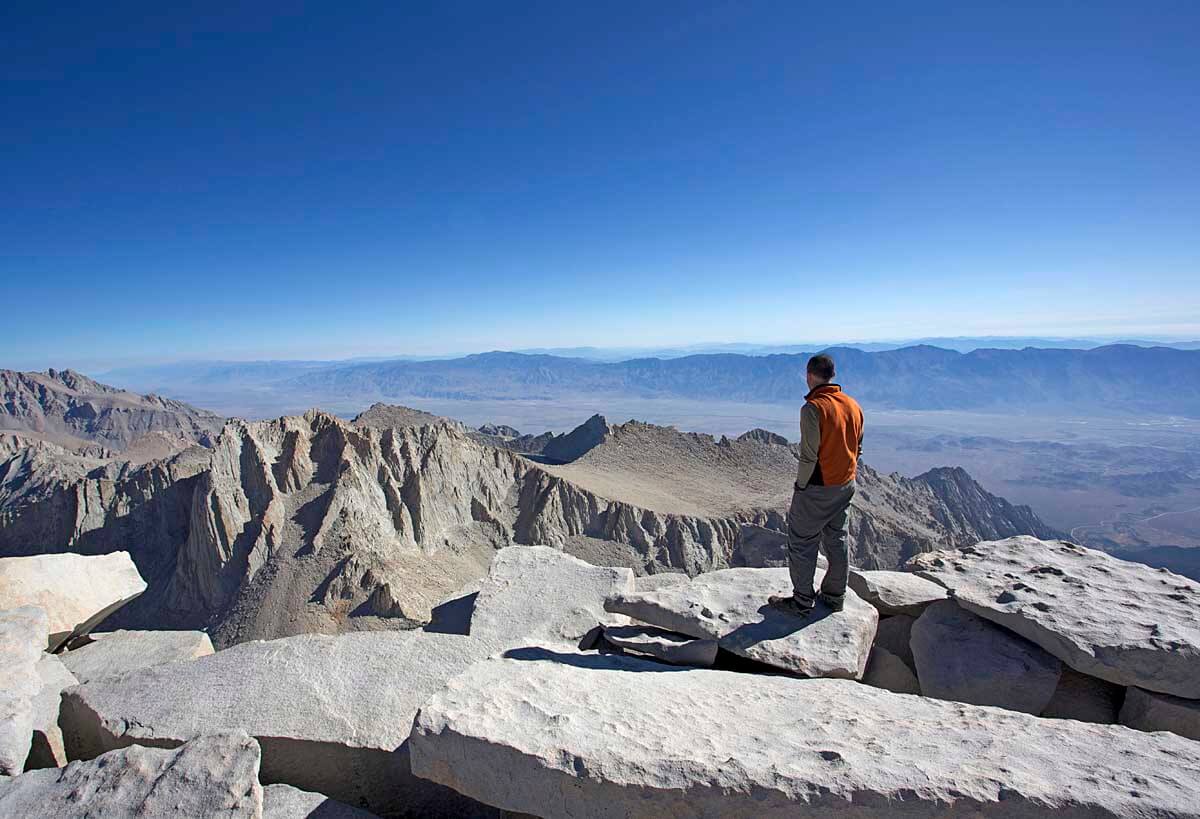
Alan looks off to the northeast from the summit of Mount Whitney. [photo Don Wilson]
Look back uphill at this switchback and you will see a very faint use trail that heads directly up on talus and scree, back towards the crest. Leave the trail here knowing you are heading into a challenging section of hiking. Head south, climbing directly uphill until you reach the crest and a low angle plateau at 13,600 feet. Once on the crest, begin dropping to the south, slowly at first, and then with an ever increasing angle on sandy scree. Your objective is to reach the upper end of the lake that lies just west of Crabtree Pass. As you drop, look for ledge systems that allow you to traverse east toward relatively flat terrain above the upper end of the lake. Then turn south to reach a small grassy haven on the east shore. This is the first reliable water since you left Iceberg Lake.
Taking a rest at the uppermost Crabtree Lake, just west of Crabtree Pass. At 12,119 feet, this isolated lake is the first water source since Iceberg Lake (i.e. summiting Mt. Whitney and traversing the Whitney Crest). It has a small patch of grass on its eastern shore. The lake is a welcome respite after the dusty 1500 foot descent from the crest. [photo Don Wilson]
Sky Blue Lake, looking north towards Crabtree Pass from near the lake’s outlet. (Pass not visible in the photo but in the vicinity of the larger of the two white cloulds on the right horizon.) The obvious cliff bands above and right of the lake force a roundabout descent to the west (on the left in the photo) from Crabtree Pass. Neither the cliff bands nor the lake can be seen for most of the descent.
Drop down from the pass, heading slightly right (south) of the direct fall line, aiming for the northwest corner of Lake 3697. Upon nearly reaching the shore of this lake, turn more west and go over a rise and through a faint notch, heading toward the smaller lake west of Lake 3697. You may be able to follow occasional cairns along this section (although not all are to be trusted). Continue traversing to the southeast shore of this lake, then turning south down slabs. About a half mile directly south of this lake the terrain flattens out. Head toward these flat sections and turn east, joining inlet streams that head down to Sky Blue Lake (still not visible). Hike east along these streams through narrow valleys, finally emerging onto slopes that provide a grand view of awesome Sky Blue Lake. Hike directly toward the north shore of the lake, where you can pick up use trails that circle the lake on its north and east sides. Cross the lakes’ outlet stream and scramble down slopes on the west side of the stream toward an obvious flatter valley below. Once on the valley floor, head south along Rock Creek, staying on the west side of the creek most of the way down. Intermittent use trails may appear, but much of the upper valley is devoid of trails. High, steep granite walls rise on both sides of the upper canyon. Use trails become more obvious as you get near 11,000 feet in elevation, and eventually the route becomes a good trail which you can follow all the way to a junction at 10,460 feet. Here you come upon a large meadow with a good trail that runs nearly perpendicular to your line of travel. There is good camping here. You have completed all the off trail travel and only pleasant trails separate you from the trailhead near Horseshoe Meadows.
Turn east (left) when you hit the trail and climb several hundred feet to another junction at 10,800 feet. Here you can take a short walk to Soldier Lake (not named on the map). Your route turns south (right) at this junction and begins a gradual climb toward New Army Pass. At 10,950 feet pass another junction where you turn east (left) toward New Army Pass. Hike up your final climb through alpine terrain. The climb up to New Army Pass does not cross the crest at its low point (huge cliffs on the far side), and instead the pass lies south of the low point, much higher up the crest at 12,300 feet. From the top of the pass you leave the Sierra crest for the last time and head down a series of impressive switchbacks past High Lake and Long Lake, and on popular trails along Cottonwood Creek. About 7 miles beyond New Army Pass you arrive at the Cottonwood Lakes trailhead, where a thrilling car ride down the steep and exposed road leads to the town of Lone Pine. This is a very popular trailhead – hitching a ride down to Lone Pine should be a simple affair.
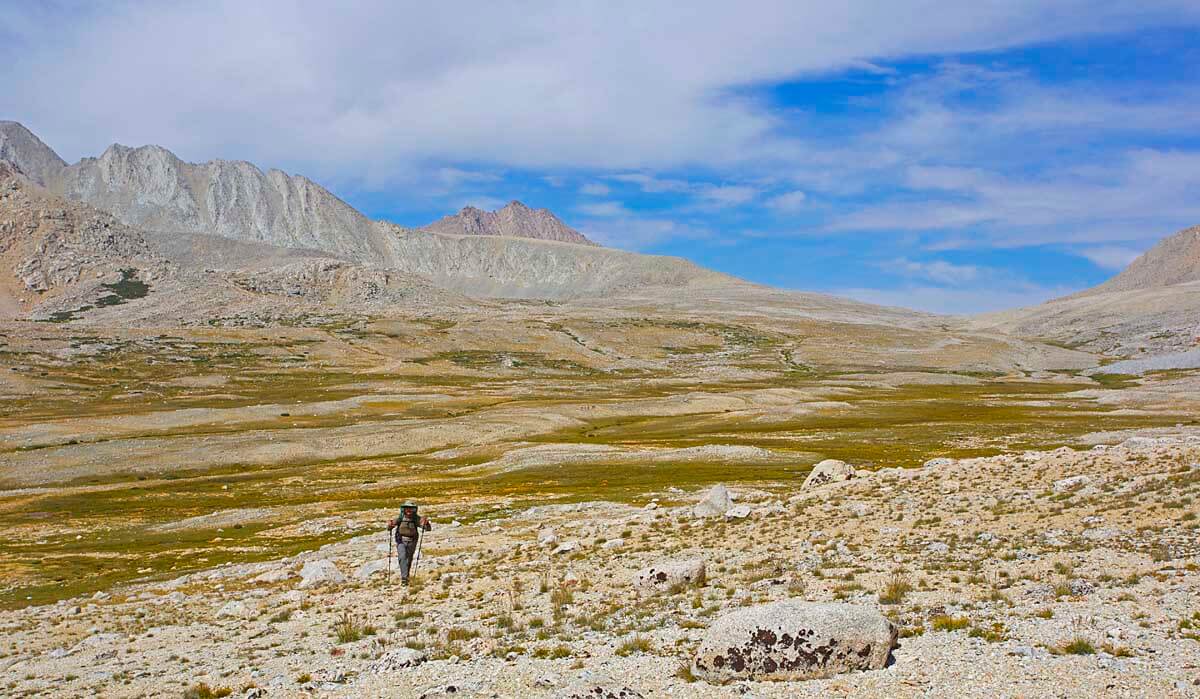
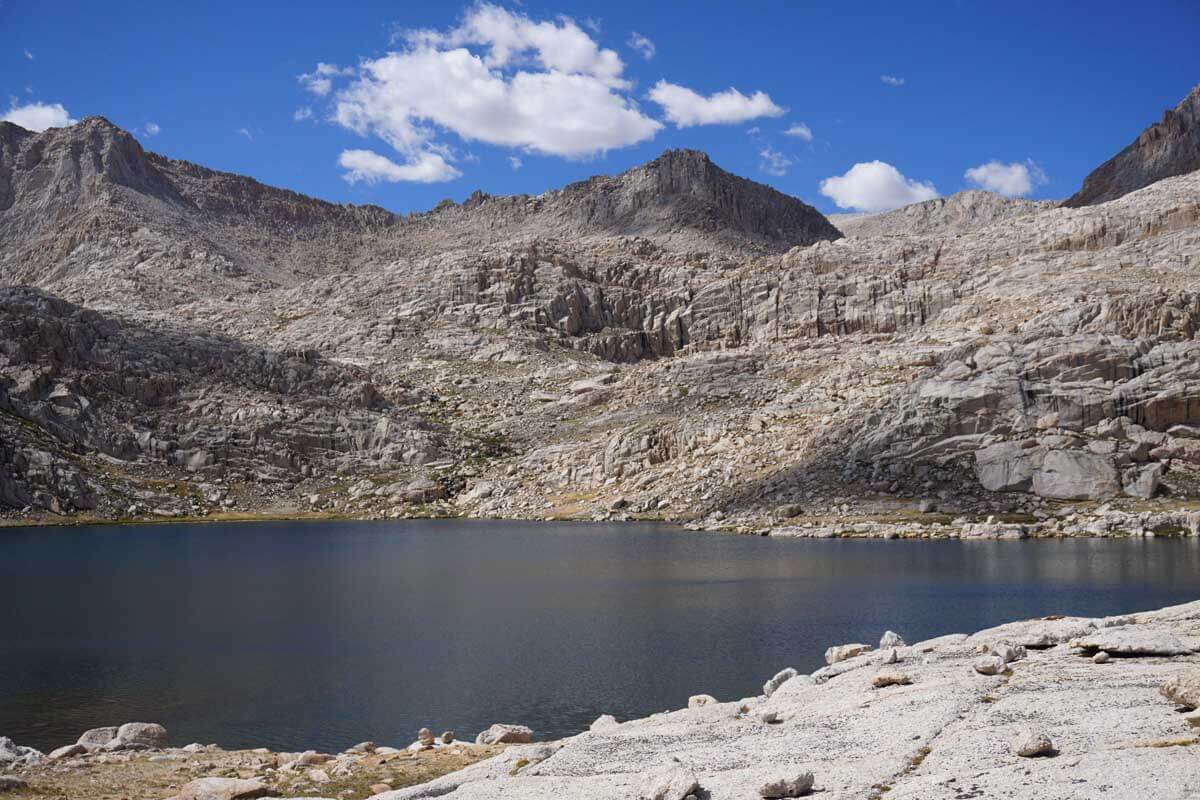
Surveying the vast and trailess expanse of the Wrights Lake Basin. [photo Don Wilson]
Other Published References (books, maps, etc.)
- High Sierra: Peaks, Passes, Trails, 3rd Ed.Feb 9, 2009
by R.J. Secor. Pretty much the bible of off-trail travel for the Sierras - The Sierra High Route: Traversing Timberline CountryMay 1, 1997
by Steve Roper The book that started it all! - Original Sierra High Route Mapset & Databook Andrew Skurka’s electronic mapset and data-book for Roper’s route. An excellent resource.

John Muir Wilderness/SEKI map set” Forest Service Publication; 3 map set at 1:63k
Long Name: A Guide to the John Muir Wilderness and Sequoia-Kings Canyon Wilderness. Inyo and Sierra National Forests, Sequoia and Kings Canyon National Parks ISBN: 978-1-59351-417-4 (Possibly no longer in print?) and very hard to find. It may still be in stock at above link.
This large 3 map set shows the entire Sierra south of Mammoth Lakes. Three very large maps not really suitable for use in the field, but the ultimate reference for planning off trail trips. We used this mapset to lay out the initial line of the SoSHR. Published by the Forest Service and difficult to find online. Available in outdoor shops and ranger stations in Mammoth Lakes, Bishop and Lone Pine.
Death Valley
If you get the chance, it’s certianly worth tagging on a trip to Death Valley to either end of this trip. After climbing Mt. Whitney the highest point in the lower 48 at 14,505 feet you can go to Badwater, the lowest point in North America, −282 feet (−86 m). If you are traveling from Las Vegas, you will literally drive through Death Valley on your way to and from the Trip.
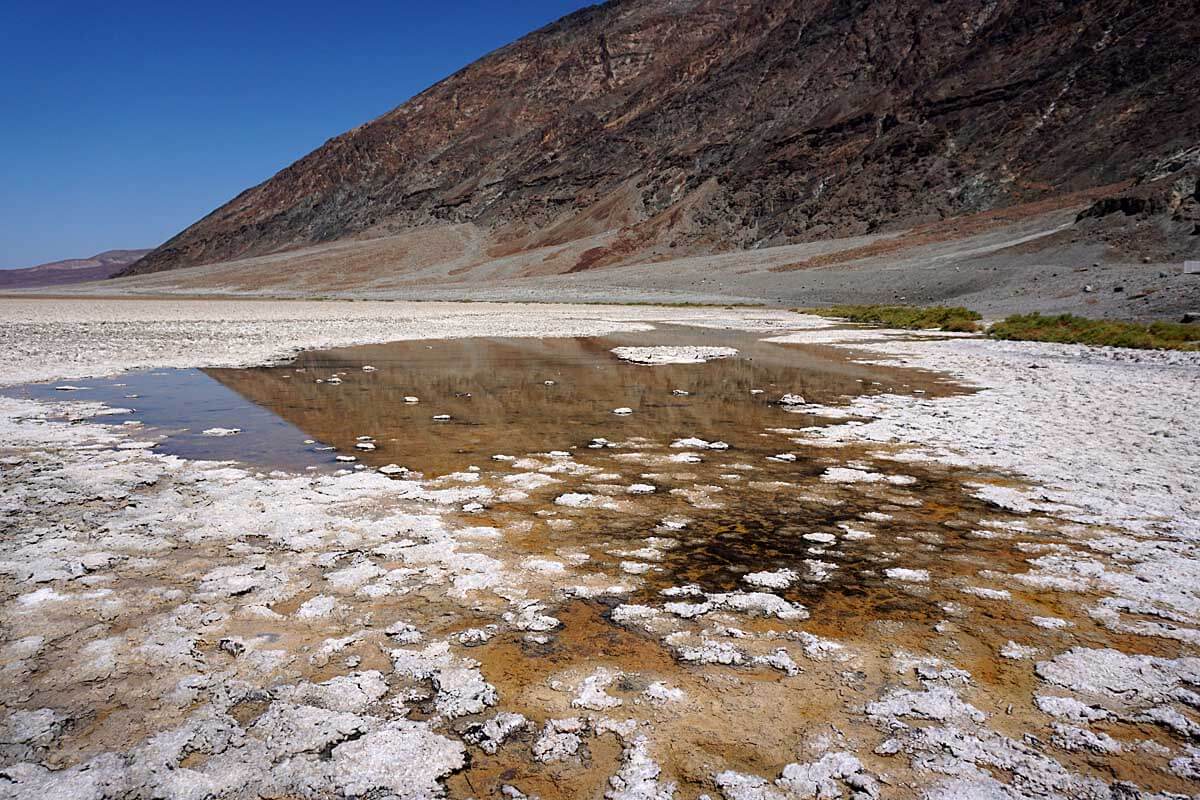
Badwater, the lowest point in North America, −282 feet (−86 m).