How to Train for Hiking & Backpacking Endurance
Last Updated: December 18, 2023


An efficient 12 week hiking training plan for busy lives
Hiking is a lifestyle, but it’s also an endurance sport; so how should you train for hiking and backpacking? For this article, we collaborated with lifelong hiker, physical therapist, and certified strength and conditioning specialist Dr. Simon Pratt to concoct a time-efficient, 12 week training plan with the goal of helping hikers improve their trail endurance.
Why train for hiking? When not under the stress of physical exhaustion, you are more relaxed and fully present to appreciate natural surroundings. You will have more fun and derive more joy from the experience. You can hike farther, see more in less time, and are less likely to become injured. Your schedule may not allow three weeks to complete the full JMT. But if you train for hiking, maybe you can do it in just two!
Whether you’re targeting a 10 mile day hike, or 25 miles per day backpacking, this hiking training plan can be customized to fit your schedule, itinerary, and endurance goals. It is designed to serve 9-5ers, informed by current academic literature, and will help you hike faster, longer, and more comfortably, while exchanging the least amount of time for the most amount of endurance benefit. All it takes is one day hike per weekend, plus three one hour sessions midweek. Specialized equipment is not required to train for hiking, and an access to a gym is merely recommended but not mandatory.
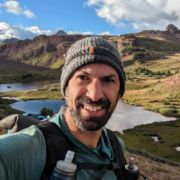
Lastly, this article represents an update to the hiking training plan first published and used by Alan Dixon to prepare for a strenuous 20-mile-per-day thru-hike of the GR20 in Corsica (seen throughout the photos). Many of Alan’s philosophies, especially the weekly training hike, were confirmed by Dr. Simon Pratt, and are still woven throughout this guide.
You make Adventure Alan & Co possible. When purchasing through links on our site, we may earn an affiliate commission at no additional cost to you. Here’s why you can trust us.
Daily Hiking Training Plan
- Sat: Long Day Hike
- Sun: Rest Day
- Mon: Rest Day
- Tue: Strength Training
- Wed: Aerobic Training
- Thu: Aerobic/Anaerobic Training
- Fri: Rest Day

Overview Of How To Train For Hiking & Backpacking
Simon Pratt: The goal of this hiking training plan is to (1) help you walk faster for longer without being as fatigued at the end of the day and (2) accommodate busy schedules via mid-week training sessions no longer than one hour per day. This program follows the principle of specificity which states, gains in physical performance are the greatest when individuals systematically exercise with the task in which performance improvements are desired1.
Backpacking and hiking require a unique combination of aerobic fitness and muscular strength. Both measures of strength, and to a higher degree, aerobic fitness are correlated with loaded carriage performance2. This means that both should be included in a backpacking training plan. Aerobic training alone or resistance training alone can improve backpacking performance, combining them can produce an even larger effect. When adding a day of loaded carriage exercise that effect can double1. Specificity, it turns out, is important!
Since the outcome we are trying to achieve is faster, longer hiking, the best way to measure the results of this program is to do a timed hike. This test can be flexible depending on your exact goals, but we recommend loading your backpack to 30lbs and timing yourself walking two miles on a familiar route1.
How To Train For Hiking: Daily Exercise Regimen
Saturday: Long Hike
Jump ahead to view the explanation ↓
- Complete a half or full length day hike, once per weekend
- Hike at conversational pace
- Wear the shoes and backpack you’ll use on the hike you’re training for
- Scale up training by hiking longer and/or farther, maintaining a conversational pace
- Scale down training by hiking slower
Tuesday Strength Endurance Day
Jump ahead to view the explanation ↓
- Weighted reverse lunges, 2-3 sets, 15-20 reps, 60%1RM
- Weighted step ups, 2-3 sets, 15-20 reps, 60%1RM
- Weighted single leg calf raises, 2-3 sets, 15-20 reps, 60%1RM
- If you don’t have gym-access, wear a backpack filled with heavy objects
- Scale up training by adding more weight, maintaining set/rep structure
- Scale down training with less weight, maintaining set/rep structure
Wednesday: Aerobic Endurance Day
Jump ahead to view the explanation ↓
- 30-60 minutes of running or hiking with a pack on
- Keep pace at 60-70% of max heart rate (conversation pace)
- Scale up training with longer or more frequent sessions, maintaining pace
- Scale down training with slower pace, intermittent walking, maintaining duration
Thursday: Aerobic or Anaerobic Endurance Day
Jump ahead to view the explanation ↓
- Uphill running, or speed hiking with pack, or stationary bicycle
- 2-4 minute intervals, 4-8 reps, 2-4 min rests
- Keep pace at 85-95%+ max heart rate (can only speak one to two words max)
- Add more weight if you don’t have access to steep hills
- Scale up training by increasing interval time or number of reps, maintaining heart rate
- Scale down training with shorter intervals, fewer reps, maintaining heart rate
- Note: beginner and intermediate hikers should repeat the aforementioned aerobic endurance training day instead of conducting anaerobic training. Hikers at the advanced or elite endurance level should begin to conduct anaerobic endurance training.
Customize The Hiking Training Plan To Your Current Endurance Level
Mobile users rotate device for full-width table
| Day | Beginner* | Intermediate** | Advanced*** | Elite**** |
| Mon | Rest | Rest | Rest | Aerobic |
| Tue | Strength | Strength | Strength | Strength |
| Wed | Aerobic | Aerobic | Aerobic | Aerobic |
| Thu | Aerobic | Aerobic | Anaerobic | Anaerobic |
| Fri | Rest | Rest | Aerobic | Aerobic |
| Sat | Long Hike | Long Hike | Long Hike | Long Hike |
| Sun | Rest | Rest | Rest | Rest |
*Beginner: A challenging hike is 3-6 miles and less than 2k elevation gain per day
**Intermediate A challenging hike is 6-10 miles and/or 2-4k elevation gain per day
***Advanced: A challenging hike is 10-20 miles and/or 3-5k elevation gain per day
****Elite: A challenging hike is 20+ miles and/or 5k+ elevation gain per day

Explaining the Long Hike Day
Actually hiking is the most effective way to train for hiking & backpacking
- Complete a half or full length day hike, once per weekend
- Hike at conversational pace
- Wear the shoes and backpack you’ll use on the hike you’re training for
- Scale up training by hiking longer and/or farther, maintaining a conversational pace
- Scale down training by hiking slower
Simon Pratt: This is the single most important day in the program. It’s game day! This is what you are training for, and specificity is critical. It bears repeating that adding a day of exercising with a backpack doubled the effect of resistance and aerobic conditioning alone1. It should also be the most fun day of this workout plan.
Explaining the Strength Endurance Day
The science behind why strength conditioning will help you train for hiking
- Weighted lunges, 2-3 sets, 15-20 reps, 60%1RM
- Weighted step ups, 2-3 sets, 15-20 reps, 60%1RM
- Weighted single leg calf raises, 2-3 sets, 15-20 reps, 60%1RM
- If you don’t have gym-access, wear a backpack filled with heavy objects
- Scale up training by adding more weight, maintaining set/rep structure
- Scale down training with less weight, maintaining set/rep structure
Simon Pratt: Runners will be familiar with the term running economy. It can be defined as the steady-state volume of oxygen required at a given submaximal speed3. This means that if you have a greater economy, you can run or walk faster at the same level of effort.
Strength training interventions have been shown to improve running economy even in highly trained runners3. Strength training increases type I and type II muscle fibers’ strength, resulting in less motor unit activation and more efficient muscle recruitment patterns to produce a given force, allowing a runner to run more efficiently at a given running speed3.
When carrying heavy loads, joint contribution shifts proximally up the kinetic chain from the ankle and knee to the hip4. As such, our strengthening day should target the muscles around these joints. Lunges will target the knee and hip; step ups will target the hips, and knee; and calf raises will target the ankle. We have picked these exercises because they mimic the movements you perform while hiking (remember that specificity thing?) but you can pick any exercise that targets these muscles, as long as the dosage is correct.
Before strength training it is important to warm up. You can do this by performing the same exercises with a smaller load or dynamic stretching. But this can also be a great opportunity for a bit more aerobic training.
To calculate your 1 Rep Max (1RM), use weights or load up a backpack and do the exercise until you can no longer perform it with good form. If you go over 15 reps, rest 3 minutes, add weight, and test again. There are many online calculators to estimate your 1RM based on how many repetitions you are able to do until failure.
Explaining the Aerobic Endurance Day
The science behind why aerobic exercise will help you train for hiking
- 30-60 minutes of running or hiking with a pack on
- Keep pace at 60-70% of max heart rate (conversation pace)
- Scale up training with longer or more frequent sessions, maintaining pace
- Scale down training with slower pace, intermittent walking, maintaining duration
Simon Pratt: Aerobic fitness is the most highly correlated fitness marker with loaded carriage performance2. Therefore, improving our aerobic fitness is a top priority for hikers. Aerobic fitness can loosely be defined as the body’s ability to take oxygen from the air and convert it to energy. We do this most efficiently when we are utilizing fat as our primary energy source. Fat contains more than twice the energy per gram, 9 calories, as both carbohydrates and protein, 4 calories each. Aerobic endurance training at low intensities is the best way to improve our ability to use fats as fuel.
Among innumerable other advantageous health benefits, endurance training leads to increases in, red blood cell volume, hemoglobin mass, skeletal muscle capillarization, and all of these adaptions allow us to get more oxygen to the working muscles which increases our VO2 max5. Mitochondrial density is also improved, and with this type of exercise the increases in mitochondrial density reflect an improved capacity to use fat as a fuel source5-6, the most efficient source of energy to use.
The best way to know if you are staying within your aerobic threshold is to monitor at what heart rate your lactate levels start to rise. Since most of us do not have access to this monitoring technology, a substitute is that your aerobic threshold will be around 60-70% of your heart rate max depending on your fitness level. Estimate your maximum heart rate using the following formula: 208-(0.7 x Age). Or simply use the Talk Test. If you can hold a full conversation with someone, but they can tell that you are exercising, then you are under the threshold. Both running and hiking with a pack are great options for this type of training. Hiking is more specific but both forms or exercise use largely the same muscle groups. If you enjoy one over the other, pick that one.
It is important to note that this pace is easier than most people would normally train. You may have to go into a brisk walk if running or slow down your hiking speed to stay under this threshold, especially when ascending hills.
Explaining the Anaerobic Endurance Day
The science behind why anaerobic exercise will help you train for hiking
- Uphill running, speed hiking with pack on or stationary bicycle
- 2-4 minute intervals, 4-8 reps, 2-4 min rests
- Keep pace at 85-95%+ max heart rate (can only speak one to two words max)
- Add more weight if you don’t have access to steep hills
- Scale up training by increasing interval time or number of reps, maintaining heart rate
- Scale down training with shorter intervals, fewer reps, maintaining heart rate
Simon Pratt: Anaerobic or high intensity training can also enhance a backpacker’s aerobic fitness. High Intensity Interval Training (HIIT) has gained popularity in recent years and for good reason. This type of training can give your aerobic and anaerobic fitness a boost and with less total training time. HIIT results in similar or even greater increases in VO2 max compared to more traditional aerobic training and is attributed to similar mechanisms including, capillary density, increased red blood cell volume and hemoglobin mass, all resulting in more oxygen getting to the muscles7. Repeated bouts of HIIT produce as much as 25–35% increases in mitochondrial content in as few as 6–7 sessions8.
As the name implies, anaerobic training also improves your anaerobic fitness. When training at higher intensities you rely more on carbohydrate oxidation and utilize more glycogen than you do at lower intensities of exercise8. This type of exercise increases key enzymes associated with glycogenolysis as well as increasing the buffer capacity of the muscles to protect against the drop in pH that comes from glycolysis without oxygen, the cause of muscle fatigue7-8.
Despite its benefits this type of exercise is most likely to cause an injury or result in overtraining. Extra aerobic training in place of anaerobic training is recommended for beginners and intermediate exercises. I will repeat, HIIT results are similar to more traditional aerobic training. One of the biggest benefits of this type of exercise for backpacking is that it will save you training time but if you replace it with another aerobic session you will not be missing out on much benefit, unless you frequently run from bears.
The best way to know if you are staying above your anaerobic threshold is to monitor at what heart rate your lactate levels rise sharply. Again, a good substitute for advanced technology is the Talk Test. This time however you should not be able to hold a conversation. Aim to only be able to say one or two words before taking a breath. It can be hard to get to this intensity on level ground so try to find a long hill to perform this exercise. Though less specific, using a stationary bicycle is the safest option for this type of training and a recommended way to start incorporating this type of training into your plan.


Jaeger Shaw: This hiking training plan does require any specialized equipment. However certain items may help improve or streamline your experience. From heart rate monitoring watches that work in the backcountry to comfier trail shoes, above you’ll find a few recommendations.
Effectively improve your trail endurance by packing lighter gear


Jaeger Shaw: If you want to train for hiking, get ready for a marathon, not a sprint. Endurance gains occur over the course of weeks-to-months. But there is an immediate way to help you hike farther, faster, and more easily – carrying lighter weight gear.
Compared to traditional backpacking gear, an ultralight kit will allow you to hike faster, longer, and more efficiently while also decreasing muscle fatigue and the likelihood of injury. These are all of the same benefits we hope to gain by training for hiking, only they can be achieved immediately by converting money, rather than training time, into results.
And the science backs this up. According to Impact of Load Carriage on Metabolic Efficiency (2022) by Tyson Ngatikaura et al., there is a linear increase between pack load and VO2, indicating a decrease in running economy at higher weights9.
To maximize weight savings, start by upgrading the big four – your tent, backpack, sleeping bag, and sleeping pad. With an ultralight version of each, the combined system will weigh roughly five pounds. Conversely, a traditional version of each of the big four will weigh 10-15 lbs, two or three times as much as their ultralight equivalents. Upgrading to ultralight apparel could save you another five pounds. Carrying more compact and nutritious food, as well as adopting a drink-on-the-go strategy could save you another five pounds in food and water weight. Pretty soon, you’re carrying 20 pounds less gear without any sacrifices to comfort!
Use GPS Software To Train For Hiking Hills

Jaeger Shaw: You may not have access to nearby mountains, but a majority of people live within reasonable striking distance of somewhere hilly (sorry Midwest). By reducing time spent commuting to scenic trails, you will have more time to actually train for hiking. It may not be as fun as summiting a mountain, but conducting your aerobic training or long day hikes at a local park increases the ratio of endurance-gains-vs-total-time-invested.
Any GPS software, such as GAIA GPS, can be used to plan hiking routes in local parks. Move way points around to optimize your route for elevation gain.
The two parks nearest to me are called Golden Gardens Park, and Carkeek Park. While neither are massive, they’re both ripe with surprisingly steep terrain, even by Seattle standards. A few minutes on GAIA GPS and I created a four mile long Carkeek Park loop with 800′ of elevation gain. Perfect for an hour-long aerobic session! A few more minutes, and I discovered that by lapping Golden Gardens beach-to-bluff trail 12 times, I could climb 3k elevation gain in just 3.7 miles.
If you live somewhere that is completely flat, in lieu of hills, you should conduct your aerobic training with added weight, by using a weight vest or loaded pack.

Conduct A Shakedown Trip As Part Of Backpacking Training
Jaeger Shaw: As we note, backpacking is an endurance sport and aerobic fitness is your best asset. But mastering gear, nutrition, trail rhythms, and camp skills is another way to move faster, safer, and more efficiently through the backcountry. Even the fittest ultra runner won’t have a good trip if their backpack is chafing, their stove doesn’t work, and their tent caves in overnight.
If you are training for a challenging upcoming backpacking trip, we strongly recommend conducting a shakedown hike first to make sure your entire kit is in working order. You don’t want to train for hiking for months, only to bail on the trip because your gear doesn’t work.
To do this, gather all of the gear you will use on the objective for which you are training, and take it out on a local overnight backpack. Pitch your tent, cook dinner on your stove, practice loading/unloading your pack, etc. Getting reps in with your kit will make everything easier and less stressful when it matters most.
If you can save 30-60 minutes per day by reducing the amount of time spent packing/unpacking, fussing with gear on trail, taking care of camp chores, and tent setup/break down, it is the equivalent time savings to hiking 5-10% faster.

Conclusion: How To Train For Hiking & Backpacking
Jaeger Shaw: We conclude with a few friendly reminders. (1) Listen to your body. If something hurts, don’t do it. If you suspect you may have an injury, consult a qualified professional. (2) Make it work for you. If you can’t maintain four days of training per week, that’s okay. Just do as much as you can or want. (3) Plan a challenging objective trip as motivation. Estimate how many miles per day and elevation gain per day you will be doing. Try hiking at that level at least once (though ideally more) before your objective trip. (4) Have fun! If you’re not having fun, change things up.
Thank you for reading our guide on how to train for hiking! We hope you find it to be effective, attainable, enjoyable, and that it leads to actual gains in your hiking endurance. Happy trails!

Full Citations
- 1. Knapik, Joseph J; Harman, Everett A; Steelman, Ryan A; Graham, Bria S. A Systematic Review of the Effects of Physical Training on Load Carriage Performance. Journal of Strength and Conditioning Research 26(2):p 585-597, February 2012. | DOI: 10.1519/JSC.0b013e3182429853
- 2. Robinson J, Roberts A, Irving S, Orr R. Aerobic Fitness is of Greater Importance than Strength and Power in the Load Carriage Performance of Specialist Police. Int J Exerc Sci. 2018 Aug 1;11(4):987-998. PMID: 30147827; PMCID: PMC6102195.
- 3. Balsalobre-Fernández, Carlos1; Santos-Concejero, Jordan2; Grivas, Gerasimos V.3. Effects of Strength Training on Running Economy in Highly Trained Runners: A Systematic Review With Meta-Analysis of Controlled Trials. Journal of Strength and Conditioning Research 30(8):p 2361-2368, August 2016. | DOI: 10.1519/JSC.0000000000001316
- 4. Wills, Jodie A.1; Saxby, David J.2; Glassbrook, Daniel J.1; Doyle, Tim L.A.1. Load-Carriage Conditioning Elicits Task-Specific Physical and Psychophysical Improvements in Males. Journal of Strength and Conditioning Research 33(9):p 2338-2343, September 2019. | DOI: 10.1519/JSC.0000000000003243
- 5. Montero D, Cathomen A, Jacobs RA, Flück D, de Leur J, Keiser S, Bonne T, Kirk N, Lundby AK, Lundby C. Haematological rather than skeletal muscle adaptations contribute to the increase in peak oxygen uptake induced by moderate endurance training. J Physiol. 2015 Oct 15;593(20):4677-88. doi: 10.1113/JP270250. Epub 2015 Sep 14. Erratum in: J Physiol. 2018 Apr 1;596(7):1311. PMID: 26282186; PMCID: PMC4606528.
- 6. Lundby, C. and Jacobs, R.A. (2016), Adaptations of skeletal muscle mitochondria to exercise training. Exp Physiol, 101: 17-22. https://doi.org/10.1113/EP085319
- 7. Atakan MM, Li Y, Koşar ŞN, Turnagöl HH, Yan X. Evidence-Based Effects of High-Intensity Interval Training on Exercise Capacity and Health: A Review with Historical Perspective. Int J Environ Res Public Health. 2021 Jul 5;18(13):7201. doi: 10.3390/ijerph18137201. PMID: 34281138; PMCID: PMC8294064.
- 8. MacInnis MJ, Gibala MJ. Physiological adaptations to interval training and the role of exercise intensity. J Physiol. 2017 May 1;595(9):2915-2930. doi: 10.1113/JP273196. Epub 2016 Dec 7. PMID: 27748956; PMCID: PMC5407969.
- 9. Ngatikaura, Tyson; Draper, Shane; Poulton, Lily; Sipple, Ally; Standifird, Tyler; and Creer, Andrew (2022) “Impact of Load Carriage on Metabolic Efficiency,” International Journal of Exercise Science: Conference Proceedings: Vol. 14: Iss. 2, Article 155.


Share this entry