“In locations where trees are readily available—nearly all of the eastern United States plus a fair amount of the Mountain West—hammock camping is likely the best sleep system.”
Types of Backpacking Hammocks: is the second part of this three part series.
- Part I: Advantages and disadvantages versus ground systems
- Part II: Types of backpacking hammocks, and spec comparisons to ground systems
- Part III: Helpful tips and resources for a virgin hammock camper

A complete hammock system: hammock, tarp + guylines & stakes, topside sleeping quilt (inside, not visible), and under-quilt (not visible). Pisgah National Forest, NC
There are two main Types of backpacking hammocks on the market:
- Gathered End Asymmetric Hammocks
- Bridge Hammocks
The sleeping position of both designs is relatively flat, not banana-shaped as customarily found with backyard furniture hammocks. Both designs normally feature integrated or removable no-see-um bug netting. Finally, additional components are usually needed to complete a hammock system:
- Tarp for protection against rain and wind
- Sleeping quilt, worn atop the sleeper, to reduce convective heat loss
- Under-quilt, secured below the sleeper usually on the outside of the hammock, to reduce convective heat loss
Gathered End Asymmetric Hammock
This is by far the most prevalent camping hammock design. It is named for its two most distinct features:
- Its ends are gathered into a single bunch, and
- It has an asymmetric shape (i.e. not symmetric) that allows the sleeper to lay diagonally to its center-line, which is a flatter sleeping position than the banana-shape of the center-line.
It’s important to note that the diagonal sleeping position is enabled not just by the asymmetrical cut, but by the width of the hammock. An excessively narrow hammock, even if it is asymmetric, will not have enough material for a flat-ish sleeping position. There are two main advantages of a gathered end asymmetric hammock over the other common design, the bridge hammock (discussed below):
- Lighter weight
- Roomier, less constrictive feel
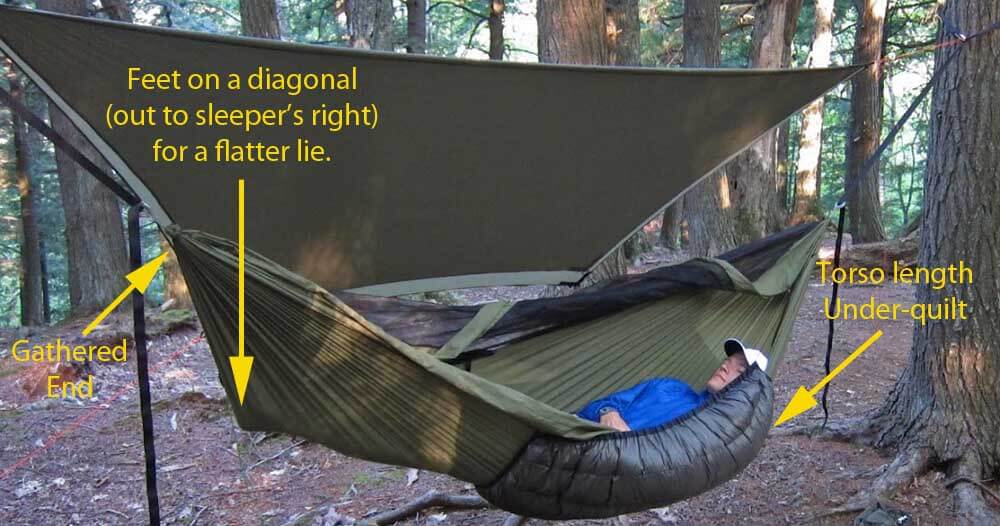
Typical gathered end hammock: Warbonnet (WB) Blackbird with Yeti under-quilt. Porcupine Mountains Sate Park, Upper Peninsula, Michigan
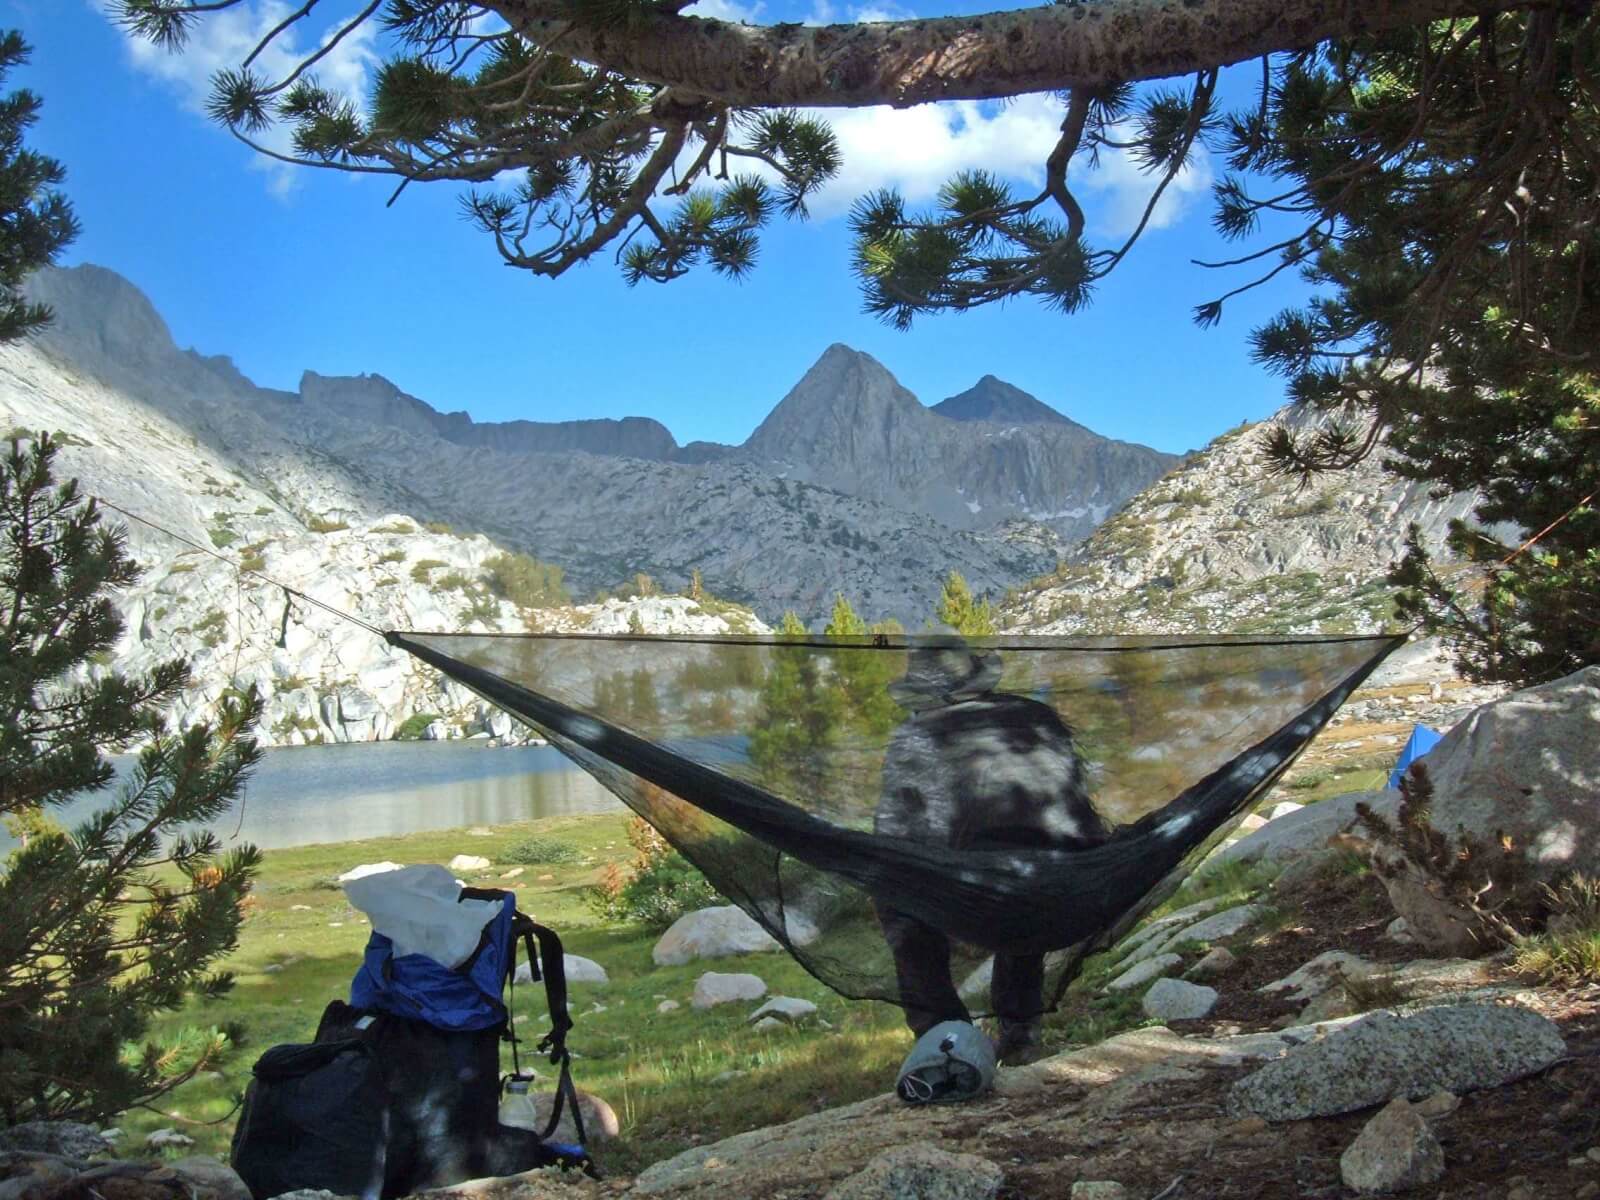
A gathered end hammock made by George “Tin Man” Andrews (self-portrait), being used as a camp chair during a thru-hike of the John Muir Trail in California.
Bridge Hammock
This design uses flat, non-gathered ends that are reinforced with a spreader bar. The resulting hammock shape is more of a flat, trough-like half-tube, versus the curved banana-shape (but not sleeping position) of a gathered end hammock. The bridge hammock provides a flatter sleeping position than the gathered end hammock, with less fuss and body adjustments, too. However, it has two potential drawbacks:
- The spreader bars add weight to the system; however, most designs allow trekking poles to be used as substitutes.
- Some sleepers may find that its tubular shape is more constrictive.
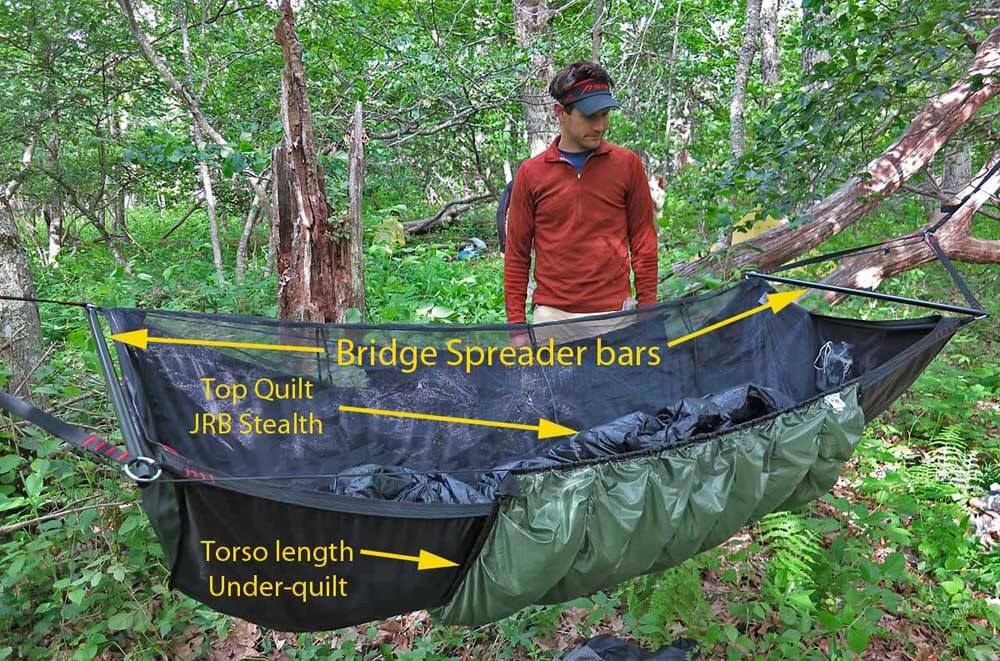
Andrew Skurka inspects a classic bridge hammock: the Jacks R Better Bear Mountain Bridge with Greylock 3 under-quilt.

Bridge hammocks create a “flatter” lie than gathered end hammocks. Note that flatter does not mean absolutely flat. Most sleepers find it more comfortable to have their head slightly lower than their feet.
About those under-quilts
To insulate themselves against the ground, which will steal heat from a ground sleeper through conduction, ground sleepers use closed-cell foam pads or air mattresses. Hammock sleepers can also lose heat from their underside, but due to air convention, especially if there is a wind. There are two options for reducing this heat loss: 1. Use a double-layer hammock to capture and control the ground-pad. The pad is inserted between the two layers of fabric. This extra layer of fabric adds weight, but it will securely fix the ground pad in place. Double-layer hammocks are popular for this reason. 2. Use an under-quilt. A better solution is to use a hammock-specific under-quilt, which increases the warmth and comfort of a hammock. It also increases the weight and expense of a hammock system, but by no more than would a NeoAir mattresses from Therm-a-Rest, which are extraordinarily popular with ground sleepers. As an added perk, you will not get dizzy inflating an under-quilt.
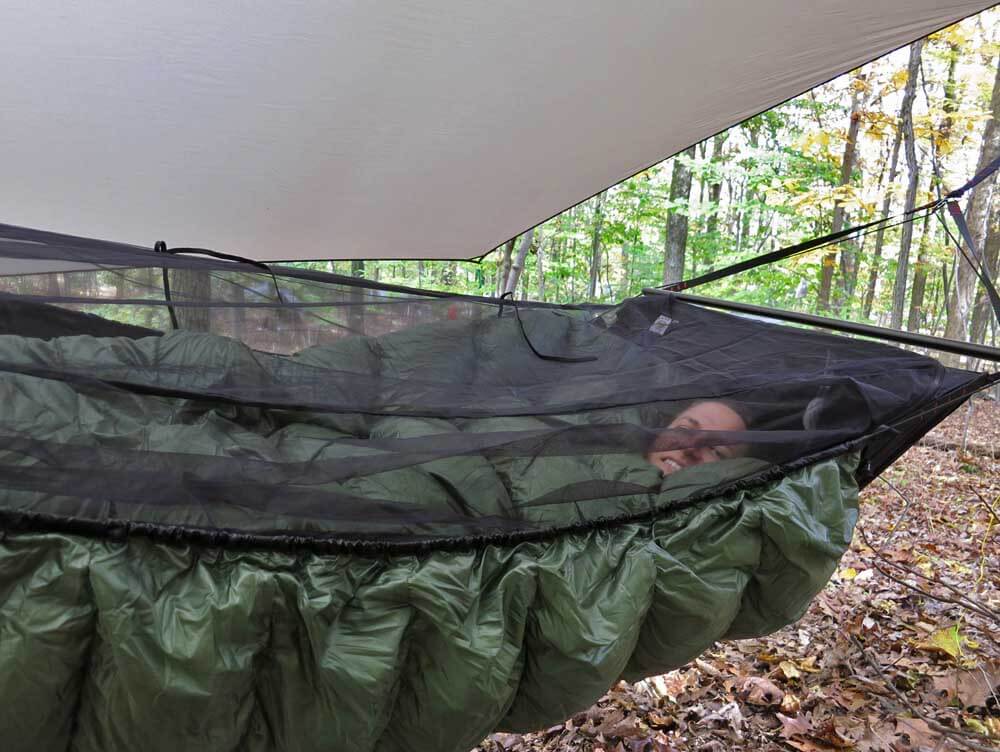
A good top and bottom quilt make all the difference for a warm night’s sleep. Pictured above is my wife, Alison, cocooned in down — a Jacks R Better High Sierra Sniveller top quilt and Greylock 3 under-quilt.
Hammock specs compared to ground systems
- How much does a hammock system weigh and cost?
- And how does the weight and expense compare to conventional ground systems?
As explained in Part I of this 3-part hammock series, it’s very difficult to compare hammocks and ground systems. Each system has several popular designs and an almost infinite number of configurations; there is no “standard.” Moreover, it’d be a challenge to find two systems that offer the exact same features and user experience. Nevertheless, I have tried, below. Each system offers a standard level of protection against rain, ground water, wind, and bugs. Each system also includes underside insulation, through either an under-quilt or a sleeping pad. Topside insulation (i.e. sleeping quilt) was not included into the weight or expense of these systems because this component would not change across systems.
The conclusion you should reach is that hammock systems weigh and cost about the same as “comparable” ground systems. Other considerations—such as where you normally backpack, whether you want a one-person or multi-person shelter, if you have already invested in gear that is optimal for one system or the other, and if you are struggling to sleep well with your current system—will drive decisions about whether you are better off with a hammock or ground system.
Gathered end asymmetric hammock system
- Blackbird Hammock, including webbing suspension ($190, 21 oz)
- Yeti 3-season under-quilt ($190, 12 oz)
- Edge Tarp with guylines and four stakes ($85, 13 oz)
Total: $465, 46 oz (2.9 lbs) Based on Warbonnet Outdoors products and pricing
Bridge hammock system
- BMBH Hammock (UL) , including webbing suspension ($190, 23 oz)
- Trekking poles (as substitute for spreader bars)
- Greylock, 3-season under-quilt ($190, 14 oz)
- Hex Tarp with guylines and stakes ($100, 16 oz)
Total: $480, 53 oz (3.3 lbs) Based on Jacks ‘R’ Better products and pricing
Ultralight hammock system (no bug net)
- Dutchware 11 ft Netless Hammock with Kevlar tree straps ($55, 10 oz)
- Hammock Gear Phoenix 3/4-length, 3-season under-quilt ($159, 9 oz)
- Hammock Gear Cuben Fiber Hex Tarp with guylines and stakes ($250, 7 oz)
Total: $464, 26 oz (1.6 lbs)
Ultralight hammock system (full bug net)
- Dream Hammock Darien UL, including suspension hardware ($180, 13 oz)
- Hammock Gear Phoenix 3/4-length, 3-season under-quilt ($144, 9 oz)
- MLD Cuben Hex Tarp with guylines and stakes ($300, 10 oz)
Tarptent system
- Tarptent Contrail ($225, 24 oz)
- Guylines and stakes (included, 2 oz)
- NeoAir, Air mattress ($160, 12 oz)
Total: $385, 38 oz (2.4 lbs) Based on TarpTent and Therm-a-Rest products and pricing
Ultralight tarp/bivy system
- Gossamer Gear SilTwinn Tarp with guylines and stakes ($175, 16 oz)
- Closed-cell foam sleeping pad ($20, 5 oz)
- Moutain Laural Designs Water-resistant bivy sack ($170, 8 oz)
Total: $365, 29 oz (1.8 lbs) Based on Gossamer Gear and Mountain Laurel Designs products and pricing