The 10 most scenic wilderness trips for spring backpacking in Washington, Oregon, and the greater PNW. These hikes are not to be missed!
Also called the Mountains of the Moon the Rwenzoris have a dizzying array of spectacular plants, trees, animals, & varied landscapes that make you aware, at all times, that you are in a place like no other on the planet. And of course, you can stand on a glacier at over 5000m (16,000 ft) with world class views of Africa below you.
The Huemul Circuit El Chalten Patagonia is one of a few ways for mere-mortal for hikers to see the vast Southern Patagonian Ice Field, the 2nd largest non-polar ice field.
Bikepacking the GAP Trail and C&O Trail from Pittsburgh to Washington DC is a superb mix of natural beauty, wooded trails, quaint towns, & American history. It’s the perfect introductory trip for those new to bikepacking. But it’s just as suitable and rewarding trip for accomplished riders. Virtually all of the trail is away from traffic on flat, wide, non-technical dirt trails (double track) that do not require great riding skills.
The Finger Lakes Gorges should not be missed. And don’t let their popularity dissuade you from hiking and exploring these gems. Like Yosemite or the slot canyons of Utah, these gorges are held in high regard for a reason so hike them!
Chile’s new Patagonia National Park has it all — the high glaciated peaks of the Andes, wide valleys with ice cold glacial rivers, forests of southern beech hanging with moss, & startlingly green glacial lakes. It may soon be the “Yellowstone of South America”
The Cerro Castillo Trek might be the best trek in Patagonia you’ve never heard of. It rivals drama and beauty of the Torres del Paine W Trek, yet has far less visitors.
We believe this is the best guide to the Torres del Paine W Trek and Circuit Treks, in-print or online. This guide was inspired by Alison and I finding a scarcity of accurate and up-to-date information anywhere…
This Guide to the AT Section Hike – Shenandoah to Harpers Ferry, is an installment of our no-car-needed, low carbon AT hiking Guides. This beautiful section has the infamous roller coaster, along with great vistas like Raven Rock and Sky Meadows Park. It connects two popular AT trailheads—Shenandoah National Park (Front Royal, VA); and historic Harpers Ferry, WV. When combined with our Low Carbon Section Hike via Train – Harpers Ferry to Harrisburg PA , you have ~180 great miles of the AT easily accessible by public transportation. Hike green!
(lead photo: late afternoon at Raven Rocks overlook. Fall colors just starting)
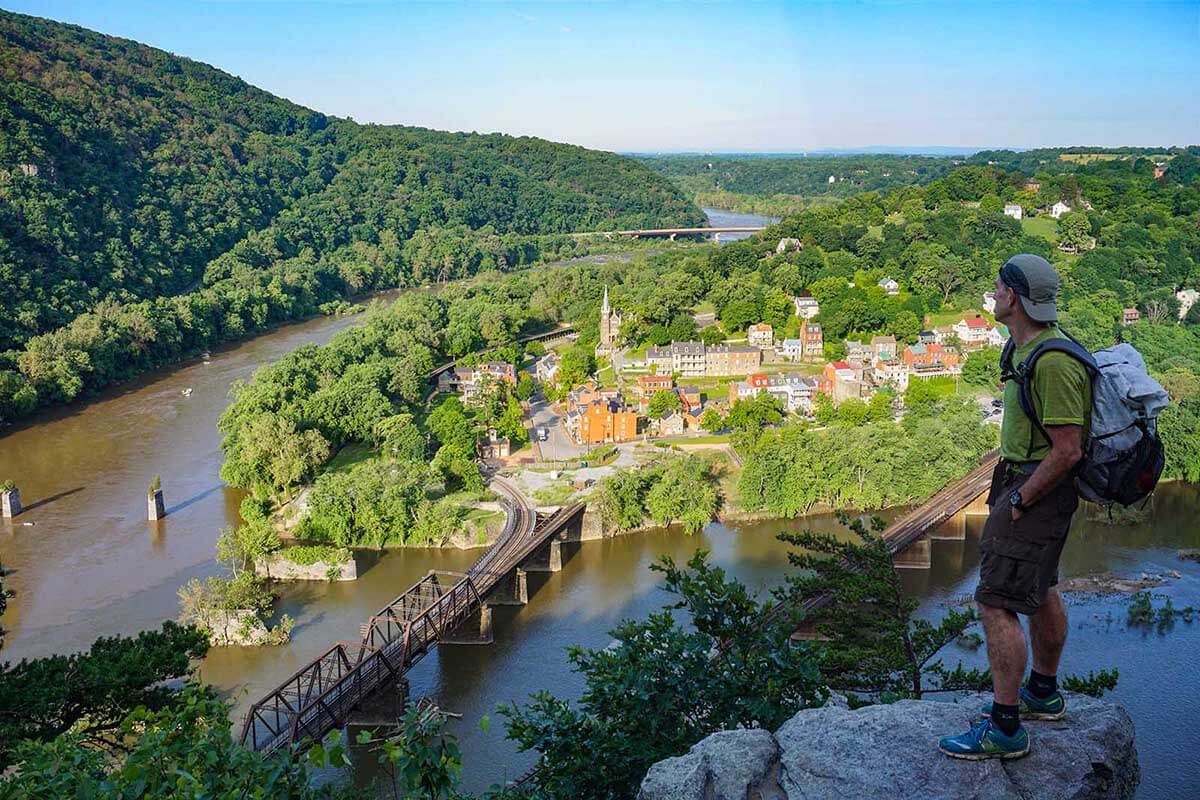
The hike ends in historic Harpers Ferry, WV and it’s well worth an overnight stay and exploration. “Harpers Ferry National Historical Park is considered one of the best walking parks in America. The views are sublime, the history compelling, the restored town a work of historical art.” (from the National Park Service Website)
A Series of Guides to Low Carbon Section Hikes on the Appalachian Trail
We are big fans of leaving the car at home when we go hiking. Because the AT goes through or near urban areas, it’s not difficult to section hike portions of the AT using only public transportation. Many of these are among the nicer sections of the AT. This guide is for an AT section hike that you can undertake solely using public transportation from Washington, DC. This 54 mile AT section could be done in one long weekend (3-4 days, e.g. an extended Memorial, or Labor Day weekend). It would also be a great hike for fall color viewing as it has somewhat less foot traffic than the adjacent Shenandoah Park.
Installment 1: Low Carbon Appalachian Trail Section Hike via Train – Harpers Ferry WV to Harrisburg PA, 124 miles
Installment 2: This post – Low Carbon AT Section Hike – Shenandoah to Harpers Ferry, 54 miles
Stay tuned as we add more Low Carbon Section Hikes on the Appalachian Trail…
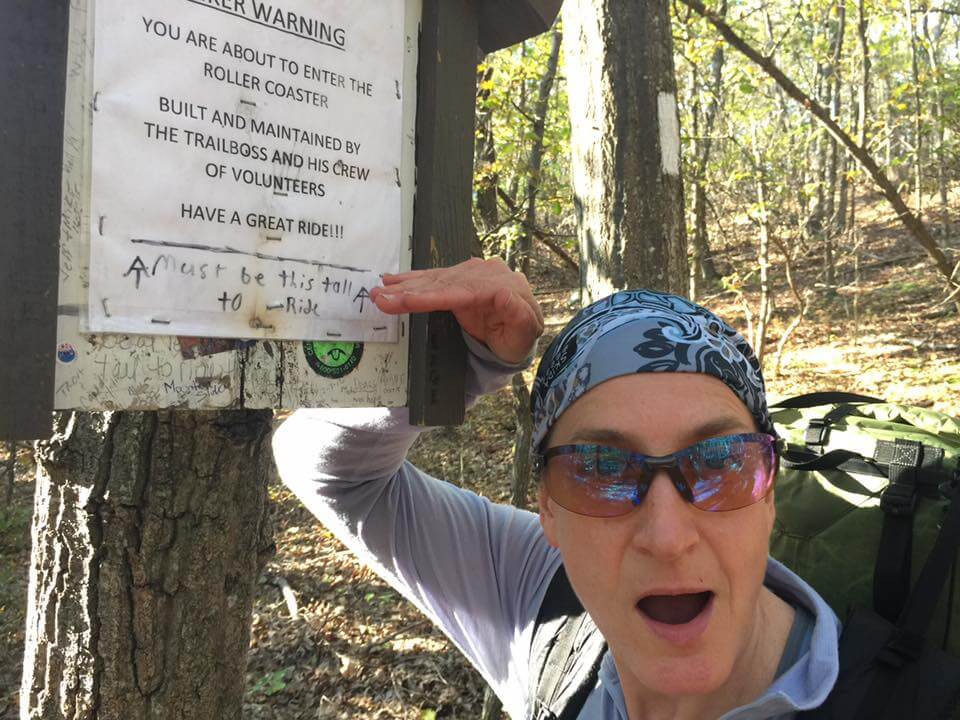
“[You] MUST BE THIS TALL TO RIDE!”
The start of The Roller Coaster, an infamous section of the AT with over 10,000 feet of elevation change in only 13.5 miles! And that was only part of our FUN for the day. Alison’s face says it all.
Top 5 Highlights of this Section of the AT
- Blue Ridge Vistas: This section of the AT is just gorgeous. There are numerous overlooks including the famous Raven Rocks, and the endless ridge top vistas from Sky Meadows Park. Because of the wonderful overlooks and clearings on this section, it would be a great hike for fall leaf viewing.
- Blackburn Trail Center: When you arrive at the Blackburn Trail Center, you are greeted by the trail boss and his wife. More often than not, trail magic will appear making the end of the roller coaster that much sweeter.
- Bears Den Hostel: This rustic stone building from the 1930’s is a gem on the AT. The hiker deal for $30 includes: bunk, shower, laundry, soda, pizza and a pint of Ben & Jerry’s ice cream. Our trip didn’t allow us to overnight there, but we did stop for the $0.50 Cokes out of the fridge and a lovely break on the lawn for a snack and rest at a covered picnic table.
- Ride the Roller Coaster: The world renown roller coaster is a 13.5 mile section of trail that closely resembles a roller coaster. Ok, not really. It’s really about 10,000 ft of elevation change in a very short distance that will keep you fully entertained.
- Harpers Ferry Overnight: Any hike that includes an overnight in Harper’s Ferry is a good hike. The town is so lovely, it is always a highlight.
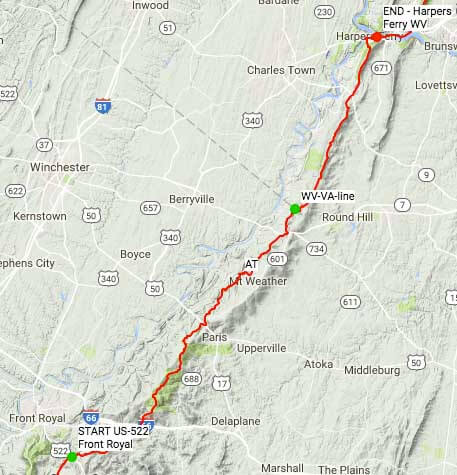
Overview map of the 54 mile route.
Quick Trip Stats
- The trip takes between 3-5 days
- 0 mile – trip start, Shenandoah Park N Boundary near Front Royal, VA
- 54 mile – trip end, Harpers Ferry, WV
Transportation Time
- START: 2.5-3.0 hrs downtown Washington DC to trip start near Front Royal, VA (via commuter bus and Uber),
- NEW OPTION: Megabus has a new Washington to Front Royal direct run (2.2 hours)
- END: 2 hrs from trip end in Harper’s Ferry, WV to Washington Union Station (via train)
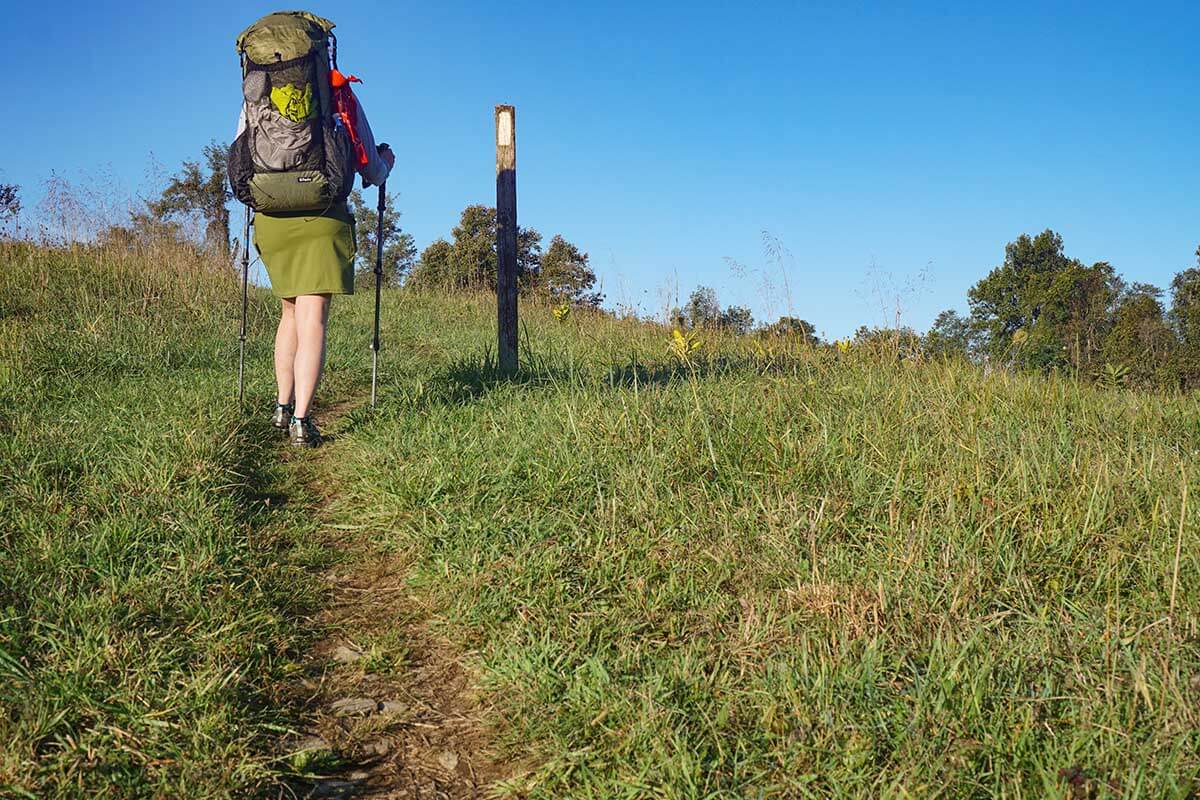
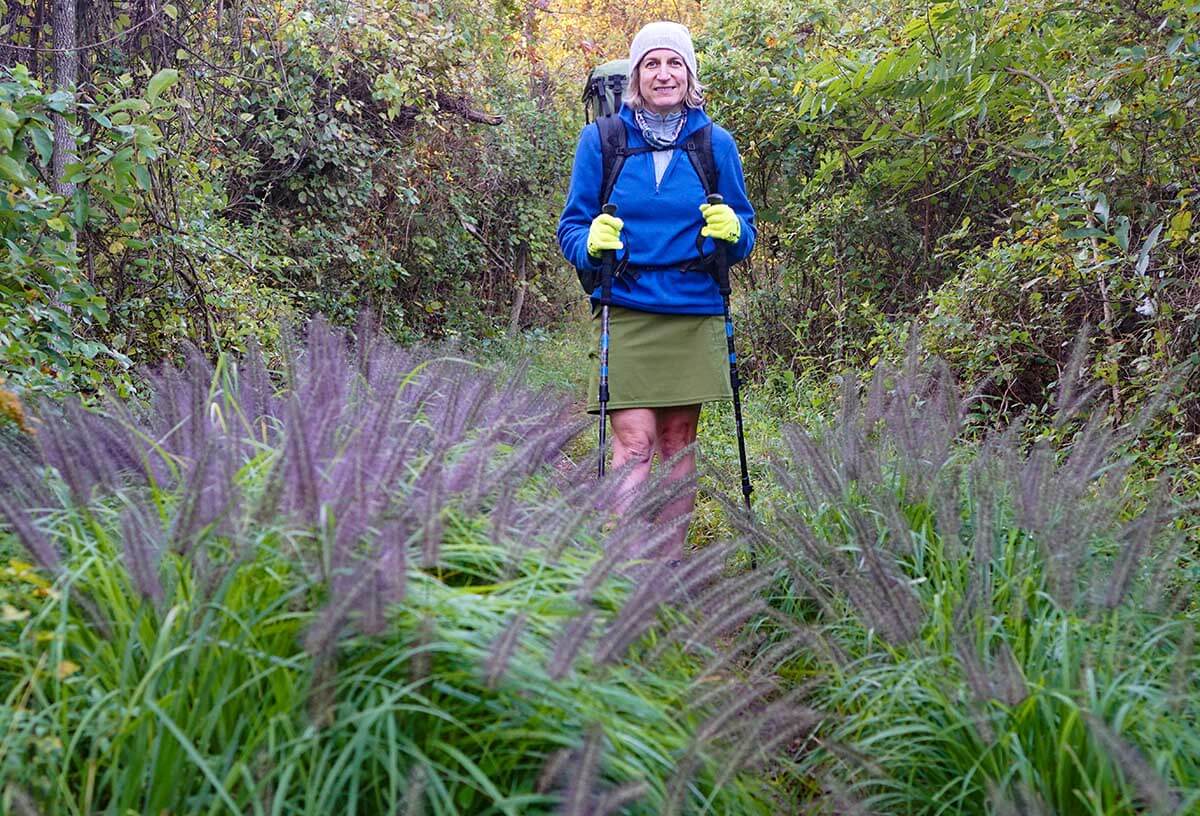
Beautiful mountain meadows and views: Alison hiking up to one of the many great vistas at Sky Meadows Park.
Overview – Low Carbon AT Section Hike – Shenandoah to Harpers Ferry – No Car Needed
This guide is meant to supplement the many excellent general guides to the Appalachian Trail (AT). As such,
- Our guide gives more detail to this specific section of the AT, and in particular how to access it by train and bus from much of Northeast US.
- Lighten your load: The GEAR (link) and FOOD (link) for the light packs we used to efficiently and comfortably hike the AT. We believe this will make the hike more pleasant for others.
- And finally, we discuss the places we most enjoyed on the hike in both text and photos.
What’s in this Trip Guide
- Logistics: link on how to use trains and other transportation to and from the start and end of the hike
(including a bit of info on lodging in Harpers Ferry, WV) - Some of our favorite places: link to Photo Essay & Trip Description
- Gear: a link to list of GEAR that made our trip more FUN (kept our packs around 12 pounds!)
- Food: a link to list of the FOOD we took to save food weight but still eat healthy
- Waypoint and Mileage Table: link to Waypoint and Mileage Table
- Maps: link to our recommendations for maps and guidebooks
- Harpers Ferry: link to ideas about where to stay and what to do in historic Harpers Ferry
Waypoint and Mileage Table
The table below is in scrollable window or you can see the table full page here, as a Google Sheet
Maps and Guides
The Appalachian Trail is possibly the most documented trail in the world. There are many excellent guides. Our favorite guide is David Miller’s (AT trail-name, AWOL) “The A.T. Guide Northbound.”
We supplement it with the following AT Pocket Profile Map(s):
“Appalachian Trail Map AT-11 Front Royal VA – Harpers Ferry WV AT”
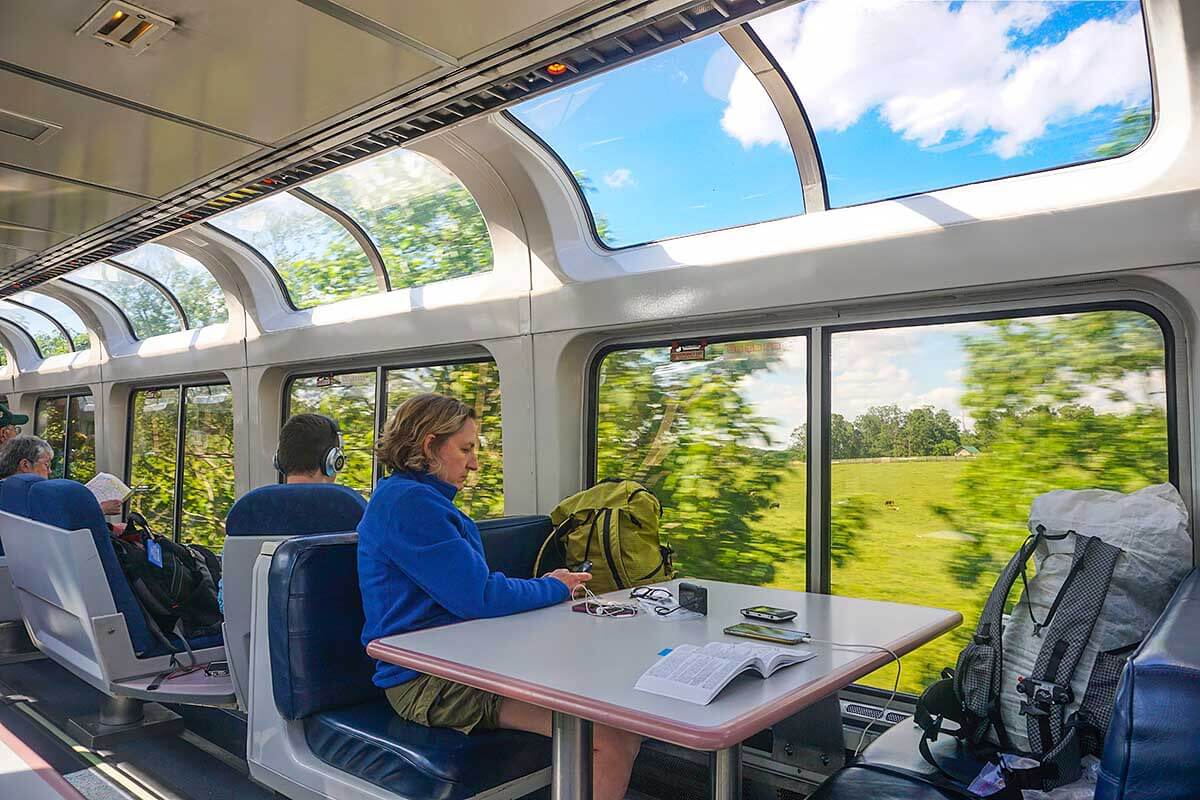
$13 Train: From tip end at Harpers Ferry, WV, it’s only an hour and $13 via train to our front door in Washington DC!
Logistics – Getting to and From the Hike
Trip Start
This hike begins at the northern end of Shenandoah National Park. You don’t need to enter the park, just begin on the outskirts of it on the more easily accessed AT crossing of US 522. Unfortunately, as of this writing, there was no public transportation directly to Front Royal from Washington DC. So we had to string together two transportation modes to get to the trip start at around 6:00 pm.
AFTERNOON OPTION
- A Omniride commuter bus leaves from multiple locations in downtown DC and goes directly to a commuter parking lot in Gainesville, VA. Cost was $6.50 using SmarTrip card or $8.75 with cash. Heading out of the city, commuter buses only leave in the afternoon “after work.” First bus leaves DC at 3:30pm ish (depending on where you pick it up) putting you in Gainsville around 5:20pm.
- From there, you can Uber (about 30 min) to the start of our trek (ask to go to Trumbo Hollow Hike Trailhead). This Uber trip costs about $50. Not cheap, but worth not having to shuttle, thus allowing us to do a one-way trek while still going low carbon. And the train ride back is only $13.
- Using public transportation, the earliest you can expect to arrive at the hike start will be around 6:00pm. You should still be able to reach the Jim & Molly denton shelter by dark. (See more options in description below.)
NEW MORNING OPTION
- Megabus has one trip a day from Washington Union Station, leaving at 9:20am arriving Front Royal Crooked Run Park & Ride at 11:40am (cost $30).
- From there, you can Uber (about 15 minutes, $20) to the start of the trek (ask to go to Trumbo Hollow Hike Trailhead).
NOTE: The combination of Uber/Lyft with the train (or bus) is a game changer for low carbon hikers. The ability to hook into a scheduled train or Greyhound route makes what used to be a “close-but-no-cigar” hike, into something quite doable.
Trip End
The easiest thing is to overnight in Harper’s Ferry and catch an early morning MARC train (Brunswick Line) back into Washington DC’s Union Station (or a few Suburban Maryland stops before DC). The MARC trains are super early, but that’s OK as you’ll get back into DC in time to catch many of the early trains and commuter buses to your final destination.
A crisp fall morning on Day 2, perfect for some hiking on the AT!
Brief Route Description and Trip Highlights – a Photo Essay
The section between Shenandoah National Park and Harpers Ferry is a rather popular section hike. The multiple overlooks and great overnight camping options make it a very nice section the AT. It follows the Appalachian Ridge for 54 miles through the State of Virginia culminating in a breathtaking walk across the Shenandoah River Bridge into West Virginia and the city of Harper’s Ferry. There is only one park you walk thru, Sky Meadows State Park (which has its own stunning overlook). Otherwise, this section is a nicely challenging walk on the AT.
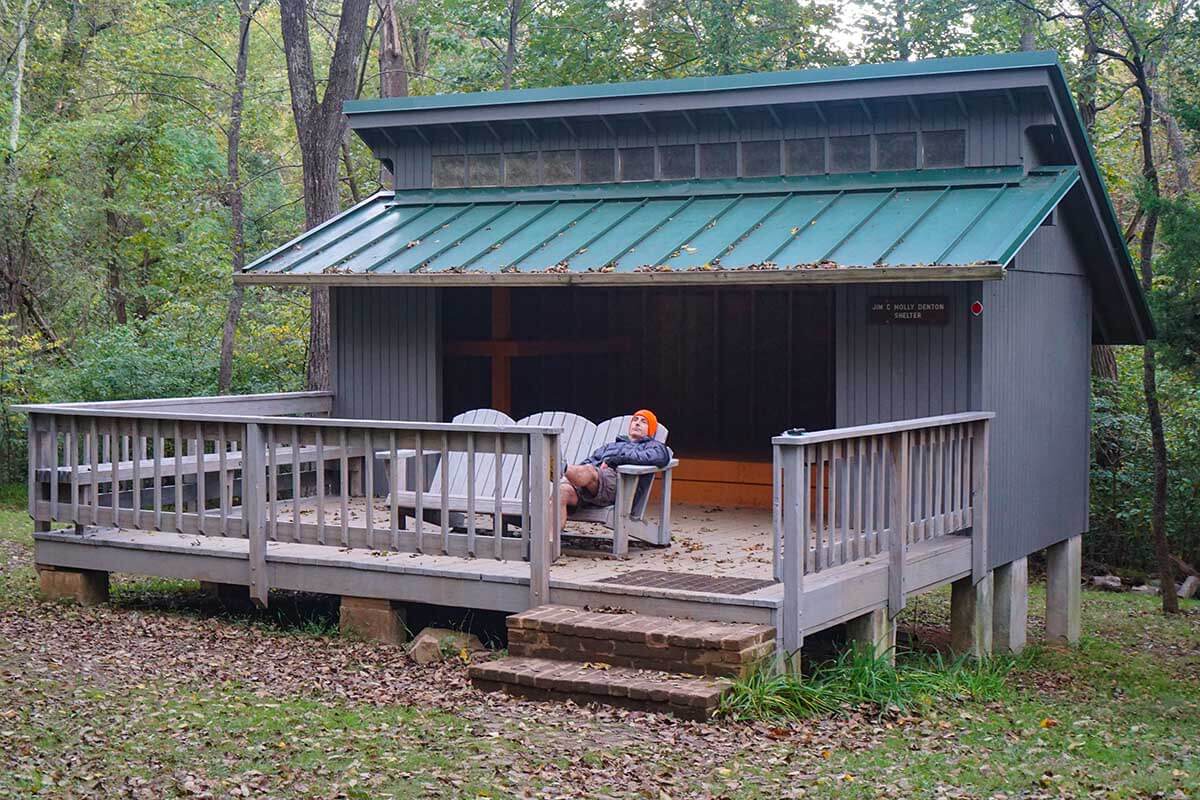
Relaxing on an Adirondack “Bench” at the recently renovated Jim & Molly Denton Shelter. It has a covered picnic pavilion and a solar shower!
If you start hiking in the late afternoon/early evening, you will likely stay at the Jim & Molly Denton Shelter. It’s a straight 5 mile shot from the trip start at US 522. You’ll be rewarded with a newish shelter, a lovely picnic pavilion, and a solar shower! Overnighting in Front Royal is another option and there are several hostel/hotel options there as well. (Front Royal hotel owners are well acquainted with AT trekkers and often provide a ride to/from the trail.)
First Full Day
Your first full day (if you started hiking the nite before) will be lovely. Keep an eye out for great overlooks because you come upon them very quickly. Sky Meadows State Park, really does have superb mountain top meadows and views. It’s a great lunch spot. After that, you also get to cross the not-so-lovely, first of two death-defying major highways on this section (no bridge, no stop signs, just put your big boy pants on and run for your life) at John Marshall Highway (VA55). We ended our day at Rod Hollow Shelter in prep for roller coaster day. Several nice campsites and hammock hanging areas are available at this shelter.

Sunrise above our hammocks at the Blackburn Center.
Day 2
First thing up the next day is riding the roller coaster! As the AWOL in The A.T. Guide notes, it’s really “13.5 miles of tightly packed ascents and descents.” Besides an amusement park aspect, this day also contains the Bears Den Hostel (an overnight option). The Bears Den Hostel was our lunch spot and we enjoyed a covered picnic table, a few cokes, and some shade from the sun. Shortly after the Bears Den you cross your second death-defying major highway, Pine Grove Road (VA 7).
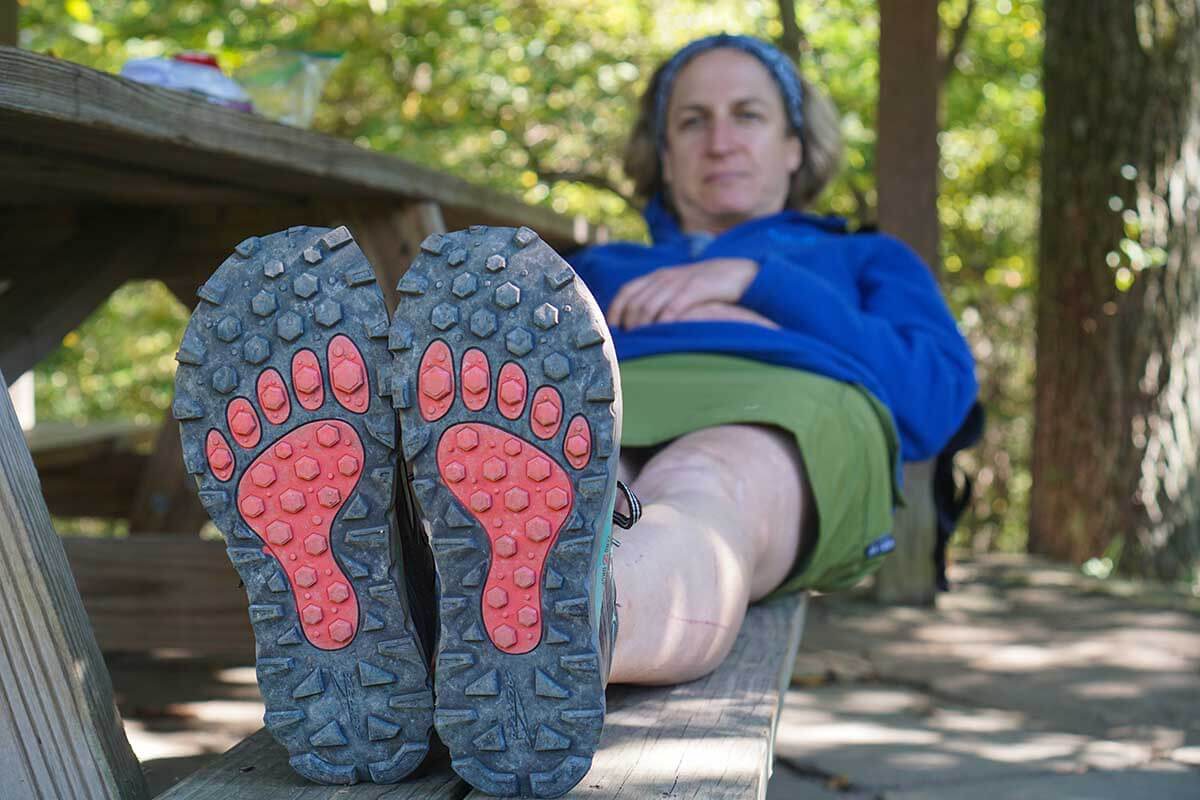
Lunch and a feet-up rest at the shaded picnic table at the Bears Den. We grabbed a couple of 50 cent Cokes out of the fridge!
If you live after crossing VA7, you get the privilege of hiking up to see the spectacular Raven Rocks overlook (lead photo of the guide). If it’s a weekend get ready for invasion of the day-hikers. The good news is that you drop the day hikers with your first step past the Raven Rocks. We ended our day at Blackburn AT Center which was quite a treat. They have tent sites, and a smallish cabin for hikers to stay in (no shelter tho), picnic tables, and fresh water from a tap. The AT Center is the meeting place for trail workers so there is a lot of activity surrounding the facility. As a result, trail magic often happens here. (Note: the Blackburn Center is a significant drop down and ascent back up to the AT.)

Cold beer and chocolate cake trail magic at the Blackburn Center. Who knew these two food groups tasted so good together?
Into Harpers Ferry – The Final Day
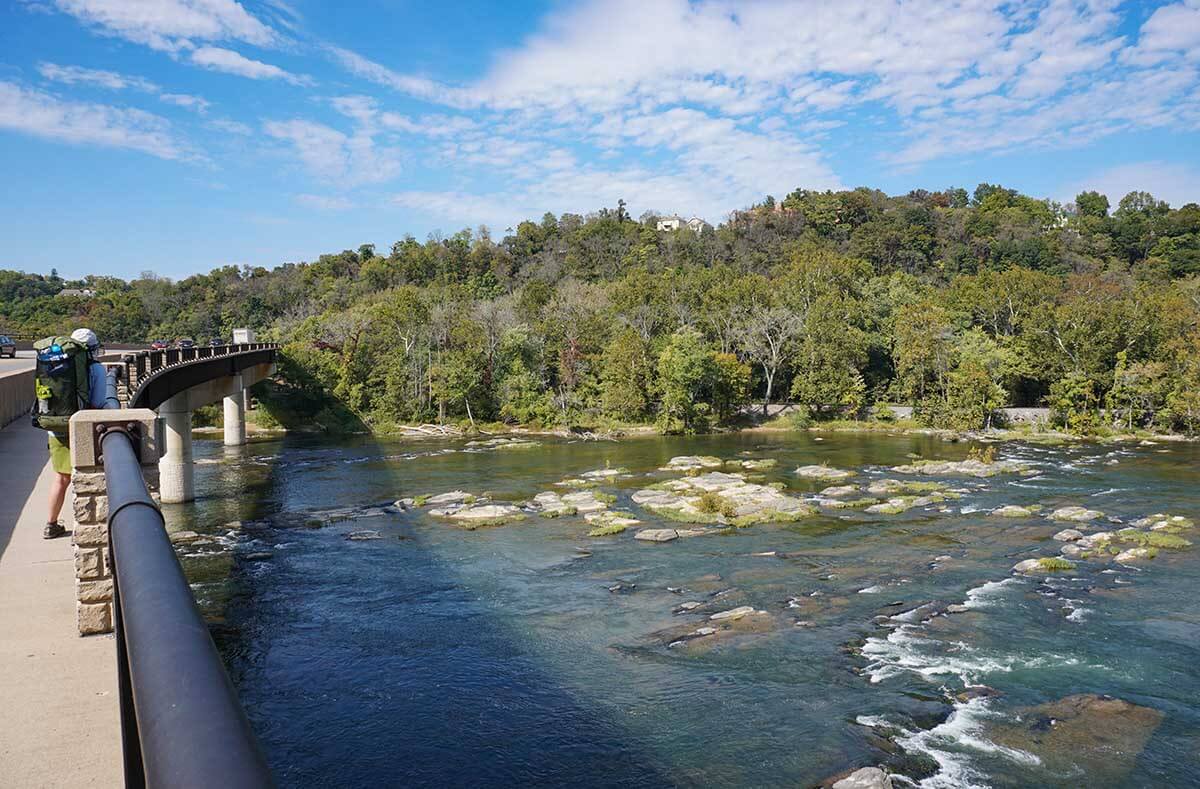
Rt 340 Bridge across the Shenandoah River as you enter Harpers Ferry.
Our last day was a walk into Harper’s Ferry. We wanted to enjoy some time in Harper’s Ferry so organized our section hike to do so. After Blackburn AT Center, the last section is fairly flat and offered up a nice stretch for your legs post-roller coaster. Coming into Harper’s Ferry is quite majestic as you cross the Shenandoah River Bridge to enter into the city.

We saw a number of these beautiful, and delicate Rough Greensnakes as we approached Harpers Ferry.
In Harpers Ferry we stayed overnight at the Econolodge as we had heard good things about it. We liked the location. Excellent WiFi and a box of trail magic available for the taking. Breakfast is always welcome and although they said it started at 6:30am, a full breakfast was out for the taking at 6:00am which helped us make our train. (If you arrive earlier or can stay a bit later in the morning, the nearby Guide Shack Cafe has the best coffee in town and serves light breakfast food.)
What to do in Harpers Ferry: Here’s a link to ideas about where to stay and what to do in Harpers Ferry
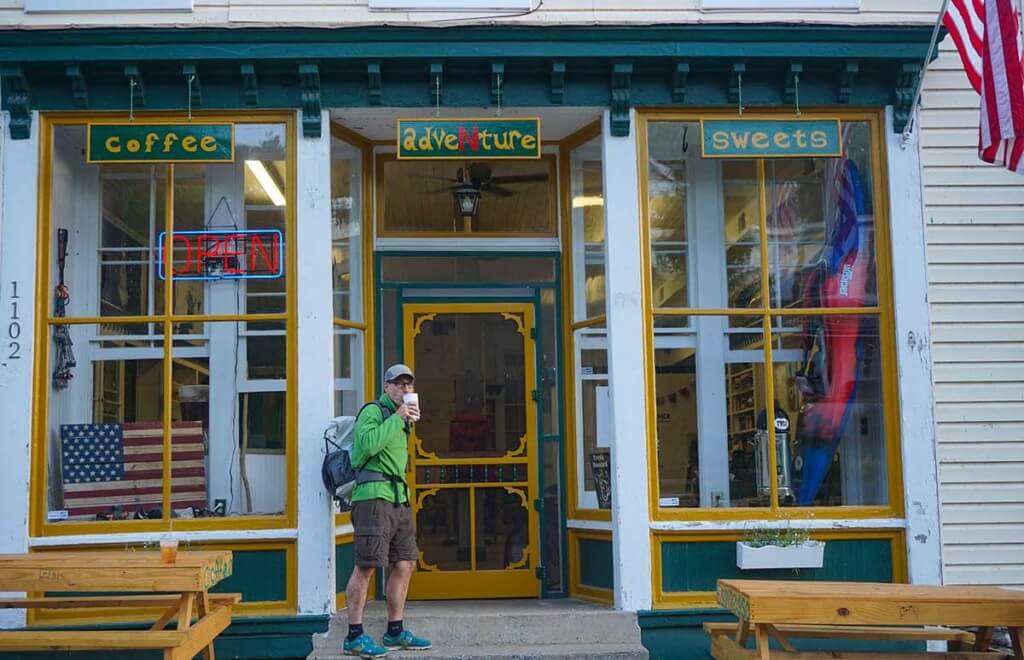
Adventure Alan under the sign for Adventure and as always finding the best coffee in town! The Guide Shack Cafe is veteran owned, veteran operated and sources its coffee and food from veteran owned Co’s! It opens early for coffee/breakfast.
Desert canyons are some of the most stunning places on earth. And contrary to the hype of high adventure and disaster in technical slot canyons, with flash floods & amputating arms—many beautiful canyons are low risk and perfect for backpacking and hiking. No rock climbing or rope needed. As such, you should seriously consider non-technical canyon backpacking in Utah.
- Best time to go: mid-March to May | mid-September to October (or even November)
- Special skills needed: This post covers much of what you need to know. It includes tips on how to purify and best manage your water in a dry desert environment (don’t stress it’s not that bad!).
- Navigation: Explains how canyon navigation is different from regular hiking/backpacking and what you’ll need to know.
- Special gear needed: While there is no need for ropes or climbing equipment, our section on the Right Gear will make canyon travel easier and safer. And there’s a section on desert canyon clothing tips, including sand resistant shoes that are also good for wading.
Canyon travel or canyoneering is mountain climbing in reverse. Rather than striving for the highest point to look down, you are in the bottom of a canyon with the world above you. It is a more intimate and enfolding way of viewing your surroundings.
Utah Canyons offer some of the best hiking & backpacking in the world
These canyons are stunningly beautiful and except for a few, lightly traveled. I can think of few places that offer as much solitude. Alison and I find the sparse beauty and solitude of desert canyons a deeply spiritual place. One that draws us back year after year for their peace and serenity.
Gems like Paria Canyon, Buckskin Gulch, the Zion Narrows, Coyote Gulch or Grand Gulch are just few of the big name canyons that are easily accessible to anyone with basic hiking skills. But the list of equally superb but lesser known canyons that await you in the Southwest US goes on and on. The Escalante Grand Staircase National Monument may alone have a lifetime’s worth of superb canyons and side-canyons to explore. Many may have only a few visitors every 10 years.
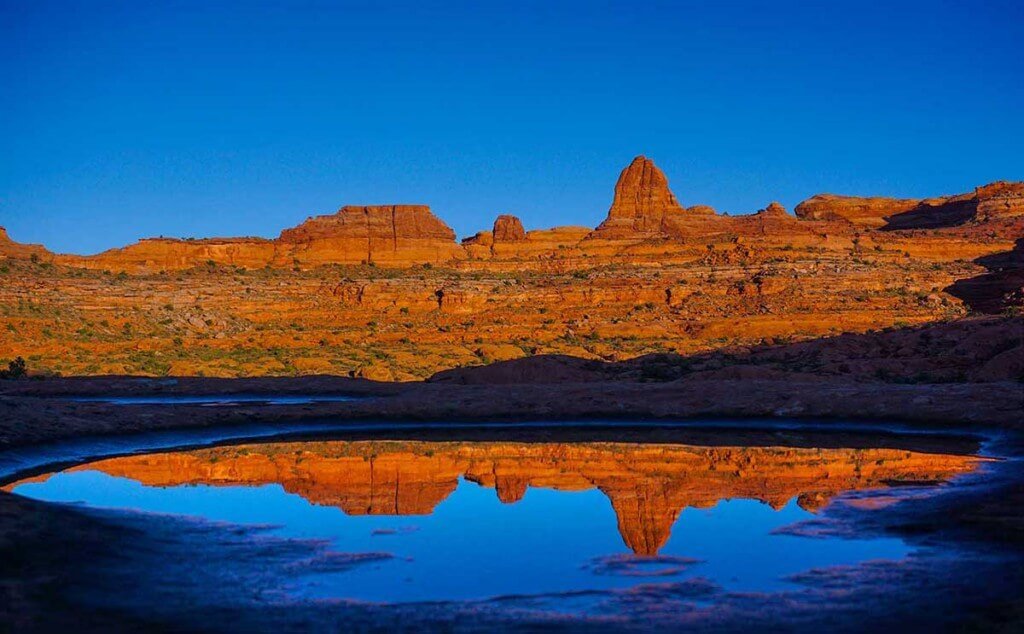
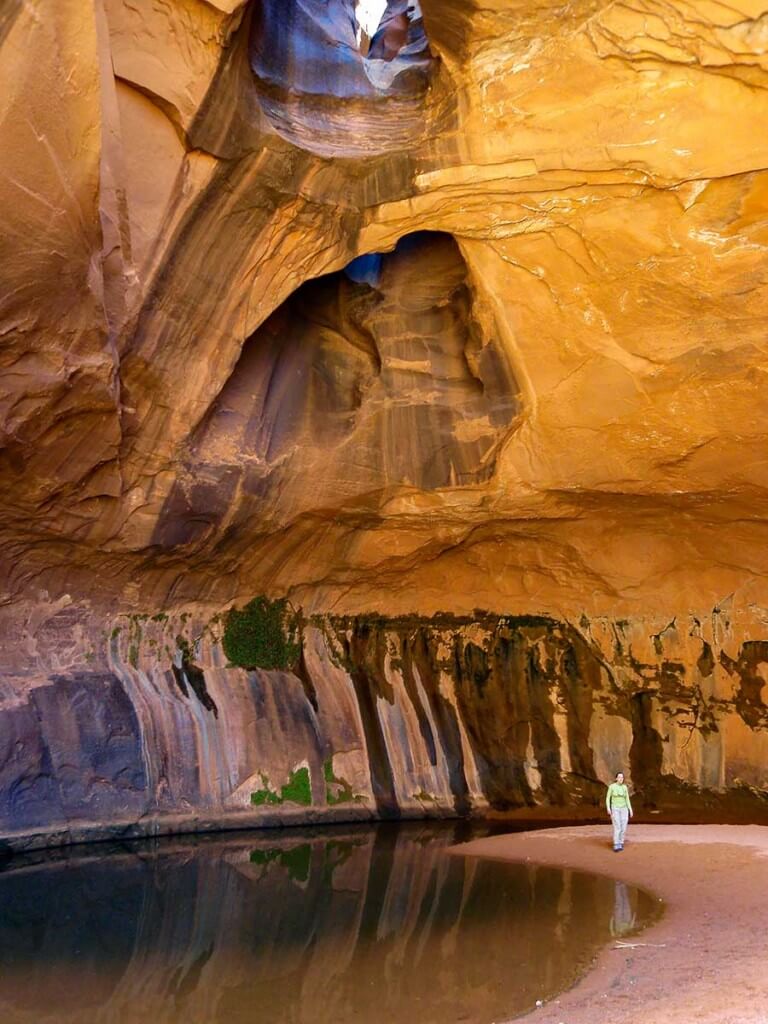
High above the Escalante River: Dawn reflection in a slickrock pool in a remote side canyon. This canyon sees fewer than 10 people per year.
Tips for Non-technical Canyon Backpacking in Utah
The good news is that many of your backpacking skills will work for canyoneering. But there are some things that will be new and different. Here are a few to consider:
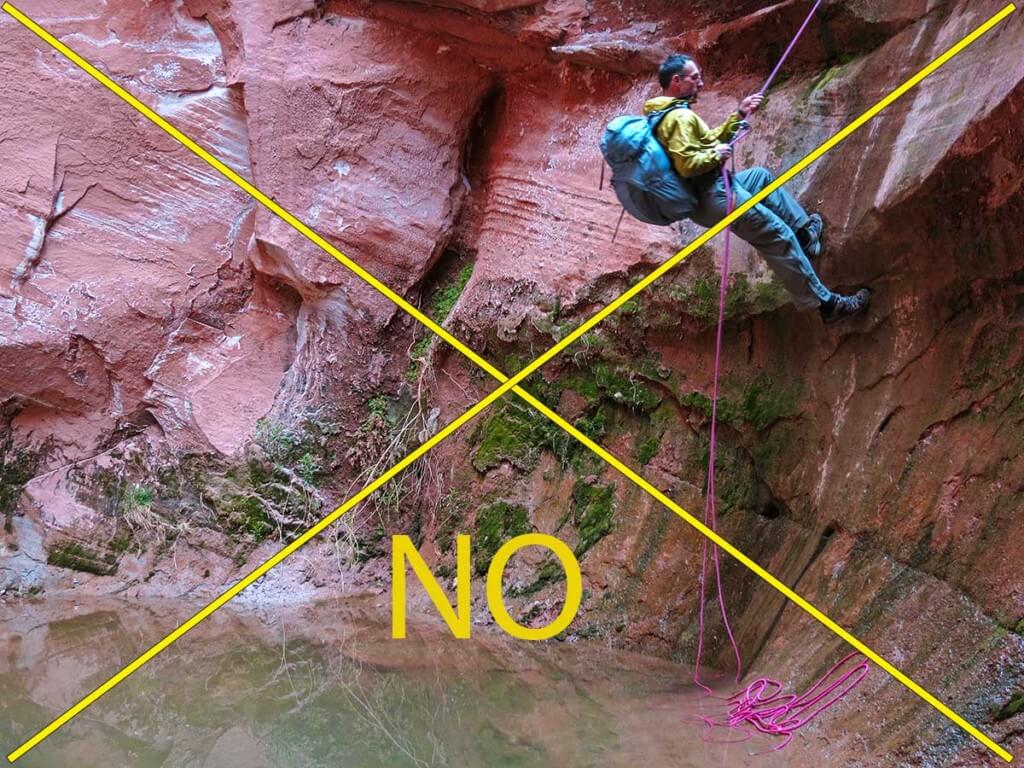
- Canyon travel can be technical and non-technical – This article is only about “Non-technical Canyon Backpacking in Utah.” This non-technical canyon travel, or what I call “canyon backpacking” is low risk and similar in difficulty to regular backpacking. You don’t need a climbing rope. In some canyons you might need to do occasional calf-deep wading, a fun but safe scramble, or some bushwhacking. But nothing to get excited about. Technical canyoneering with ropes and rock climbing will not be discussed in this article.But at the end of this post I have included a section on tips for the more adventurous canyon traveler.

What this guide is NOT ABOUT. There’s no need to do this to see many spectacular canyons!
- When to go – Most of the year it is too cold or too hot to backpack in the canyons. Most canyons in Utah have a short season, the middle of spring (mid-March to mid-May) and middle of fall (October-November).
-
Gear for Non-technical Canyon Backpacking in Utah – Having the right gear makes canyon travel easier and more fun. Here’s a link to the Gear List that we use. It’s excellent for non-technical Canyon Backpacking or hiking in Utah. A section dedicated to clothing is below.

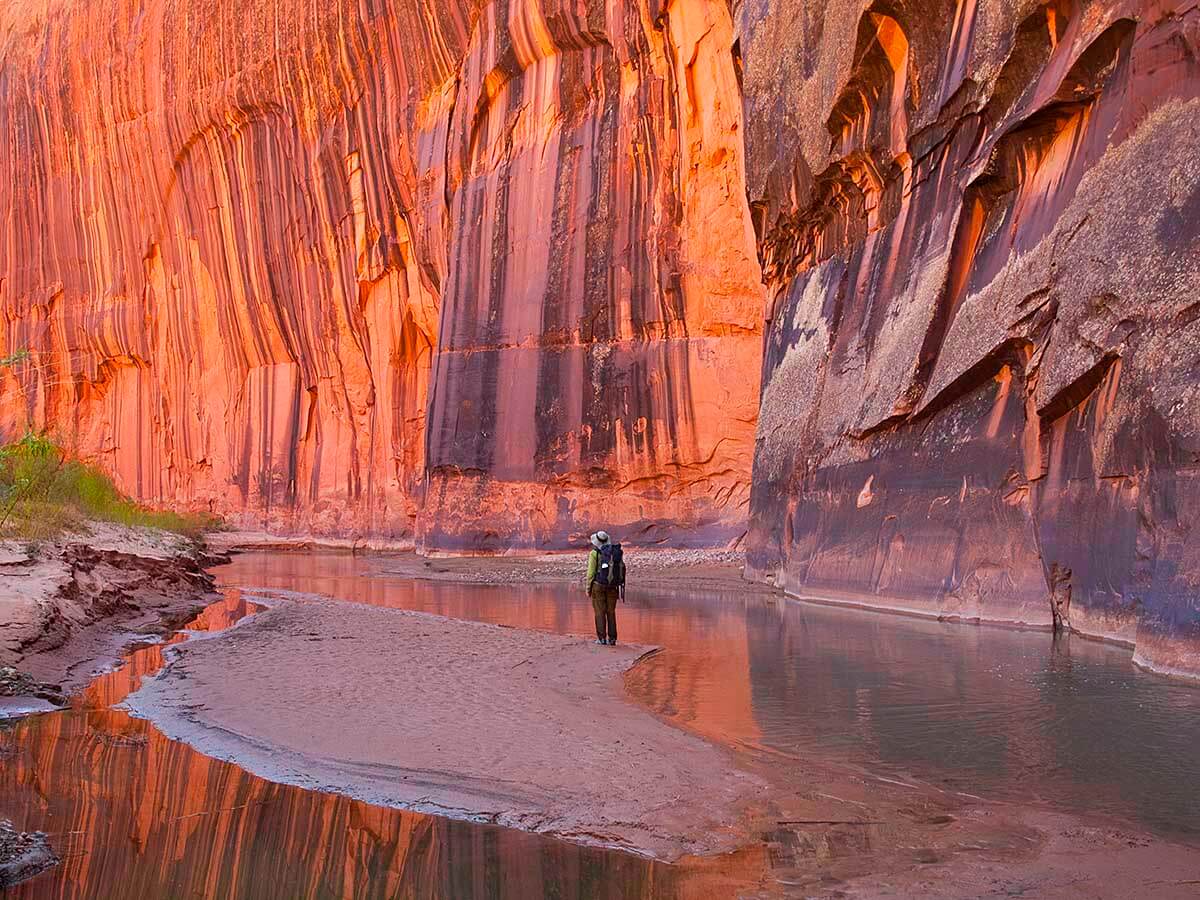
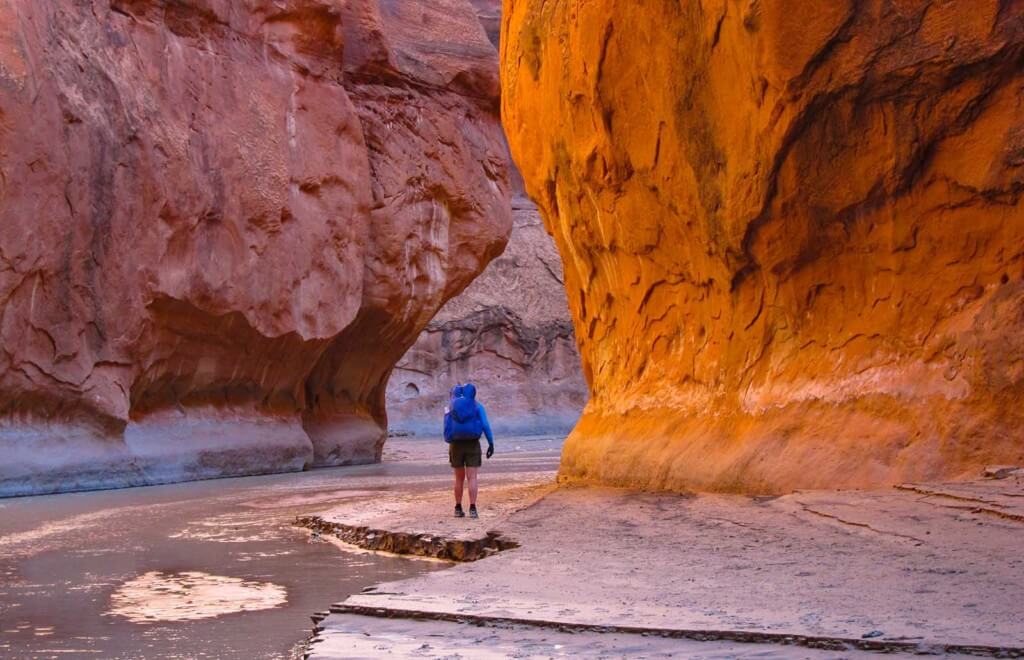
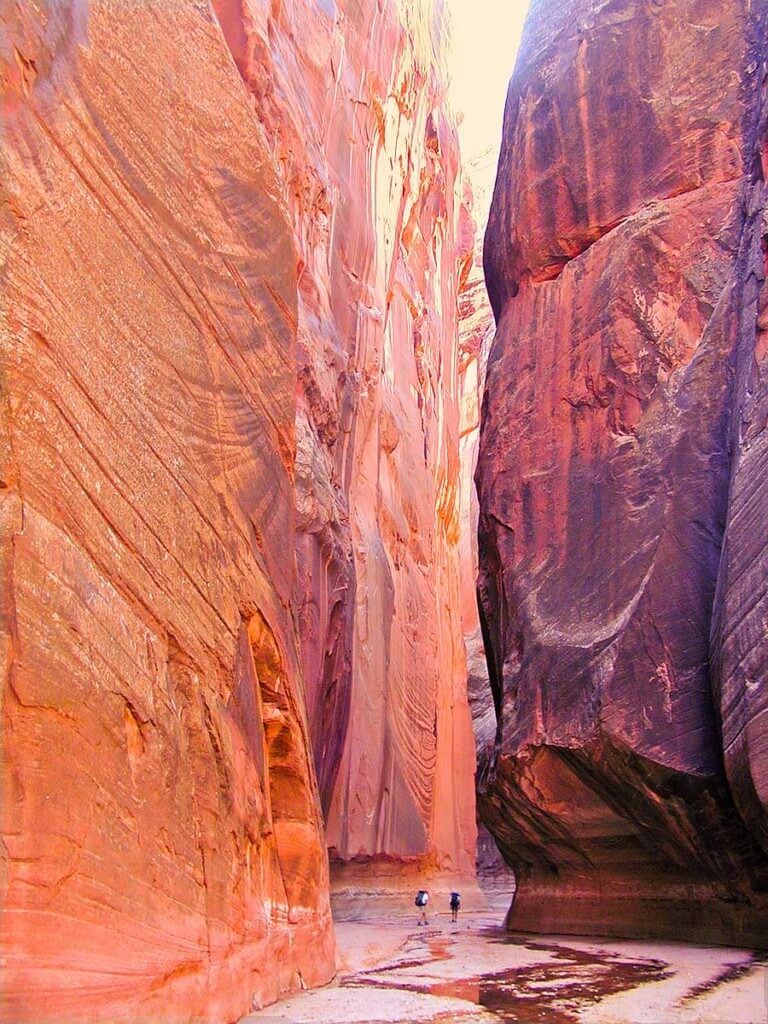
Paria Canyon
- Don’t stress too much about drinking water – Water, or lack of it, is not the big a deal most “knowledgeable professionals” make it out to be. See: “The Best Hydration – Drink When Thirsty.” Many of the better known canyons have well documented water sources so you’ll know how far it will be to your next good water. As such, you won’t be humping a ton of water or in dire risk of dehydration. My wife and I over the last 15 years have routinely carried far, far less than the recommended gallon of water. We have yet to go dry or thirsty. Note: Most canyon river/stream water, if it’s running at all, is too silty and hard with minerals to make good drinking. You’ll get most of your water from springs and from the few clear-drinkable sources of canyon river/streams. For treatment, I prefer the Sawyer Squeeze Water Filter System.

Neon Canyon, Escalante Grand Staircase National Monument
- There is a low risk of flash floods in most “backpacking” canyons – most of the better known “backpacking” canyons are not slot canyons. As such, they are less prone (but not immune) to sudden and devastating flash floods. A slight risk of a flash flood (or far more likely, just high water) still exists in almost any canyon. So you still need to be aware of the weather. During the rare big storm, water levels may rise considerably but not so fast or so high that you won’t have time to find suitable high ground. They will also recede quickly. (Buckskin Gulch is the exception big name canyon with a significant flash flood risk, but the Ranger’s won’t give you a permit for Buckskin if there is the slightest chance of a flash flood. And many hundreds of people hike it safely every year.)
- Start small and build – Take some canyon day-trips and expand your skills—locating canyon entrances and exits, finding and managing drinking water, walking through sand, river wading, bushwhacking—generally learning how to make intelligent and efficient progress in a desert environment. Even two or three canyon day-trips will give you great insight to prepare for and execute your first multi-day canyoneering trip. Oh, and day-tripping in canyons is great fun!

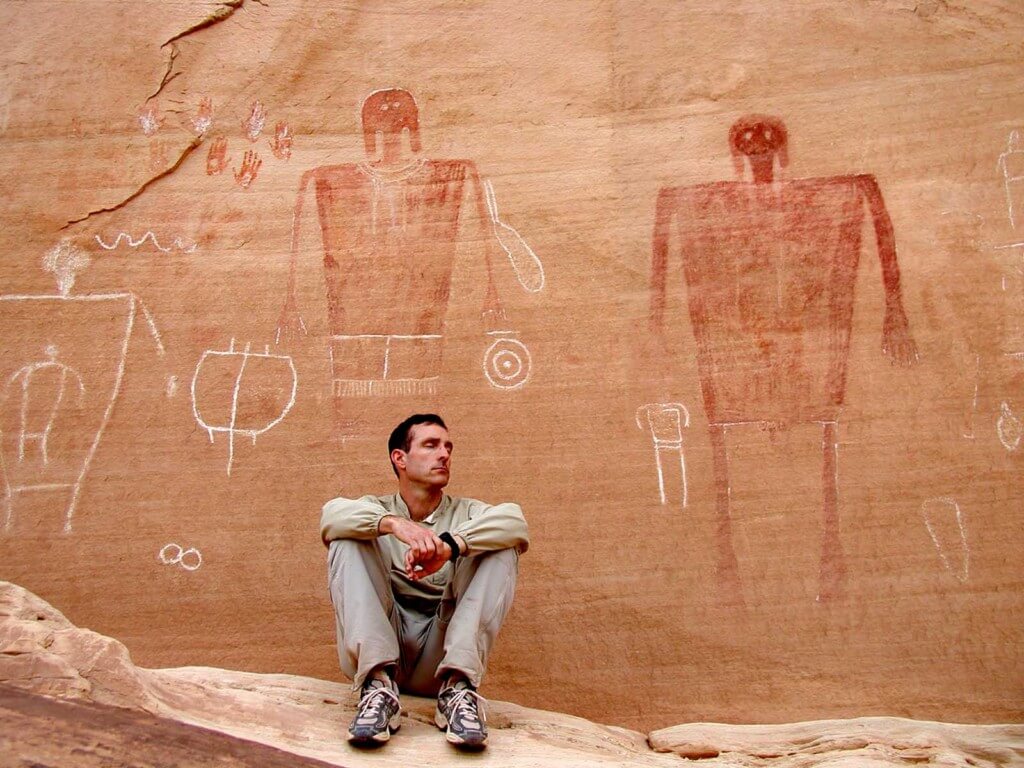
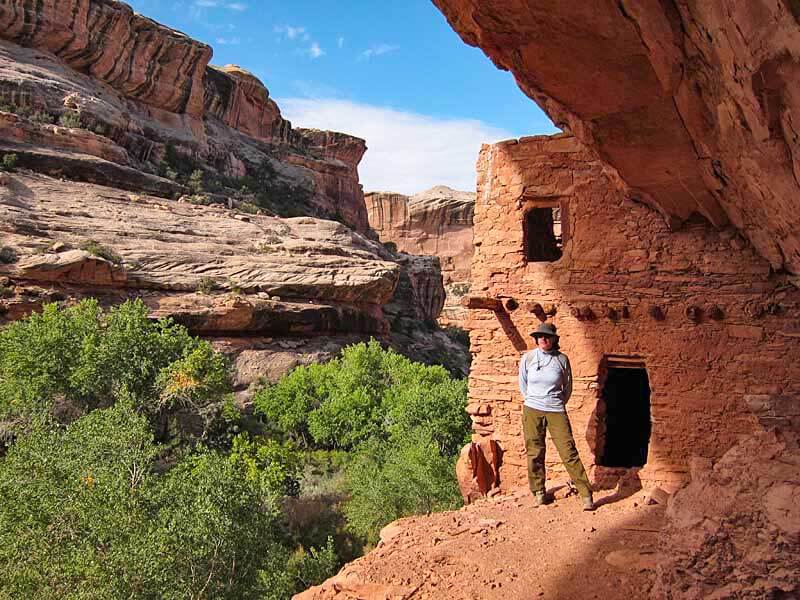
Grand Gulch, an open air cultural museum of Anasazi pictographs/petroglyphs and ancient dwellings. Note: If you find any artifacts; pottery fragments, arrowheads, etc. please leave them where you find them. The same goes with structures and dwellings. Do not enter them, walk on walls, etc. General rule is don’t touch, don’t move. Leave it as you found it.

- Guidebooks to get you started – Steve Allen has the best and most respected series of guidebooks on canyoneering in Utah. While some of his trips are technical, there are plenty of non-technical trips. And his general advice about canyoneering is among the best for both the non-technical and technical traveler. I have used the Falcon Guide “Hiking Grand Staircase-Escalante & the Glen Canyon Region” for canyons that Steve Allen doesn’t cover like Buckskin Gulch, Paria Canyon, and Grand Gulch. The guide’s specific information on the canyons is adequate but I would defer to Allen for general information on Utah and canyoneering.

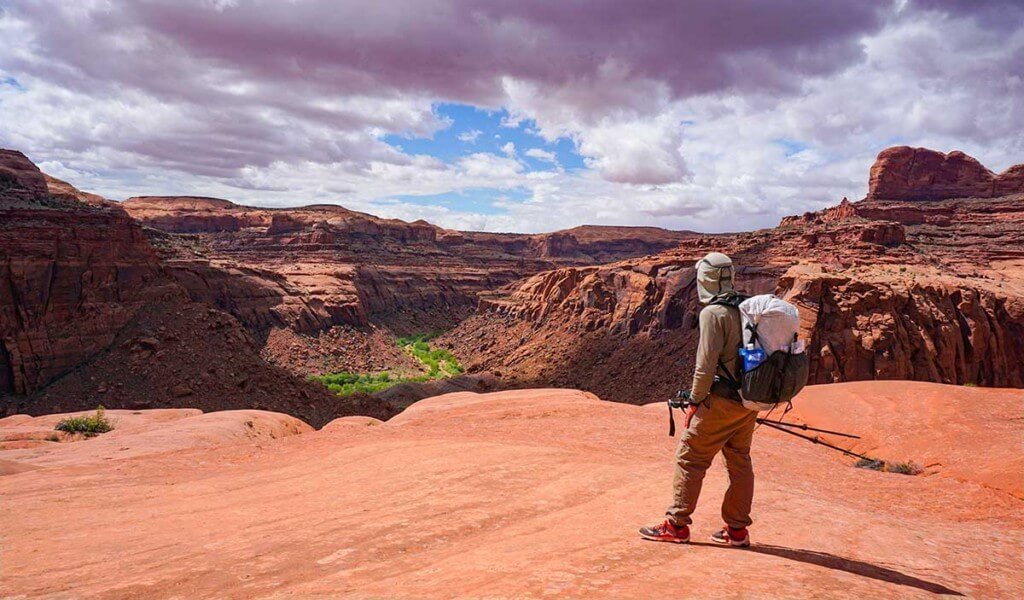
Hiking in shorts, short sleeves and hatless is a terrible idea! Complete clothing coverage is better.
- Clothing for Non-technical Canyon Backpacking in Utah – The desert can be a hot, scratchy, prickly place with intense sun. Wear long desert/travel pants like these , long-sleeve desert/travel shirts like these or a Rail Riders Adventure (or EccoMesh) Top, and a hat with complete sun coverage including neck and ears (e.g. Outdoor Research Sun Runner Hat). Light smooth fabrics (like thin nylon) slide easily through brush, absorb little sweat/water and dry quickly. Apply strong sunscreen to unprotected areas like hands or wear sun gloves like these OR ones. For more info See a detailed list of clothing we normally wear.
Footwear – Boots are not needed or even desirable. Take light trail running shoe like Altra Lone Peaks or Altra Superiors. Fine mesh outer fabric is best (our favorite shoes are the Altra Superior Trail Running Shoes which have a very fine mesh that slows sand entry but lets water drain quickly after wading. And beware, the large-weave mesh popular on many trail runners lets too much sand in. Gore-Tex shoes do poorly. They are too hot, do not breathe well and don’t drain water after wading. (But they do have the advantage of being sand-proof!) - Navigation in Canyons is different than other backpacking areas
Navigating Canyon Bottoms takes a bit of getting used to. (Don’t worry, you’ll get better at it over time.) There are no signs, no blazes and almost no trails. One might think it’s simply a matter of following the canyon bottom like a train on its tracks. But for those new to it, walking in the bottom of a many branched canyon system can seem more like navigating a hedge maze. At the bottom of a canyon you have limited visibility and to the uninitiated the main canyon can be almost indistinguishable from its many side canyons. It’s much easier than you think to walk by and completely miss your exit ramp or exit side canyon. Over time you’ll get more observant, and pay better attention to small details. Travel in many canyon bottoms is a combination of river walking/wading, bushwhacking through willows (easier) and tamarisk (harder), and sandy bench walking. There is no “right” route: you just figure out what works for you.Navigating Benches Above the Canyon should likely wait until you are a more seasoned canyon traveler. It is usually more challenging than traveling the canyon bottom—with more difficult route-finding, hard to find entrances and exits, potentially technical sections and a likelihood of impassible side canyons and slots blocking forward travel.Note: Contrary to common belief GPS can work in canyons! So with some caveats, the section below explains how to best use your GPS in many canyons — just don’t rely on it!!
Paria Canyon
- Emergency contact. Much of Utah is remote like few other place in the lower 48. Hikers are hard to see or locate in the canyons, and there may be few or no other hikers to happen by if you are in trouble. Make sure you have your trip itinerary filed with an emergency contact monitoring your trip. I strongly recommend you consider a device like a Garmin inReach (preferred) or a SPOT Satellite Messenger. And here’s a link to a good template for your “Trip Plan” (a trip-tracking/emergency info document). It’s a great idea to have some version of one, even for a day hike!

Tips for those feeling more adventurous
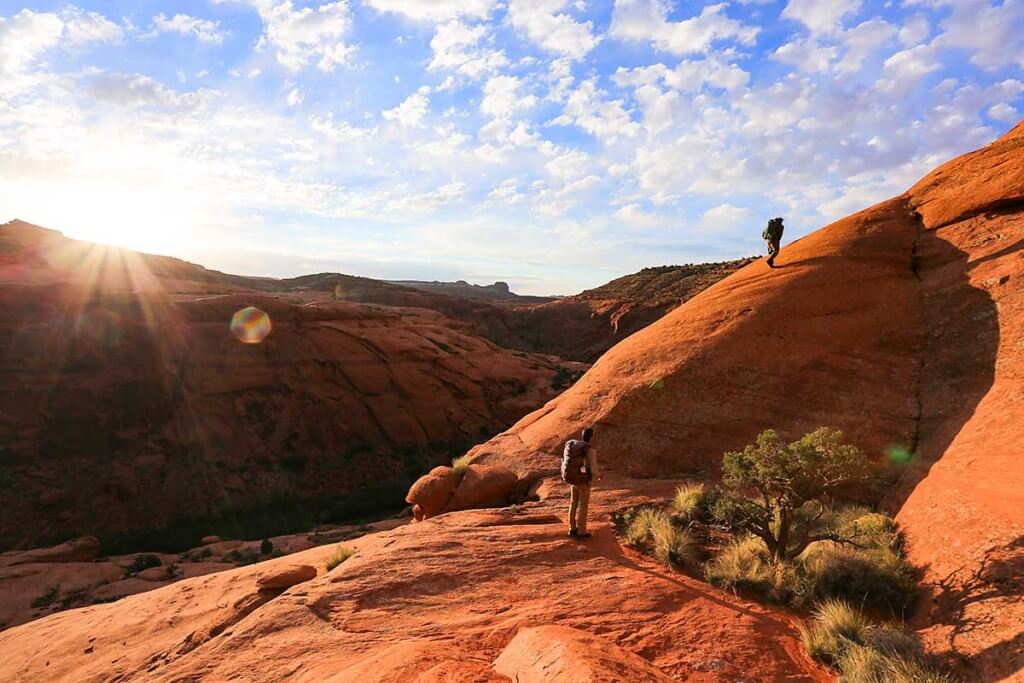
Author on a dawn climb out of the Escalante Canyon. Andrew Skurka waits to go next. photo: Don Wilson
- Proceed with caution! Make sure you can reverse your route. Even small, seemingly insignificant up-climbs or down-climbs of just 8-10 feet might be irreversible, forcing you to move on without a retreat.
- If you do decide to do more adventurous scrambling, a 40-50’, 6-7 mm rope can be a huge help to raise or lower backpacks. Without a backpack on, members of your party can more easily balance and safely climb short sections that would be otherwise impassible. This can greatly expand where you can go in canyons. [Again, use caution and always err on the side of safety when “climbing” in the canyons.]

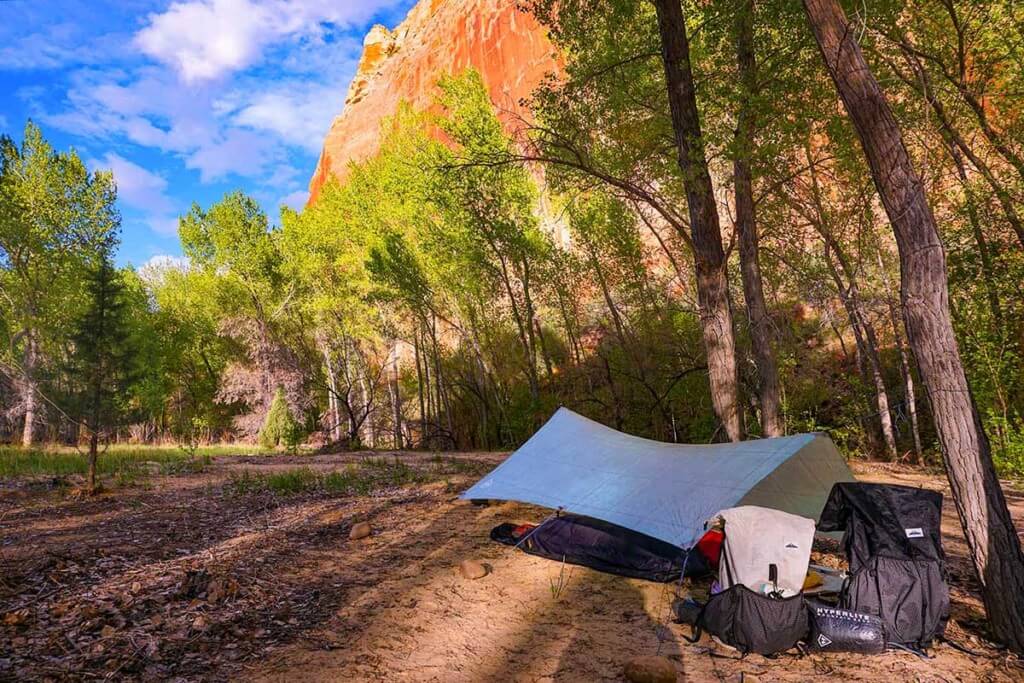
Tarps are perfect for the desert with its low chance of rain. They are a great way to save weight. I only set mine up when there is a chance of rain, otherwise it stays in my pack. See: Recommended Tents, Tarps and other Shelters
- Flash Flood risk for less well traveled canyons: some moderately narrow “backpacking” canyons off the beaten path, may be more at risk for serious flash floods. These are not usually the big name canyons with lots of travelers. Choprock Canyon in the Escalante Grand Staircase is an example of moderately narrow “backpacking” canyon more at risk for flash floods.
- GPS use – See: How to use the iPhone as the Best Backpacking GPS. Contrary to the common statement “GPS doesn’t work in canyons,” I’ve had good success using my iPhone as a GPS when canyoneering. Obviously the deeper and narrower the canyon, the harder it is to get a position fix. But with a little smarts one can use it with reasonable success by opportunistically getting fixes in wider canyon sections or other areas with a better sky view. [And, do not rely on your GPS to navigate the canyons. It’s a convenience, not a substitute for navigation by map an compass and/or a crutch for poor navigation skills. This may be truer in canyons (with their iffy GPS reception) than almost anywhere.]
- Be safe out there!
Parting Photos
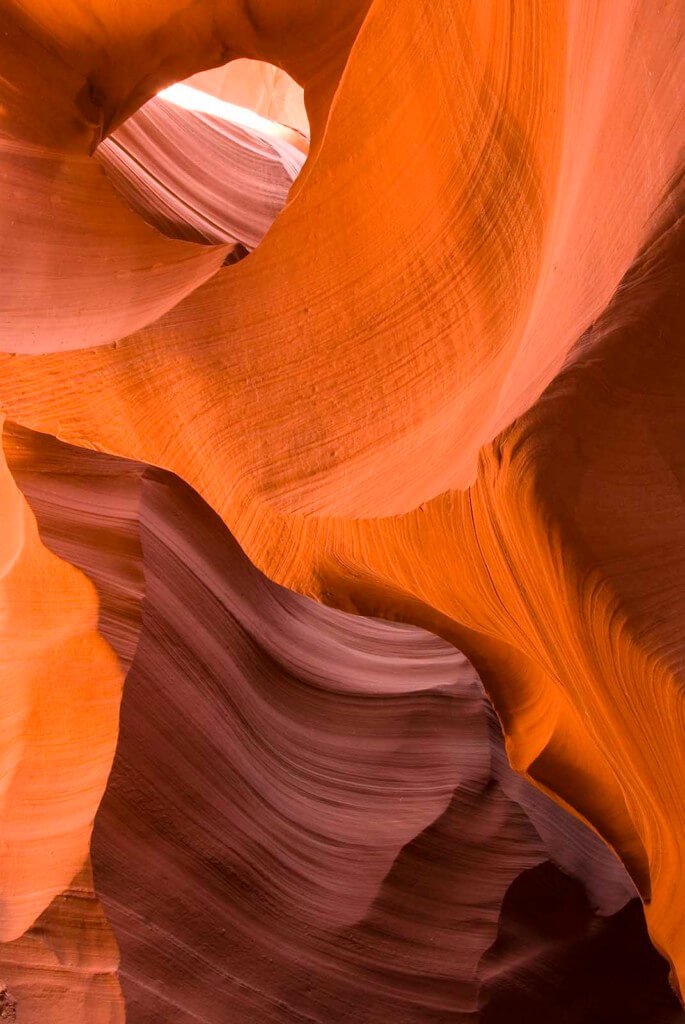
Perfect light: Brilliant oranges and reds from sunlight filtering into a canyon. For narrower canyons the “magic hour” for photography is not early morning or late evening. Usually it’s close to high noon with the sun directly over the canyon. Only then does the light penetrate, causing the sandstone to come alive and glow.
Buckskin Gulch. One of the longest, deepest and most spectacular slot canyons in the world. Hundreds of backpackers safely hike through this canyon every year.
Related Content
- What a technical canyoneering trip looks like: A Very Different High Route | Escalante Overland Route
Disclaimer
This post contains affilate links. If you make a purchase after clicking on the these links, a portion of the sale helps support this site at no additional cost to you. I do not receive compensation from the companies whose products are listed. For product reviews: unless otherwise noted, products are purchased with my own funds. I am never under an obligation to write a review about any product. Finally, this post expresses my own independent opinion.